


20
ENGLISH
Teletext
Special Teletext functions
Changes Teletext mode
; Only Teletext mode, text mode superimposed on the
TV picture, TV mode
Selects double height text.
Press this button to enlarge the top half of the page.
Press this button again to enlarge the bottom half of
the page.
Press this button again to return to the normal display.
Stops the automatic page change, which will occur if a
Teletext page consists of 2 or more sub pages. The
number of sub pages and the sub page displayed is,
usually, shown on the screen below the time. When
this button is pressed the stop symbol is displayed at
the top left-hand corner of the screen and the
automatic page change is inhibited. To continue press
this button again.
Return to index page
TEXT/MIX
Functions
MENU
SIZE
HOLD
INDEX
Displays the TV picture on the screen while waiting for
the new Teletext page. The display will appear at the
top left hand corner of the screen. When the updated
page is available then display will change to the page
number.
Press this button to view the updated Teletext page.
UPDATE
When viewing a TV programme, press this button to
display the time at the top right hand corner of the
screen. Press this button again to remove the display.
In Teletext mode press this button to select and hold
or change a four-digit sub page number. This is
displayed along the bottom of the screen. Press this
button again to exit this function.
TIME
Press this button to display the concealed information,
such as solutions of riddles or puzzles.
Press this button again to remove the information from
the display.
REVEAL
21
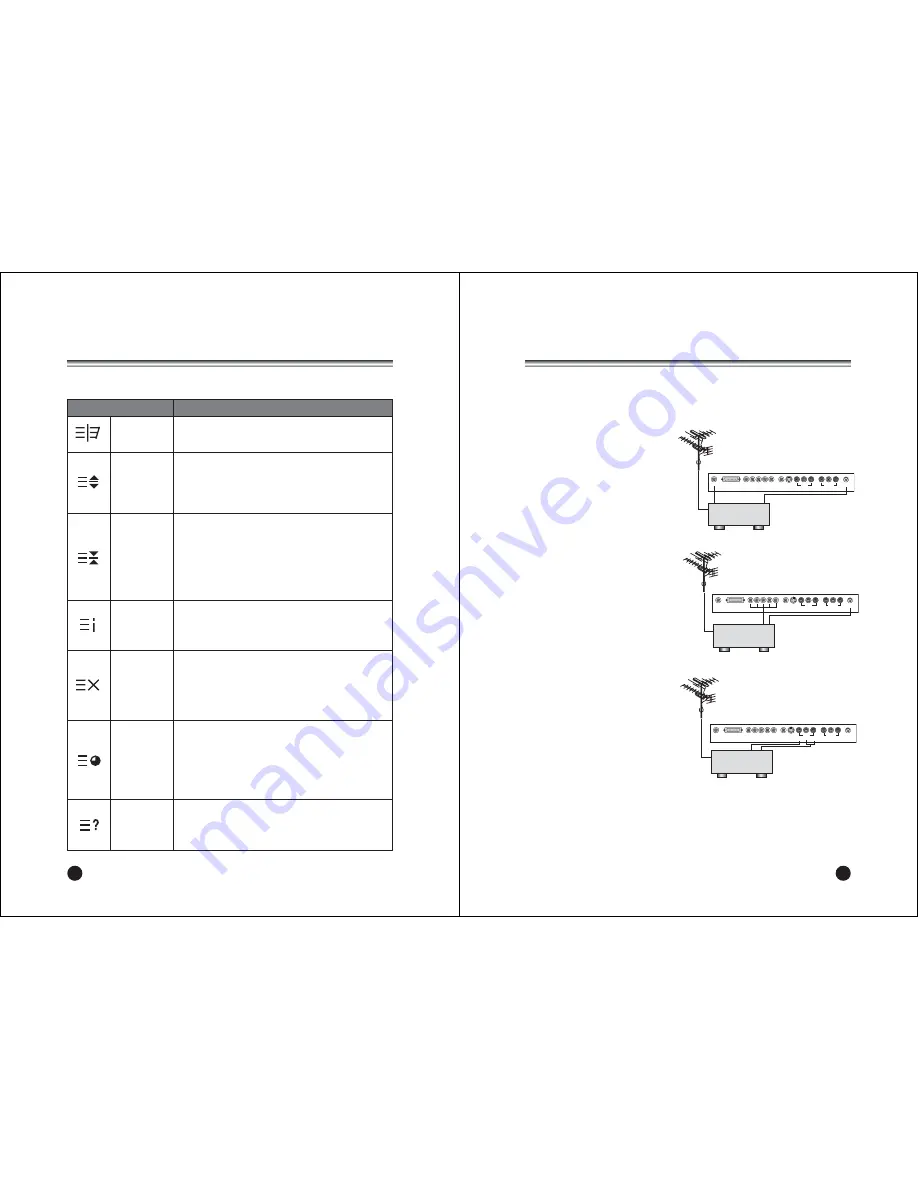
External Equipment Connection
When connecting to external equipment, please ensure you turn the main switch OFF
to prevent any damage to the equipment.
You can connect additional equipment, such as VCRs, camcorders etc. to your set.
Examples are shown below.
Antenna connection
1. Connect RF out on the VCR to the
Antenna input on the rear of the TV.
2. Connect the antenna cable to the
antenna in jack on the VCR.
3. Press the
TV/AV
button to select
Antenna input source.
4. Press the PLAY button on the VCR.
COMPONENT INPUT
1. Connect the Video outputs (Y Cb Cr) on
a DVD to the COMPONENT on the TV.
2. Press the
TV/AV
button to select
COMPONENT mode.
3. Press the
PLAY
button on the DVD.
A/V INPUT
1. Connect the A/V out jacks on a VCR
to A/V-IN jacks on the TV.
2. Press the
TV/AV
button to select
VIDEO
mode.
3. Press the
PLAY
button on the VCR.
The VCR playback picture appears on the
TV screen.
Note
: If you have a mono VCR, connect the
audio cable from the VCR to the
A/V-IN
socket of the set.
VCR
ANT.
PC/DTV INPUT
H/P S-VIDEO
A/V-IN
VIDEO
L
R
A/V-OUT
DC 15V
VIDEO
L
R
COMPONENT
(DVD)
ANT.
PC/DTV INPUT
H/P S-VIDEO
A/V-IN
VIDEO
L
R
A/V-OUT
DC 15V
VIDEO
L
R
VCR
ANT.
PC/DTV INPUT
H/P S-VIDEO
A/V-IN
VIDEO
L
R
A/V-OUT
DC 15V
VIDEO
L
R
Summary of Contents for NLT-20
Page 14: ...500 031104 ...