


Radio Control
20
This function is possible only when the set is in Radio mode.(Radio mode is displayed
when the Setting for special menu is radio On.)
1. Use
TV/AV
button on remote controller to select
Radio mode
.
2. Press the MENU button to set
Radio Setup
menu.
3. Press the
VOL
Ïq
button repeatedly to select
Mode Auto
or
Manual
.
* When the Radio Setup Mode is
Auto
, only the
programmes stored in memory are selected.
* When the Radio Setup Mode is
Manual
, all frequencies
are selected.
If you press the PR button to select programme
4. Press the
PR
xy
button select
Frequency
.
Then press the
VOL
Ïq
button repeatedly to tune in the
desired station manually. If you press the
VOL
Ïq
button
continually above 2 seconds, It automatically changes
present frequency into next frequency.
5. Press the
PR
xy
button to select
Programme
.
Then press the
VOL
Ïq
button repeatedly to select
programme.
6. Press the
PR
xy
button to select
memorize
. If you want
to memorize this radio setup, press the
VOL
Ïq
button.
7. Press the
PR
xy
button to select
Delete
. Select
Off
with the
VOL
Ïq
button to delete the station.
8. Press the
PR
xy
button to
select
Auto Programme
.
9. Press the
VOL
Ïq
button
repeatedly to automatically
scans and tunes to the next
available station.
10. Press the
PR
xy
button to
select
Off Time
.
Then press the
VOL
Ïq
button repeatedly to select
Off, 5, 10, 30(minutes).
11. Press the
PR
xy
button to
select
Edit Name
.
Then press the
VOL
Ïq
button to edit radio name.
12. You can assign a radio name with 8 characters.
Press the
PR
xy
button repeatedly. You can use the
numeric 0 to 9, the alphabet A to z(capital and small letters.) and a blank.
With the
VOL
Ïq
button, you can select in the opposite direction.
13. Press the
MENU
button to return to prior menu.
14. Press the
TV/AV
button to exit. Then the radio setting
condition is displayed.
Radio Setup
Mode
Auto
Frequency
87.50 MHz
Programme
1
5MUWZQbM
Delete
Auto Programme
Ș
7NN<QUM
7NN
Edit Name
Ș
6IUM
Position :
ƇƉ
Adjust :
ȖȘ
Exit : TV/AV
Radio Auto Programme
Start
Back : MENU
Start :
ȖȘ
Exit : TV/AV
Radio Name Edit
Ƈ
Station P01 -------
Ɖ
Adjust :
ƇƉ ȖȘ
Back : MENU
Confirm : OK
Exit : TV/AV
Note.
If you want to listen to the radio in the PC mode, the
ANT
. Jack must be
connected to the antenna input of the set.
OFF time in the radio means the LCD back light will be OFF, but the radio will
still be running.
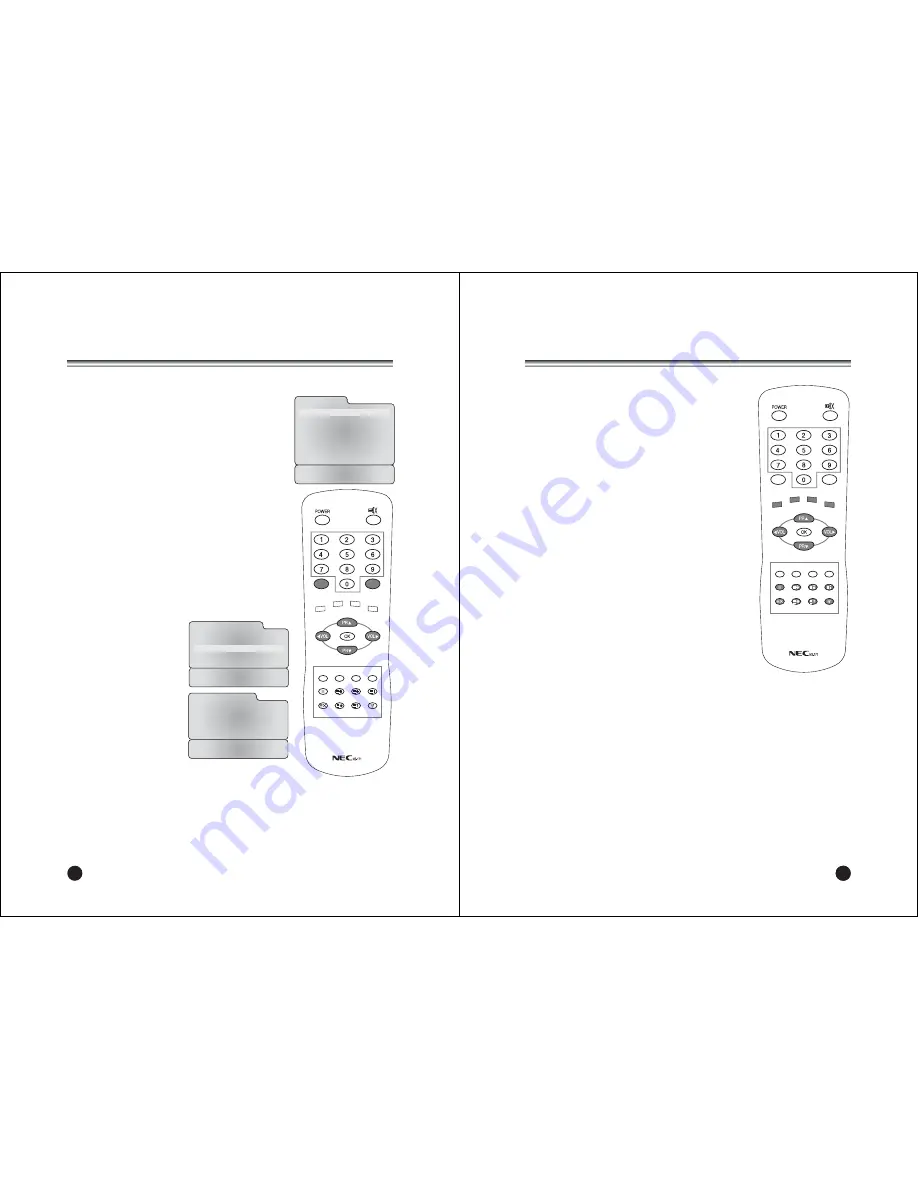
TV/AV
I/II LIST
SLEEP Q.VIEW
MENU
PC/ *
PSM
SSM
ARC/ *
REVEAL
TEXT
MIX
SIZE
HOLD
INDEX
UPDATE
TIME
22
21
TELETEXT
TV/AV
I/II LIST
SLEEP Q.VIEW
MENU
PC/ *
PSM
SSM
ARC/ *
REVEAL
TEXT
MIX
SIZE
HOLD
INDEX
UPDATE
TIME
TEXT On/Off
1. Press
TEXT
button once, displays the Teletext pages.
If you press the
TEXT
button twice, the teletext pages
and the TV picture are concurrently displayed on both
sides of the screen.
2. Press
MIX
button once more, displays the Teletext
pages superimposed on the TV picture.
3. Press the
TEXT
button to switch off Teletext once
more, Text mode is off, and TV mode appears.
TOP text
The user guide displays four fields-red, green, yellow and
blue at the bottom of the screen. The yellow field denotes
the next group and the blue field indicates the next block.
Group/block/page selection
1. With the
BLUE
button you can progress from block to
block.
2. Use the
YELLOW
button to proceed to the next
group with automatic overflow to the next block.
3. With the
GREEN
button you can proceed to the next
existing page with automatic overflow to the next
group. Alternatively the
PR
x
button can be used.
4. The
RED
button permits to return to previous
selection. Alternatively the
PR
y
button can be used.
FLOF text
The Teletext pages are colour coded along the bottom of
the screen and are selected by pressing the corresponding
coloured button.
Page selection
1. Press the
INDEX
button to select the index page.
2. You can select the pages, which are colour coded
along the bottom line with the same coloured buttons.
3. The
PR
xy
button can be used to select the
preceding or following page.
Summary of Contents for NLT-17WF
Page 16: ...500 028Z041028 ...


