background image

Sharpness               

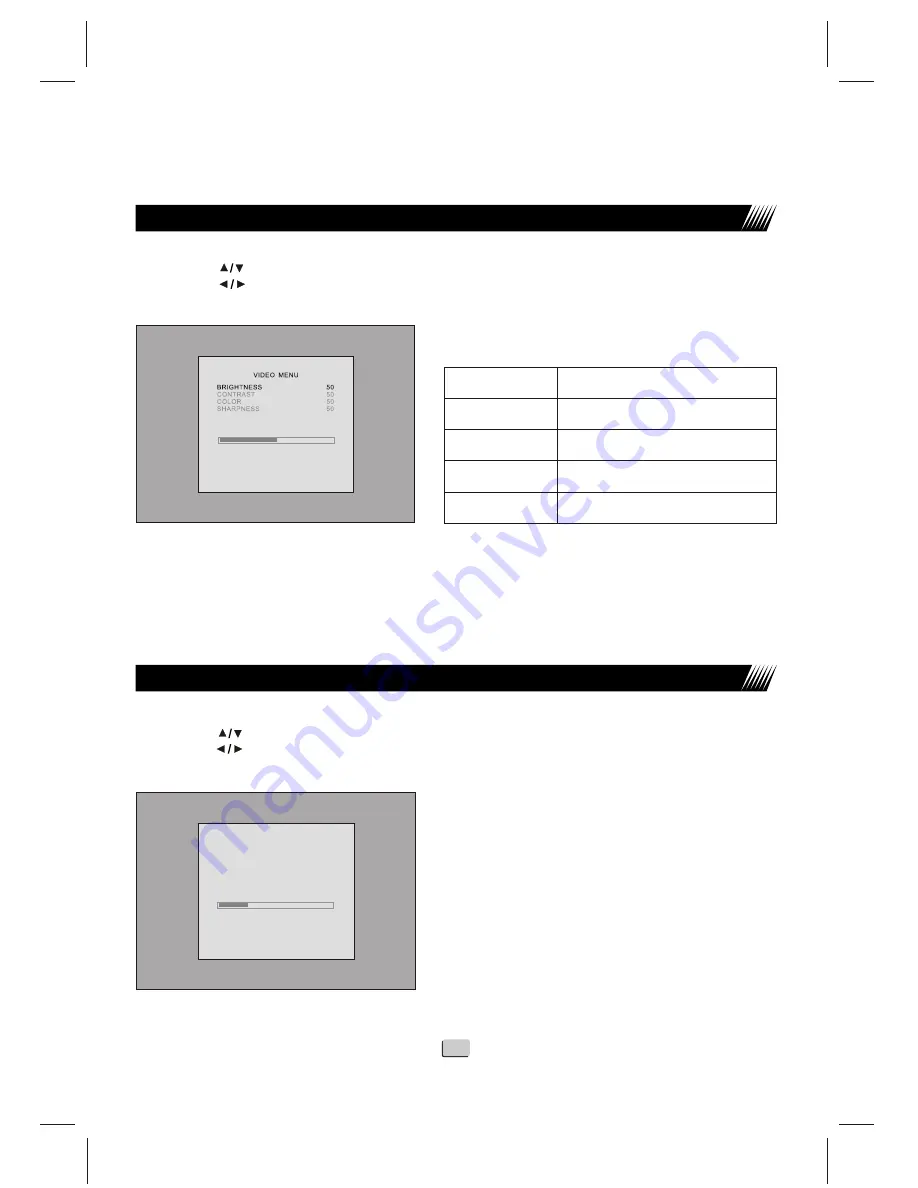
Sharpness Adjustment

MENU SETTING

19

VIDEO Setting 

Audio Setting

AUDIO    MENU

VOLUME

25

BALANCE

50

AUDIO   PRESET                                                
TREBLE                                      
BASS                                                

PRESONAL

50
50

1.Press MENU repeatedly to display the PICTURE menu page
2.Press the        

 buttons

 to select the item that you wish to change.

3.Press the         

buttons to

 adjust the Value of the item

Color                     Color Adjustment

1.Press MENU repeatedly to display the AUDIO Setting menu page
2.Press the        

 buttons

 to select the item that you wish to change.

3.Press the         

buttons to

 adjust the Value of the item

To adjust the Volume, use the volume buttons (VOL+ and VOL-)

Brightness               

Brightness adjustment

Contrast                   

Contrast adjustment

Item

Function

Summary of Contents for NLT-15C

Page 1: ...User s Manual NLT 15C 38cm 38cm 15inch LCD TV ...

Page 2: ...a DVD Player Connect a PC TURNING THE UNIT ON AND OFF Turning the Unit On and Stand by BASIC OPERATIONS MENU introdution MENU SETTING VIDEO Setting AUDIO Setting LANGUAGE Setting OPERATIONS TV Manual Fine tuning Manual Scan Auto Search Changing Channels Selecting Channels NICAM Broadcast Selection IGR German stereo system Broadcasts Examples of external devices that can be connected TABLE OF CONTE...

Page 3: ...TABLE OF CONTENTS OPERATIONS VGA Adjustment in PC VGA OPERATIONS TELETEXT Teletext TROUBLESHOOTING SPECIFICATIONS ACCESSORIES 24 24 25 25 26 27 27 02 ...

Page 4: ...e of power supply to your home consult your product dealer or local power company For added protection for this product during a thunder storm or when it is left unattended and unused for a long period of time unplug it from the wall outlet and disconnect the cable system 7 Power cord protection Protect the power cord from being walked on or pinched particularly at plugs convenience receptacles an...

Page 5: ...r d When the product does not operate properly as described in the operating instructions e If the product has been dropped or the cabinet has been damaged in any way f When the product displays an abnormal condition or exhibits a distinct change in performance Any noticeable abnormality in the product indicates that the product needs servicing Do not touch the controls other than those described ...

Page 6: ...ng and or shorten the life of the product Do not place the product on a bed sofa rug or other similar surface since they can block ventilation openings This product is not designed for built in installation do not place the product in an enclosed place such as a bookcase or rack unless proper ventilation is provided or the manufacturer s instructions are followed 21 Heat sources Do not install it ...

Page 7: ...r LCD TV set or operate the remote control closer to the remote sensor window Batteries for the Remote Control If the remote control fails to operate the LCD TV functions replace the batteries in the remote control 1 Open the battery cover 2 Replace AAA batteries 3 Replace the cover and slide in reversely until the lock snaps Slide the cover while pressing down Place the batteries with it terminal...

Page 8: ...in lead flat feeder Note Power Connection This product should be operated only from the type of power source indicated on the marking label Always unplug the AC cord from power outlet when not using for a long period of time This illustration is for reference only The AC plug may be different on different models It is recommended that the 75 ohm coaxial cable be used to eliminate interference and ...

Page 9: ...Menu main page In OSD menu press this button to turn the next page 4 VOL VOL Press the VOL or VOL button to directly increase or decrease the sound volume level In OSD Menu press these buttons to adjust the value or setting of each item 5 PRO PRO Press these two buttons to directly change the TV channel In OSD Menu press these buttons to choose the OSD items A green indicator lights when the power...

Page 10: ...io output on your PC It supports DVI and VGA Audio output 4 VGA Connect to a computer s VGA output jack 5 L R Connect the Audio L R to external video device such as VCR DVD 6 Video CVBS Connect the Composite Video Yellow to external video device such as VCR DVD and Video game 7 S Video Receiver a S Video signal from external source such as VCR or DVD player 8 RF Connect RF cable or outdoor antenna...

Page 11: ...r select or teletext page number select 12 One digit or two digit TV channel select 13 DISPLAY Display current TV channel or cancel 14 RETURN Quick TV channel switch 15 NICAM A2 NICAM GERMAN Stereo select 16 SYSTEM TV System select 17 PAGE UP Increase the page number by one VOL VOL PRO PRO NICAM A2 NICAM A2 SYSTEM SYSTEM MENU MENU INPUT INPUT DISPLAY DISPLAY ESC ESC AUTO AUTO PAGE UP PAGE UP PAGE ...

Page 12: ...coded page access 27 RED Red button Teletext To decrease contrast 28 GREEN Green button Teletext To increase contrast 29 YELLOW Yellow button T eletext To decrease brightness 30 CYAN Correspond to the differently colored subjects 31 TV channel up 32 TV channel down 33 Volume down Left orientation 34 Volume up Right orientation VOL VOL PRO PRO NICAM A2 NICAM A2 SYSTEM SYSTEM MENU MENU INPUT INPUT D...

Page 13: ...atch Decoder 1 Turn on your LCD TV Press INPUT button on the remote control 2 Press INPUT to select SCART 3 Turn on your decoder The unit receives CVBS VIDEO signal and RGB signal from SCART interface and is able to identify the signal format automatically The unit chooses the RGB signal prior to the CVBS VIDEO signal Note Specification of SCART interface 1 Audio output B right 2 Audio input B rig...

Page 14: ...RT interface How to connect Connect the Scart Cable between the unit and the VCR To play VCR 1 Turn on your LCD TV Press INPUT button on the remote control 2 Press INPUT to select SCART 3 Turn on your VCR Insert a videotape and press the Play button CONNECTIONS 13 ...

Page 15: ...S Video input terminal share the same Audio input terminals Note How to connect Connect the Audio Video cables between theAudio L R Video jacks on the unit and external devices To view signal from AV S VIDEO inputs 1 Turn on your LCD TV press INPUT button on the remote control 2 Press INPUT to select AV or S Video 3 Turn on the external device and play it CONNECTIONS The unit provides Audio Video ...

Page 16: ...input jacks on the unit and VIDEO S VIDEO output jacks on the DVD player Connect the Audio cable between the AUDIO input jack on the unit and AUDIO output jacks on the DVD player To play DVD 1 Turn on your LCD TV press INPUT button on the remote control 2 Press INPUT to select AV or S VIDEO 3 Turn on your DVD player insert a DVD disc and press the Play button 15 ...

Page 17: ...e unit Connect an Audio cable between the AUDIO output on the PC and AUDIO input jack on the unit To Watch the display of PC 1 Turn on your LCD TV press INPUT button on the remote control 2 Press INPUT to select VGA 3 Turn on your PC and check for PC system requirements 4 Adjust the PC s screen 16 Connect a PC ...

Page 18: ...u appears on the screen 2 Use the MENU to select menu page Use to activate the menu page 3 Use the to select an item Use to adjust value or setting of each item Use ESC to exit menu system OSD menu will disappear from the screen automatically after some seconds or you can press the MENU button repeatedly to exit the menu system In Menu operations you may use the VOL button on the unit to confirm y...

Page 19: ...L MENU LANGUAGE ENGLISH BLUE SCREEN ON NOISE REDUCE INPUT SOURCE RESET ON TV AUDIO Setting MENU TV Setting MENU VIDEO MENU BRIGHTNESS 50 CONTRAST 50 COLOR 50 SHARPNESS 50 PC MENU BRIGHTNESS 50 CONTRAST 50 COLOR SETTING USER AUTO CONFIG 0 H POSITION V POSITION PHASE CLOCK 0 0 0 NO SYNC TV MENU CHANNEL 1 SYSTEM BG SKIP OFF AFC FINE TUNE SWAP MANUAL SEARCH AUTO SEARCH ON 152 40MHZ AUDIO MENU VOLUME 2...

Page 20: ...o select the item that you wish to change 3 Press the buttons to adjust the Value of the item Color Color Adjustment 1 Press MENU repeatedly to display the AUDIO Setting menu page 2 Press the buttons to select the item that you wish to change 3 Press the buttons to adjust the Value of the item To adjust the Volume use the volume buttons VOL and VOL Brightness Brightness adjustment Contrast Contras...

Page 21: ...SIC THEATRE and PERSONAL Personal is set in the menu Select input signal Press the INPUT button on the control panel unit one time system will circulate with TV SCART PC AV S VIDEO signal source sequence 1 Press MENU repeatedly to display the GENERAL MENU page 2 Press the buttons to select the item that you wish to change 3 Press the buttons to select an OSD Language English German French Spanish ...

Page 22: ...SEARCH using the buttons 4 Press the button and a pop up window will appear as shown below 5 Pressing the button the TV searches towards higher frequencies 6 Pressing the the TV searches towards lower frequencies 7 The search stops when a program is found and this program will be stored in current channel 8 If this is not the station you want press the buttons again until the station you want is o...

Page 23: ...ve the station to eg 1 7 Use the buttons to select SWAP and press BBC1 will now be in location 1 and the station that was in location 1 will be shown on the screen When you exit the menu you will find that BBC1 is in location 1 To change all the other stations repeat the instructions 2 to 6 The correct order of stations is BBC1 BBC2 ITV Ch4 ITV5 SKIP After Auto Search there may be unwanted station...

Page 24: ...l To let you enjoy NICAM broadcasting this LCD TV set can receive stereo bilingual and monaural broadcasts of the NICAM system Stereo When the LCD TV set is receiving a stereo broadcast you can press The mode changes between NICAM Stereo and Mono When Mono is selected the TV sound is in Mono Bilingual When the LCD TV set is receiving a bilingual programme you can press The mode changes as follows ...

Page 25: ...y adjust the phase clock and position of the image to obtain the best display Item Function OPERATIONS VGA 24 PC MENU BRIGHTNESS 50 CONTRAST 50 COLOR SETTING USER AUTO CONFIG 0 H POSITION V POSITION PHASE CLOCK 0 0 0 NO SYNC 1 Press MENU repeatedly to display the Menu Setting menu page 2 Press the buttons to select the item you wish to change 3 Press the buttons to adjust the value you wish to cha...

Page 26: ...OW FAST TEXT You can select a group or block of pages displayed in the colored brackets at the bottom of the screen by pressing the corresponding color buttons RED GREEN YELLOW on the remote control 0 9 buttons Directly select any page from 100 to 899 by using 0 9 Reveal To reveal hidden information such as an answer to a quiz press Reveal Press the button again to hide the information Size Press ...

Page 27: ... to a suitable aerial Check connections from aerial If using an indoor aerial you may need an outdoor aerial Check settings Enter the PC Menu and chose Auto Adjust Change the PC settings in Display mode to 60Hz refresh rate Replace batteries every 6 months Ensure no bright lights are shining onto the Remote sensor Symptom Possible Cause Remedy Dead No Led lit No power Check all connections ensure ...

Page 28: ...4 SECAM L 5 12 21 69 X ZC57 S1 S41 Teletext TOP FLOF TELETEXT Maximum Audio Output 1 5W x2 Power Consumption 30W Unit Weight kg 3 3 Unit Dimensions WxDxH mm 466x133 x340 Terminals Video In RF TV CATV 75ohms coaxial x1 VGAx1 Video RCA 75ohms x1 S Video x1 Audio In 3 5mm Stereo mini phone Jack for VGA L R RCA for Video or S Video x1 21 pinEuro Scart x1 DC 12V SPECIFICATIONS Model 27 Accessories Stan...

Page 29: ...NEC Australia Pty Ltd Made in China ...

Reviews: