background image

Power

Cord

Power Outlet

RESET

MUTE

PROCEED

EXIT

CONTROL

4. Locate the audio output connection on the component(s) which will serve as the

source(s) for the built-in speakers.  (The component(s) could be your system, CD-
ROM, sound card, etc.).

5. Once you have determined the source, identify the connector present from the

source and connect the stereo input cable.

Headphone

Headphones may be connected to the “Headphones” output on the left of the

monitor’s bezel marked “      ”.  While the headphones are connected, the
sound from the speakers will be disabled.  Headphones can be purchased from
your local electronics store.

Microphone

Connect 

stereo male mini jack cable to the microphone (MIC IN) input on the

rear of your system. (Figure A.1, B.1)

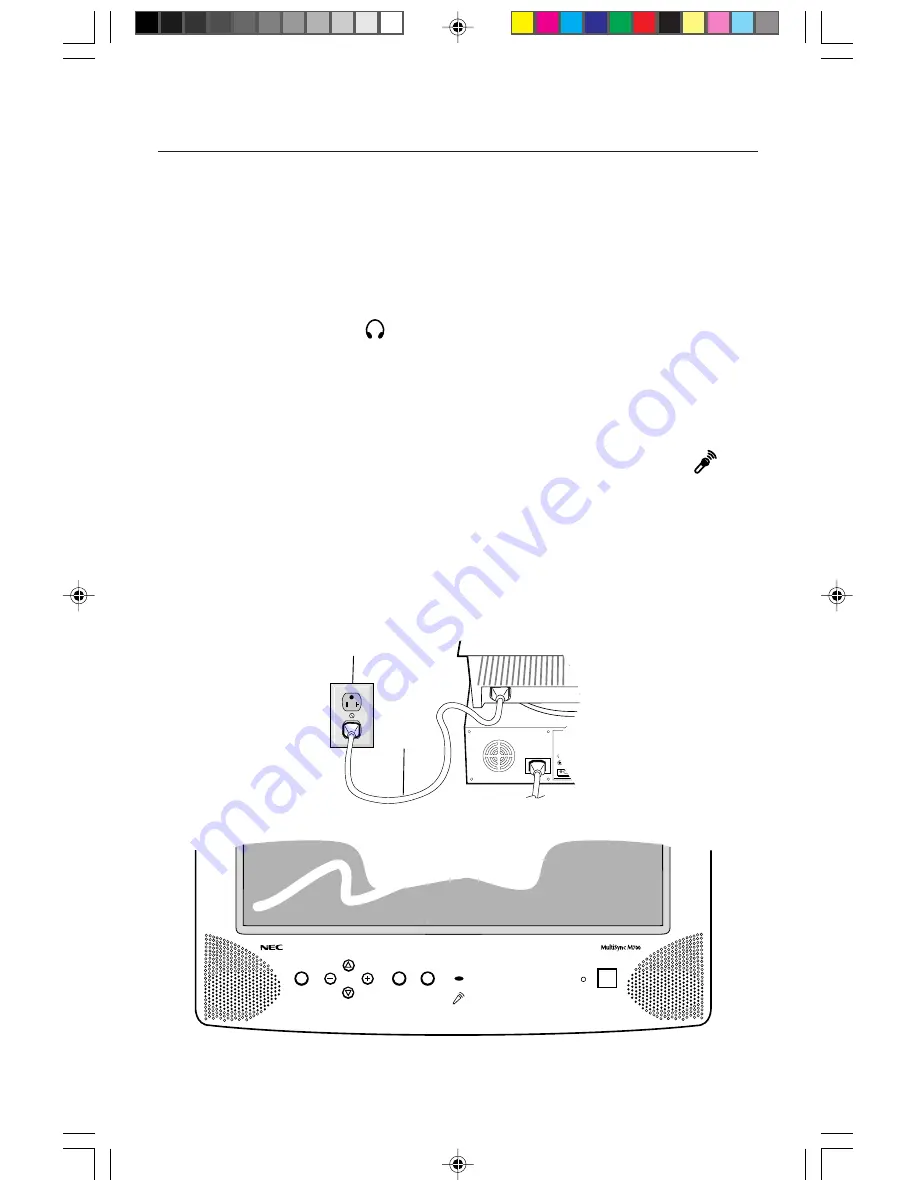
NOTE: There is a microphone hole on the 

front

 of the monitor marked “     ”.

This is the location of the built-in microphone.  This is not to be used for
the input for the mini jack cable. (Figure D.1)

6. Connect one end of the power cable to the MultiSync M Series monitor and

the other end to the power outlet. (Figure C.1)

7. Turn on your MultiSync monitor and computer.
NOTE: If you have any problems, please refer to the 

Troubleshooting

 section of

this User’s Manual.

Quick Start

3

Figure D.1

Figure C.1

78133441

6/24/98, 7:50 AM

5

Summary of Contents for MultiSync M500

Page 1: ...al MultiSync M Series User s Manual NEC Multimedia Series Contents 1 Quick Start 2 3 Controls 4 7 Recommended Use 8 9 Specifications 10 11 Features 12 Troubleshooting 13 References 14 Limited Warranty...

Page 2: ...nitors so as not to interfere with radio and television reception 1 Please use the supplied power cable or equivalent to ensure FCC compliance 2 Shielded captive combined signal cable Use of other cab...

Page 3: ...ITOR P R O D U C T R E G I S T R A T I O N NEC Performance Series MultiSync M Series User s Manual MultiSync M Series User s Manual NEC Multimedia Series Contents Power Cord Registration Card 1 Your n...

Page 4: ...or the PC Connect the MultiSync M Series 15 pin mini D SUB of the captive combined signal cable to the connector of the display card in your system Figure A 1 Tighten all screws 2 Figure A 1 For the M...

Page 5: ...ers will be disabled Headphones can be purchased from your local electronics store Microphone Connect stereo male mini jack cable to the microphone MIC IN input on the rear of your system Figure A 1 B...

Page 6: ...for the speakers To quickly turn off the sound of the speakers BUTTON simply press the MUTE button To disable the mute function and restore the sound press the MUTE button again Speaker Controls Volum...

Page 7: ...ols allow you to adjust the curvature or angle of the sides of your display Sides In Out pincushion Increases or decreases the curvature of the sides either inward or outward Sides Left Right pincushi...

Page 8: ...ress PROCEED then and hold down simultaneously Vertical Linearity This selection allows you to adjust the spacing of the area on the screen The purpose of this control is to ensure that a one inch cir...

Page 9: ...ion which includes the following Fitness Tips The Fitness Tips provide you with helpful reminders to periodically rest your eyes You may select how frequently the reminders are displayed based upon yo...

Page 10: ...ll causing serious damage to the monitor Keep the monitor away from high capacity transformers electric motors and other devices such as external speakers or fans which may create strong magnetic fiel...

Page 11: ...akes it hard for you to see your screen use an anti glare filter Clean your monitor regularly Use a lint free non abrasive cloth and a non alcohol neutral non abrasive cleaning solution or glass clean...

Page 12: ...rted 640 x 480 60 to 120 Hz Some systems may not support Resolution based on horizontal and 800 x 600 55 to 110 Hz all modes listed vertical frequencies only 832 x 624 55 to 110 Hz 1024 x 768 55 to 85...

Page 13: ...60 to 120 Hz Some systems may not support Resolution based on horizontal and 800 x 600 55 to 110 Hz all modes listed vertical frequencies only 832 x 624 55 to 110 Hz 1024 x 768 55 to 85 Hz 1152 x 870...

Page 14: ...lth of the user and save money Examples include OSM controls for quick and easy image adjustments tilt swivel base for pre ferred angle of vision and compliance with MPRII guidelines for lower emissio...

Page 15: ...looks blotchy Adjust Brightness and Contrast Controls Access the Degauss Control through OSM controls Activate the Degauss Control CAUTION A minimum interval of 20 minutes should elapse before the Deg...

Page 16: ...the file NECMSINF ZIP FastFacts Information 800 366 0476 INFORMATION DESCRIPTION DOCUMENT MultiSync M500 and Detailed monitor information 157201 MultiSync M700 monitors Glossary Definition of terms re...

Page 17: ...y calling 1 800 632 4662 The Product shall not have been previously altered repaired or serviced by anyone other than a service facility authorized by NECTECH to render such service the serial number...

Page 18: ...Notes 78133441 6 24 98 7 50 AM 18...

Page 19: ...Notes 78133441 6 24 98 7 50 AM 19...

Page 20: ...ng two conditions 1 This device may not cause harmful interference and 2 this device must accept any interference received including interference that may cause undesired operation U S Responsible Par...

Reviews: