background image

4

Preparation for setup

During Windows setup, you are required to enter the name of the person who 
will be using the computer (user name), as well as the computer name. Please 
choose these names in advance.

Turning ON the power

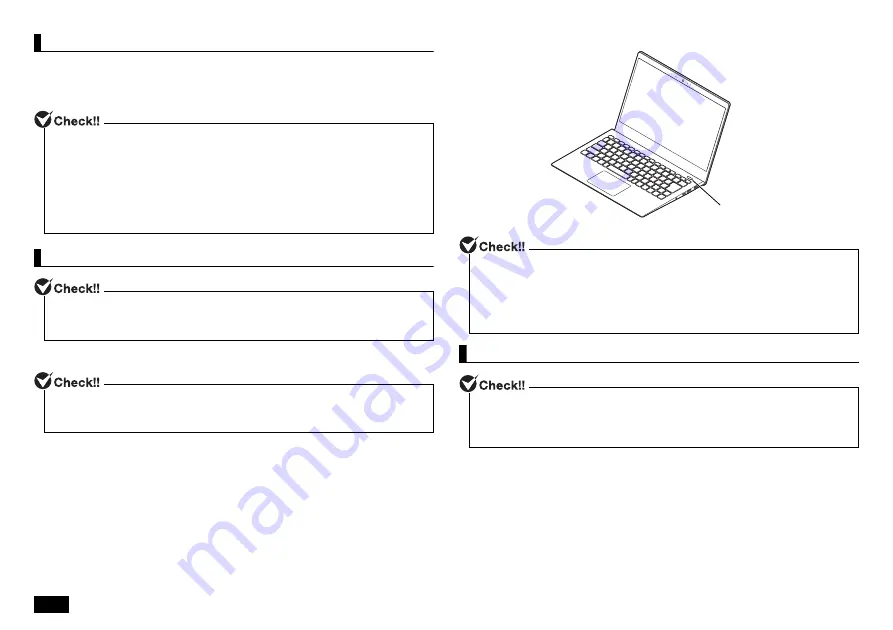
1.

Open the computer lid.

2.

Press the power switch.

Setup Procedure

For the user name and computer name, use single-byte alphanumeric characters 
only (20 or less).
If the following symbols or if certain strings are used for any part of the user name or 
computer name, Windows setup may not be completed and some applications may 
not run correctly.
• Non-standard characters, all symbols, spaces
• Restricted strings

CON, PRN, AUX, CLOCK$, NUL, COM1-COM9, LPT1-LPT9, NONE

If the AC adapter is not properly connected, the power is not turned on by pressing 
the power switch when you first turn the power on. Check the connection of the AC 
adapter again.

Please securely support the keyboard side when opening and closing the LCD 
display. In order to prevent excess force from being directly applied to the LCD 
screen, please handle the screen around the border area.

Power switch

• Never turn OFF the power during Windows setup. Turning OFF the power switch 

or pulling out the power cord in the middle of this process may lead to damage.

• It may take several minutes for the screen to appear after pressing the power 

switch. During this time, the NEC logo may appear, or the screen may turn black, 
this is not a malfunction. Please wait until the screen appears without turning off 
the power.

If not operated for a while during setup, the system automatically enters the power 
saving mode and the screen goes dark. Press [Shift] on the keyboard or operate the 
NX pad. If there is still nothing on the screen, lightly press the power switch on the 
unit.

Summary of Contents for LAVIE PM9560

Page 1: ...ed by turning the equipment off and on the user is encouraged to try to correct the interference by one or more of the following measures Reorient or relocate the receiving antenna Increase the separation between the equipment and receiver Connect the equipment into an outlet on a circuit different from that to which the receiver is connected Consult the dealer or an experienced radio TV technicia...

Page 2: ...arranty period we shall provide repair services based on the conditions specified in the warranty For repairs after the warranty period has expired please consult the place of purchase or one of our specified customer service locations If the functions can be restored by repairs we will perform repairs for a fee with request from the customer Base unit AC adapter Power cord User s Guide Instructio...

Page 3: ...eral devices Never connect any peripheral devices printers memory etc other than the items outlined in Connecting Included Accessories p 2 Please connect or install such peripheral devices after Windows Setup had been completed Do not connect a LAN cable and make sure that the wireless LAN is turned OFF To ensure safe connection of this product to the network connect a LAN cable or turn on the wir...

Page 4: ... switch when you first turn the power on Check the connection of the AC adapter again Please securely support the keyboard side when opening and closing the LCD display In order to prevent excess force from being directly applied to the LCD screen please handle the screen around the border area Power switch Never turn OFF the power during Windows setup Turning OFF the power switch or pulling out t...

Page 5: ...rd screen is displayed Re enter the password 10 The Create security questions for this account screen is displayed Select the security questions Click on the Next button 11 Enter the answer to the first security question Click on the Next button 12 Enter the answer to the second security question Click on the Next button 13 Enter the answer to the third security question Click on the Next button 1...

Page 6: ... Select Yes and then press Enter This will load the default factory setting values 6 Press the F10 key The setup confirmation screen should come up 7 Select Yes and then press Enter The BIOS setup utility should now be finished and Windows will automatically restart After this please refer to Setup Procedure and continue on with the process 4 Names of the Parts Names and descriptions of each part ...

Page 7: ...or that can be used to sign into Windows 7 Keyboard Press the keys to enter characters or operate the screen 8 NX pad The mouse pointer on the screen moves when you trace the pad with your fingertips Move the mouse pointer to the screen or icon and press the pad to operate 1 HDMI output terminal Connector for connecting an HDMI compatible large screen TV or an external display with an HDMI termina...

Page 8: ...ws When the computer is turned on USB3 1 Type C connector USB3 0 Type C connector 1 5A USB3 1 connector 0 9A When in sleep mode A few tens of mA about 1 Headphone headphone microphone terminal A terminal for connecting headphones or a headphone microphone 4 pole mini plug for smartphones A terminal for connecting external speakers and audio equipment to output and input audio signals 2 microSD mem...

Page 9: ...gs are at the factory default values the following operations can be performed with the NX pad Configuring the NX pad The NX pad settings can be changed from Touchpad Touchpad is displayed using the following procedure 1 Display Settings 2 Click or tap Devices 3 Click or tap Touchpad 1 Ventilation holes Holes for releasing the heat inside the main unit 2 Speakers Outputs audio 1 2 Moving the mouse...

Page 10: ...ns not expressly approved by the party responsible for compliance could void the user s authority to operate this equipment This transmitter must not be co located or operating in conjunction with any other antenna or transmitter Operations in the 5 15 5 25GHz band are restricted to indoor usage only This device meets all the other requirements specified in Part 15E Section 15 407 of the FCC Rules...

Page 11: ...s certification information 9 Bluetooth function The Bluetooth standard supported by this device is V5 0 A maximum of 7 theoretically Bluetooth devices can be connected simultaneously Notes on Bluetooth Before using the Bluetooth function be sure to read the attached Safety Instructions If many Bluetooth devices are used at the same time the communication load may increase and affect the operation...

Page 12: ...eral times The BIOS setup utility will then be displayed The basic hardware environment can be set in the Main menu Advanced menu Security menu and Boot menu of the BIOS Setup Utility 11 Application LAVIE Easy Settings LAVIE easy settings can be used to change the battery settings 12 Factory Reset If the Windows status is not good such as frequent errors or freezes or extremely slow operation you ...

Page 13: ...he Create Recovery Drive screen Please follow the instructions on the screen When you create a recovery drive all data on the USB memory will be deleted The recovery drive cannot be divided and written to multiple USB memory devices 1 Remove all peripheral devices memory printer scanner etc 2 Click Start Windows System Control Panel 3 Click or tap System and Security 4 Click or tap Security and Ma...

Page 14: ... again from step 5 important Do not turn OFF the computer during factory reset If the power is turned OFF the computer may malfunction Model PC PM75GNAR N Product LAVIE Pro Mobile Processor Intel Core i7 8565U 4C 8T 1 8 4 6GHz 8MB Graphics Integrated Intel UHD Graphics 620 Chipset Integrated in CPU Memory 8GB Soldered LPDDR3 SDRAM Dual channel capable Display 13 3 FHD 1920x1080 IPS LED back light ...

Page 15: ...ated Li ion 49Wh battery supports Rapid Charge charge up to 80 in 1hr Max battery life MobileMark 2014 x x hrs Battery life varies significantly with settings usage other factors Power Adapter 65W USB Type C Operating System Windows 10 Home 64 English Bundled Software Office Trial ...

Page 16: ...t that require high reliability 6 Overseas maintenance repair services is limited to the models that are covered by the overseas warranty service NEC UltraCareSM International Service repair services will be performed in Japan after picking up from the target areas specified by the Company For details of the service and target models see the following website http 121ware com navigate support over...

Reviews: