background image

36

4. Using Menus

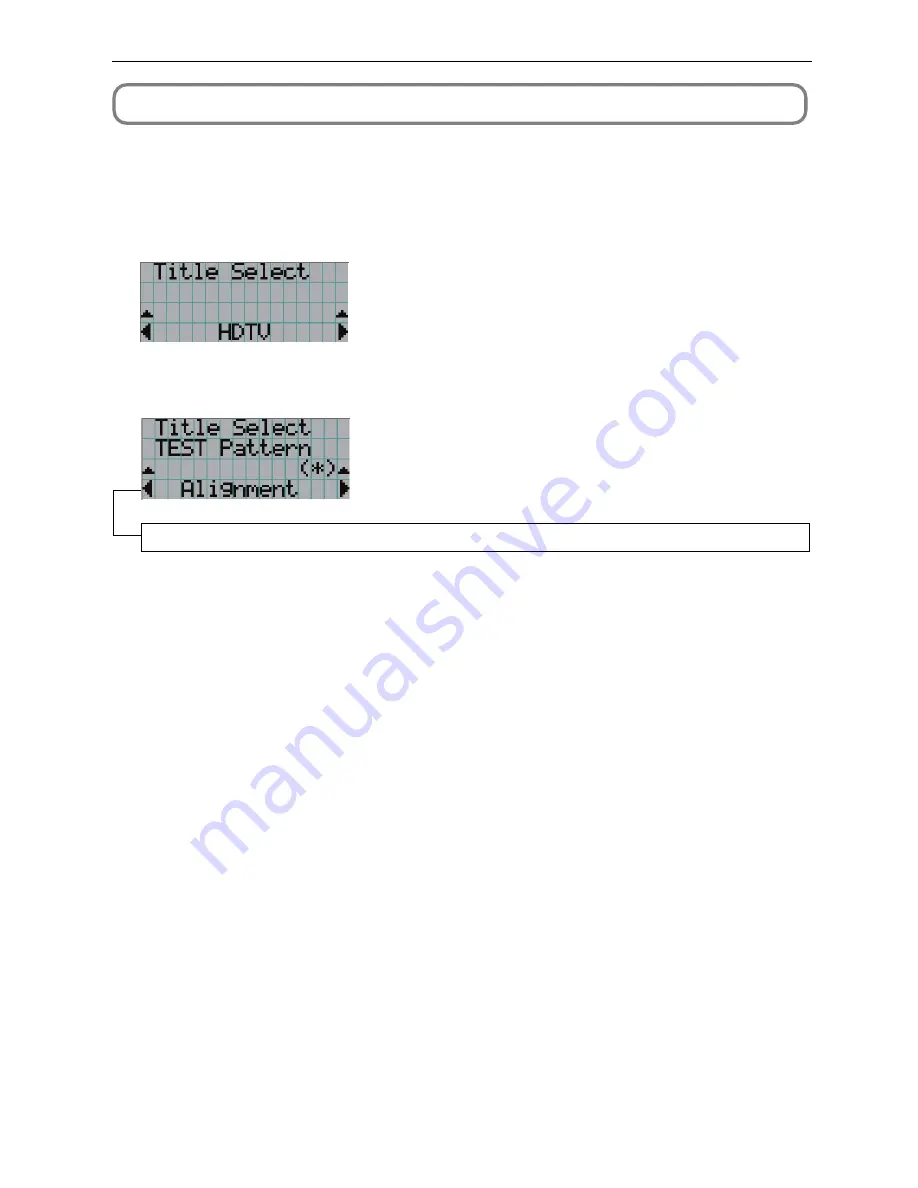
4-3. Title Select

4-3-1. Title select (Title Memory)

Selects the title of the signal to be projected.

You can register up to 100 titles. You can also assign registered titles to the preset buttons (<1> to <8> buttons) on the

projector’s control panel and call them up directly using those buttons.

Request your dealer/distributor for details on registering and changing titles.

 Displays the currently selected item with asterisk (*).

 Selects the title to be projected. 

4-3-2. Test Pattern

Selects the test pattern to be projected.

OFF, Alignment, Cross Hatch, Convergence, Red, Green, Blue, White, Black, White 50% [IRE], H-Ramp, Logo

 Displays the currently selected item with asterisk (*).

 Selects the test pattern to be projected. 

Summary of Contents for DLP Cinema NC2000C

Page 1: ...NC2000C User s Manual DLP Cinema Projector ...

Page 2: ...und pressure level is less than 70 dB A in accordance with EN ISO 7779 Disposing of your used product EU widelegislationasimplementedineachMember State requires that used electrical and electronic products carrying the mark left must be disposed of separately from normal household waste This includes projectors and their electrical accessories or lamps When you dispose of such products please foll...

Page 3: ...the power cable by yourself Doing so may cause a fire or electric shock To carry the projector a minimum of five persons are required Do not hold the lens part and the anamorphic lens part or wide converter lens part with your hand Otherwise the projector may tumble or drop causing personal injury If the projector will not be used for an extended period of time shut down AC power For C2 connection...

Page 4: ... projector has been turned off The POWER button LED blinks in white while the fan is rotating and Cooling is displayed on the LCD screen The cooling fan continues to work for 5 min utes For questions relating to unclear points or repairs Contactyourdealerorthefollowingsupportbranchforquestions relating to unclear points malfunctions and repairs of the prod uct In Europe NEC Europe Ltd European Tec...

Page 5: ...sting the position and the size of projected screen 23 3 5 Preventing misoperations 27 3 6 Turning on off the lamp with the projector turned on 28 3 7 Turning your projector off 29 4 Using Menus 30 4 1 Basic operation with adjustment menus 30 4 2 Table of adjustment menus 35 4 3 Title Select 36 4 4 Configuration 37 4 5 Title Setup 38 4 6 Information 38 5 Maintenance of Your Projector 42 5 1 Cleani...

Page 6: ...s function makes it possible to minimize the fluctuation in brightness as brightness of the lamp decreases as a result of long term lamp usage The time for maintaining fluctuations in brightness depends on the setting value for brightness 3 Easy lamp replacement The lamp can be replaced from the backside of the projector so the lamp can be easily replaced even in narrow locations when a film proje...

Page 7: ...air and oily particles in smoke associated with event halls from coming into contact with the face of the DMD and causing operating problems Efficient cooling of the heat from the DMD unit by the cooling structure The DMD unit uses a highly efficient liquid cooling method This efficiently eliminates heat applied to the DMD by the complete dust control structure and high light output thereby ensuri...

Page 8: ...let protective sheet fastening band x 4 Small iris x 1 Cover key x 2 Lamp door key x 2 Important Information x1 CD ROM User s Manual 1 2 3 4 5 LAMP MENU ENTER DOUSER KEY LOCK EXIT IMB 6 7 8 TIP In the event that you did not receive all of the accessories outlined above or some are damaged contact your dealer distributor Differs slightly from the drawings in this manual but there is no problem in a...

Page 9: ...0B Contact your dealer distributor for more information on the NC 80MB01 and MM3000B 4 Projector power switch upper lamp power switch lower The projector enters the standby state when you turn on the lamp power switch and projector power switch while the AC power is on 5 Ethernet port The connector for external devices such as a cinema server or a PC installed with the DCC See page 13 6 Buzzer The...

Page 10: ...gs Fittings to attach the fixing stay when using the optional conversion lens anamorphic lens or wide converter lens Contact your dealer distributor for more information on the conversion lens and fixing stay 12 Conversion lens stage connecter terminal The terminal to connect the control connector of the conversion lens table when using the optional conversion lens anamorphic lens or wide converte...

Page 11: ...can adjust the projector inclination at 4 positions 6 Air outlet for cooling the projector electric circuits The air outlet to exhaust the heat from the projector electric circuits Do not cover 7 Rear status indicator These indicate the status of the projector When the projector is operating normally these light blink in green or orange When an error occurs they light blink in red When an error oc...

Page 12: ... Box and the Names of the Projector Parts 12 WARNING Only service personnel should open the lamp door The interior reaches high temperatures and there is a risk of burns There is a risk of injury if the lamp is broken ...

Page 13: ...nal server or controlling the projector from a PC via a network Connect the projector and the PC with a commercially available Ethernet cable 10 100 1000Base T 7 Device management indicator The indicator for displaying the projector status Used by service personnel during maintenance 8 HDSDI input terminal SDI A SDI B SDI C SDI D BNC The terminal for connecting an image signal server or video imag...

Page 14: ...tton Press this button to display the lamp adjustment menu See page 26 3 MENU button Press this button to display the menu for various settings and adjustments See page 35 4 LCD screen The LCD screen displays menus and setting values for the projector operations 5 ENTER button Press this button to select the menu item 6 KEY LOCK button Press this button to lock KEY LOCK the buttons on the control ...

Page 15: ...F button Press this button for five seconds or longer to turn on or off the lamp while the projector is on See page 28 10 IMB button This button is operable when the media block NC 80MB01 is installed in the projector Press this button to display the operation menu of the media block 11 Play pause button This button is operable when the media block NC 80MB01 is installed in the projector Press thi...

Page 16: ...ps for setting up your projector Step 1 Setup the screen and projector Contact your dealer to carry out the setup Step 2 Connect cables to the image input terminals See page 17 Connect cables to the various control terminals See page 18 2 Installation and Connection ...

Page 17: ...al and DVI D input terminal HDSDI A B C D input terminal Inputs serial digital images from a cinema server or an image device such as HDSDI or VTR DVI D A B input terminal DVI A DVI B Inputs digital RGB signals from a PC Cinema server HDSDI VTR PC A B SDI DVI C D A B 75Ω coaxial cable DVI D signal cable NC 80LB01 SDI A SDI B SDI C SDI D ...

Page 18: ...ch ports as the PC control terminal and the Ethernet port RJ 45 PC control terminal RS 232 Use this terminal when controlling the projector in serial connection from a PC Ethernet port LAN Use this port when controlling the projector in LAN connection from a PC GP I O 3D RS 232 USB REMOTE LAN PC RS 232C Ethernet cable ...

Page 19: ... power to the projector See page 20 Step 2 Select the title of input signal See page 22 Step 3 Adjust the position and size of the projected screen See page 23 Step 4 Turn off the power to the projector See page 29 3 Projection of Images Basic Operation ...

Page 20: ...K button for one second or longer KEY LOCK is off and buttons on the control panel become operable 3 Press the POWER button three seconds or longer Your projector is turn on Turning power off See page 29 1 Press the POWER button three seconds or longer Your projector is set in a standby state 2 When the fan has stopped turn off the projector power switch and lamp power switch Your projector is tur...

Page 21: ... light about 15 seconds later The LAMP ON OFF button lights green The douser is closed until the screen glows light the DOUSER button blinks white When the douser is open the DOUSER button lights green LAMP MENU ENTER DOUSER KEY LOCK EXIT IMB NOTE While your projector is on be sure to have the lens cap removed from the lens Otherwise the lens cap may get deformed due to a heat buildup In the follo...

Page 22: ...tor 2 Press the MENU button 3 Press the LEFT RIGHT button to display Title Select on the LCD screen At each press of the LEFT RIGHT buttons the display will cycle as Title Select Configuration Title Setup Information 4 Press the DOWN button The title of the input signal is displayed When you have made a wrong selection press the UP button A return will be made to the previous menu 5 Press the LEFT...

Page 23: ... pattern according to 3 3 Selecting the title of input signal See page 22 1 2 3 4 5 LAMP MENU ENTER DOUSER KEY LOCK EXIT IMB 6 7 8 2 Press the LEFT RIGHT button to display Title Select on the LCD screen 3 Press the DOWN button The title of the input signal is displayed 4 Press the LEFT RIGHT button to display TEST Pattern on the LCD screen 5 Press the DOWN button The LCD screen enters the mode whe...

Page 24: ...tton to display Configuration on the LCD screen 3 Press the DOWN button 4 Press the LEFT RIGHT button to display Lens Control on the LCD screen 5 Press the DOWN button The screen Lens Position to adjust the position of the projected screen is displayed 6 Press the UP DOWN LEFT RIGHT button The position of the projected screen moves in the selected direction 1 2 3 4 5 LAMP MENU ENTER DOUSER KEY LOC...

Page 25: ...utton The screen to adjust the size and focus of the projected screen is displayed Press the ENTER button to switch the display between Lens Position and Focus Zoom adjustments ENTER button 7 Adjust the size and focus of the projected screen Press the UP DOWN button to adjust the focus Press the LEFT RIGHT button for fine adjustment of the size 1 2 3 4 5 LAMP MENU ENTER DOUSER KEY LOCK EXIT IMB 6 ...

Page 26: ... button Lamp Setup is displayed LAMP MENU ENTER DOUSER KEY LOCK EXIT IMB 2 Press the DOWN button The screen to adjust the lamp output is displayed 3 Press the LEFT RIGHT button to adjust the lamp output 4 Press the ENTER button The specified adjustment value is applied 1 2 3 4 5 LAMP MENU ENTER DOUSER KEY LOCK EXIT IMB 6 7 8 ...

Page 27: ...tate depends on the Auto Key Lock setting in the adjustment menu When Auto Key Lock is enabled KEY LOCK becomes automatically on if no control panel operation takes place in the standby state for 30 seconds KEY LOCK becomes automatically on again even after KEY LOCK is turned off if no control panel operation takes place for 30 seconds When Auto Key Lock is disabled KEY LOCK becomes automatically ...

Page 28: ... the projector turned on 3 6 1 Turning off the lamp 1 Press the LAMP ON OFF button on the control panel for five seconds or longer LAMP MENU ENTER DOUSER KEY LOCK EXIT IMB 3 6 2 Turning on the lamp 1 Press the LAMP ON OFF button on the control panel for five seconds or longer ...

Page 29: ...operation takes place in the standby state for 30 seconds by default Buttons on the control panel do not function while KEY LOCK is on See page 27 LAMP MENU ENTER DOUSER KEY LOCK EXIT IMB 2 After the projector enters the standby state turn off the projector power switch 1 then the lamp power switch 2 The POWER button is turned off and the power for the projector and lamp is turned off 1 2 3 4 5 LA...

Page 30: ... information on selected menus The meanings of symbols in the menu display screen are outlined below Indicates that there is a menu of a higher level Press the UP button to return to a menu one level above Indicates that there is a selected item or menu at the same level Press the LEFT RIGHT button to display other selected items or menus Indicates that there is a menu of a lower level Press the D...

Page 31: ... displayed Displays the hours of lamp bulb use Displays the lamp output Displays the selected title Displays the selected port When the power is turned off The amount of time remaining for cooling is displayed as shown below when the power to the projector head is turned off When a button is pressed while the key lock function is on If a button on the control panel is pressed while the key lock fu...

Page 32: ...tle Setup Information 3 Press the DOWN button The submenu Lamp of Information is displayed The menu item can be selected by pressing the ENTER button instead of the DOWN button To return to the previous state press the UP button or the EXIT button 4 Press the LEFT RIGHT button to select the submenu Version At each press of the LEFT RIGHT button the display will cycle as Lamp Preset Button Usage Er...

Page 33: ...ress the LEFT RIGHT button to select the submenu Data At each press of the LEFT RIGHT button the display will cycle as BIOS Firmware Data Serial No and each version information is displayed 8 Press the UP button several times At each press of the UP button the display will return to a menu one level above ...

Page 34: ...h button as shown in the following table To delete a character during entry press the DOWN button Example of Entry Button 1 2 3 4 5 6 7 8 LAMP IMB Entered character A B C 1 a b c D E F 2 d e f G H I 3 g h i J K L 4 j k l M N O 5 m n o P Q R 6 p q r S T U 7 s t u V W X 8 v w x Y Z 9 y z 0 To enter XGA for example use the following procedure 1 Press the 8 button three times V W X 2 Press the RIGHT b...

Page 35: ... entries only when the projector is in standby mode Bulb Warning Sets the lamp bulb warning time only when the projector is in standby mode New Lamp house Resets the lamp house usage time and makes settings or selects modes only when the projector is in standby mode Bulb Alignment Sets the lamp bulb alignment Usage Reset Initializes the usage time of the fan and air filter NewRouterSetup Sets the ...

Page 36: ...el and call them up directly using those buttons Request your dealer distributor for details on registering and changing titles Displays the currently selected item with asterisk Selects the title to be projected 4 3 2 Test Pattern Selects the test pattern to be projected OFF Alignment Cross Hatch Convergence Red Green Blue White Black White 50 IRE H Ramp Logo Displays the currently selected item ...

Page 37: ...de Displays the currently selected item with asterisk Displays the setting 4 4 2 Lens Control Adjust the position size and focus of the projected screen Press the ENTER button to switch the display between Lens Position and Focus Zoom adjustments Press the EXIT button to return to a menu one level above Lens Position Adjusts the position of the projected screen The projected screen moves in the se...

Page 38: ...urrent A Displays the power consumption kW Bulb Type A Displays the registered name and the maximum minimum current setting of the currently used lamp bulb Displays Bulb Entry registered name Displays Bulb Entry maximum minimum currents A Bulb Type W Displays the registered name and the lamp rated output kW of the currently used lamp bulb Displays Bulb Entry registered name Displays Bulb Entry lam...

Page 39: ...enabled warning time The following is displayed depending on the item set by the Bulb Warning setting When Use Bulb Entry is enabled Displays the Bulb Entry value When in Manual setting Displays the value set using Manual Displays the usage time on the AC power supply of the projector cooling fan Displays the usage time on the projector s power supply of the projector cooling fan Displays the usag...

Page 40: ... the signal input board NC 80LB01 Displays the version information IMB Displays the version information of the media block NC 80MB01 Displays the version information MMS Built in Displays the version of the built in multi media switcher MM3000B connected to the projector head BIOS Firmware Data FPGA Cfg FPGA Serial No Displays the BIOS version of the built in multi media switcher MM3000B Displays ...

Page 41: ...mounted in slot A and slot B signal input board multi media switcher or media block on the projector Normally the device name mounted in slot A and slot B are displayed The device name is displayed in when the projector is in standby or when connection to the device cannot be confirmed B A Displays the link status of the device in slot B SIB Signal input board MMS Multi media switcher IMB Media bl...

Page 42: ...e cleaner without an adapter to come into direct contact or use a nozzles adapter in cleaning Clean the ventilation opening at regular intervals Dust if allowed to accumulate there may cause heating inside which leads to functional trouble The interval which can vary with the location of your projector is about 100 hours Do not damage the cabinet by scratching it or allowing hard objects to hit it...

Page 43: ...ector lead to a rise of the internal temperature and may cause a fire or malfunction NOTE Please purchase the replacement air filter at your dealer distributor Specify NC 80AF01 for the air inlet of the lamp or NC 80AF02 for the air inlet of the projector electric circuit when you order Air inlets for the projector electric circuit side Air inlet for the lamp Air inlet for the projector electric c...

Page 44: ...ired for the lamp air inlet 1 Turn off the power to the projector 2 Open the air inlet cover The air inlet cover is fastened by a leg on the top left corner of the cover when the project is facing towards you Lift the leg up to open the air inlet cover NOTE Take care not to damage the upper surface of the projector when opening the air inlet cover 3 Remove the filter cover Push the latch until it ...

Page 45: ...cating the installation direction on the side of the air filter Place the filter so that the arrow is pointing down at the projector 5 Mount the filter cover Align two fasteners on the filter cover to holes on the projector and push in until the latch clicks to mount the filter cover Latch ...

Page 46: ...jector air inlet on the front Prepare the optional NC 80AF02 to replace air filters for the projector air inlet on the front The NC 80AF02 contains four replacement air filters Two air filters are required for the projector air inlet on the front 1 Turn off the power to the projector 2 Remove the air inlet cover Push the latch until it clicks to unlock the air inlet cover The air inlet cover is at...

Page 47: ...ch 4 Replace with new air filters Look for an arrow indicating the installation direction on the side of the air filter Place the filter so that the arrow is pointing down at the projector 5 Mount the filter cover Align two fasteners on the filter cover to the holes on the projector and push in until the latch clicks Latch ...

Page 48: ...the projector air inlet on the front 5 3 3 Replacing air filters for the projector air inlets on the side Prepare the optional NC 80AF02 to replace air filters for the projector air inlets on the side The NC 80AF02 contains four replacement air filters Two air filters one each for two air inlets are required for the projector air inlets on the side 1 Turn off the power to the projector 2 Remove th...

Page 49: ...the filter so that the arrow is pointing down at the projector A IR F L O W AIR FLOW 4 Mount the filter cover Align two fasteners on the filter cover to the holes on the projector and push in until the latch clicks Latch 5 Repeat Step 2 to 4 to replace one more air filter This completes replacement of the air filters for the projector air inlets on the side ...

Page 50: ...h the protective function does not allow your projector to be turned on Wait some time and then turn it on Check to see if the connected input has been selected Check to see if a cable is properly connected to the input terminal Check to see whether the douser is closed Check to see if the settings are all adjusted properly Check to see if the protractor is properly set up Make certain that the le...

Page 51: ...The STATUS indicator blinks in red An error code is displayed Check these items Your projector may have trouble Please contact your dealer distributor for instructions Please contact your dealer distributor for instructions ...

Page 52: ...tor condition The key lock is off The key lock is on Note 6 2 2 POWER button Indicator condition Off Blinking light Steady light Projector condition The project power supply is off The projector is starting up The projector is cooling down The projector is turned on The projector is in standby Note Wait for a moment Wait for a moment Green White Green White 6 2 3 DOUSER button Indicator condition ...

Page 53: ...afety problem error Error with possible image project under certain conditions The projector is turned on The projector is in standby Error at a level with not affect on projection Note Wait for a moment Wait for a moment An error message is displayed in the LCD screen Check the content of the error An error message is displayed in the LCD screen Check the content of the error Green Orange Red Wit...

Page 54: ...efore engaging in browser operations Operations with a browser that uses a proxy server may not be possible depending on the type of proxy server and the setting method Although the type of proxy server will be a factor it is possible that items that have actually been set will not be displayed depending on the effectiveness of the cache and the contents set from a browser not be reflected in oper...

Page 55: ...stopped by clicking the same button one more time Zooms up the lens Zooms down the lens Stops the zooming Zooming the can also be stopped by clicking the same button one more time Focuses up the lens Focuses down the lens Stops the focusing Focusing can also be stopped by clicking the same button one more time Click and the douser closes and the projected picture disappears Click once again and th...

Page 56: ...56 6 Appendix 6 4 Outline Drawing 700 503 1005 990 Units mm ...

Page 57: ... Desktop front Desktop rear 99 kg Excluding lens 700 mm W x 990 mm D x 503 mm H Does not include protruding portions Includes foot Operating temperature 10 to 35 C Operating humidity 10 to 85 non condensing Storage temperature 10 to 50 C Storage humidity 10 to 85 Safety EMC USA UL60950 1 FCC Class A Canada CSA60950 1 ICES 003 Class A Europe EN60950 1 EN55022 Class A EN55024 Oceania IEC60950 1 AS N...

Page 58: ...l ready Note 1 Signal GND Data set ready Note 1 Transmission request Transmission available Ring indicator Projector Connector Operation Not used N C Data transmission to an external device Data reception from an external device Connection to 6 pins Signal GND Connection to 4 pins SYSTEM Note 2 Hi Z Not used CINEMA Note 2 Hi Z Used SYSTEM Note 2 Fixed at 6 5 V Not used CINEMA Note 2 10 5 V Used De...

Page 59: ...GPOUT4 Internal 3D L R Output Reference EXT_GPOUT1 Projector Ready Busy EXT_GPOUT2 Projector Error Status EXT_GPOUT3 IMB Play End Status EXT_GPOUT4 Projector Heartbeat NC not connected GND GND I O IN IN IN IN IN IN IN IN OUT OUT OUT OUT OUT OUT OUT OUT PWR PWR Pin No 20 21 22 23 24 25 26 27 28 29 30 31 32 33 34 35 36 37 Signal Name GPIN1 3D L R Input Reference GPIN2 3D L R Display Reference GPIN3 ...

Page 60: ...F ON OFF Power OFF OFF OFF ON ON Lamp ON OFF ON OFF OFF Lamp OFF OFF ON OFF ON Image douser ON OFF ON ON ON Image douser OFF OFF ON ON ON System reserved used internally ON OFF OFF OFF Selects the title registered to the preset button 1 ON OFF OFF ON Selects the title registered to the preset button 2 ON OFF ON OFF Selects the title registered to the preset button 3 ON OFF ON ON Selects the title ...

Page 61: ...ff on Example of Select Preset Button approx 200 ms Off at least 500 ms at least 500 ms approx 200 ms 5 24 7 26 6 25 8 27 time Execute Image douser Douser ON off off on on Example for turning the image douser Douser on Off at least 500 ms at least 500 ms approx 200 ms 5 24 6 25 7 26 8 27 time Execute Lamp On off off on on Example of Lamp On ...

Page 62: ...62 6 Appendix Off at least 500 ms at least 500 ms approx 200 ms 6 25 5 24 7 26 8 27 time Execute Power OFF off off on on Example for turning the power off ...

Page 63: ... 16 35 EXT_GPOUT1 EXT_GPOUT4 as the default You can change the assigned functions Pin No 9 28 10 29 11 30 12 31 13 32 14 33 15 34 16 35 Photo coupler ON OFF ON OFF ON OFF ON OFF ON OFF ON OFF ON OFF Function External 3D L R timing signal output ON OFF System reserved used internally System reserved used internally Internal 3D L R timing signal output ON OFF GPIO control status check ON GPIO contro...

Page 64: ...coupler inside the projector 8 3D_INPUT_REFERENCE IN 3D L R timing signal Connects to the anode of the input diode of the photo coupler inside the projector 9 12V PWR Supplies power 12V to the 3D image system 10 IN 3D L R timing signal Connects to the cathode of the input diode of the photo coupler inside the projector 11 3D_DISPLAY_REFERENCE 3D_DISPLAY_REFERENCE 3D_INPUT_REFERENCE CONN_3D_MODE CO...

Page 65: ...s compliant with hot plug detect HPD Use a single link cable Noise may be generated in the video if you use a dual link cable EDID is available even when the projector is switched off Pin No 1 2 3 4 5 6 7 8 9 10 11 12 Signal Name TMDS Data 2 TMDS Data 2 TMDS Data 2 Shield Unused Unused DDC Clock DDC Data Unused TMDS Data 1 TMDS Data 1 TMDS Data 1 Shield Unused Pin No 13 14 15 16 17 18 19 20 21 22 ...

Page 66: ...Lens 1 90 to 3 25 1 Zoom Lens 2 4 to 3 9 1 Zoom Lens 3 9 to 6 52 1 Wide Converter Lens X 1 26 Anamorphic turret 4 0kW Lamp 4 0kW Lamp Long life type 4 0kW Lamp Pedestal Air Filter For the lamp Air Filter For the projector Rear Duct Unit Built in type Multi Media Switcher DVI HDCP Input Board SDI Input Board Analogue RGB Input Board Video Input Board Model name NC 60LS13Z NC 60LS14Z NC 60LS16Z NC 6...

Page 67: ... MEMO ...

Page 68: ... NEC Display Solutions Ltd 2010 Ver 1 01 10 ...

Reviews: