NCR RealScan 7872 Installation/Owner Guide
08/04
497-0415291 Release F
14 of 44
Step 2 Connect the Cables
1.
Verify that the RealScan 7872 power receptacle switch is off. Plug the power cord
into the RealScan 7872 power receptacle. Pass the power cable from the power
supply through the checkstand opening.
2.
Connect the communications interface cables to the host terminal. Refer to the
terminal documentation for instructions on connecting the interface cables.
Note:
Some terminals may require a trained service technician to open the terminal
and connect the interface cables.
3.
Pass the interface cable through the checkstand opening (See previous section
regarding Hole Requirements for Cables).
4.
If you are installing an NCR 7825 Remote Display, pass the cable from the display,
through the checkstand, and through the checkstand opening where the RealScan
7872 is going.
5.
If you are installing an RS-232 peripheral device, pass its interface cable through the
checkstand opening as needed.
6.
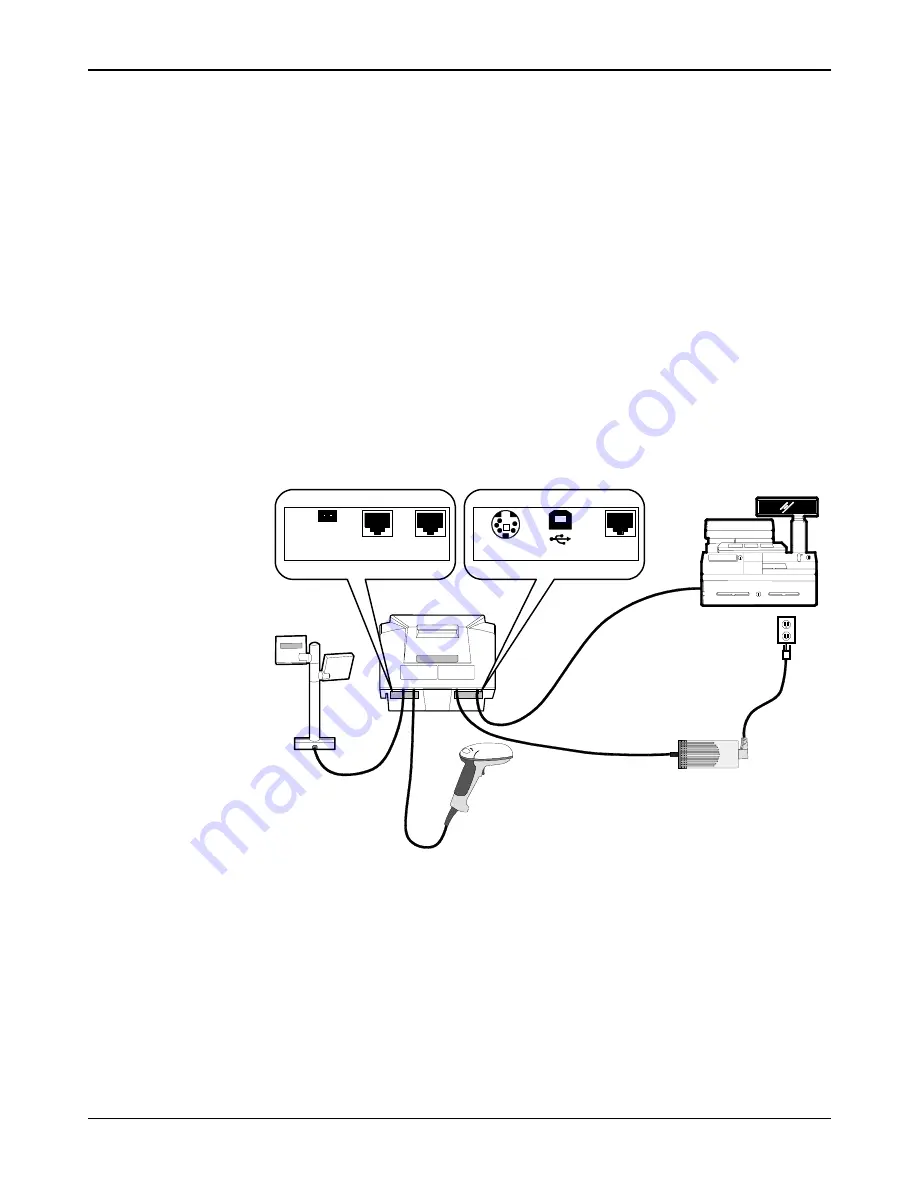
Connect all cables to the RealScan 7872 according to the following illustration.
21476
EAS
INTERLOCK
REMOTE DISPLAY
5V 5A MAX
PORT 1
SCANNER
DC
POWER
USB
Note:
If you are using a USB cable to connect the RealScan 7872 to the host terminal,
connect the USB cable to the USB connector rather than the Scanner connector on
the back of the RealScan 7872.


