NCM
LYON
10
INSTALLATION AND ADJUSTMENT
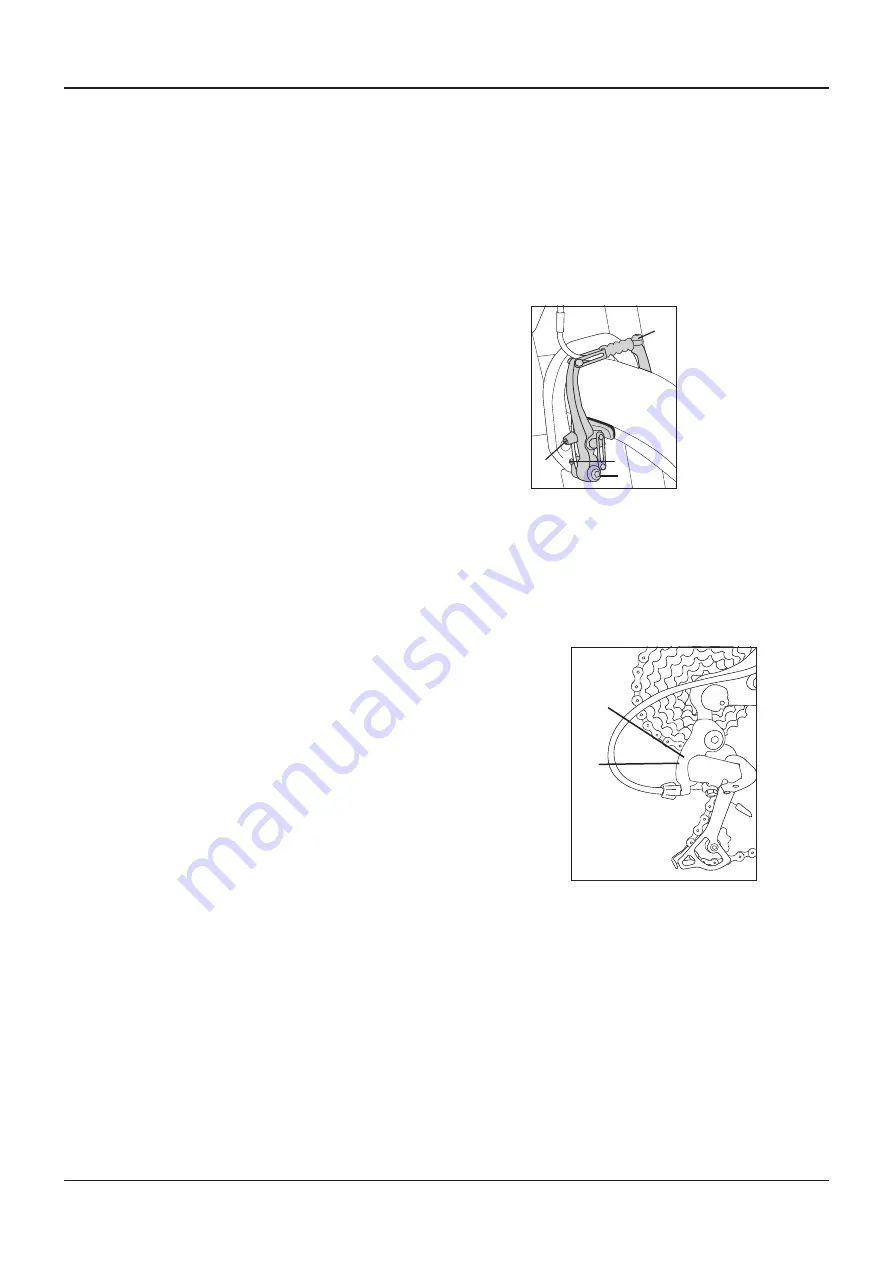
To adjust the alignment of the brake pads on a rim brake
1. Loosen the brake-pad fixing bolt.
2. Align the brake pads as shown in the figure above. Tighten the brake-pad fixing bolts.
3. After you adjust the brake, test it by pulling the lever. Make sure the cable does not slide through the cable clamp, the
brake pads engage the rim at ninety-degree angles, and the brake pads do not touch the tire.
To adjust the clearance between the brake pads and the rim
1. Turn the barrel-adjuster located on the brake lever.
• To increase the clearance between the brake pads and rim, turn the
barrel-adjuster clockwise.
• To decrease the clearance, turn the barrel-adjuster counter clock-
wise.
2. If the brake pads cannot be adjusted correctly with the
barrel-adjuster, further work is required:
• Loosen the cable-clamp bolt, adjust the cable and tighten the bolt
again.
• Release the cable slightly to increase clearance.
• Tighten the cable to decrease clearance.
• Re-adjust the brake-pad alignment, or take the bicycle to your dealer.
3.8 Shifter and Derailleur Adjustment
Rear Derailleur Adjustment
Step 1: Make sure the rear derailleur is shifted all the way down to the
smallest cog.
Step 2: Turn your barrel-adjuster all the way tight so that you have
room to adjust it later.
Step 3: Adjust the high limit by rotating the screw marked "H" on your
derailleur so that it lines up with that smallest cog.
Step 4: Tighten the tension in your cable by unscrewing the cable
anchor, pulling the cable tight, and screwing the anchor back on tight.
Step 5: Shift your rear derailleur to the 4th or 5th cog.
Step 6: To adjust the index, turn your barrel-adjuster so that the
derailleur pulley lines up underneath the correct (chosen) cog. With a
Shimano rear derailleur, you want to line up the pulley slightly inboard
of the cog. Perform some practice shifts to make sure it is adjusted
properly.
Step 7: Shift your rear derailleur to the largest cog.
Step 8: Adjust the low limit by rotating the screw marked "L" on your
derailleur so that it lines up with the largest cog.
Step 9: Adjust the B-tension screw so that the pulley on the rear
derailleur is as close to the largest cog on the cassette as possible
without dragging.
1.Cable-clamp bolt
2.Pad-clamp bolt
3.Center-adjust screw
4.Arm-clamp bolt
H
L
1
3
4
2


