NAVCAM
‐
PRO
USER
MANUAL
7
Crashcam
‐
PRO
(Navcam
‐
PRO)
Manual
Ver
3.0
09/2013
The
Crashcam
‐
Pro
has
a
Mini
USB
DC5V
input.
Please
use
the
original
car
charger
which
will
step
down
the
car
(or
truck)
12/24VDC
to
5VDC.
Hints
and
tips:
The
Crashcam
‐
Pro
works
best
when
mounted
centrally
and
high
up
on
the
windscreen
(typically
behind
or
close
to
the
rear
vision
mirror).
Avoid
fastening
the
adhesive
pads
to
the
upper
tinted
section
of
the
windscreen.
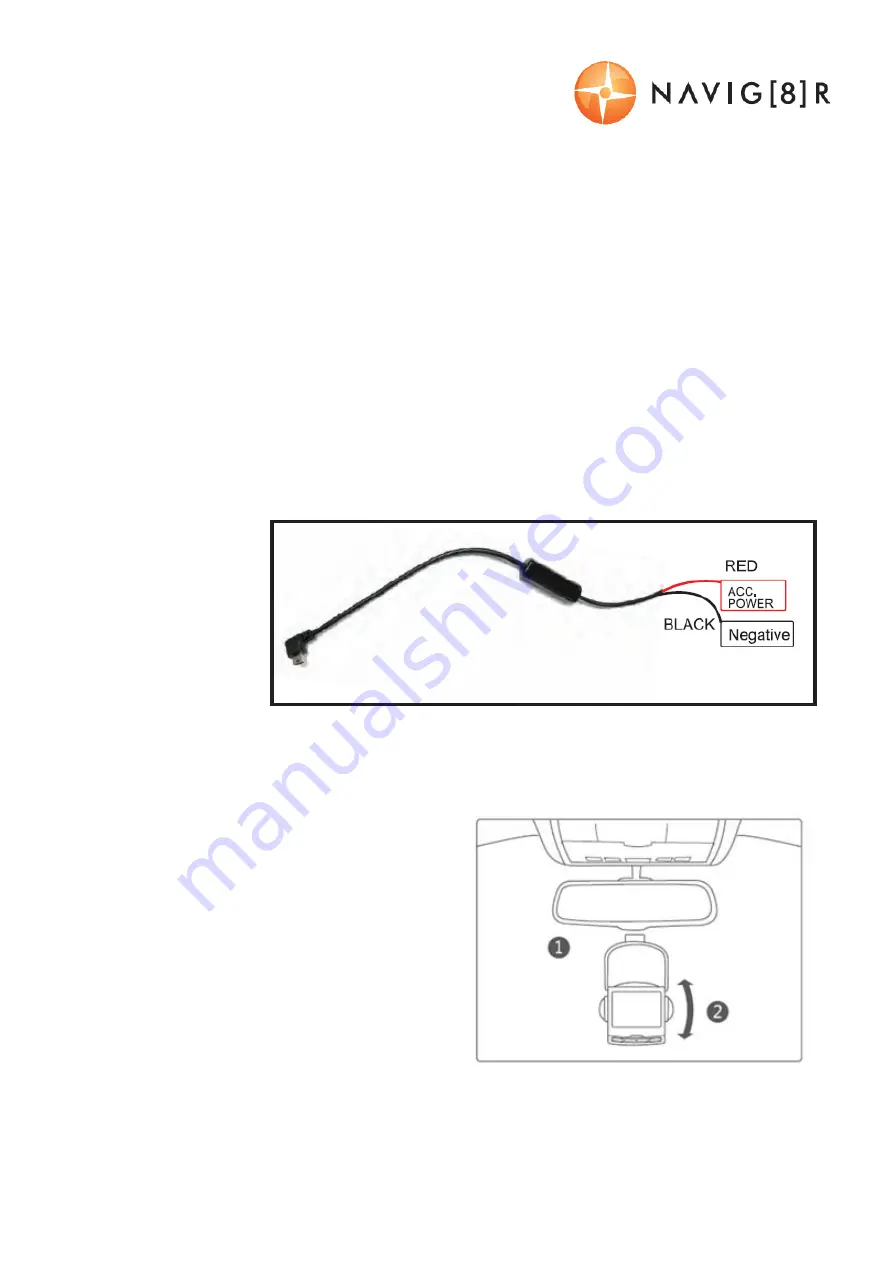
CAN I “HARDWIRE” THE POWER CABLE TO MY CAR/TRUCK INTERNAL WIRING?
Yes,
the
12/24v
Cigarette
socket
plug
can
be
cut
off
exposing
a
black
(negative)
and
red
(positive)
wire.
The
black
wire
should
be
connected
to
the
vehicle’s
ground
/
negative
and
the
red
wire
connected
to
the
vehicle’s
“ignition
on”
(so
that
when
you
turn
off
the
ignition,
the
camera
turns
off
as
well).
Note:
if
you
are
not
confident
in
doing
this
yourself,
it
is
recommended
that
you
seek
the
assistance
of
an
automotive
electrician.
Note:
Do
not
remove
the
inline
transformer
which
is
15cm
from
the
USB
socket
end
of
the
cable.
ATTACHING THE ADHESIVE PADS TO THE BACKING PLATE
Connect
the
camera
to
the
backing
plate
and
find
the
best
mounting
location.
Once
you
have
found
the
best
location,
check
that
it
does
not
interfere
with
rear
vision
mirror.
Mark
the
glass
area
and
ensure
it
is
straight
and
level.
Thoroughly
clean
and
dry
the
area
where
the
adhesive
pads
will
be
applied.
Remove
the
release
paper
and
fasten
one
side
of
the
pad
to
the
backing
plate.
Press
it
firmly
to
ensure
a
good
adhesive
bond.
Remove
the
release
paper
from
the
other
side
and
stick
it
on
the
windscreen.
Press
firmly
to
ensure
a
good
adhesive
bond.
Do
not
touch
or
adjust
the
backing
plate
and
pad
for
at
least
24
hours
while
the
adhesive
cures.


