


BHM
01/27/20
NTV-DOC350
Agreement
:
End user agrees to use this product in compliance with all State and Federal laws. NAV-TV Corp. would not be held liable for misuse of its product.
If you do not agree, please discontinue use immediately and return product to place of purchase. This product is intended for off-road use and passenger
entertainment only.
7 |
P a g e
Interface setup for Smart-Link (compatible NAV-TV interface)
If using the Smart-Link in conjunction with a compatible NAV-TV interface, the UI control is over
factory
touchscreen
and the Video is sent via
DIGI-RGB
(via HDMI cable).
Audio output
from the Smart-Link module
must be connected to the vehicle AUX input. If no AUX input is available, contact NAV-TV for options. Follow
the instructions below to set up the NAV-TV interface for proper communication with the Smart-Link.
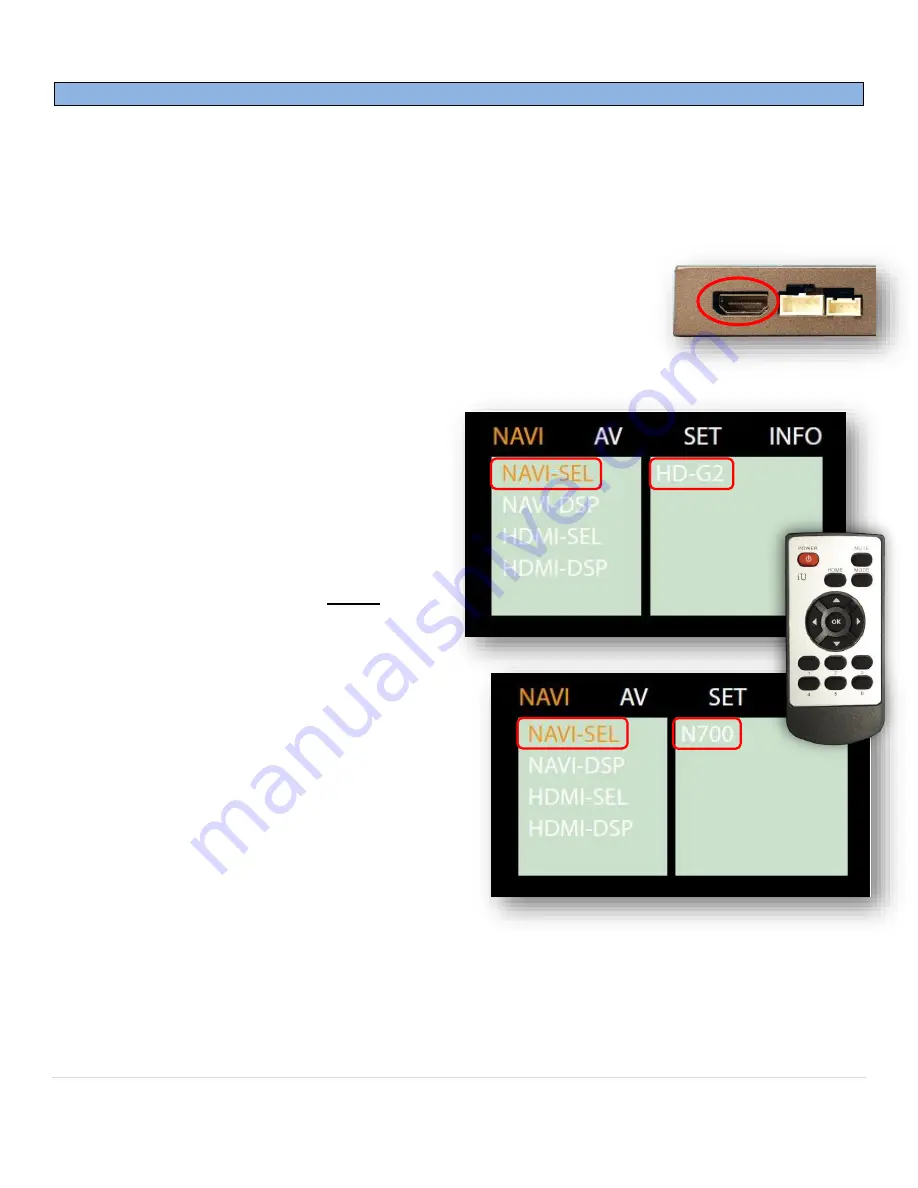
To begin, follow the instructions on the compatible NAV-TV interface for proper
installation. Connect the provided HDMI cable from the
OUTPUT
port on the
Smart-Link to the
DIGITAL-RGB IN or LVDS-IN
port (HDMI) on the interface.
•
Follow the steps below to set up the
Interface
for Smart-Link connection:
a.
With the system on, put dip switch
#1 in the
DOWN
position.
b.
Activate the
‘NAV INPUT’
by pressing
the proper button on the steering
wheel or dash (see interface manual,
‘operation’
)
c.
Once
‘NAV INPUT’
shows on the
screen, on the provided remote
press the
OK BUTTON
4 times
, then
press
POWER
(after connecting IR
receiver).
d.
Navigate to the
‘NAVI’
section.
a.
Select
‘NAVI
-
SEL’
(OK button)
b.
Choose
‘HD
-G2
’
or
‘
N700
’
(up or
down arrow, then OK to select)
c.
Press
MODE
on the remote to
return and exit the OSD menu (or
let it time out).
•
Once complete, pressing the OEM button
assigned for AV switching (button to switch to
cycle AV sources
–
see interface manual) will
activate the Smart-Link, and repeating the same
action will return to the OEM screen.


