background image

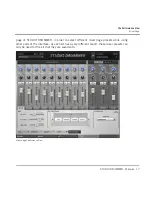
 To shift the selection over to reveal more room types, click on the room images to the 

right and left of the selected image.

 To select the room type, click on the drop-down menu above the selected room image. 

The drop-down menu below the room image allows you to select a specific room preset 
within that room type.

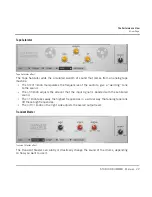
 To adjust the overall level of the reverb, move the fader on the Reverb channel. The 

amount of reverb in each channel is adjusted with the 

SEND

 knobs at the top of each mi­

crophone channel.

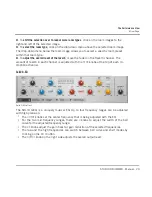
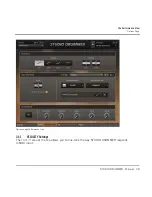
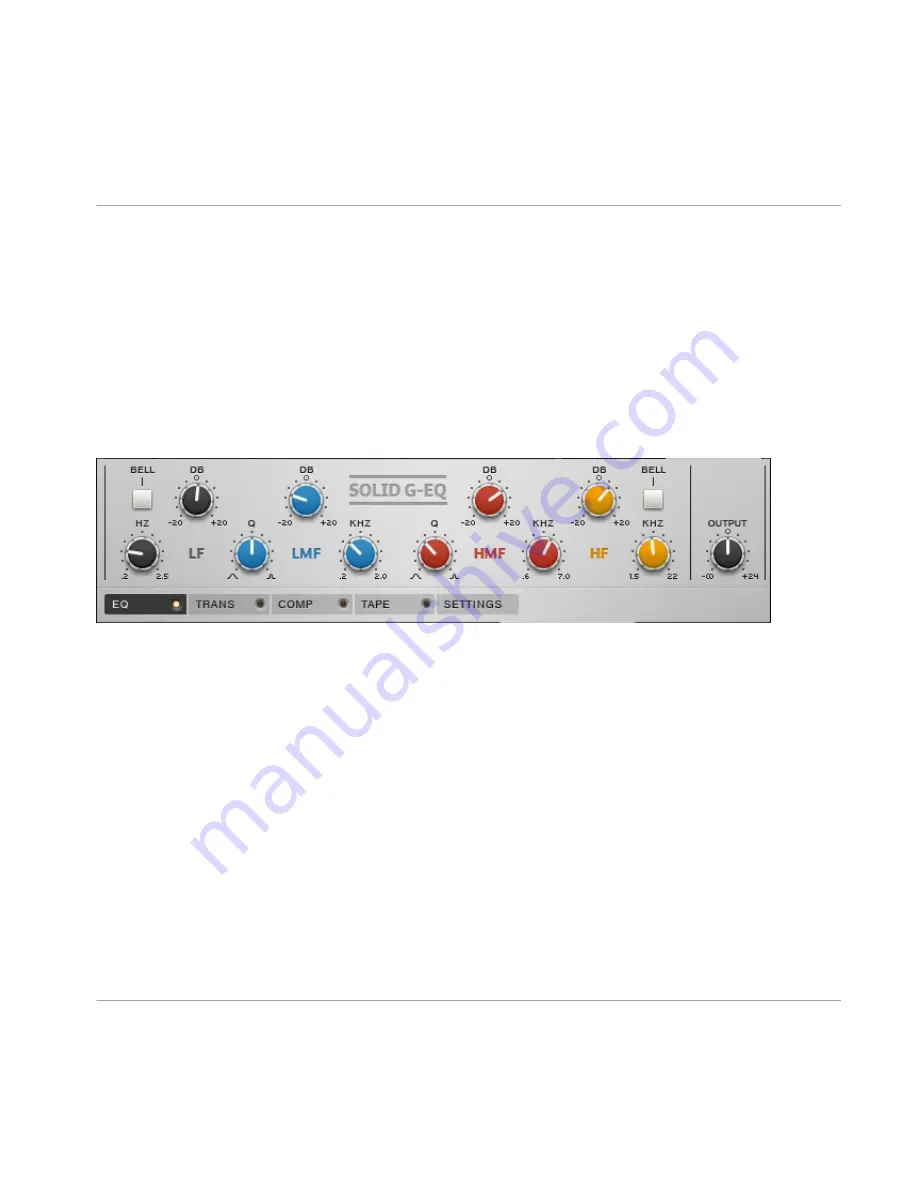
Solid G-EQ

Solid G-EQ effect

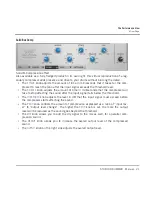
The SOLID G-EQ is a uniquely musical EQ. Up to four frequency ranges can be adjusted 
with high precision.

The 

HZ

/

KHZ

 knobs set the center frequency that is being adjusted with the EQ.

For the two mid frequency ranges, there are 

Q

 knobs to adjust the width of the bell 

curve for the adjusted frequency range.

The 

DB

 knobs adjust the gain boost or gain reduction of the selected frequencies.

The low and the high frequencies can switch between bell curve and shelf modes by 
clicking on the 

BELL

 button.

The 

OUTPUT

 knob on the right side adjusts the overall output level.

The Performance View

Mixer Page


STUDIO DRUMMER - Manual - 20

Summary of Contents for Studio Drummer

Page 1: ...Manual...

Page 2: ...uments NI and associated logos are registered trademarks of Native In struments GmbH Mac Mac OS GarageBand Logic iTunes and iPod are registered trademarks of Apple Inc registered in the U S and other...

Page 3: ...sische Str 28 D 10997 Berlin Germany www native instruments de USA Native Instruments North America Inc 5631 Hollywood Boulevard Los Angeles CA 90028 USA www native instruments com Native Instruments...

Page 4: ...ing 11 3 The Performance View 13 3 1 Kit Page 13 3 1 1 OH and ROOM MIX Knobs 15 3 1 2 TUNE Knob 16 3 1 3 ATTACK HOLD and DECAY Knobs 16 3 2 Mixer Page 16 3 2 1 Common Mixer Controls 18 3 2 2 CLOSE MIC...

Page 5: ...5 Drum Articulations 32 5 1 Session Kit 32 5 2 Stadium Kit 35 5 3 Garage Kit 37 6 Credits 41 Table of Contents STUDIO DRUMMER Manual 5...

Page 6: ...same velocity hit Each kit has up to 18 microphones that can be mixed separately including many direct mics a mono and stereo overhead set of mics and room mics to capture the ambient sound of the va...

Page 7: ...n Save as etc and paths to locations on your hard drive or other storage devices is printed in italics Text appearing elsewhere on the screen labels of buttons controls text next to checkboxes etc is...

Page 8: ...es tuning and volume envelopes for those drums You can also select which snare you want to use as well as load and unload the separate kit pieces Mixer page This page has all of the standard controls...

Page 9: ...underneath the snare drum image to switch be tween the snares 4 The snare image will change to indicate the newly selected snare Switching between the snares 2 2 3 Creating a Mix To create a mix of th...

Page 10: ...snare mic bleed when the kick and toms play Additional controls for the Kick and Snare channels 2 2 4 Adding and Removing Drums If you will not be using a particular drum cymbal or percussion instrume...

Page 11: ...on the right and left arrows To load a preset simply select the preset from the drop down menu Saving User Presets You can save presets for the settings of the whole mixer on the Mixer page as well a...

Page 12: ...set without changing the name it will overwrite the current user preset Removing User Presets 1 To remove a user preset 2 Select the preset in the drop down menu 3 Click on the icon above the drop dow...

Page 13: ...Kit Mixer Grooves and Options 3 1 Kit Page The Kit page has a view of the drum kit where you can select each drum and adjust the tuning the volume envelope the overhead microphone mix the room microp...

Page 14: ...the upper left corner The drums and cymbals can be se lected by clicking on their respective images and the percussion can be selected by click ing on the icon representations at the right of the kit...

Page 15: ...the INSTRU MENT header This is useful for freeing up computer memory by removing unused kit pieces You can always load them back at any time When a kit piece is unloaded its im age turns dark The res...

Page 16: ...HOLD knob adjusts how long the sound stays at maximum volume The DECAY knob adjusts how quickly the sound fades out after the HOLD time has passed For the most natural drum sound the default setting i...

Page 17: ...er page presets while using other parts of the interface As each kit has a very different sound these mixer presets can only be used for the kit that they are saved with Mixer page Performance View Th...

Page 18: ...d mute M the individual channels When a track has the Solo button pressed all other channels are silent and only the soloed channel can be heard Putting additional channels into solo mode will add tho...

Page 19: ...labeled at the bottom and the labels are highlighted when editing the channels 3 2 4 Effects Several new high quality effects are included with STUDIO DRUMMER specifically tail ored for acoustic drum...

Page 20: ...each mi crophone channel Solid G EQ Solid G EQ effect The SOLID G EQ is a uniquely musical EQ Up to four frequency ranges can be adjusted with high precision The HZ KHZ knobs set the center frequency...

Page 21: ...r the input signal falls below the threshold The THRESHOLD knob adjusts the level in dB that the input signal must exceed before the compressor starts affecting the sound The RATIO knob controls the a...

Page 22: ...nt that the input signal is boosted with the saturated sound The HF knob takes away the highest frequencies in a similar way that analog tape rolls off those high frequencies The OUTPUT knob on the ri...

Page 23: ...to choose from These change the order of which effect comes before the other depending on your preference in a mix for example some engineers prefer to use EQ before compres sion while others prefer t...

Page 24: ...ointing up and the Snare Bleed The Snare Bleed fader adjusts the amount of the buzzing sound that the bottom of a snare produces when resonated by the Kick and Toms 3 3 Grooves Page The Grooves page i...

Page 25: ...Fills and Variations The middle column shows the list of Grooves and Fills available for that Genre The standard time signature is 4 4 unless otherwise shown in the name of the Groove or Fill And the...

Page 26: ...po of the groove is played or felt This is usually based on the instrument that is keeping the time such as the hi hat or ride cymbal Hat Ride Other This is the instrument that is keeping the time of...

Page 27: ...MANIZE and SWING knobs For example selecting 1 8 will push the grooves towards or away from the 8th notes of the beat when using the HUMANIZE knob The VELOCITY knob changes the range of the velocities...

Page 28: ...s page Performance View 3 4 1 VELOCITY Settings The VELOCITY area at the top allows you to fine tune the way STUDIO DRUMMER responds to MIDI input The Performance View Options Page STUDIO DRUMMER Manu...

Page 29: ...g the mapping to the way that suits you best when playing the drums with a MIDI keyboard or for adjusting the mapping to a custom electronic drum setup To assign the MIDI notes manually by entering or...

Page 30: ...ases by a random amount with each hit VELOCITY The velocity of the played drum will increase or decrease slightly which can trigger different samples above or below the one at the original velocity TI...

Page 31: ...y footprint than the Full kits at the cost of losing some realism Template Kits Studio Drummer Session Kit Template Studio Drummer Stadium Kit Template Studio Drummer Garage Kit Template The Template...

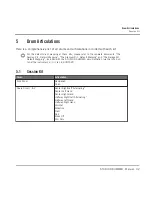
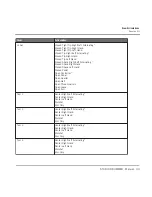
Page 32: ...d The Garage Kit Default Mapping included with the STUDIO DRUMMER documentation via the Info but ton of the Instrument s Library tab in KONTAKT 5 1 Session Kit Drum Articulation Kick Drum Dampened Ope...

Page 33: ...n Controller Open Pedal Open Quarter Open Half Open Three Quarters Open Loose Open Full Tom 1 Center Right Left Alternating Center Right Hand Center Left Hand Rimshot Rim Only Tom 2 Center Right Left...

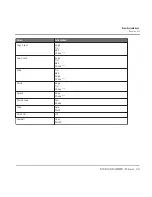
Page 34: ...Tip Bell Choke Low Crash Edge Tip Bell Choke Ride Tip Bell Edge Choke China Edge Tip Choke Splash Edge Choke Tambourine Tap Shake Clap Solo Multi Stick Hit Hit Cowbell Open Muted Drum Articulations Se...

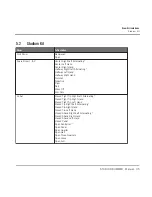
Page 35: ...es Off Rim Only Hi hat Closed Tight Tip Right Left Alternating Closed Tight Tip Right Hand Closed Tight Tip Left Hand Closed Tip Right Left Alternating Closed Tip Right Hand Closed Tip Left Hand Close...

Page 36: ...Left Hand Rimshot Rim Only Tom 3 Center Right Left Alternating Center Right Hand Center Left Hand Rimshot Rim Only Tom 4 Center Right Left Alternating Center Right Hand Center Left Hand Rimshot Rim O...

Page 37: ...lock Hit 5 3 Garage Kit Drum Articulation Kick Drum Dampened Open Snare Drum 1 2 Center Right Left Alternating Center Left Hand Center Right Hand Halfway Right Left Alternating Halfway Left Hand Halfw...

Page 38: ...and Closed Pedal Open Controller Open Pedal Open Quarter Open Half Open Three Quarters Open Loose Open Full Tom 1 Center Right Left Alternating Center Right Hand Center Left Hand Rimshot Rim Only Tom...

Page 39: ...in speed This adds a realistic sound to faster playing as a drummer would also switch to using both hands at fast speeds There is a separate note assignment for the open hi hat that controls the amoun...

Page 40: ...e sample will play the sound of a choked cymbal which relates to the current volume of the played cymbal If no cymbal sound is currently active then the cymbal choke notes will do nothing Choke sample...

Page 41: ...g Dinos Vallianatos Adam Hanley Nicki Marinic Project Management Gerald Zollner Teldex Engineer Tobias Lehmann Teldex Assistant Engineer Tom Ru b ldt Drummer Simon Baumann Drum Sound Specialist Udo Ma...

Reviews: