JuLI™Stage, Real-Time Cell History Recorder
10
11
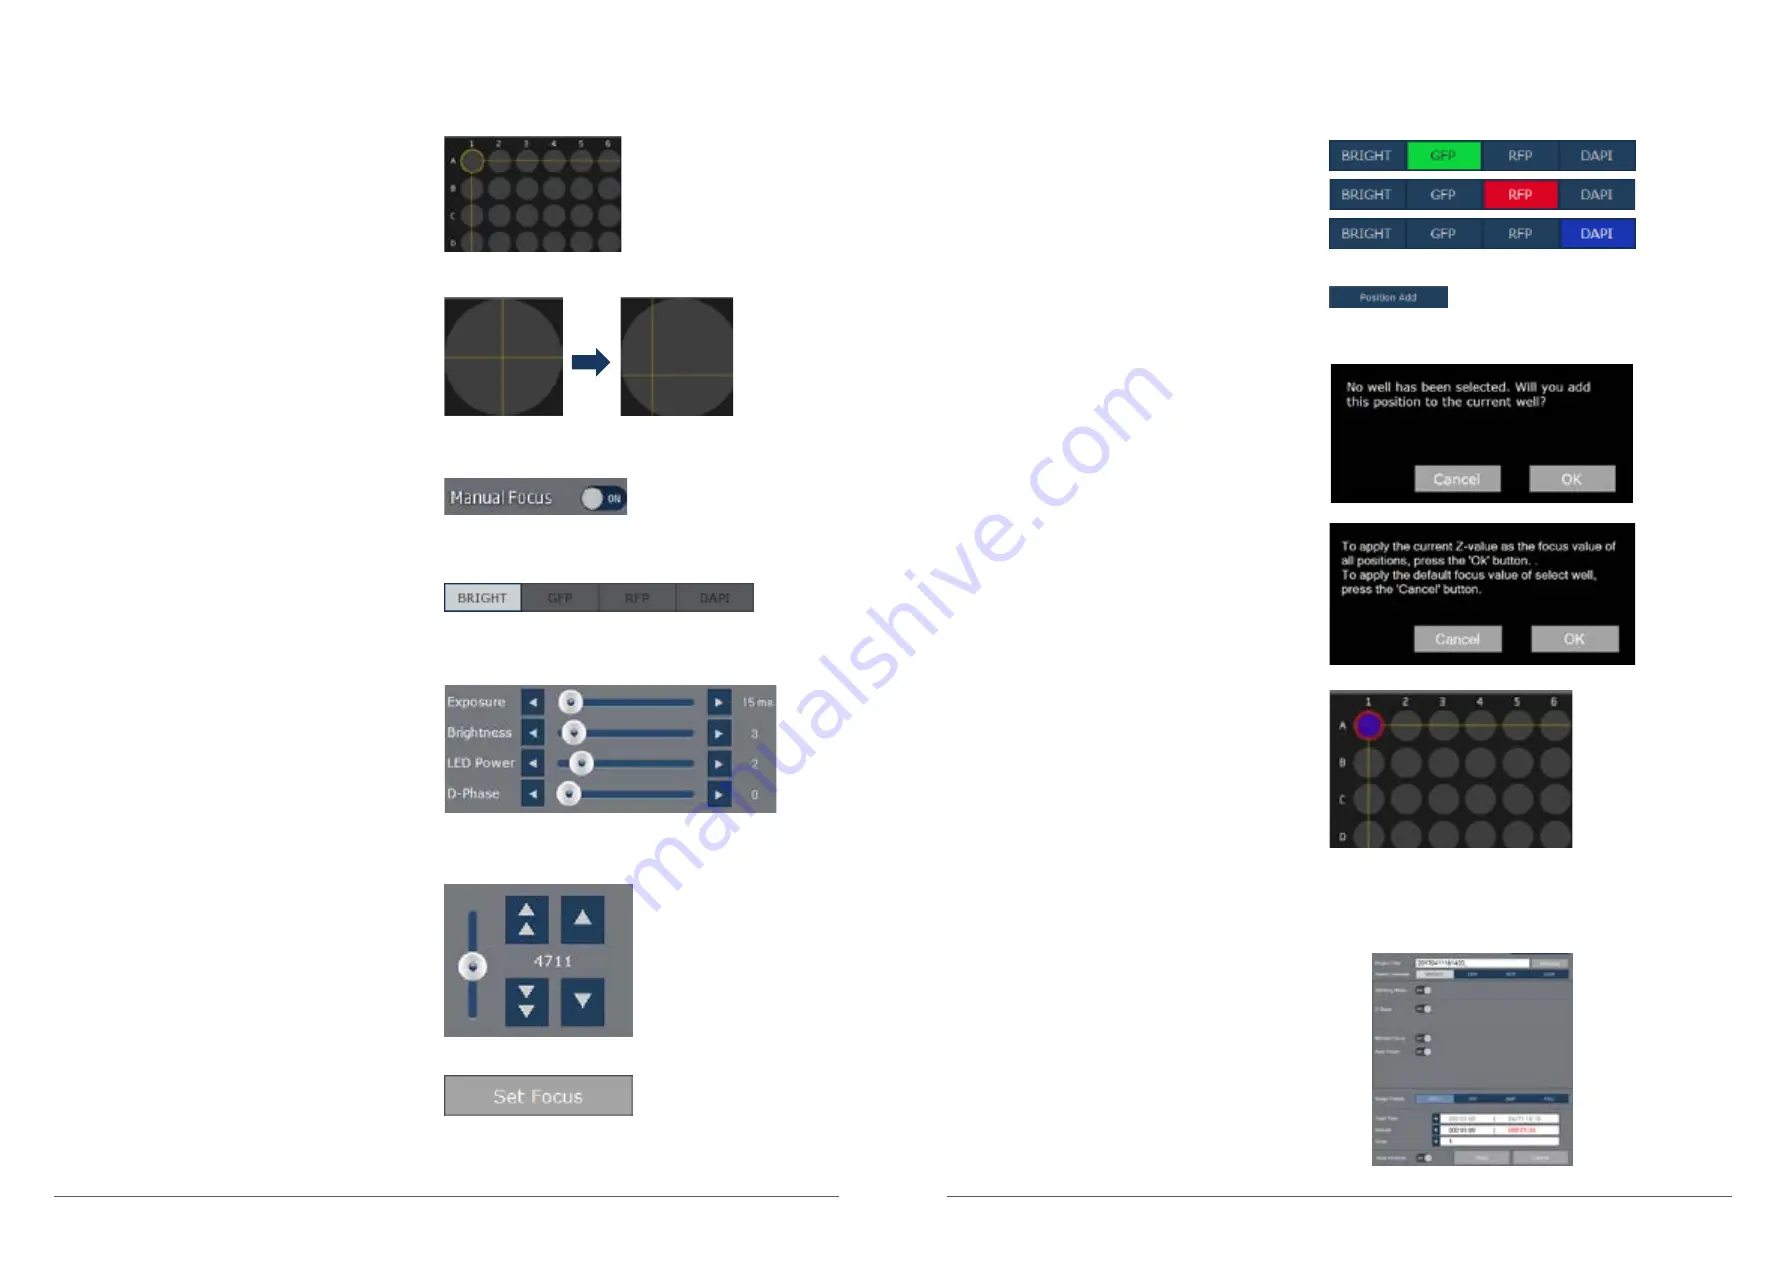
8. Select Other LED channels, If necessary to capture
additional images in different channel.
Follow Step 4 ~ 7 repeatedly and save images for
each channel.
9. After adjusting focus and assigning position,
press the Position Add button.
10. Press the OK button when the pop-up window
appears.
11. Once the wells are finally confirmed, they are
changed to Red color.
12. If necessary to set manual focus in other wells,
follow the previous step 1 ~ 11.
13. Enter the detail setting information.
(Please refer to the previous )
☞
Refer to the detail options of Monitoring option tap
in the option menu (User manual page. 36)
Operation type-2
(for selecting Individual samples using the Manual focus)
1. Click a well you want to capture using the Right
mouse button.
2. Once the well is selected, stage is automatically moved
to center of well. Use Right mouse button to navigate
around the well to discover points of interest within the
well. The location will be shown by the grid lines.
3. Turn on the Manual Focus toggle button.
4. Select the LED channel.
5. Adjust the Exposure, Brightness and LED power and
D-Phase, if necessary.
6. Find optional focus adjusting the Focus
bar and buttons.
7. Set Focus button is used to assign
optional focus per each position. After setting
the focus of each position, press the Set
Focus button to save setting value.
Operation type-2
(for selecting Individual samples using the Manual focus)


