


JuLI™Stage, Real-Time Cell History Recorder
2
3
Installation
Basic operation
The JuLI™ Stage used in combination with PC (Monitor Resolution 1920x1080) to enables users
to operate the instrument using the computer mouse and keyboard. The JuLI™ Stage basic operations
use the mouse for moving, selecting and zooming in/out.
☞
Quick manual describes the mouse function in Default setting (Type 1).
If necessary, you can change the mouse setting type in the Setting menu.
1. Moving: Move the X-Y stage to wells or positions.
•
Moving among wells (Inter well)
•
Moving within the well (Intra well)
•
Moving in view
2. Selection: Select the wells or specific positions which user wants to set.
•
Selecting well
•
Selecting position
3. Zoom: Zoom in and out of the image in the screen.
•
Zoom-in (Scroll up)
•
Zoom-out (Scroll down)
•
Size bar (Wheel dragging)
[1
st
Zoom-in]
[2
nd
Zoom-in]
[3
rd
Zoom-in]
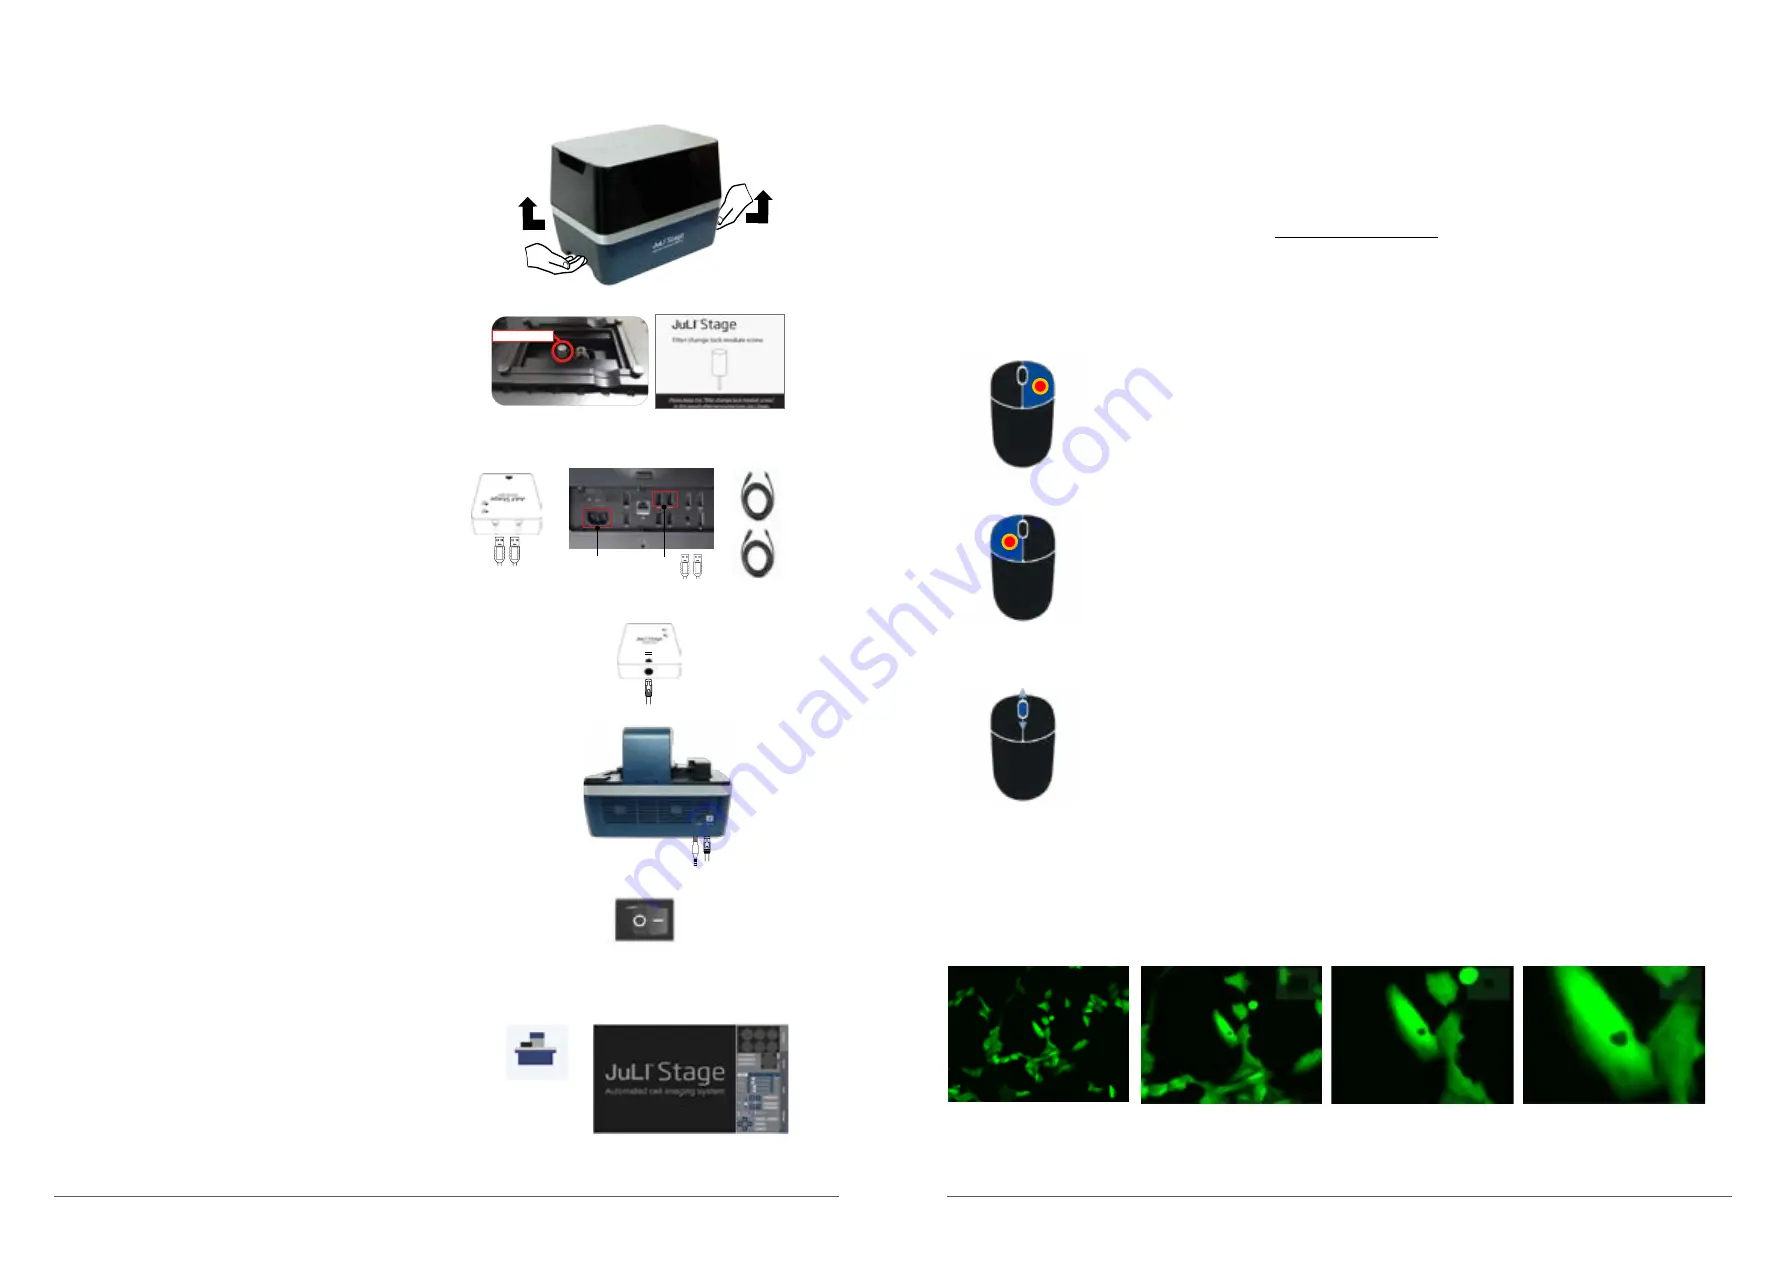
1. Open the box and remove the material foam from the box.
2. Carefully lift the instrument out of the box, using the handholds
in the bottom of the base.
3. Place the instrument on a flat, level surface (table or incubator).
4. Unscrew the filter change lock module screw.
5. Gently pull filter change lock module screw out, away from the
instrument. Put the filter in the pouch to keep safe.
6. Connect repeater to the PC and two USB cables, then connect to
control box. (PC Monitor Resolution: 1920 ×1080 pixels)
7. Connect the JuLI™ Stage instrument and the Control box and
using the connection cable. Connect the connection cable and control box
matching the blue and red sticker.
☞
Note : Make sure of connection port direction to control box before
connecting.
8. Plug the power cord of PC and instrument into the electrical outlet.
9. Turn the PC and the Control box on by pressing the Power button.
10. Double-click the JuLI™ Stage icon on desktop The JuLI™ Stage
software starts up.
Power port
USB port
Filter change lock module
Filter change lock module
Right mouse
Left mouse
Mouse wheel
☞
Note: Check the connection on the rear side of the PC.


