


Page | 17
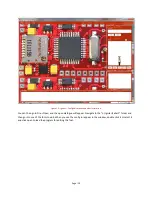
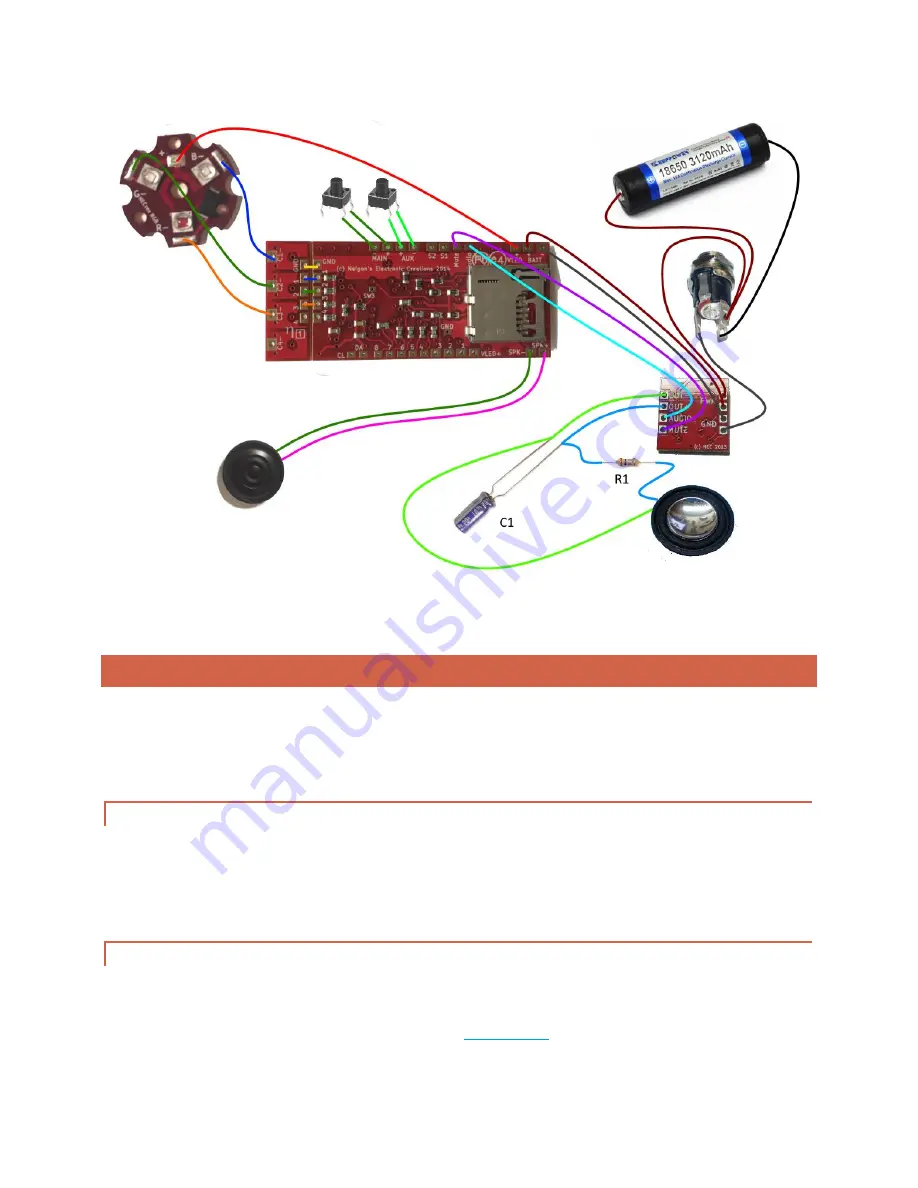
Figure 10 – Full MaxAmp™ wiring that allows a subwoofer setup for great low tones! Note that both C1 (10uF capacitor) and R1 (1ohm,
1/4W resistor) are included with purchase of the MaxAmp™.
4.
CONFIGURATION EDITING
Once Igniter 3™ has been wired according to the wiring above then it will work immediately with the default
configuration. However, changing the fonts and effects is completely possible and encouraged by using the
Igniter™ Config Editor. The following section will go through installing and using the editor to modify Igniter™
configuration.
4.1.
INSTALLATION
To install the application, launch the .msi file from the installer zip file. You can get the file from SaberIgniter.com.
A version is also included on the micro SD card that came with Igniter™, but I recommend going to the site to get
the newest version in case any enhancements have been made to the program. Click through the wizard until the
application launches.
4.2.
COPY FILES TO YOUR MACHINE
Before opening Igniter™ Config Editor you will need to copy the files you want to edit from the micro SD card to
your local computer. First, insert your micro SD card into your computer using your SD card reader. If you do not
currently have one, I recommend this cheap one off eBay:
Micro SD card
.


