background image


Getting started                                                                                                                                 

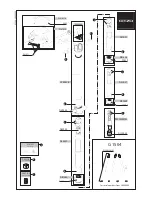
Install battery 

The camera uses four AAA alkaline batteries (not included) or a rechargeable lithium 

battery (included). Open the battery cover and insert the battery. Be sure to insert with the 

+ of the battery matching the + indicator on the camcorder. Replace the battery cover. 

Your battery should be CHARGED before use. It may be charged in the camera through 

the USB port. Connect the USB cable to your camcorder and then to a POWERED USB 

port on your computer or to a universal USB type wall charger (not included). 

Install SD/MMC memory card 

Open the battery cover and insert the SD/MMC memory card with the contacts facing the 

camcorder into the card groove in on the camcorder in accordance with the diagram on 

the card groove. To remove the memory card, press the SD/MMC memory card and then 

remove it. 

_______________________________________________________________________ 


                  NOTE!           


Be sure to turn off the power on the camcorder before changing the memory card. 


Insert the card in the correct direction. DO NOT use too much force to insert the 

card. Doing so may cause damage to the card or the parts of the camera. If the card 

is difficult to insert, verify that the direction is correct. 


Memory cards being used for the first time or that have been used on other 

cameras MUST be formatted before use. 

_______________________________________________________________________ 

Summary of Contents for FamilyCam HD

Page 1: ...OPERATING INSTRUCTIONS...

Page 2: ......

Page 3: ...rance 6 Key functions 7 Getting started 8 Installing the battery 8 Installing the SD card 8 Powering the camcorder 9 Switching modes 9 Recording video and taking photos 9 Playback 9 TV output 9 HDMI o...

Page 4: ...the camera in accordance with the following sequence Charge the camera Insert and format the memory card Record take video or photos Connect to computer Charge and power on the camera Insert and forma...

Page 5: ...card it should be replaced DO NOT bend the memory card since it is the precise electronic device DO NOT store or use the memory card in the environment with strong electric field or magnetic field suc...

Page 6: ...st on the surface should be removed before cleaning the lens Then use an appropriate cleaning cloth or tissue that is suitable for the cleaning the optical equipment to lightly wipe the lens If necess...

Page 7: ...er Memory More than 128MB Sound card and graphic card The sound card and graphic card must support Direct X version 8 or higher CD ROM Speed 4X or higher Hard disk More than 1 GB remaining space Other...

Page 8: ...6 Appearance ___...

Page 9: ...hoto when enlarging photos in the playback mode Left direction key Select the file activate fill light switch the screen display move the photo when enlarging photos in the playback mode Right directi...

Page 10: ...e SD MMC memory card with the contacts facing the camcorder into the card groove in on the camcorder in accordance with the diagram on the card groove To remove the memory card press the SD MMC memory...

Page 11: ...se the left key and right key to select the photos Press the OK key to select the photo you wish to view Use the zoom key to enlarge the photo Press upward downward left right keys to move the photos...

Page 12: ...eriod that exceeds the automatic power off time you have selected one minute three minutes five minutes the camcorder will automatically power off to save the battery Accessing the menus Press the men...

Page 13: ...shutter key To record video press the record key Stop recording by pressing the recording key again To use the digital zoom press the zoom key in the desired direction T for telephoto or W for wide an...

Page 14: ...d inserted Memory card has write protection enabled 5 Countdown for self timer Indicates the countdown of the self timer mode 6 Zoom indication Indicates the current digital zoom ratio 7 Battery Level...

Page 15: ...he left and right navigation keys to make the selection and press the OK key to confirm your selection After returning to the main menu press the menu key to exit Video Image Menu Options Main menu Su...

Page 16: ...ity Good Better quality Image quality Normal General quality 3200 x2400 8 million pixel resolution 2592 x1944 5 million pixel resolution Image size 2048 x1536 3 million pixel resolution 2sec or 10sec...

Page 17: ...s tone and software version Video Still Photo Mode When powering on the camcorder it will default to the video recording mode To enter the still photo mode press the shutter key To return to the video...

Page 18: ...layed on the top right corner of the screen Press the OK key to pause the playback or to restart the playback after pausing While in the pause mode you may press the left or right key to move forward...

Page 19: ...r to download photos videos Connect the camcorder to your computer using the USB cable included The camcorder will be recognized by your computer as a new Removable disk in the My Computer window Phot...

Page 20: ...packed with your camcorder includes ArcSoft MediaImpression imaging software Software Installation Put the CD into the CD ROM drive of your computer the following menu will appear If the CD does not...

Page 21: ...ediaImpression Installation and Use Installation Click the Install MediaImpression button and complete the installation following the on screen instructions After installation please restart the compu...

Page 22: ...20 Run MediaImpression Double click the icon on the desktop or follow Start Programs to open MediaImpression After starting MediaImpression click the Import to import the media...

Page 23: ...and choose the output location Choose required file and click the import selected file will be stored in the output location Click Go to start page to return to the main screen Click the Video or All...

Page 24: ...22 Choose file and click the upload to You Tube Enter you username and password to login the You Tube execute upload...

Page 25: ...t photometry Exposure Compensation 2 0 2 0 EV USB Interface USB 2 0 TV Output NTSC PAL Display Screen 3 0 TFT LCD Power Rechargeable lithium battery 3 7V 800mAh included or 4 AAA alkaline batteries no...

Page 26: ...The SD card is locked Remove the SD card and move the protection switch to the unlocked position Photos are fuzzy The camcorder was not held steady when recording Hold the camcorder with two hands or...

Page 27: ......

Reviews: