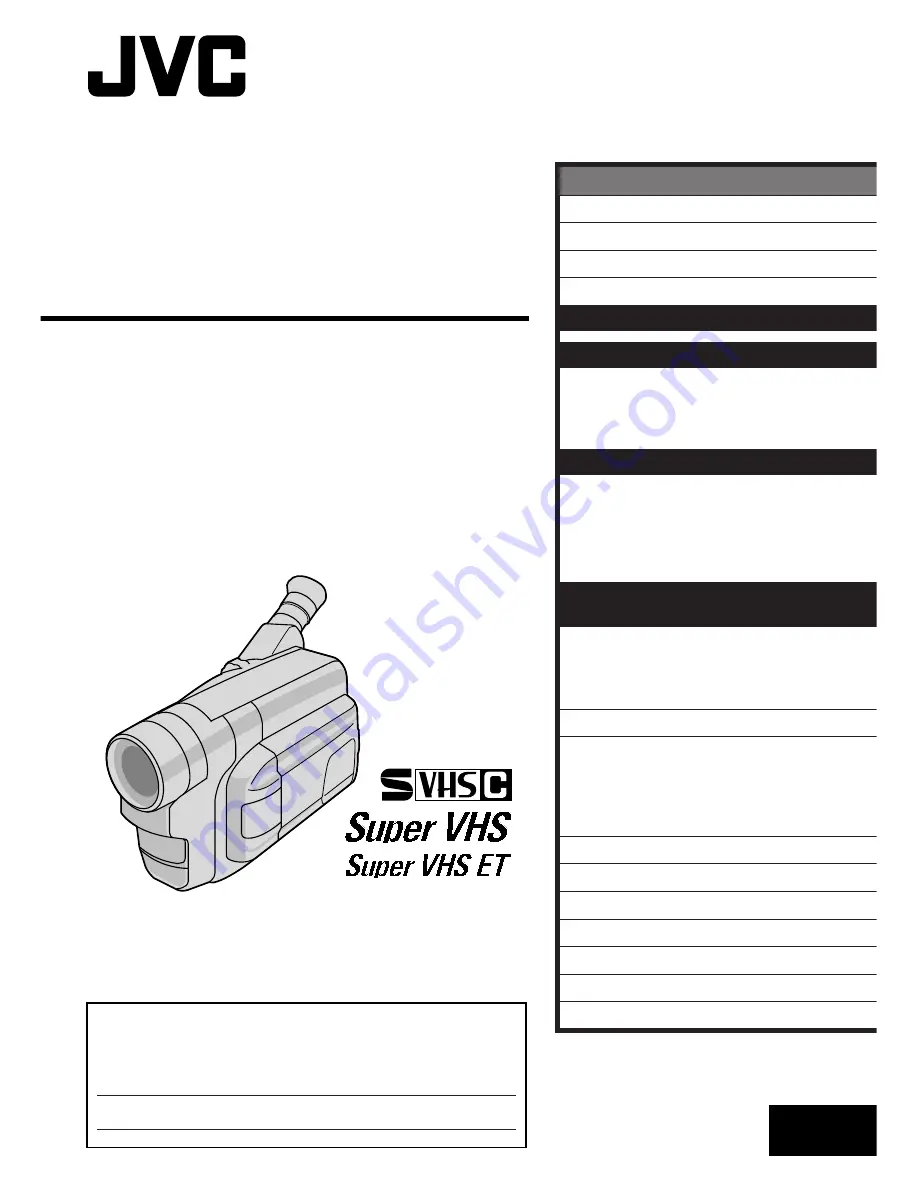
background image

LYT0475-001A

EN

COMPACT 

VHS CAMCORDER

INSTRUCTIONS

GR-SXM525

For Customer Use:

Enter below the Model No. and Serial No. which is located on the
bottom of cabinet. Retain this information for future reference.

Model No.

Serial No.

ENGLISH

CONTENTS

SAFETY PRECAUTIONS

2 – 5

QUICK OPERATION GUIDE

6

MAJOR FEATURES

7

PROVIDED ACCESSORIES

7

GETTING STARTED

8 – 15

RECORDING

16 – 30

Basic Recording

.......................... 16

Basic Features

........................... 18

Advanced Features

...................... 21

PLAYBACK

31 – 35

Basic Playback

........................... 31

Features

.................................. 32

Using The Cassette Adapter

........... 33

Connections

............................... 34

USING THE REMOTE
CONTROL UNIT

36 – 39

Animation And Time-Lapse

............. 37

Insert Editing

............................. 38

Audio Dubbing

........................... 39

TROUBLESHOOTING

40 – 41

INDEX

42 – 45

Controls, Connectors And

Indicators

............................... 42

Indications

................................ 44

CAUTIONS

46 – 48

TERMS

49

USER MAINTENANCE

50

SPECIFICATIONS

51

ESPAÑOL

52 – 53

FOR SERVICING (Only in U.S.A.)

54

WARRANTY (Only in U.S.A.)

55

Summary of Contents for GR-SXM525

Page 1: ...CCESSORIES 7 GETTING STARTED 8 15 RECORDING 16 30 Basic Recording 16 Basic Features 18 Advanced Features 21 PLAYBACK 31 35 Basic Playback 31 Features 32 Using The Cassette Adapter 33 Connections 34 USING THE REMOTE CONTROL UNIT 36 39 Animation And Time Lapse 37 Insert Editing 38 Audio Dubbing 39 TROUBLESHOOTING 40 41 INDEX 42 45 Controls Connectors And Indicators 42 Indications 44 CAUTIONS 46 48 T...

Page 2: ...ES The rating plate serial number plate and safety caution are on the bottom and or the back of the main unit The rating information and safety caution of the AC Power Adapter Charger are on its bottom Warning on lithium battery for clock operation The battery used in this device may present a fire or chemical burn hazard if mistreated Do not recharge disassemble heat above 100 C 212 F or incinera...

Page 3: ...batteries at the end of their useful life when taken out of service in the United States The RBRC program provides a convenient alternative to placing used Ni Cd batteries into the trash or the municipal waste stream which may be illegal in your area Please call 1 800 8 BATTERY for information on Ni Cd battery recycling and disposal bans restrictions in your area JVC s involvement in this program ...

Page 4: ...rsonal safety In order not to defeat the built in safeguards observe the following basic rules for its installation use and servicing ATTENTION Follow and obey all warnings and instructions marked on your product and its operating instruc tions For your safety please read all the safety and operating instructions before you operate this product and keep this manual for future reference INSTALLATIO...

Page 5: ...ing amplifiers that produce heat SERVICING 1 Servicing If your product is not operating correctly or exhibits a marked change in performance and you are unable to restore normal operation by following the detailed procedure in its operating instructions do not attempt to service it yourself as opening or removing covers may expose you to dangerous voltage or other hazards Refer all servicing to qu...

Page 6: ... pg 33 1 Turn the LENS COVER Open Close Ring to open the lens cover 2 Set the Power Switch to AUTO or PRO The power lamp will light and an image will appear 3 Press the Recording Start Stop Button Recording starts To stop recording temporarily momentarily press the Recording Start Stop Button once again For more details Z pgs 16 17 The viewfinder switches off automatically to save power when the L...

Page 7: ...e demonstration will resume n To cancel Automatic Demonstration set the Power Switch to PRO and press MENU while the demo is in progress This takes you directly to the demo mode s Setting Menu so you will not have to go through the main Menu Screen Rotate the Select Wheel to select OFF and press it The Menu Screen appears with the highlight bar on RETURN Press it to close the Menu Screen DEMO MODE...

Page 8: ...rging times noted above are for a fully discharged battery pack Charging time varies according to the ambient temperature and the status of the battery pack To avoid interference with reception do not use the AC Power Adapter Charger near a radio If you connect the camcorder s DC cord to the adapter during battery charging power is supplied to the camcorder and charging stops Since the AC Power Ad...

Page 9: ...spective instruction booklet when the video light is on NOTES Recording time is reduced significantly under the following conditions Zoom or Record Standby mode is engaged repeatedly The LCD monitor is used repeatedly Before extended use it is recommended that you prepare enough battery packs to cover 3 times the planned shooting time Battery pack BN V11U BN V12U optional BN V20U optional BN V856U...

Page 10: ...CD monitor fully 2 Slide EJECT until the cassette holder opens Do not use force to open 3 Insert or remove a cassette When inserting make sure the label is facing outward 4 Press PUSH to close the cassette holder until it locks into place Close the LCD monitor NOTES Closing the LCD monitor while the cassette holder is still open may cause damage to the LCD monitor The cassette holder can t be open...

Page 11: ... Wheel to move the highlight bar to EXIT and press it then go to step 7 To set only the time without changing the date go to step 5 4 To set YEAR MONTH or DAY rotate the Select Wheel to move the highlight bar to the desired item and press it When the setting begins blinking rotate the Select Wheel until the correct setting appears and then press it The setting stops blinking Repeat for other date ...

Page 12: ...ng Menu Select Wheel Power Switch MENU Button SP EP Recording Mode Button Viewfinder Tape Length Setting Set the tape length according to the length of the tape used 1 Set the Power Switch to PRO then press MENU 2 Rotate the Select Wheel to move the highlight bar to TAPE LENGTH then press it The TAPE LENGTH Setting Menu appears 3 Rotate the Select Wheel to move the highlight bar to the correct tap...

Page 13: ...light bar to S VHS then press it The S VHS Setting Menu appears 3 Rotate the Select Wheel to set to either of the parameters then press it The highlight bar moves to EXIT In the S VHS ET Setting Menu ON Records with S VHS picture quality on a VHS cassette factory preset This is called Super VHS ET Expansion Technology OFF Records in VHS In the S VHS Setting Menu ON Records in S VHS on an S VHS cas...

Page 14: ...VCR equipped with the SQPB S VHS QUASI PLAYBACK function S VHS picture quality is not available Tapes recorded in S VHS ET mode cannot be played back on some VCRs including some JVC VCRs eg HR S6600U HR SC1000U etc n Tapes recorded in S VHS or S VHS ET mode cannot be played back correctly on a normal VHS VCR n You can play back S VHS ET recordings not only on this VCR but also on another VHS VCR e...

Page 15: ...t Control until the indications in the viewfinder are clearly focused Shoulder Strap Attachment 1 Following the illustration thread the strap through the eyelet 1 then fold it back and thread it through the buckle 2 Repeat the procedure to attach the other end of the strap to the other eyelet 3 making sure the strap is not twisted 2 Adjust as shown in the illustration 4 CAUTION When using a tripod...

Page 16: ...Record Standby mode PAUSE is displayed in the LCD monitor 2 Tilt the LCD monitor upward downward for best viewability and press the Recording Start Stop Button appears in the LCD monitor while recording is in progress NOTE When you use the LCD monitor outdoors in direct sunlight the LCD monitor may be difficult to see If this happens use the viewfinder instead To Stop Recording press the Recording...

Page 17: ...g 19 to find the end of the last recording so you do not erase any of it While shooting sound is not heard from the speaker Self Recording JOURNALISTIC SHOOTING In some situations different shooting angles may provide more dramatic results Hold the camcorder in the desired position and tilt the LCD monitor in the most convenient direction It can rotate 270 90 downward 180 upward INTERFACE SHOOTING...

Page 18: ...digital processing When using Digital Zoom the quality of image may suffer To deactivate Digital Zoom set D ZOOM to OFF in the Menu Screen Z pg 24 FEATURE Picture Stabilizer PURPOSE To compensate for unstable images caused by camera shake particularly at high magnification OPERATION Press P STABILIZER appears n To switch off the Picture Stabilizer press P STABILIZER The indicator disappears NOTES ...

Page 19: ...2 reverses it 3 Press the Recording Start Stop Button to start recording NOTE Noise bars appear and pictures may become monochrome or darken during Retake This is normal FEATURE 5Sec Rec 5 sec Recording PURPOSE To record a scene for 5 seconds providing quick scene transitions like those seen in TV programs OPERATION n Make sure the recording mode is set to SP 1 During Record Standby press 5SEC REC...

Page 20: ...ht when the camcorder senses insufficient lighting on the subject ON Always keeps the light on as long as the camcorder is turned on n The video light can only be used with the camcorder s power on n It is recommended to set the white balance Z pg 30 to when you use the video light n When not using the video light turn it off to save battery power NOTES Even if the battery indicator does not blink...

Page 21: ...es in from the top and bottom closing over the image like a shutter or a new image pushes open the black screen vertically from the center SLIDE Wipe A black screen moves in from the left to gradually cover the image or a new image moves in from right to left DOOR Wipe Wipes in as the two halves of a black screen open to the left and right revealing the scene or wipes out and the black screen reap...

Page 22: ...ia tinted reddish brown monochrome giving the effect of an older movie Use together with Wide Z pg 24 for the authentic look of a classic Hollywood movie SPORTS High shutter speed clearly captures fast moving action ND ND EFFECT A black mist darkens the picture as when an ND filter is used Helps to counter the effects of glare on the subject FG FOG Makes the picture look misty white as when an ext...

Page 23: ...OSURE Z pg 28 M W B Z pg 30 DATE TIME Z pg 11 and perform each procedure from step 4 If you select JLIP ID NO rotate the Select Wheel until the desired number appears and press it Then rotate the Select Wheel to move the highlight bar to EXIT If you select any other functions rotate the Select Wheel to move the highlight bar to the desired setting To return to the previous setting place the highli...

Page 24: ... EIA Standard for Low Light Sensitivity Measurement EIA Electronic Industries Alliance OFF Allows you to shoot dark scenes with no picture brightness adjustment Allows you to superimpose one of eight preset titles Z pg 26 Makes the date time settings appear in the camcorder or on a connected monitor Z pg 26 ON Allows you to use the Digital Zoom By digitally processing and magnifying images zooming...

Page 25: ...is 06 ON Demonstrates certain functions such as Fade Wipe etc When DEMO MODE is set to ON and the Menu Screen is closed the demonstration starts Operating the Power Zoom Lever during the demonstration stops the demonstration temporarily If the Power Zoom Lever is not moved for more than 1 minute after that the demonstration will resume NOTE When a tape whose Erase Protection tab is in the position...

Page 26: ...tch O H O M A H O W C E F A U E A U E O X F P R R S P R D N I P R P P D G T Y V Y E Y N I R A C E N A B C C I H W G T T I A H A O U I R T R L L B D L T T I I I A A A L H O S D D B Y T E D N T A A Y I A M Y Y O Y A S N S S Instant Titles The camcorder has eight preset titles in memory You can superimpose one of them over the video image Instant Titles can be displayed not only in English but also i...

Page 27: ...reset time spans Leaving the camcorder aimed at a specific subject you can record subtle changes over an extended period of time 1 Set REC TIME Z step 1 and 2 of Animation above 2 Rotate the Select Wheel to move the highlight bar to INT TIME and press it The INT TIME Menu appears Rotate the Select Wheel to move the highlight bar to the desired interval time then press it The Menu Screen reappears ...

Page 28: ...ve the highlight bar to MANU then press it The Menu Screen disappears and 00 exposure control level counter appears 5 To brighten the image rotate the Select Wheel upward The exposure control level counter increases maximum 06 To darken the image rotate the Select Wheel downward The exposure control level counter decreases maximum 06 6 Press the Select Wheel The setting is complete The Menu Screen...

Page 29: ...d appear The focus is locked at this point 5 To focus on a farther subject rotate the Select Wheel upward appears and blinks To focus on a nearer subject rotate the Select Wheel downward appears and blinks 6 Press the Select Wheel The setting is complete The Menu Screen reappears with the highlight bar on RETURN 7 Press the Select Wheel The Menu Screen disppears and reappears to indicate the focus...

Page 30: ... is activated Manual White Balance Operation Perform Manual White Balance when shooting under various types of lighting 1 Follow steps 1 through 4 of the white balance adjustment and select MWB 2 Hold a sheet of plain white paper in front of the subject Adjust zoom or position yourself so that the white paper fills the screen 3 Press the Select Wheel until MWB begins blinking When the setting is c...

Page 31: ...Power Zoom Lever VOL Select Wheel BRIGHT Set to PLAY Speaker LCD Monitor Brightness Adjustment Rotate the Select Wheel BRIGHT towards to brighten or towards to darken The Bright Level Indicator is displayed under the Date Time Display when you play back images recorded in Wide Mode Z pg 24 Speaker Volume Control Slide the Power Zoom Lever VOL towards to turn up the volume or towards to turn down t...

Page 32: ...STABILIZER during playback for more than 1 second When the TBC mode is activated TBC is displayed The TBC indicator turns green gray with a camcorder equipped with a black white viewfinder while TBC is working TBC does not work during still playback and shuttle search The TBC indicator turns white while TBC is not operative It may take a few seconds before TBC actually starts working The picture m...

Page 33: ...er into the VCR and play the tape back as you would any other 4 Slide the latch and the compartment door opens automatically This may take around 10 seconds Do not attempt to force the adapter open Then insert your finger in the hole on the underside of the adapter as shown in the illustration at left and push up and remove the cassette NOTES During tape loading and unloading do not touch the reel...

Page 34: ...o TV or VCR To AUDIO IN When connecting the cables open this cover Connector cover Audio cable optional To Video Output Video cable optional To VIDEO IN VCR Recording deck TV To AUDIO IN To Audio Output B Connection to a TV or VCR equipped only with A V input connectors A Connection to a TV or VCR equipped with an S VIDEO IN and A V input connectors To TV or VCR To S Video Output To S VIDEO IN S V...

Page 35: ... AUTO or PRO then set your TV to the appropriate input mode Make sure you adjust the TV sound volume to its minimum level to avoid a sudden burst of sound when the camcorder is turned on If you have a TV or speakers that are not specially shielded do not place the speakers adjacent to the TV as interference will occur in the camcorder playback picture Tape Dubbing 1 Following the illustration on p...

Page 36: ...s the Recording Start Stop Button on the camcorder Retake forward Z pg 19 Time Lapse Z pg 37 With the camcorder s Power Switch set to PLAY Playback start Z pg 31 Rewind Reverse Shuttle Search Z pg 31 Stop Z pg 31 Insert Editing Z pg 38 Fast Forward Forward Shuttle Search Z pg 31 Pause Z pg 31 Audio dubbing Z pg 39 When using the remote control be sure to point it at the remote sensor The illustrat...

Page 37: ...ME on the remote control until the Recording Time indicator disappears Time Lapse 1 Set Instead of performing steps 1 through 3 on pg 27 Time Lapse press INT TIME and REC TIME on the remote control Each time INT TIME is pressed the Interval Time indicator appears changing in the following order 15S 30S 1MIN 5MIN and no indication off Each time REC TIME is pressed the Recording Time indicator appea...

Page 38: ... Press REW to go a little beyond the beginning of the scene you want to replace press PLAY to view the recorded tape and press PAUSE exactly at the Edit In point where the new scene should start 5 Press and hold INSERT and without releasing INSERT press and release PAUSE The Insert Editing indicator appears and the Insert Editing mode is engaged When the scene the camcorder is aimed at appears on ...

Page 39: ...ode 4 To end Audio Dubbing press STOP NOTES Do not press FF or REW during Audio Dub Standby or the edit points will not be accurate If the microphone is too close to the TV or if the TV s volume is too high whistling or howling may occur NOTES for Insert Editing and Audio Dubbing Insert Editing and Audio Dubbing may not work correctly if the tape contains blank segments or if the recording speed w...

Page 40: ...d Z pg 8 The power supply has not been correctly connected Z pg 9 The battery pack has completely discharged Remove the cassette and disconnect the power source then after a few minutes try turning the power back on If it still does not come on consult your nearest JVC dealer Make sure the Erase Protection tab is in the position that allows recording If not slide the tab Some cassettes have remova...

Page 41: ...ses it to be hot Close the LCD monitor to turn it off or set the Power Switch to OFF and let the unit cool down The LCD monitor and the viewfinder are made with high precision technology However black spots or bright spots of light red green or blue may appear constantly on the LCD monitor or in the viewfinder These spots are not recorded on the tape This is not due to any defect of the unit Effec...

Page 42: ...42EN INDEX Controls Connectors And Indicators U I 1 i o q u p e r w 2 Q W 3 4 5 6 y E R Y T t 7 8 0 9 ...

Page 43: ...Stop Button Z pg 16 Power Switch OFF AUTO PRO Z pg 16 31 Battery Release Switch BATTERY RELEASE Z pg 9 PUSH Button Z pg 10 Connectors q DC IN Connector Z pg 9 The connectors w to t are located beneath the cover w Video Output Connector Z pg 34 e Audio Output Connector Z pg 34 r S Video Output Connector Z pg 34 t J Terminal JLIP Joint Level Interface Protocol Connector It is used to connect the cam...

Page 44: ... Indicator Z pg 21 Displayed at 3 for approx 2 seconds when the Fade Wipe is switched from one effect to another by pressing EFFECT then only the indicator remains at 9 4 Recording Format Indicator S S ET Z pg 13 5 Tape Length Indicator Z pg 12 6 Zoom Indicator Bar Z pg 18 Zoom Level Indicator Approximate Zoom Ratio 7 Recording Indicator Z pg 16 0 Picture Stabilizer Indicator Z pg 18 Interval Time...

Page 45: ...on again These 2 warnings appear alternately every 3 seconds if dirt is detected on the heads during recording In this case use an optional cleaning cassette If the warning remains after cleaning consult your nearest JVC dealer The error indications E01 E06 show what type of malfunction has occured If an error indication and warning appear turn the unit off remove the power supply battery etc and ...

Page 46: ...3 Be sure to install batteries in the correct direction 4 Do not use rechargeable batteries 5 Do not expose the batteries to excessive heat as they can leak or explode 6 Do not dispose of the batteries in a fire 7 Remove the batteries from the unit if it is to be stored for an extended period to avoid battery leakage which can cause malfunctions INFORMATION This device complies with Part 15 of FCC...

Page 47: ...is normal for the battery pack to be warm after charging or after use Temperature Range Specifications Charging 10 C to 35 C 50 F to 95 F Operation 0 C to 40 C 32 F to 104 F Storage 10 C to 30 C 14 F to 86 F Recharging time is based on room temperature of 20 C 68 F The lower the temperature the longer recharging takes Cassettes To properly use and store your cassettes be sure to read the following...

Page 48: ... subject to excessive shock or vibration near a television set near appliances generating strong magnetic or electric fields speakers broadcasting antennas etc in places subject to extremely high over 40 C or 104 F or extremely low under 0 C or 32 F temperatures 3 DO NOT leave the unit in places of over 50 C 122 F in places where humidity is extremely low below 35 or extremely high above 80 in dir...

Page 49: ... pg 26 Interface Shooting pg 17 J JLIP ID NO pg 25 Journalistic Shooting pg 17 L LCD monitor Viewfinder Indications pg 44 45 Load A Tape pg 10 M Manual Focus pg 29 Menu Screen pg 23 25 N ND Effect Mode pg 22 Nega Posi Mode pg 22 P Picture Stabilizer pg 18 Power Switch Position pg 16 Program AE With Special Effects pg 22 Provided Accessories pg 7 Q Quick Review pg 19 R Recording Format pg 13 Record...

Page 50: ...t cloth Be careful not to damage the monitor Close the LCD monitor 3 To clean the lens blow it with a blower brush then wipe gently with lens cleaning paper 4 To detach the eyepiece turn it counterclockwise and pull it out 5 Remove dust from the viewfinder using a blower brush 6 Re attach the eyepiece and turn it clockwise Remove PUSH Button LENS COVER Open Close Ring EJECT Switch Set to OFF BATTE...

Page 51: ... source DC 6 0 V Power consumption LCD monitor off viewfinder on 4 1 W LCD monitor on viewfinder off 4 6 W LCD monitor on viewfinder on 5 1 W Video light 3 0 W Signal system NTSC type Video recording system Luminance FM recording Color Converted sub carrier direct recording Conforms to VHS standard Cassette cassette Tape speed SP 33 35 mm sec 1 5 16 ips EP 11 12 mm sec 7 16 ips Recording time max ...

Page 52: ...ndicador de carga Se incorpora un indicador de carga sobre la batería para ayudarle a recordar si ha sido cargada o no Los dos colores indicadores rojo y negro le permiten seleccionar la carga y la descarga USO DE LA BATERIA Enganche el extremo a la cámara de video y presione la batería hasta que se trabe en el lugar Si la batería es colocada en la posición equivocada puede ocurrir un mal funciona...

Page 53: ...e el conmutador de alimentación en AUTO o PRO La lámpara de alimentación se encenderá y aparecerá una imagen 3 Presione el botón inicio parada de grabación Comenzará la grabación Para detener temporariamente la grabación presione nuevamente el botón de inicio parada de grabación Por más detalles Z p 16 17 El visor se desconecta automáticamente para ahorrar energía cuando el monitor LCD es abierto ...

Page 54: ... Just as quality is a keyword in the engineering and production of the wide array of JVC products service is the key to maintaining the high level performance for which JVC is world famous The JVC service and engineering organization stands behind our products NATIONAL HEADQUARTERS JVC SERVICE ENGINEERING COMPANY OF AMERICA DIVISION OF JVC AMERICAS CORP 10 New Maple Avenue Pine Brook NJ 07058 9641...

Page 55: ... to any attachment not provided with the products or if the model or serial number has been altered tampered with defaced or removed 2 Initial installation and installation and removal for repair 3 Operational adjustments covered in the Owner s Manual normal maintenance video and audio head cleaning 4 Damage that occurs in shipment due to act of God and cosmetic damage 5 Signal reception problems ...

Page 56: ...COPYRIGHT 2000 VICTOR COMPANY OF JAPAN LTD U Printed in Japan 1299MKV UN YP VICTOR COMPANY OF JAPAN LIMITED EN GR SXM525 ...

Reviews: