Page
31
of
51
Step 12:
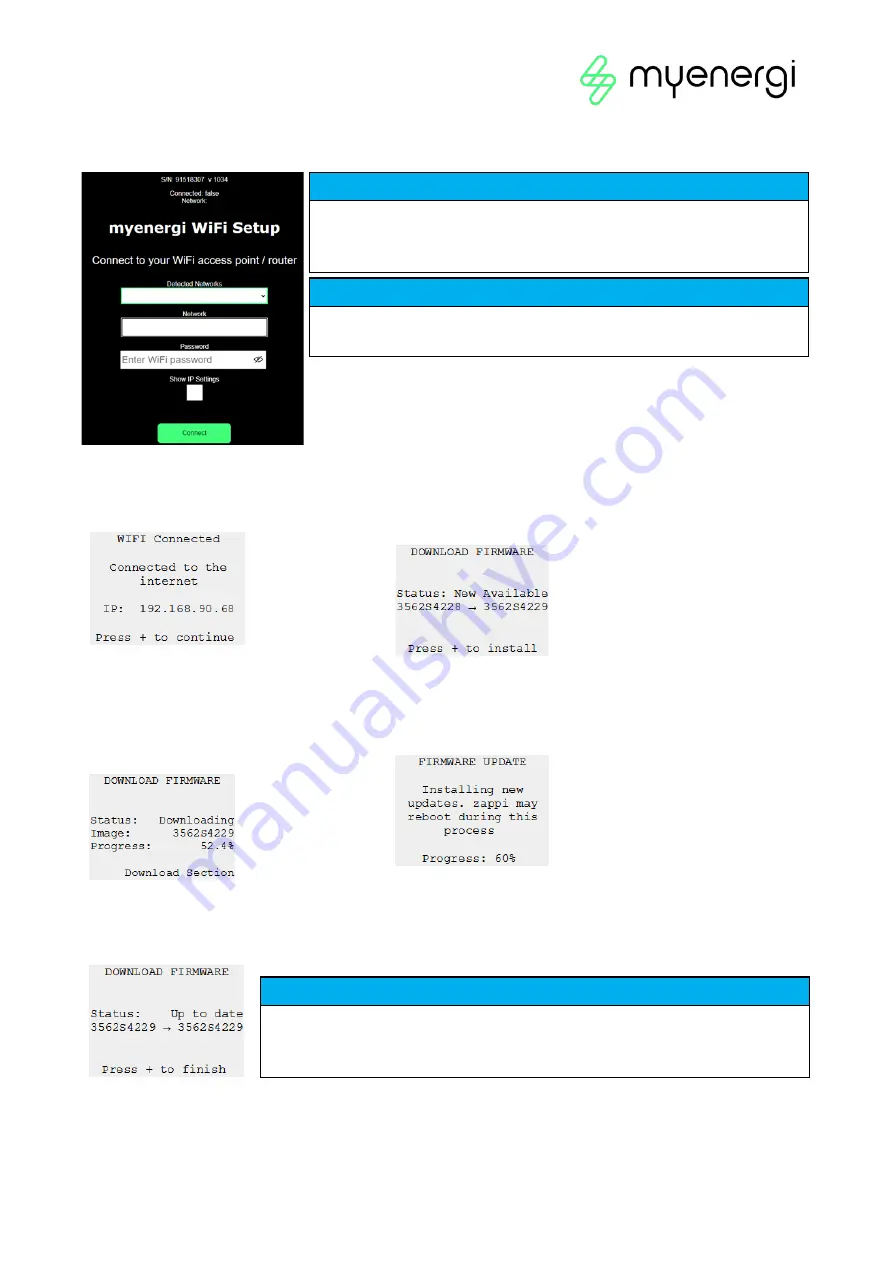
Once connected, you will be directed to the webpage below where you will need to select your
home WiFi network from the list in the “Detected Networks” box and type in your home WiFi’s password to
connect to your router.
Step 13:
Once connected, you will see
this screen on your
zappi
display. Press + to
continue.
Step 14:
By this step
zappi
should now be internet
connected either via WiFi or hard wired Ethernet.
zappi
will now check for firmware updates. Please be patient.
If no Firmware updates are available
jump to
Step 17.
Step 15:
If Firmware updates are
available
zappi
will proceed to download
these. Showing the progress percentage on
the display.
Step 16:
Once download reaches 100%
zappi
will proceed
to install updates.
zappi
may reboot during this process.
Step 17:
If
zappi
has no updates available or after updates have been installed this screen will show on
your
zappi
display informing you that firmware is up to date and giving you the firmware version number.
Step 18:
Jump to “9.5 Testing”.
NOTICE
Please be patient. It could take up to 15 seconds for the connection to
take place.
NOTICE
In most cases you should leave the “Show IP Settings” option unticked.
However, if you want to give your zappi a fixed IP address then tick the
“Show IP Settings” box and fill in the extra information required.
NOTICE
If
zappi
has been installed alongside another myenergi device, refer to Linking
Devices section for guidance on pairing. Also refer to the instruction
documentation for the other devices.
Summary of Contents for zappi
Page 7: ...Page 7 of 51 ...
Page 16: ...Page 16 of 51 ...


