Page
36
of
51
Step 6:
Wait 5 seconds for your password to change and the webpage to reload.
Step 7:
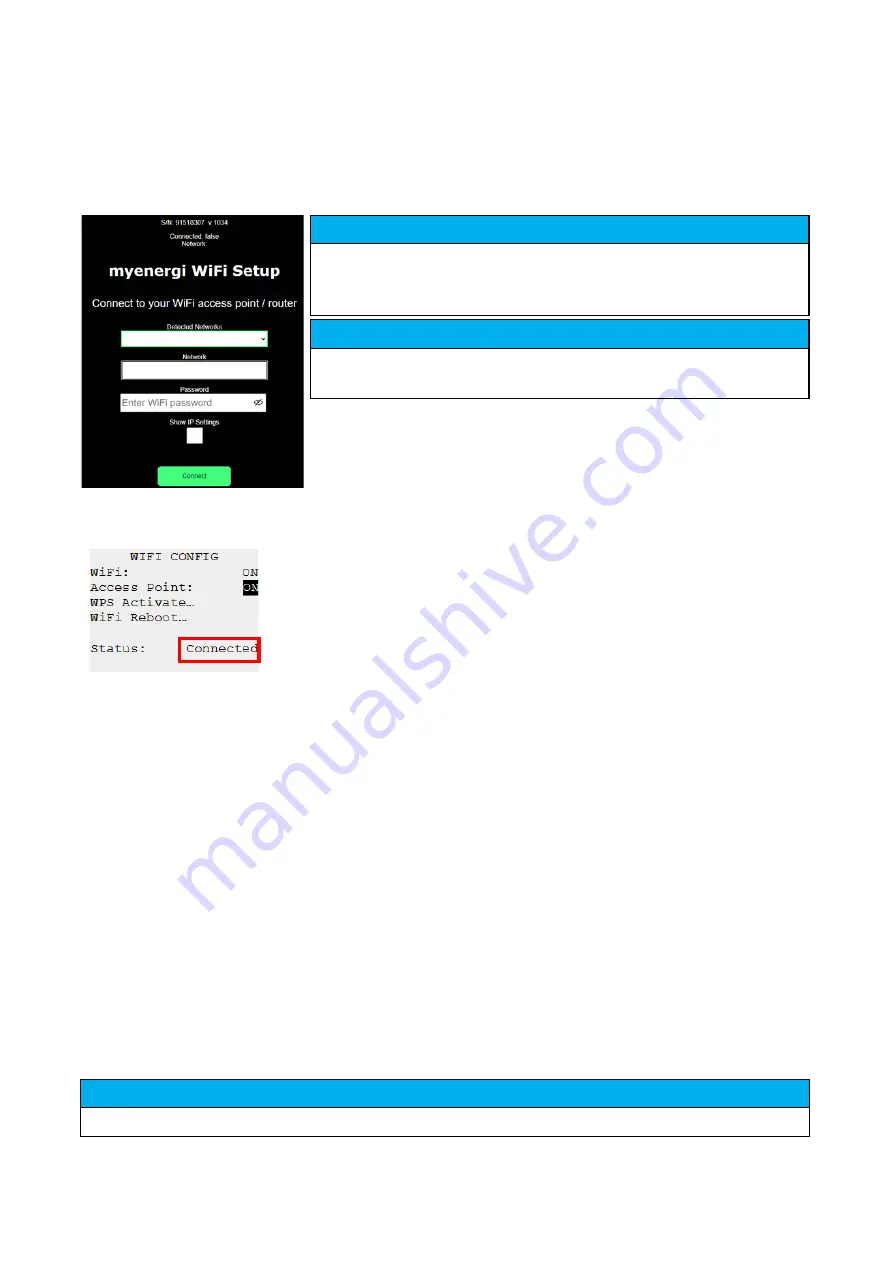
Once connected, you will be directed to the webpage below where you will need to select your
home WiFi network from the list in the “Detected Networks” box and type in your home WiFi’s password to
connect to your router.
Step 8:
Once complete, check WiFi is connected. Do this by navigating back to the WiFi Config Menu as
you did at Step 1. Check Status is showing as “Connected”.
9.5
Testing
Before leaving site, it is important that a few checks are carried out, ensuring the sensors have been correctly
installed and are functional.
Step 1:
Check that the time and date are correct and are displayed on the bottom left of the main screen. If
they are not present or are incorrect, set the correct time and date in the Other Settings/Time & Date menu
option.
Step 2:
Check that the EV will charge in FAST mode.
Step 3:
Check the Grid Power reading at the top right of the main screen is showing sensible readings and
the direction of power flow is as expected.
Step 4:
With the EV plugged in, switch to ECO mode and check that the charge power is at minimum (about
1.4kW) OR that it is 'tracking' the surplus power (i.e. the Grid Power reading is 0.0kW)
Step 5:
If a Generation CT has been installed, check that the generated power is shown in the top left of the
main screen. If the generation reading is missing, the most likely cause is the associated CT input is not enabled.
NOTICE
Remember – Only one CT (or three phase set of CTs) can be set to Grid.
NOTICE
In most cases you should leave the “Show IP Settings” option unticked.
However, if you want to give your zappi a fixed IP address then tick the
“Show IP Settings” box and fill in the extra information required.
NOTICE
Please be patient. It could take up to 15 seconds for the connection to
take place.
Summary of Contents for zappi
Page 7: ...Page 7 of 51 ...
Page 16: ...Page 16 of 51 ...


