Page
26
of
51
NOTICE
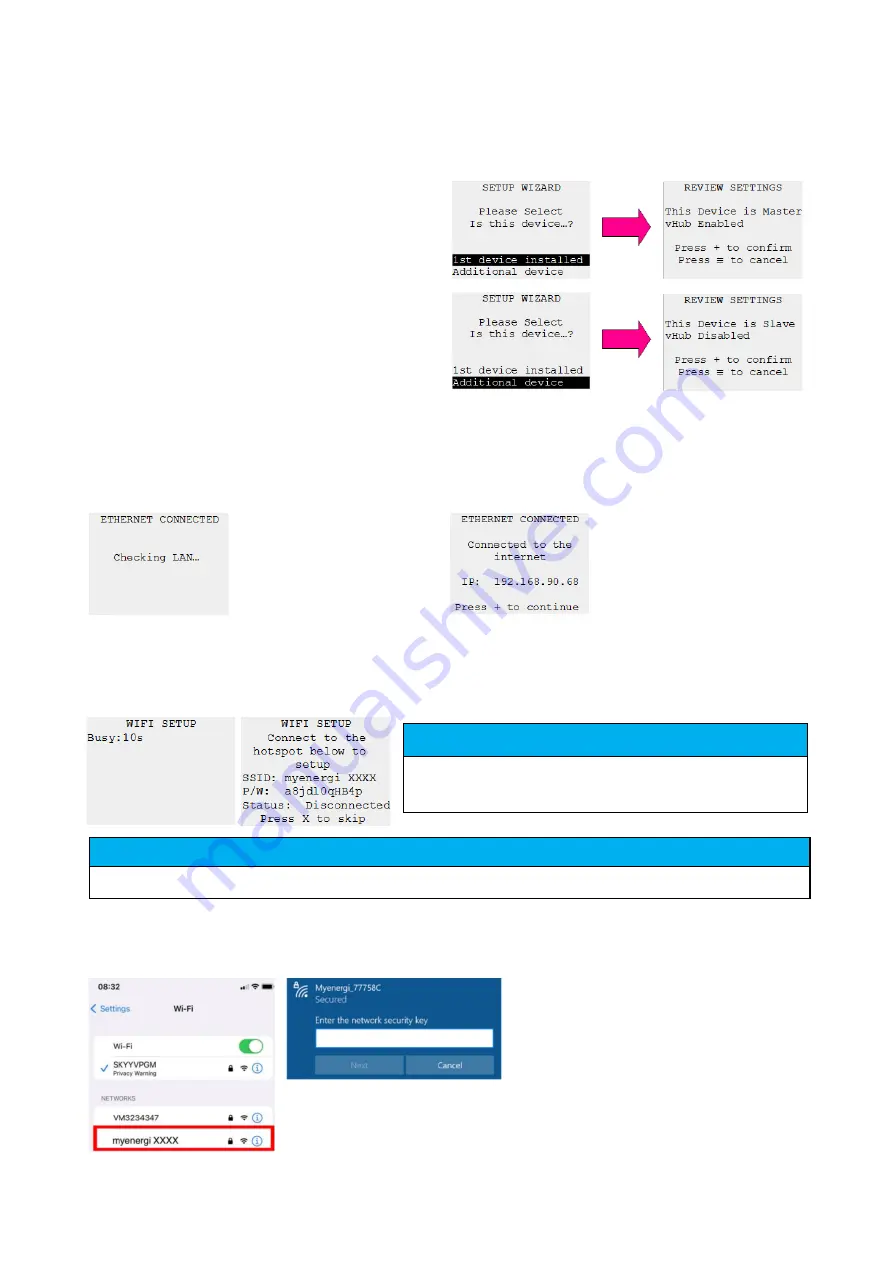
Make a note of the SSID and Password (P/W) now, for use
in the next steps.
NOTICE
If the screen above is
skipped
, please see section 9.4 for details on retrospective WiFi set-up.
Step 3:
If this is your first
myenergi
device select “1
st
Device Installed”. If you are adding this
zappi
to
an existing
myenergi
eco-system, select “Additional Device”.
Step 4:
Review settings and press + to confirm.
Note:
Selecting “1
st
device installed” will configure your
zappi
as Master and enable vHub.
Selecting “Additional device” will configure
zappi
as
Slave and disable vHub.
Step 5:
If you are connecting to the internet via
WiFi please
skip ahead to
Step 7
If you inserted an Ethernet cable earlier (section
9.4)
zappi
will detect this and attempt connect to
the home router automatically.
Step 6:
Once
zappi
has secured an internet
connection via Ethernet the below screen will show.
Skip ahead to
Step 14
for next steps.
Step 7:
The following steps are for
zappi’s
connecting to the internet via WiFi. If you have already made
a hard wired Ethernet connection
jump ahead to
step 14.
zappi
will attempt to identify WiFi details. During this attempt you will see the first screen below. Once
established the second screen will show.
Step 8:
Connect your smartphone or computer to the
myenergi
access point by entering your phone or
computer WiFi Settings and searching for the network displayed with the same name as the SSID you noted
down above. Once displayed, select the network to connect.
Summary of Contents for zappi
Page 7: ...Page 7 of 51 ...
Page 16: ...Page 16 of 51 ...


