


GB - 10
GB - 11
GB - 12
GB - 13
GB - 15
GB - 16
GB - 17
GB - 18
GB - 14
GB - 19
Channel Search
• Auto Search
Search and install all channels automatically. This option overwrites all preset
channels.
1. Select [Auto Search] and press
ENTER
or ► to start channel search.
2. To cancel channel search, press
EXIT
.
Note: You can speed up the search progress by pressing
SETUP
button on remote
control during auto search.
• Manual Search
Install new channels manually. This option adds new channels without changing the
current channel list.
1. Select [Manual Search] then press
ENTER
or ► to access manual search setting
menu.
2. Press ◄ / ► key to select the channel frequency.
3. Press
ENTER
to start searching channels.
If a channel is found, it is saved and added to the channel list. If channels can‘t be
found, then it will exit the menu.
• Country
Select your country of residence.
• Antenna Power
To adjust the sensitivity when external antenna is connected.
Set the antenna setting to “ON” if the unit is connected to DVB-T antenna.
Set the antenna setting to “OFF” if the unit is connected to public TV antenna or 75
ohm transferring antenna(not included).
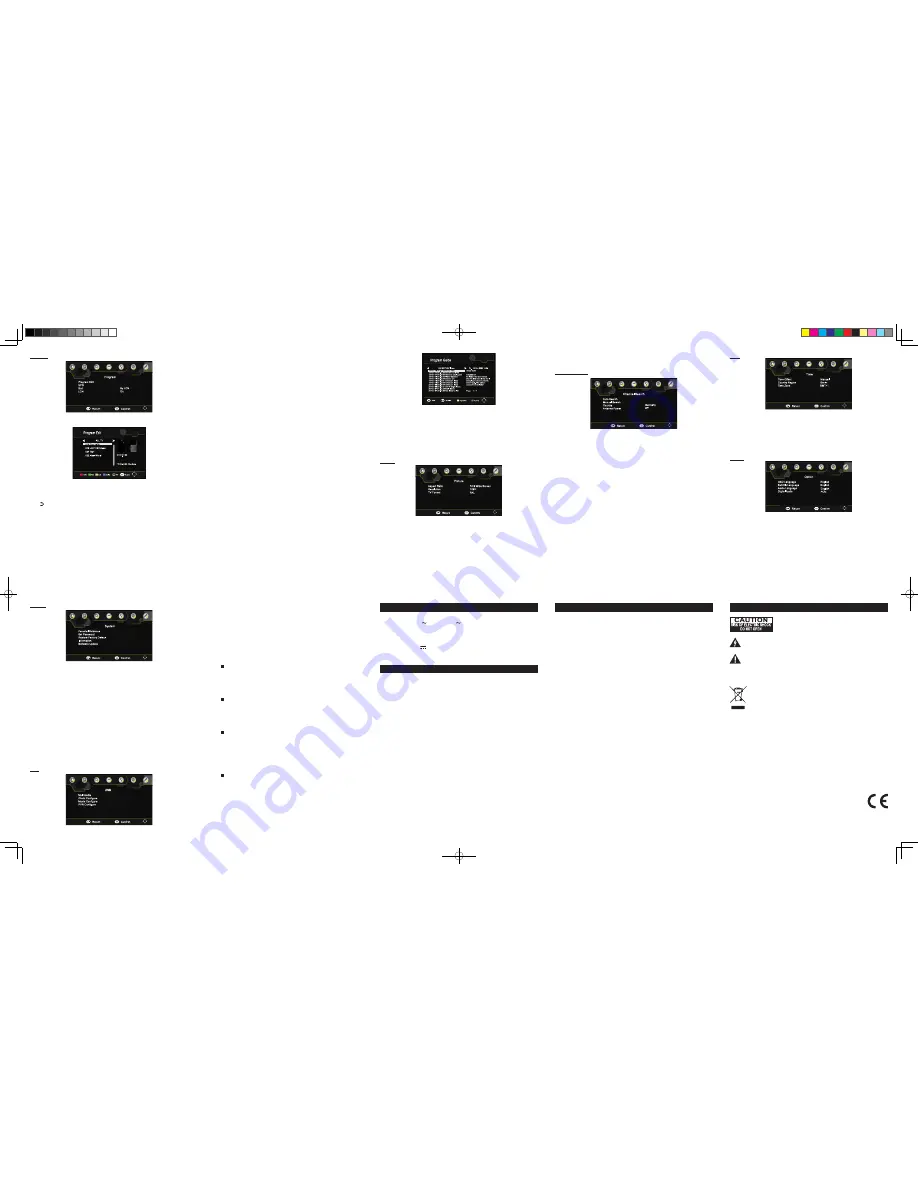
Time
• Time Offset
Select “Auto” or “Manual” for GMT offset adjustments.
• Country Region
Country Region is set automatically when you set the country at channel search menu.
• Time Zone
To select your desire time zone when “Time offset” is set to manual.
• OSD Language
To select the language of unit’s menu.
• Subtitle language
To select the language of the subtitles.
Note: It depends on the languages supported by the received channels.
• Audio Language
Select the preferred audio language for watching TV channels. If the language is not
available, the default program language will be used.
• Digital Audio
Set the desired audio format at the HDMI slot: PCM, Raw HDIM On, Raw HDMI Off,
Off (if available).
Option
System
• Parental Guidance
*
You can restrict access to channels that are unsuitable for children.
*
To restrict/lock the channel you will need to enter either the default password ‘888888’
or your own password.
• Set Password
Set or change the password for locked programs. Enter your old password or the
default password “888888”. You will then be asked to enter your new password and
confirm the new password again.
• Restore Factory Default
To reset to factory default settings, select this item and enter either the default
password ‘88888888’ or your own password. Then press
ENTER
to initialize the
settings.
• Information
View the information of model, hardware version and software version.
• Software update
Upgrade software via USB.
• Multimedia
This unit can play MP3, MPEG 4, JPEG and video files recorded on USB flash drive (not
supplied). Plug the USB flash drive into the USB port. Select “ Multimedia” and press
ENTER
to access the sub option.
Note:
*
It is recommended to plug in the USB flash drive when the unit is in OFF mode.
*
There are many USB devices in the market. We cannot guarantee to support all
different models. Please try another USB device if your device is not supported.
Music
1. Press ◄ / ► to select “Music” item, press
ENTER
to confirm your selection.
2. Press ▲/▼ to select your desired folder if needed and press
ENTER
to confirm.
3. Press ▲/▼ to select your desired file, then press
ENTER
to start playback.
4. Press to stop playback
.
5. Press
EXIT
to return to the multimeida menu.
Photo
1. Press ◄ / ► to select “Photo” item, press
ENTER
to confirm your selection.
2. Press ▲/▼ to select your desired folder if needed and press
ENTER
to confirm.
3. Press ▲/▼ to select your desired file, press
ENTER
to start to preview.
4. Press to stop to photo preview.
5. Press
EXIT
to return to the multimeida menu.
Movie
1. Press ◄ / ► to select “Movie” item, press
ENTER
to confirm your selection.
2. Press ▲/▼ to select your desired folder if needed and press
ENTER
to confirm.
3. Press ▲/▼ to select your desired file, press
ENTER
to start to playback
4. Press to stop to playback.
5. Press
EXIT
to return to the return to multimeida menu.
PVR
you could record the preference program and playback.
Instant recording, EPG recording and timer recording are available.
*
Recording
1. Press
REC
(Record) button to start instant recording when watching TV. The
recording symbol will be displayed on screen.
2. Press key to stop instant recording.
• Photo Configure
Set the parameters for viewing photographs.
• Movie Configure
Set the parameters for displaying movie subtitles.
• PVR Configure
Set the parameters for record device.
USB
SPECIFICATIONS
HDTV system:
Input frequency: 177.5 226.5MHz
;
474 866MHz
Modulate: QPSK/16QAM/64QAM, 256QAM
Decode standard:
MPEG4 AVC/H.264 HP@L4, HEVC/H.265 HT@L4, MPEG2 [email protected]
Audio decode standard: MPEG-1 (layer1&2&3)
Power supply: DC 9V
1.5A
Power Consumption: 10W
TROUBLE SHOOTING
No power.
• Ensure the AC adaptor is connected.
• Make sure that the unit is turned on.
The remote control does not function.
• Make sure the infrared remote sensor is not blocked.
• Point the remote directly at the infrared remote sensor on the unit.
• Replace the battery in the remote with a new one.
Very little or no sound is coming from the TV.
• Make sure that the unit is turned ON.
• Make sure that the connections are correct.
• Make sure the MUTE function is not on.
• Make sure the sound track is correct.
No picture.
• Make sure that the unit is turned on.
Screen shows “No signal”.
• Make sure the DVB-T antenna is connected properly.
• Make sure the settings are correct.
Only sound , no image on the screen.
• Make sure the unit is in TV mode not radio mode.
Forget Password
• If you forget your own password, enter “888888” to reset.
Specifications and appearance are subject to change without notice.
SAFETY PRECAUTION
- The set does not work in extremely high or low temperature.
- Do not attempt to modify the unit, modifying the unit may cause an accident.
- Do not put the remote control under high temperature or under the sunshine.
- Do not use your set immediately after transportation from a cold place to a warm
place, there may be condensation problems.
- Make sure that you keep your set away from water and high temperatures.
- The ventilation should not be impeded by covering the ventilation openings with
items such as newspapers, table-cloths, curtains, etc.
- No naked flame sources, such as lighted candles, should be placed on the
apparatus.
- To use the apparatus in moderate climates.
- The apparatus should not be exposed to dripping or splashing.
- Ensure a minimum distance of 5cm around the apparatus for sufficient ventilation.
- Do not place objects filled with liquids, such as vases, on the apparatus.
- The marking plate is located on the back of unit.
- Attention should be drawn to the environmental aspects of battery disposal.
- Do not throw batteries in fire!
- Battery shall not be exposed to excessive heat such as sunshine, fire or the like.
- Excessive sound pressure from earphones and headphones can cause hearing loss.
- Under the influence of electrical fast transient or/and electrostatic phenomenon, the
product may malfunction and require user to power reset.
Cleaning
WARNING: Disconnect the unit from the mains supply before cleaning.
- Use a soft, dry, clean cloth. Regularly dust the vents at the back or sides.
- Using solvents, abrasive or alcohol-based products risks damaging the appliance.
- If an object or liquid enters inside the appliance, unplug it immediately and have it
checked by an authorized engineer.
SAFETY INFORMATION
ATTENTION:
To reduce the risk of electric shock, do not remove
the cover or back. There are no user serviceable parts inside
the unit. Refer all servicing to qualified personnel.
The lightning flash with arrowhead symbol within the triangle is a warning sign
alerting the user of “dangerous voltage” inside the unit.
The exclamation point within the triangle is a warning sign alerting the user of
important instructions accompanying the product.
WARNING: TO PREVENT FIRE OR SHOCK HAZARD, DO NOT EXPOSE THIS
APPLIANCE TO RAIN OR MOISTURE.
If at any time in the future you should need to dispose of this product please note
that Waste electrical products should not be disposed of with household waste.
Please recycle where facilities exist. Check with your Local Authority or retailer
for recycling advice. (Waste Electrical and Electronic Equipment Directive)
NEW ONE S.A.S
10, Rue de la Mission, 25480 Ecole Valentin, France
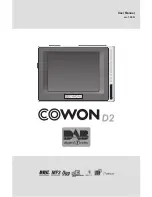
Program
Picture
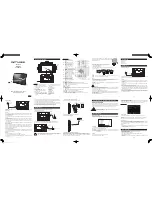
• Program Edit
• EPG (Electronic program guide)
*
The EPG is an on-screen TV guide that shows scheduled programs seven days in
advance for every tuned channel. Press the
EPG
button on the Remote Control to
access the program guide.
*
Press ▲/▼to select the preferred program. If there is more than one page of
information, use the
BLUE
button for page up and the
YELLOW
button for page
down.
• Sort
Sort your channels from the following options:
[By ONID] – Sort the channels by original Network ID
[By LCN] – Sort the channels in ascending order.
[By Service Name] – Sort the channels in alphabetical order.
[Service ID] – Sort the channels according to the station.
• LCN (Local Channel Number)
Set LCN on or off.
• Aspect Ratio
To set the display mode: Auto, 16:9 pillar Box, 16:9 Pan & Scan, 4:3 Letter Box, 4:3
Pan & Scan, 4:3 Full, 16:9 Wide screen.
• Resolution
If the video does not appear correctly, change the setting. This setting is to match the
most common setting for HDMI.
[576i]: for PAL system TV
[576p]: for PAL system TV
[720p]: for NTSC or PAL system TV.
[1080i]: for NTSC or PAL system TV.
[1080p]: for NTSC or PAL system TV.
• TV format
To select your TV system among PAL and NTSC.
To edit your program preferences (move, skip, lock, delete or favorite), you will need to
enter the Program Edit Menu.
Press ▲/▼ to select your desired channel, press
RED/ GREEN/ YELLOW/ BLUE/
FAV/
buttons to select the corresponding function as follows: “Move”, “Skip”, “Lock”,
“Delete”, “FAV” (favorite), “Rename”. Press
EXIT
button to return to main menu.
Set Favorite Program(s)
You can create a shortlist of favorite programs that you can easily access. Set Favorite
TV or Radio program:
1. Select the preferred program then press the
FAV
button. A heart-shaped symbol will
appear and the program is marked as a favorite.
2. Repeat the previous step to select more Favorite programs.
3. To confirm and exit the Menu, press the
EXIT
button.
Disable Favorite TV or Radio Program:
Press the
FAV
button on the Remote Control with the heart-shaped symbol.
View Favorite Program(s):
1. Press the
FAV
button and the Favorite Menu will appear.
2. Press ▲/▼ to select your Favorite Programs.
3. Press
ENTER
to select your favorite program.
Delete a TV or Radio Program(s)
1. Select the Program and then press the
BLUE
button. A message will appear. Press
ENTER
to delete the program.
2. Repeat the previous step to select more programs to delete.
Skip TV or Radio Program(s)
1. Select the program you would like to skip and press the
GREEN
button. A skip
symbol is displayed. The program is marked as a skip.
2. Repeat the previous step to select more programs.
3. To confirm and exit the menu, press
EXIT
key.
Disable a skip for TV or Radio Program:
Press the
GREEN
button on the skip program with the skip symbol.
Move a TV or Radio Program(s)
1. Select the preferred program then press the
RED
button. A move symbol will
appear.
2. Press ▲/▼ to move the program.
3. Press
ENTER
to confirm.
4. Repeat the above steps to move more channels .
Lock Program(s)
You can lock selected programs for restricted view.
Lock a TV or Radio Program:
1. Select the preferred program then press the
YELLOW
button. A lock-shaped symbol
is displayed. The program is now marked as locked.
2. Repeat the previous step to select more programs.
3. To confirm and exit the menu, press the
EXIT
button.
4. Press the
YELLOW
button to disable the locked program.
5. To view the locked program, you will be required to enter your password or the
default password.
M-335TV/IB/V0
PTM-3850 IB MUSE 001 REV0 - GB.indd 2
2017/3/31 17:05:49