GETTING STARTED
etherFAX
®
A2E MT200A2E-EF User Guide
7
Getting Started
The device ships provisioned to your etherFAX account. Before connecting the device to a power source and
network, ensure it has been assigned correctly to your etherFAX account and the desired DIDs or TFNs (Toll-Free
Numbers) have been provisioned to the etherFAX A2E.
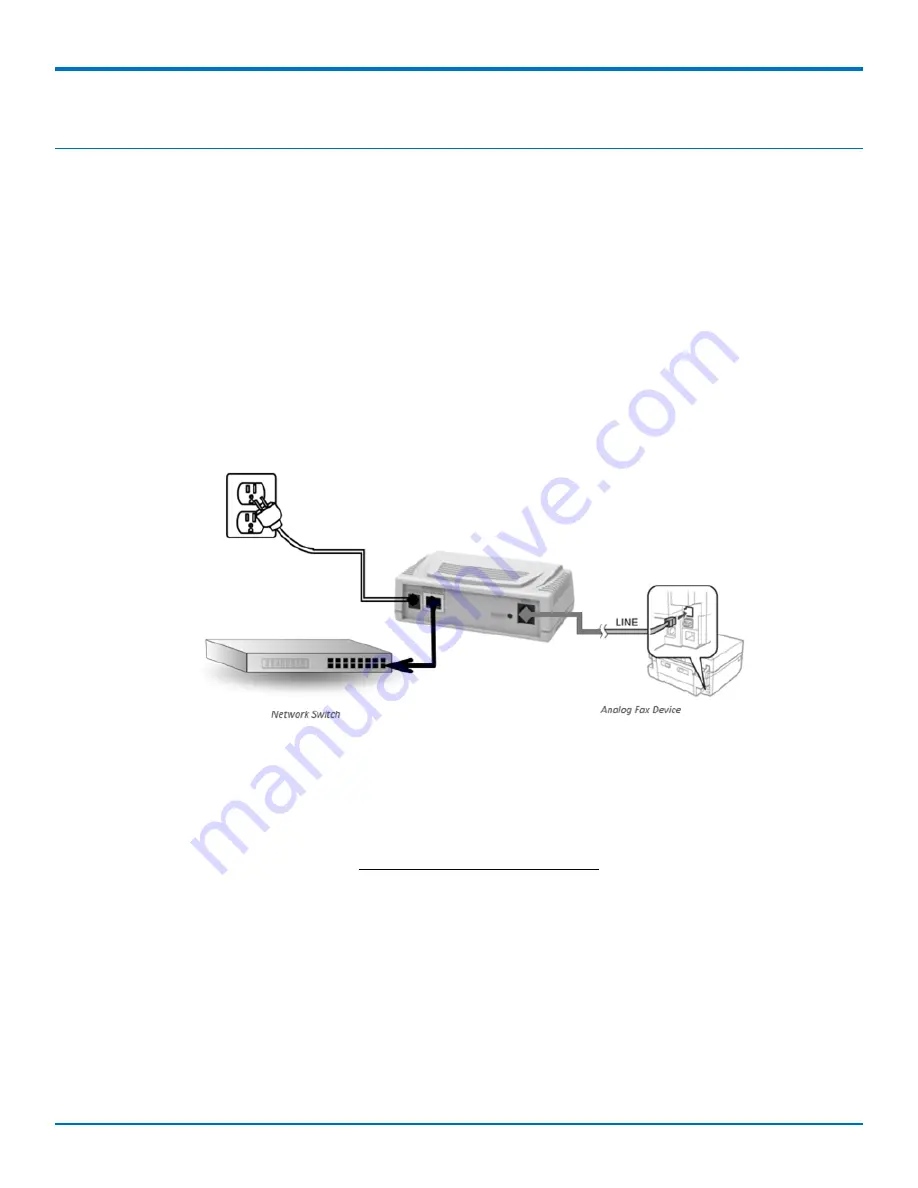
Cabling Your Device
To register the device and complete initial setup:
1.
Connect the RJ-11 telephone cable to the RJ-11 connector on the back of the etherFAX A2E and connect
the other end into the Line port on your analog fax device.
2.
Connect the Ethernet cable to the RJ-45 connector on the back of the etherFAX A2E and the other end
into an active network jack.
3.
Connect the supplied power adapter to the power connector on the etherFAX A2E and plug into a power
outlet.
Using DHCP
The etherFAX A2E is configured for DHCP. If your network supports DHCP, the device is assigned a local IP address
that appears in the etherFAX Client Portal. To verify that the device was assigned a local IP address:
1.
Open a web browser and go to https://clients.connect.etherfax.net
2.
Enter your client portal login credentials to sign in.
3.
Select A2E Devices from the menu on the left side of the screen.
4.
Check the Device Management page to confirm if your device received an IP address from the DHCP
server in your local network. If your device did not automatically receive the IP address, see the next
topic,
Setting Up an IP Address Manually
.
For additional configuration information, go to
Configuring Your Device
.


