8
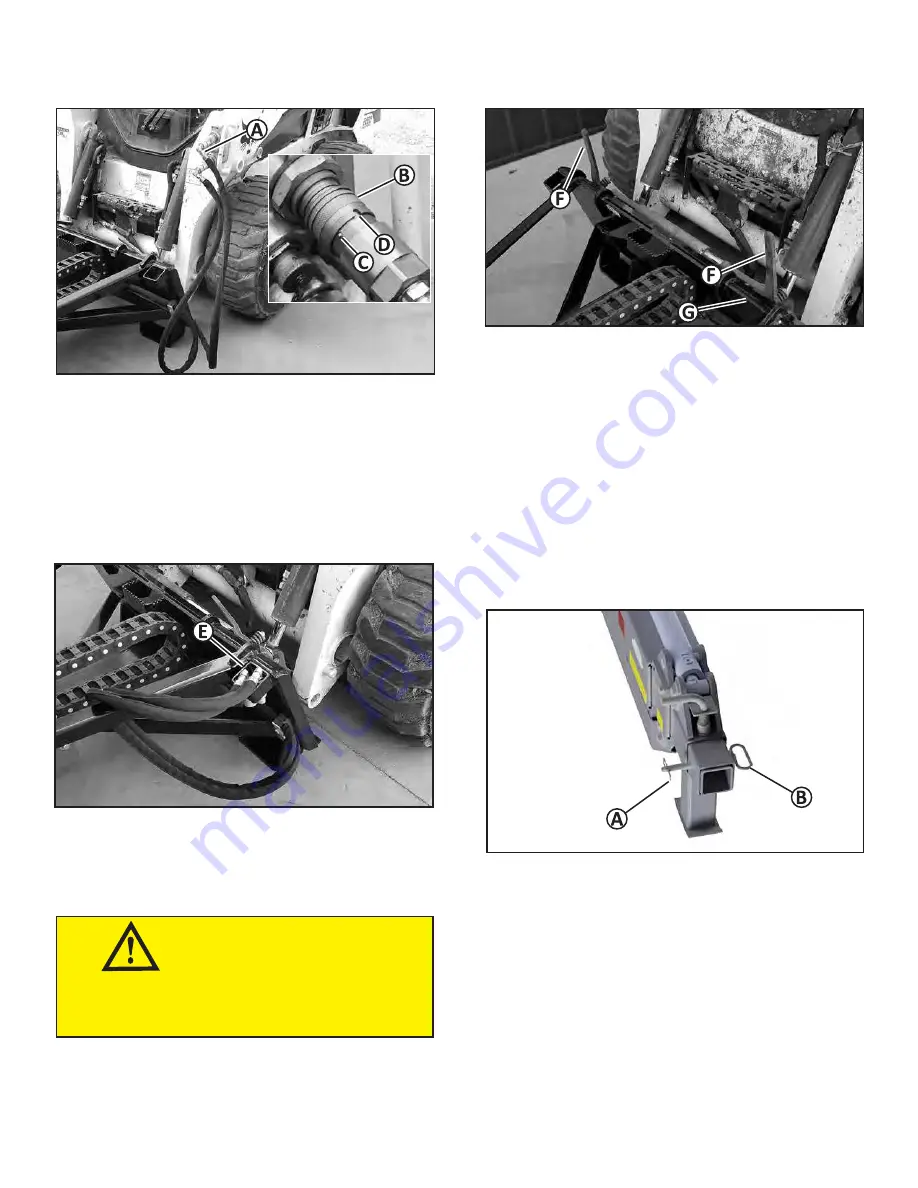
5. Disconnect the attachment hydraulic hoses from the
loader’s front auxiliary couplers (A).
a. Rotate the coupler sleeves (B) so the ball (C) is
aligned with the groove (D) to allow the coupler
to disconnect (Some sleeves may not have this
locking mechanism).
b. Grasp and push or pull the sleeves to disconnect
the couplers.
6. Install protective caps on the couplers if they are
provided, and store the couplers on the attachment
hydraulic hoses into the hose coupler storage area
(E) as shown.
WARNING
AVOID INJURY!
Loader attaching plate levers which are operated
manually may have spring tensioning. Firmly grasp
the levers and move the levers slowly.
7. Move the loader attaching plate levers (F) to the
unlocked (up) position as shown either manually or
by using the loader controls.
8. Tilt the loader attaching plate forward slightly and
drive the loader backward until the top edge of
the attaching plate clears the top flange (G) of the
attachment mounting frame.
Installing the Secondary Attachments
1. Install the telescoping boom attachment on the
loader.
2. Park the loader (See Parking Safely in this manual.)
3. Remove the pin (A) and hitch pin (B) from the end
of the manual extension tube.
4. Install the secondary attachment in the tube with the
hitch pin and pin.
Installing and Removing
Summary of Contents for 14592
Page 17: ...17 Replacement Parts...


