-3-
1. Starting your HMC-1000 for the first time
A. Now that you’re all connected, turn on your TV and turn on HMC-1000, either by pressing the POWER
button in the front, or by pressing POWER button on your remote controller.
B. Wait for about 30-40 seconds. Your HMC-1000 is starting up for the first time. You think it takes too long to
start the machine? It takes this long only when you plug in your machine and start it up for the first time.
After that, under normal condition, it takes about 15 seconds for HMC-1000 to wake up.
C. Depending on where you live, your TV screen might not look normal. This is because your TV is NTSC and
HMC-1000 is PAL; or your TV is PAL and HMC-1000 is NTSC.
i. It’s simple to correct this problem. Look for the NTSC/PAL button on your remote controller.
ii. Press it once to switch your HMC-1000 to a different setting.
2. You will see the blue screen with six menu items. They are: LIVE, PLAY LIST, PROGRAM, TOOLS,
SETTINGS, and MESSAGES.
-2 -
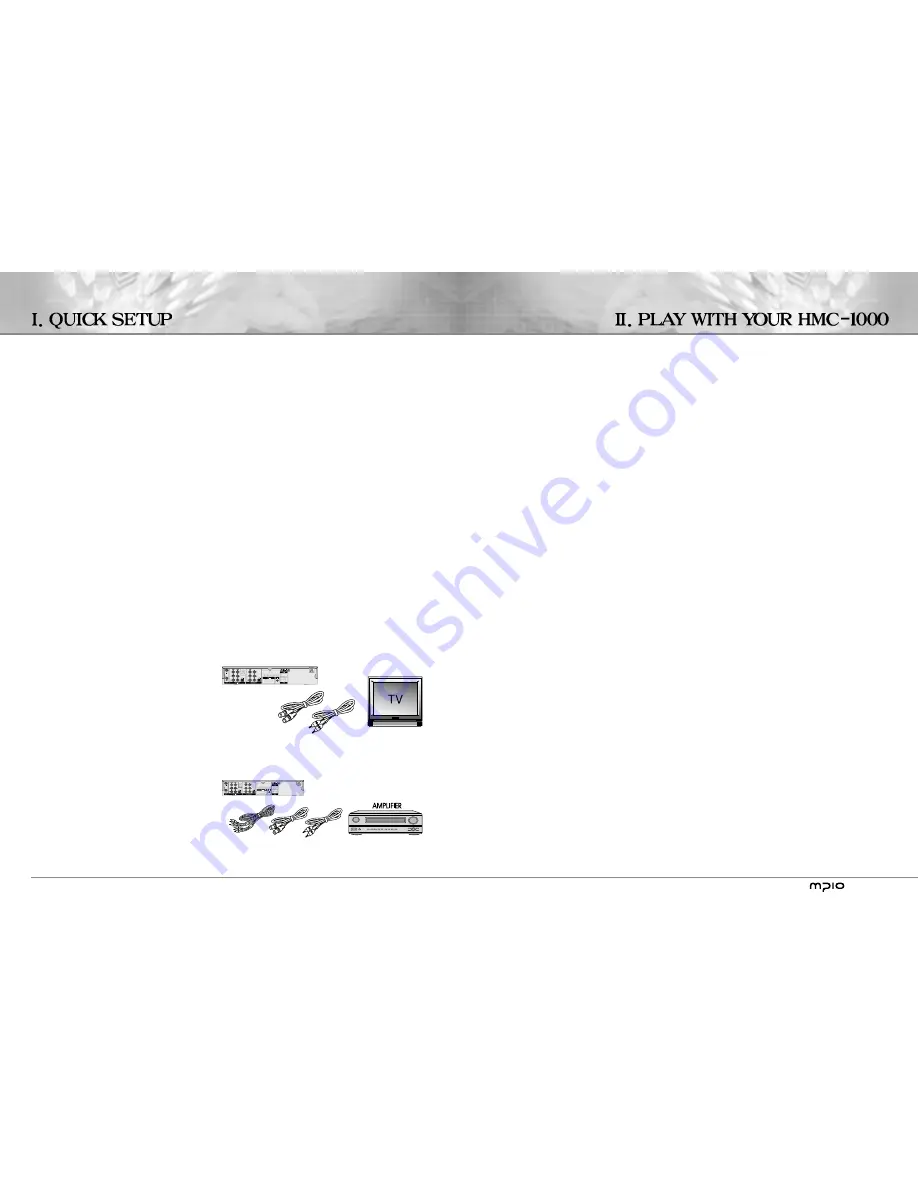
Connect your player to your television using the RCA cable that comes with your player. The RCA cable is the
cable with yellow, white, and red cords bundled together. Connect one end of the RCA cable to “CVBS” above
“AV / OUTPUT” on your player. Connect the other end to the RCA (some TV might have this labeled
“composite” or “CVBS”) input on your television. Connect the power cable to the power connector.
For connecting video, you have the following options:
�
VIDEO (composite video)
�
S-VIDEO (or “super-VHS”, provides a better quality than VIDEO)
�
COMPONENT VIDEO (provides an even better quality than the above)
After connecting the video, you will have to connect the audio. You can connect the audio to either the television
or your HiFi set. HMC-1000 outputs both analog and digital audio. Analog audio is the most common format, and
is supported by most devices. Digital audio is more common on high-end equipment and surround amplifiers.
For connecting the audio, you have the following options:
�
Connect AV OUT to your television using phono (RCA) jacks
�
Connect AV OUT to your HiFi stereo using phono (RCA) jacks
�
Connect COAXIAL or OPTICAL digital audio to your HiFi stereo
Video connection
Connecting your HMC-1000 player to your TV can be done using any of the cables below. (Only one cable can be
connected at a time)
1. S-Video (the cable is an extra accessory)
2. Composite
3. Component
Audio connection
Connecting your HMC-1000 player to your amplifier can be done using any of the cables below. (Only one
cablecan be connected at a time)
1. Analog Stereo
2. Coaxial Output (the cable is an extra accessory)
3. Optical Output (the cable is an extra accessory)
Summary of Contents for HMC-1000
Page 1: ...H M C 1 0 0 0 Q U I C K S E T U P G U I D E...
Page 2: ......


