


22
23
3. Learning Basic Usage
3. Learning Basic Usage
3. Learning Basic Usage
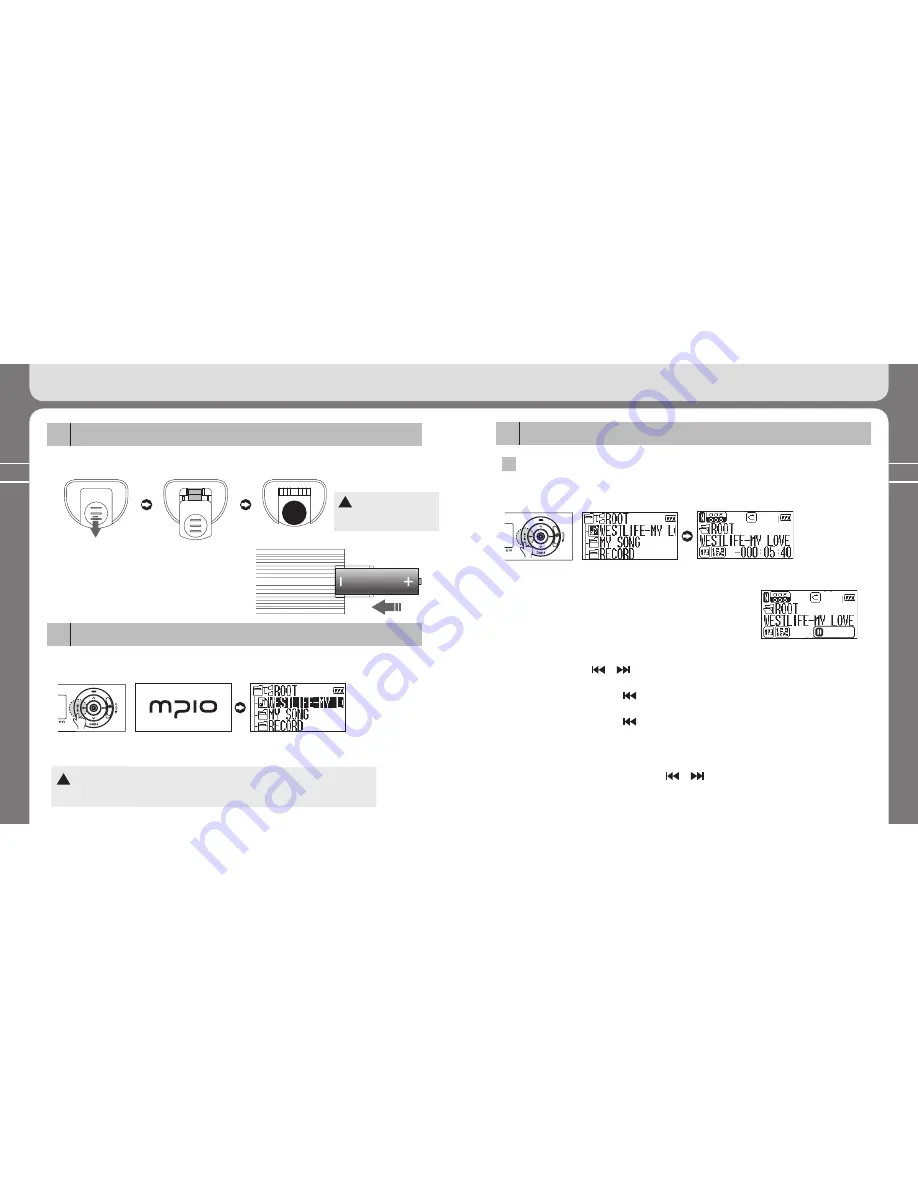
Inserting a battery
1
①
Push the battery cover to the arrow direction to open it.
!
Do not apply excessive
force to the cover. It can
break down.
②
Insert the battery with proper po, –
and close the battery cover.
(1 AAA battery)
Turning the player on/off
2
①
Press the
▶/■
button longer. Then, the player will be turned on with a logo screen. Then,
the file list screen will appear.
②
Press the
▶/■
button longer to turn the player off.
Logo screen
File list screen
!
If there is not key input (or operation) for longer than 3 minutes in the stop mode, the player
will be automatically turned off.
See (Auto Power Off) in page 61.
Listening to music
3
1
Music playback
Press the
▶/■
button shortly to play back the selected music. Or, press the stick to the
vertical direction to play back the selected music.
Playback screen
File list screen
①
Pause/Stop pausing
Press the
▶/■
button shortly during playback to pause playback.
To resume playback, press the
▶/■
button shortly again.
PAUSE
②
Playing back previous/next music
Push the stick towards or direction during playback to play back the previous
or next music.
*
If you push the stick towards direction 10 seconds after music file playback,
the music file currently being played back will be started again from the beginning.
*
If you push the stick towards direction before 10 seconds after music file playback,
the music file next to the current one will be played back.
③
Fast Forward (FF)/Rewind (REW)
To start FF or REW, push the stick towards or direction during playback.
Summary of Contents for FY 500
Page 1: ...FY500 User s Manual...


