


179
5.
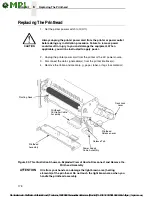
Open the pivoting deck by rotating the deck lock lever fully
counterclockwise. The pivoting deck will swing upward, exposing the
bottom of the printhead assembly.
ATTENTION
To prevent electrostatic damage to electronic components, ground
yourself by touching an unpainted part of the printer frame before
handling and installing the printhead.
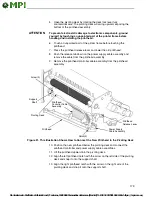
6.
Touch an unpainted part of the printer frame before touching the
printhead.
7.
Press the printhead release lever and lower the old printhead.
8.
Push the release tab down on the power supply cable assembly and
remove the cable from the printhead assembly.
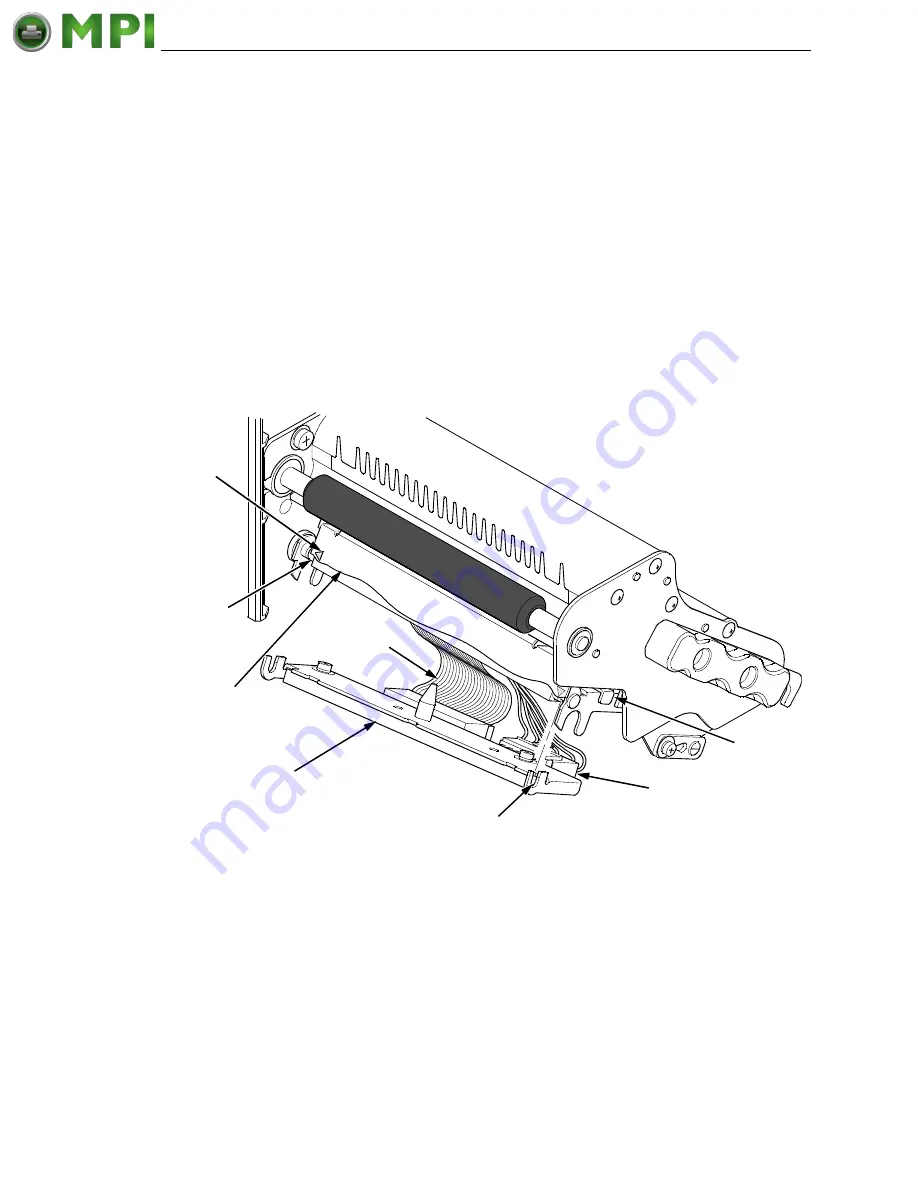
9.
Remove the printhead controller cable assembly from the printhead
assembly.
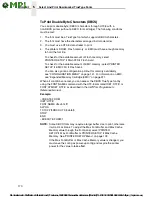
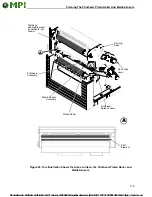
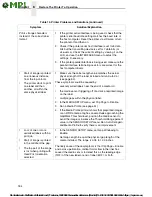
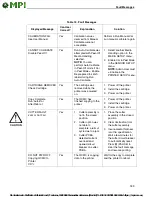
Figure 31. This Illustration Shows How to Connect the New Printhead to the Pivoting Deck
10. Position the new printhead below the pivoting deck and connect the
printhead controller and power supply cable assemblies.
11. Lift the printhead upward into the pivoting deck.
12. Align the left printhead notch with the arrow on the left side of the pivoting
deck and snap it onto the support shaft.
13. Align the right printhead notch with the arrow on the right side of the
pivoting deck and snap it onto the support shaft.
Power Supply
Cable Assembly
Printhead
Controller Cable
Assembly
Printhead
Pivoting Deck
Printhead
Release Lever
Notch(2)
Support
Shaft
Arrow(2)