Using the Camera
8 - 3
Camera Settings
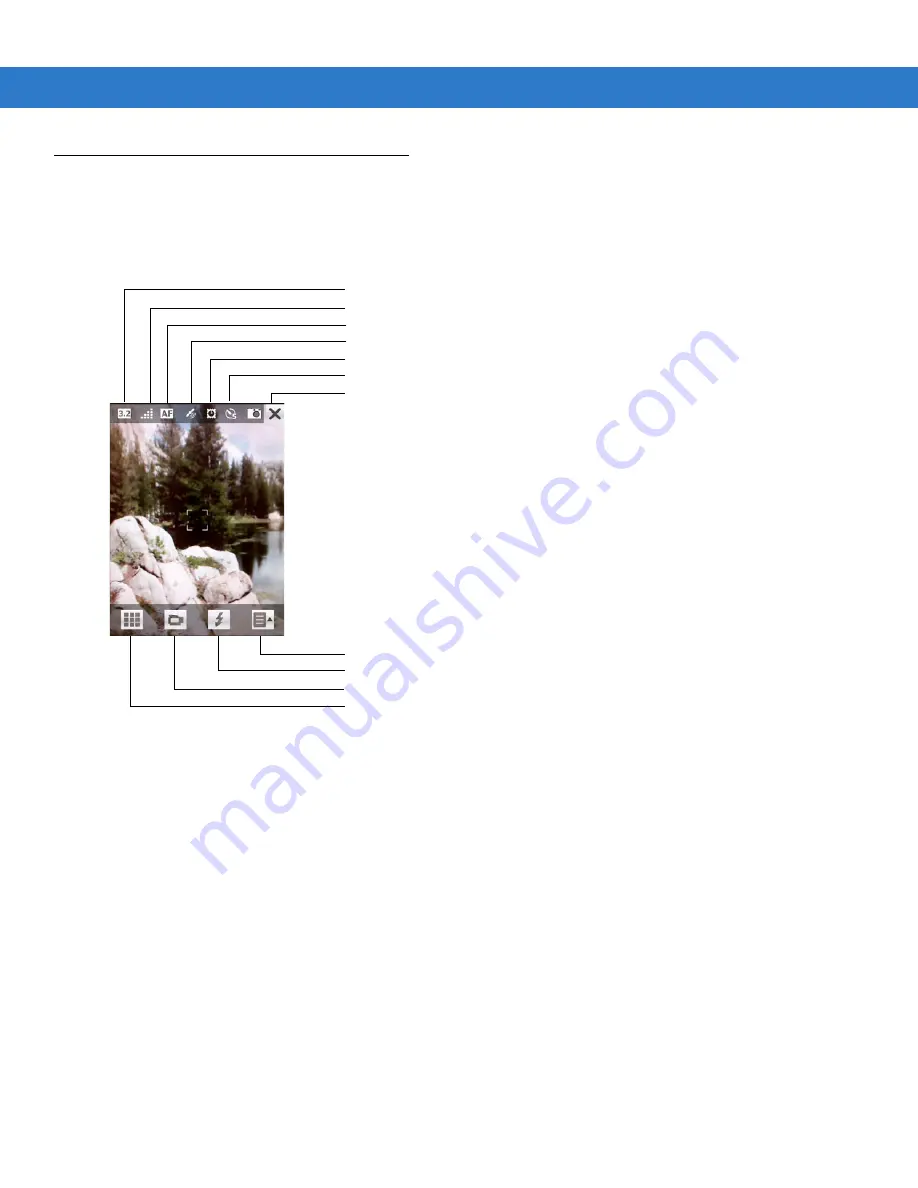
Tap anywhere on the screen to display the camera Status bar and Control bar. The Status bar at the top of the
screen provides camera setting information. The Control bar at the bottom of the screen provides function buttons
to control the camera.
Figure 8-4
Camera Settings View
Camera Menu Options
Use the Camera Menu to configure the camera settings.
Size/Quality Settings
Use the Size/Quality settings to set the size and quality of the image. Tap the Size/Quality option to open the
Size/Quality window.
Select one of the three yellow Size boxes to set the size of the image. The image can be set to three sizes:
•
1.3 Megapixels (1280 pixels x 1024 pixels)
•
2 Megapixels (1600 pixels x 1200 pixels)
•
3.2 Megapixels (2048 pixels x 1536 pixels).
Select one of the three yellow Quality boxes to set the quality of the image. The image can be set to three quality
settings; Low, Medium and High.
Increasing the size and quality of the picture increases the size of the file saved on the ES400. The size of the file
displays below the Quality boxes. Also listed is the number of pictures that can be stored on the ES400.
Image Quality
Focus Setting
Time Stamp Enabled
Close the Camera Application
Opens the Photo Menu
Toggles the Close-up Light On and Off (Off shown)
Toggle between Photo or Video Mode (Photo Mode shown)
Opens the Gallery Application
Image Size
Location Enabled
Timer
Summary of Contents for ES400
Page 1: ...ES400 User Guide ...
Page 2: ......
Page 3: ...ES400 User Guide 72E 136310 01 Rev A September 2010 ...
Page 6: ...iv ES400 User Guide ...
Page 16: ...xiv ES400 User Guide ...
Page 54: ...2 24 ES400 User Guide ...
Page 84: ...5 8 ES400 User Guide ...
Page 90: ...6 6 ES400 User Guide ...
Page 104: ...8 12 ES400 User Guide ...
Page 116: ...9 12 ES400 User Guide ...
Page 120: ...10 4 ES400 User Guide ...
Page 200: ...D 4 ES400 User Guide ...
Page 210: ...Index 6 ES400 User Guide ...
Page 211: ......


