background image

Select      from the Program Information Screen.   

Select      to change the Recording Options or select  

     to delete this program from your list of Future 

Recordings. 

Use the 



buttons on your remote to change 

the 

Recording Options


• 

Change the frequency of the recording, such as 


  every day or once a week


• 

Specify how many recordings to save


• 

Set a Save Until parameter, either until you delete 


  or delete automatically when space is needed


• 

Change the start and end times in order to catch  


  every minute of a program, even if it runs over
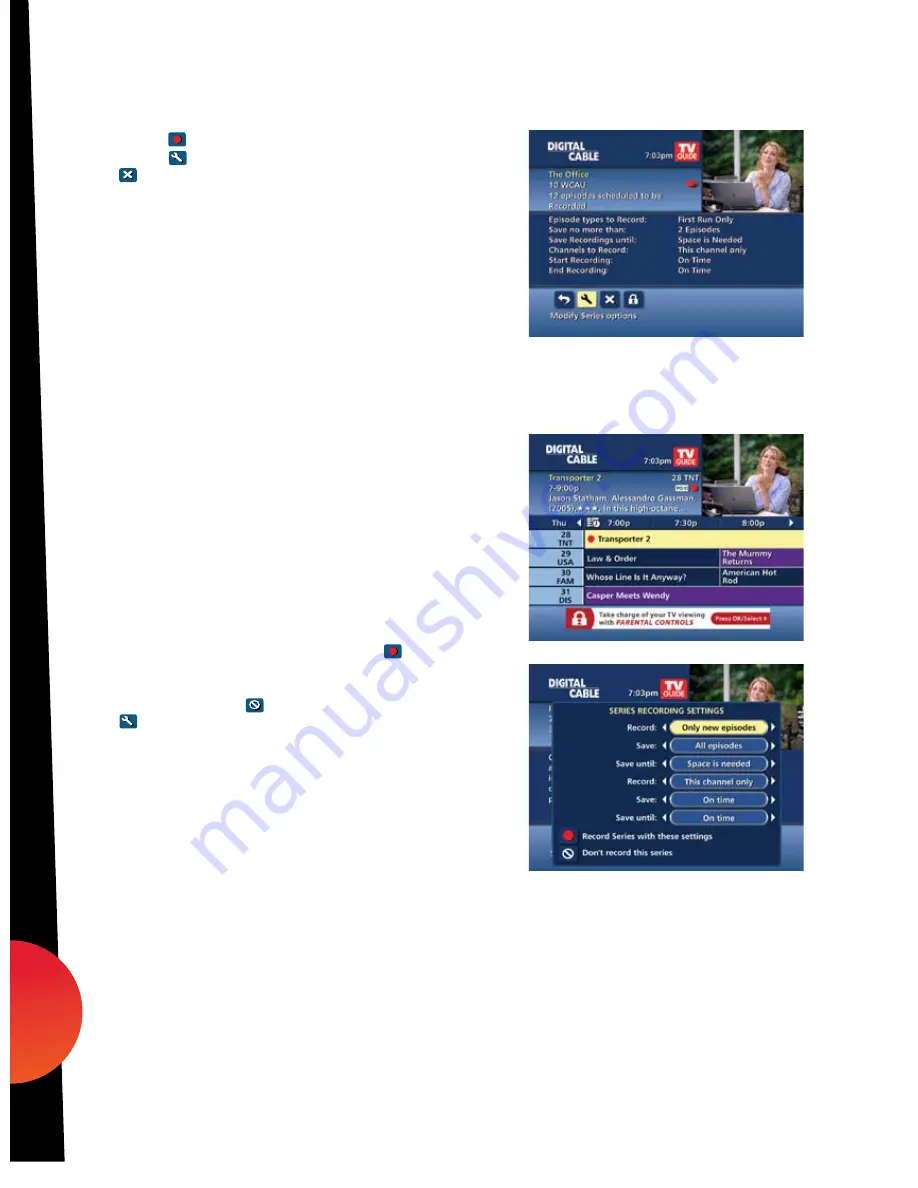
From Listings

Select your 

Scheduled Recording

 in the listings; it will 

be indicated by the red dot in the 

Instant Info

.  

Press 

OK/Select

 or 

INFO

 and select      to change your 

options or delete the Scheduled Recording.  

From here, select      to cancel the recording, or select            

     to see all the Recording Options.  

dvr

38

38

09ROVI1204 User i-Guide Manual R16.indd   40

4/6/10   12:28:50 PM

Summary of Contents for DCX700M

Page 1: ...recent 2 hours Status Bar The Status Bar appears whenever you Pause Rewind or Fast Forward a live program The Status Bar shows title channel and duration of time Green indicates the length of program in the buffer Red indicates you are watching a DVR recording in progress White indicates the length of multiple programs that have been recorded in the buffer Playback Controls You can play back your ...

Page 2: ...or Rewind Press the to move forward Press it up to 4 times to increase FF speed On the 5th press the program resumes normal play You can only Fast Forward up to the point of live broadcast Slow Motion Use Slow Motion to access slow forward and slow rewind perfect when watching sporting events To activate press Pause then Fast Forward or Pause then Rewind Press Play to resume regular program speed ...

Page 3: ... buffer recording 1 While tuned to a program press SWAP on your remote to change tuners 2 Select a second program by changing channels or using the guide 3 Press SWAP again to toggle between the two programs 4 When recording two programs at the same time on screen prompts will ask if you wish to swap tuners Select your desired recording preference Recording Programs i Guide makes it easy to schedu...

Page 4: ...rograms at Once A Dual Tuner DVR allows you to set recordings for two different programs that air at the same time While recording two programs you can watch and control either program up to the point of live TV by using the SWAP button on your remote While Watching a Show Currently Airing Press RECORD to record the program you are watching Press SWAP to switch to the other tuner and find the seco...

Page 5: ...ogram to record Search and Record Expanded search and record capabilities make it easy to find your favorite shows celebrities or even subject on TV and schedule auto recordings based on your search criteria Actor Director Search Actor Director Search allows you to find your favorite celebrities appearing on TV Select Actor Director from the Search Menu and use the buttons to navigate the keyboard...

Page 6: ...earches at one time From any Search Results screen you can Sort Results sort results by title or date Save Search save your search for future reference save up to 16 searches Auto Record set a DVR auto recording of your search results Recording Series Your DVR allows you to record multiple episodes of a program series according to your preferences To set up a Series Recording begin by selecting th...

Page 7: ...ecord in the next 14 days Highlight the to modify settings Select the again to view and modify all settings Highlight the to confirm Modify the Series Priority List If there are scheduling conflicts in your series recordings your DVR automatically creates a Series Priority List The first series you set to record has the highest priority and will be the one recorded if there is a conflict You can e...

Page 8: ...to sort recordings by Title Date or Channel Use the arrows to scroll through the list and press OK Select or INFO for program description and use the action icons to begin playback You can control playback of a recording by using the video control buttons or arrow buttons on your remote to fast forward rewind and pause your program LIVE LIVE Return to previous screen Record new program or series a...

Page 9: ...gs list until you decide to delete it or have set it to delete when space is needed Your DVR will record and store up to 90 hours of standard definition programming and up to 20 hours of High Definition programming There are several options you can choose to make the most efficient use of your storage space i Guide gives you easy ways to manage your recordings DVR Setup From the Quick Menu or Main...

Page 10: ...ding overlap when both tuners are in use For example while watching live TV a scheduled recorded program ends at 9 05 but your second recorded program is scheduled to begin at 9 00 the second program will be clipped so that your first program is recorded in full Clipping happens when both tuners are in use during the recording time If this occurs a clipped notice will appear next to those programs...

Page 11: ...a list of recent DVR deletions or missed recordings If a program did not record DVR History will provide a reason why the program didn t record or when a program was deleted Modify Recording Options i Guide gives you flexibility to manage your personal video library You can modify your Recording Options at any time as often as you like From the Quick Menu or Main Menu or from MY DVR on the remote ...

Page 12: ...parameter either until you delete or delete automatically when space is needed Change the start and end times in order to catch every minute of a program even if it runs over From Listings Select your Scheduled Recording in the listings it will be indicated by the red dot in the Instant Info Press OK Select or INFO and select to change your options or delete the Scheduled Recording From here selec...

Page 13: ...r DVRs only and you attempt to change channels a notice will appear Two Recordings in Progress screen Select the to view the other recording Select the to continue recording as scheduled Select to cancel the current recording and change the channel Recording Low and Full Notices i Guide will advise you with an on screen notice when available memory on the DVR is low or full If recording space beco...

Reviews: