39
camera
3
Press
s
to take the photo.
4
Press
Send
to save the photo and send it in a
message.
Note: Network/subscription-dependent feature.
Select
in Message
to immediately send the photo in a
message, or select
to Online Album
to first save the
photo to an online album. You will then see the
Msg
screen. You can now send the photo in a message.
(See your
User’s Guide
for more information.)
Press
Save
to save the photo and return to the
camera viewfinder.
Press
Delete
to delete the photo and return to the
active photo viewfinder.
5
Press
O
to return to the main screen.
40
camera
When the camera is active, press
Options
to set camera
options:
option
Resolution
Set resolution to
1600x1200
,
1280x960
,
640x480
,
320x240
, or
Picture ID
.
Self Timer
Set the camera to take a photo
after a specific interval:
3 seconds
,
5
seconds,
or
10 seconds
. Or turn it off.
Add Picture Frame
Select a custom frame for your
photo.
Brightness
Adjust image brightness by
scrolling left or right from
-2
to
2
.
White Balance
Adjust for different lighting
conditions by scrolling left or right
to choose from
Auto
,
Sunny
,
Cloudy
,
Tungsten
,
Fluorescent
, or
Darkness
.
Color Effects
Scroll left or right to select
Normal
,
Antique
,
Black & White
, or
Negative
.
41
camera
Storage Location
Note: Optional accessory
required.
Specify where you want
to save photos (
Phone
or
Memory Card
).
This option is available only if you
have a memory card inserted.
option
42
camera
take photos—flip closed
1
Make sure the external buttons are unlocked (see
page 27).
2
Press the smart/speakerphone key to activate the
external buttons.
3
Press the camera button
Î
(see page 26) to activate
the camera
Your phone displays the camera viewfinder.
4
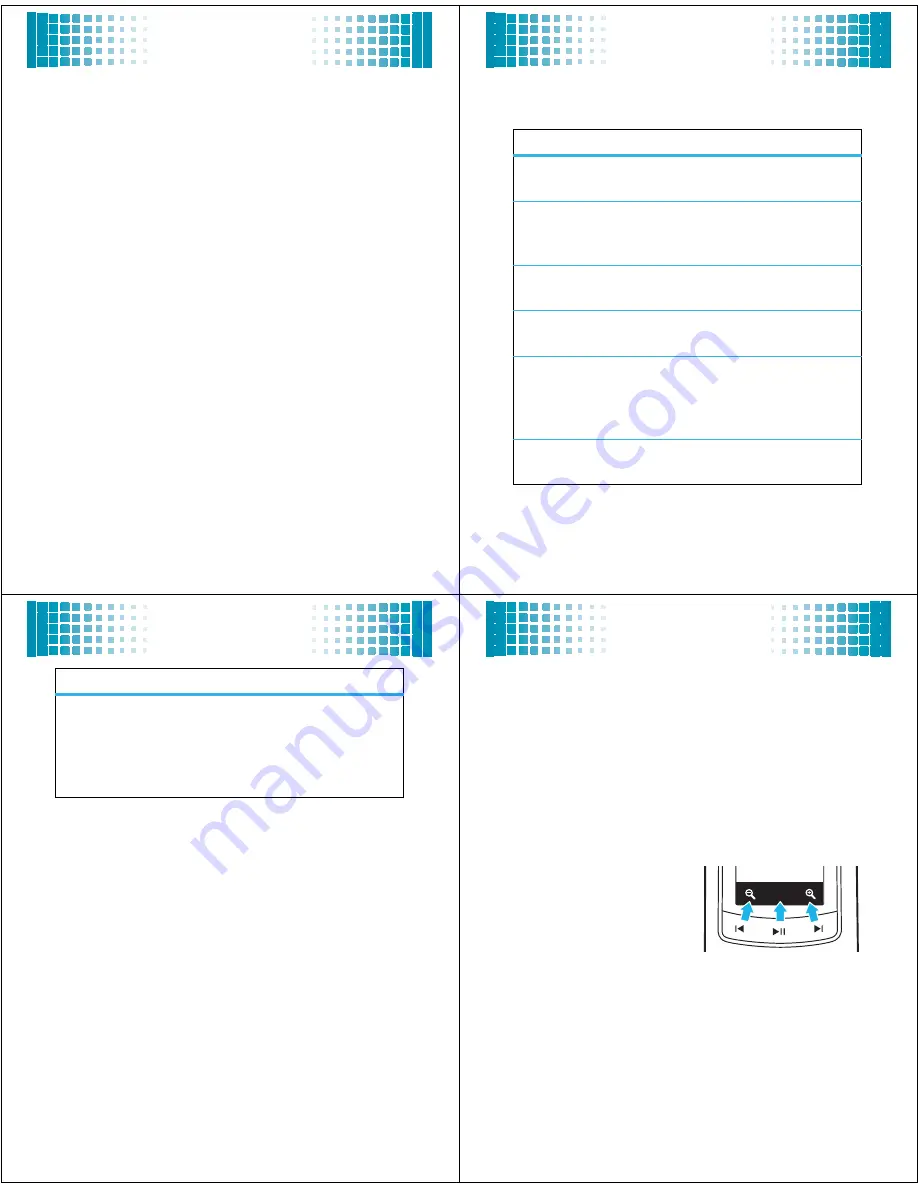
Use the external
buttons to zoom in and
out and to take a photo.
Labels at the bottom of
the display show the
function of each
external key.
Press
Ï
and
Î
to zoom in and out. Press
y
to take
a photo.
5
Press the smart/speakerphone key to exit the
camera.
w