


Using the camera as a Macro Camera
1. Install the Motic Images Plus application program from the CD included.
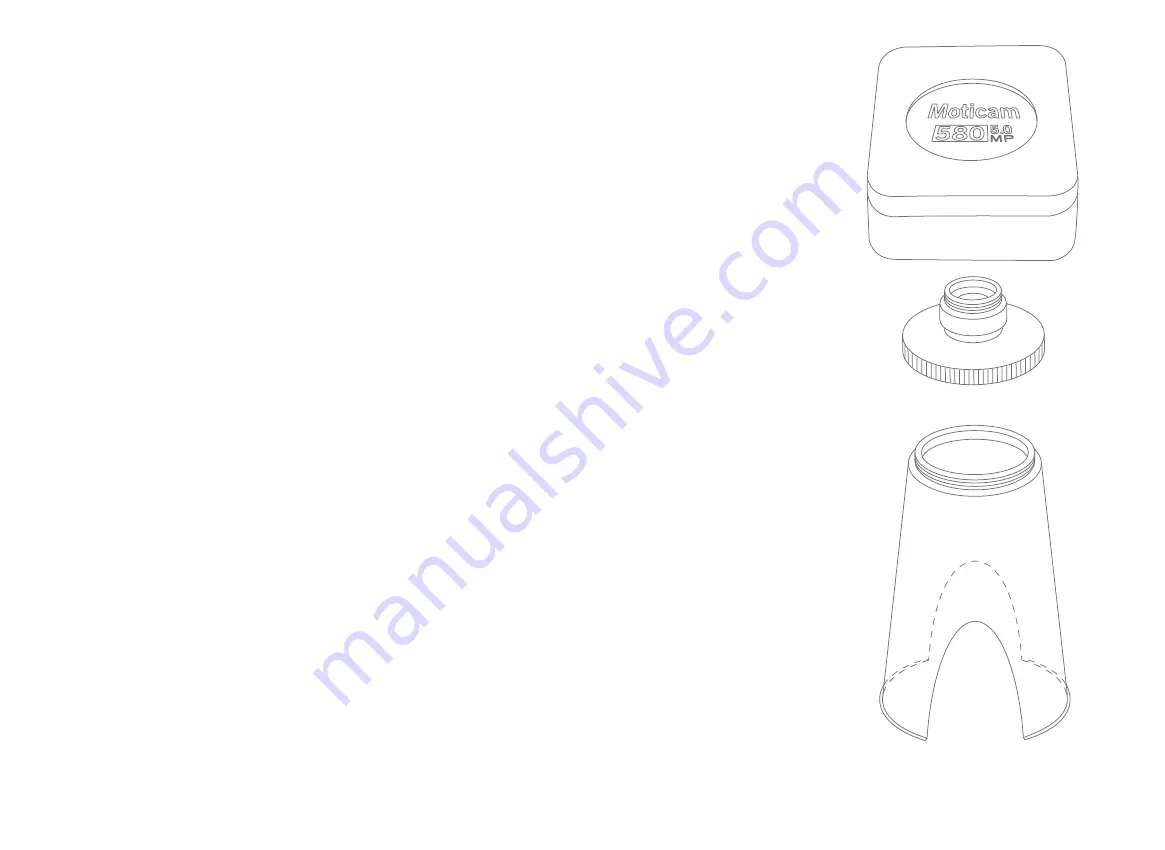
2. Remove the Dust Cap (B) from the camera (A) and attach the focusable lens (C).
3. Attach the Macro Tube (H) onto the lens.
4. Place this assembly over the item you wish to view and ensure there is adequate lighting. If necessary, a desk lamp is a
good solution.
5. Connect the USB cable (F) onto the camera and then plug it into the computer.
6. Install the driver if necessary by following the instructions on screen. The driver for the Moticam 580 is located in the
Moticam 580 Subfolder on the CD.
Uso de la cámara como cámara macro
1. Instale el programa de aplicación Motic Images Plus incluido en el CD.
2. Quite la tapa protectora (B) de la cámara (A) y enrosque la lente enfocable (C).
3. Enrosque el tubo macro (H) en la lente.
4. Coloque ahora la cámara con el tubo macro sobre el objeto que desea visualizar. Asegúrese de que el objeto está
correctamente iluminado. Si fuera necesario una lámpara de sobremesa puede ser una buena solución.
5. Conecte el cable USB (F) en la cámara y después en el ordenador.
6. Instale el driver si es necesario, siguiendo las instrucciones que aparecen en pantalla. El driver para la Moticam 580 se
encuentra en la subcarpeta Moticam 580 del CD.
Die Verwendung der Kamera als Makro-Kamera
1. Installieren Sie das Motic Images Plus Anwendungsprogramm von der mitgelieferten CD.
2. Entfernen Sie die Schutzkappe (B) von der Kamera (A) und befestigen Sie die fokussierbare Linse (C).
3. Befestigen Sie den Makrotubus (H) an der Linse.
4. Legen Sie diese Anordnung über den Gegenstand, den Sie sich ansehen möchten und sorgen Sie für eine ausreichende
Beleuchtung. Falls erforderlich, wäre eine Schreibtischlampe eine gute Lösung.
5. Verbinden Sie das USB-Kabel (F) mit der Kamera und stecken Sie es dann in den Computer.
6. Installieren Sie den Treiber bei Bedarf, indem Sie den Anweisungen auf dem Bildschirm folgen. Der Treiber für Moticam
580 ist im Moticam 580 – Unterordner auf der CD.
Pour utiliser la caméra en observation macro
1. Installer Motic Images Plus à l'aide du CD fourni.
2. Enlever le bouchon anti-poussière (B) de la caméra (A) et visser la lentille macro à mise au point réglable (C).
3. Visser le tube macro à la lentille.
4. Placer ce montage au dessus du spécimen à observer, et assurer vous que l'éclairage est suffisant, ajouter une simple
lampe de bureau est une bonne option.
5. Brancher le câble USB (F) à la camera, le brancher ensuite sur l'ordinateur.
6. Installer au besoin le pilote de la caméra en suivant les instructions sur votre écran. Le pilote de la Moticam 580 se trouve
dans le sous fichier Moticam 580 dans le CD.
Usando la telecamera come Macro Camera
1. Insatallare il programma Motic Image Plus application usando il CD incluso.
2. Togliere il tappo anti-polvere (B) dalla telecamera (A) ed applicare la lente focalizzante (C).
3. Attaccare il tubo Macro (H) alla lente.
4. Metterlo quindi sull’oggetto che si vuole visualizzare ed assicurarsi che ci sia un illuminazione adeguata. Se fosse
necessario, una lampada da tavolo puó essere una buona opzione.
5. Connettere il cavo USB (F) alla telecamera e successivamente connetterla al computer.
6. Installare ora il driver necessario seguendo le istruzioni che appaiono sullo schermo. Il driver per la Moticam 580 si trova
nel CD dentro la cartella “Moticam 580”.
EN
ES
DE
FR
IT
1. This button cycles through the functions of the camera. The LED indicator lights
show what mode the camera is currently in. If Indicator A is on, the camera is in the
Still Image Capture Mode. Pressing the SNAP button captures an image onto the SD
Card. If Indicator B is on, the camera is in the Live Image Capture Mode. Pressing the
SNAP button captures a video file onto the SD Card. If both Indicators A and B are on,
the camera is in the ALBUM mode, use buttons 2 and 3 to scroll through the images
on the SD Card.
2. When an analog device is connected to the camera, this button switches the output
between NTSC and PAL outputs. When the camera is in ALBUM Mode use this button
to scroll left.
3. Pressing this button activates the camera’s hardware White Balance function. Use
this function to calibrate a white background depending on the microscope’s illumina-
tion. When the camera is in ALBUM Mode use this button to scroll right.
4. This button will Capture a Still Image or Start/Stop the Video Recording depending
on what Mode the camera is in.
5. AV out for connecting to an Analog Display (the cable is provided in the Moticam
580 box)
6. USB port for connecting to a Computer (the cable is provided in the Moticam 580
box)
7. Mini-HDMI port for connecting to an HDMI ready Display (the cable is provided in
the Moticam 580 box)
8. Power port for connecting the included Power Supply.
9. SD Card slot for capturing images and video files onto an SD card. The maximum
size compatible is 32GB SDHC.
NOTE: The remote control for the Moticam 580 is an optional extra available in the
premium pack
10. Pressing this button switches off the camera completely. Please note that you will
need to replug the power supply to switch it on.
11. This button will Capture a Still Image or Start/Stop the Video Recording depend-
ing on what Mode the camera is in.
12. This toggle pad allows you to scroll through the images in the ALBUM and also
through the camera’s custom setup MENU.
13. Access the camera’s custom setup by pressing this button. Please note that all
settings go back to the default once the camera is disconnected from the power
supply.
14. This button cycles through the functions of the camera. The LED indicator lights
show what mode the camera is currently in. If Indicator A is on, the camera is in the