S
Stto
orra
ag
ge
e d
do
om
me
e
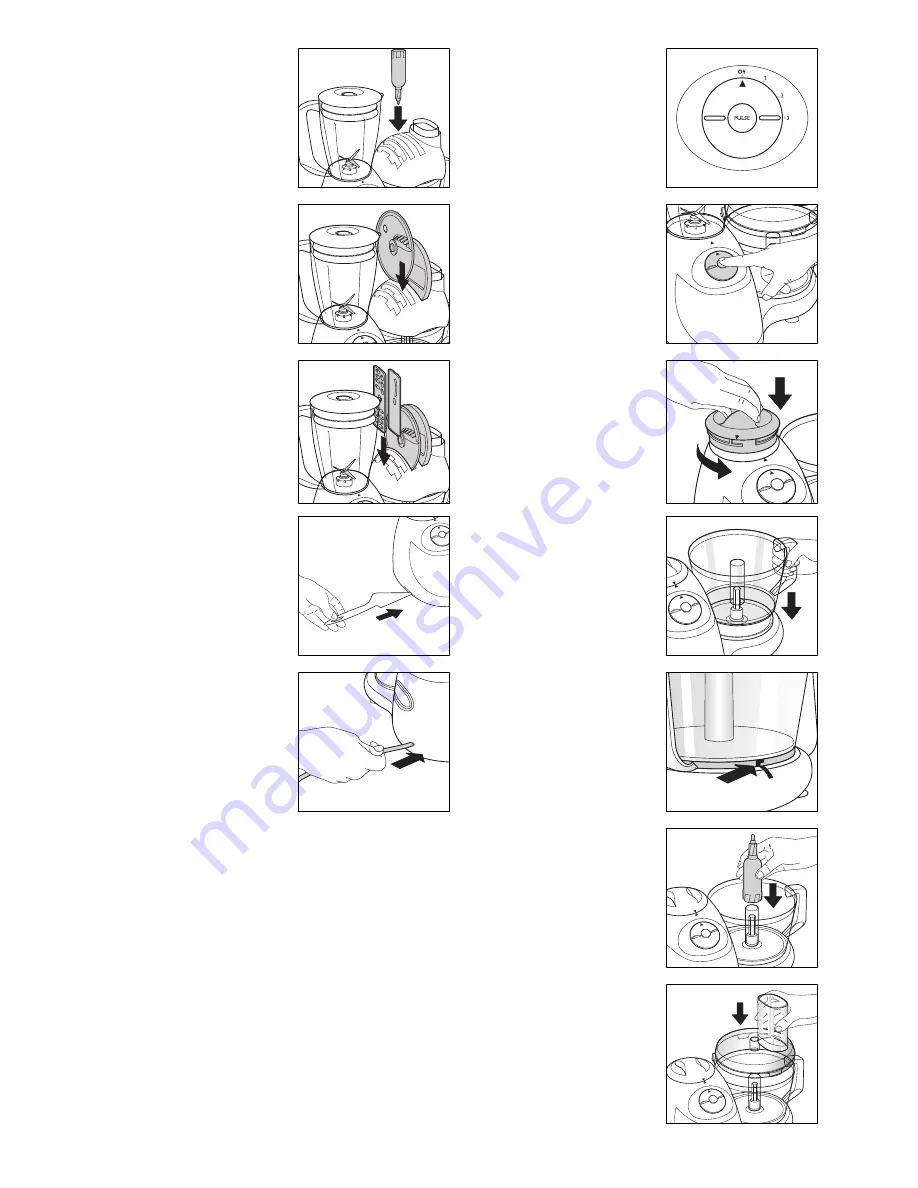
1 Fit the processor bowl
‰
and
processor lid
Ê
onto the
processor base.
2 Place the storage dome
Ë
onto the processor lid.
3 Add the spindle
Â
into the
circular hole in the storage
dome.
4 Place the plastic blade holder
Í
and metal chipping disc
Ì
into the two longer slots.
5 Add the slicing blade
Ï
and
shredding blade
Î
into their
slots in the storage dome
S
Sp
pa
attu
ulla
a
Slide the spatula
È
into the
slot provided on the side of the
processor body
⁄
.
C
Co
orrd
d s
stto
orra
ag
ge
e
The mains lead can be stored
by feeding it into the opening at
the back of the processor body.
O
Op
pe
erra
attiin
ng
g
c
co
on
nttrro
olls
s
The processor and blender
control dials have settings as
follows:
Off/3 speeds
Pulse
The speed can be adjusted
whilst the processor or blender is
in use.
Using the pulse button allows
greater control over the texture
of the food produced. It is only
intended to be used for short
‘bursts’ of processing or blending.
O
Op
pe
erra
attiin
ng
g tth
he
e
ffo
oo
od
d p
prro
oc
ce
es
ss
so
orr
S
Se
ettttiin
ng
g u
up
p
1 Ensure the processor is
unplugged from the mains.
2 Fit the safety cover
¤
into the
processor body and turn anti-
clockwise firmly until it ‘clicks’
into place (the arrows will now
be lined up). THE FOOD
PROCESSOR WILL NOT
OPERATE WITHOUT THE
SAFETY COVER IN PLACE.
3 Place the processor bowl
‰
onto the processor body
⁄
,
(there is no need to turn the
bowl).
4 When fitted correctly, the
handle will be to the right of
the assembly, and the ridge on
the base of the bowl will fit
into the slot at the back of the
processor body.
5 Fit the spindle
Â
onto the
motor shaft
fl
and the
appropriate attachments onto
the spindle. Refer to following
section, ‘Fitting and using the
tools’.
6 Holding the processor lid
Ê
by the feed tube, fit the lid by
rotating anti-clockwise.
5


