


Installation
ProStar Operator’s Manual
27
26
3.0
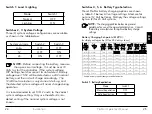
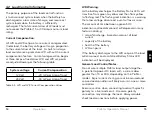
Switch 8: Current Switching
Mode
Switch 8
PWM switching
OFF
Slow switching
ON
The default (PWM) switching setting (OFF / down) operates
at 300Hz. If load or system noise is an issue, DIP 8 can be set
(ON-up) for slow switching at 1Hz. Standard PWM switching is
recommended when system noise is not a problem.
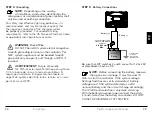
3.3 Mounting
Inspect the controller for shipping damage. Mount the
ProStar to a vertical surface (4-#8 stainless steel self-
tapping screws are included). Tighten the mounting
screws using care not to crack the plastic case. Do not
install directly over an easily combustible surface since
the heat sink may get hot under certain operating
conditions.
NOTE:
The heat sink must be in a vertical
position (fins up and dow
n).
For proper air flow, allow at least 15 cm (6 in) of space
above and below the controller, and 50 mm (2 in) at
the sides - see Figure 3-2 below. Install in an area
protected from direct rain and direct sun.
If the controller is installed in an enclosure, some
ventilation is recommended. Do not locate in an
enclosure where battery gases can accumulate.
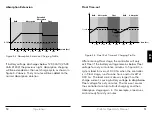
Figure 3-2. Proper Clearances for Passive Cooling
6 in / 150 mm
6 in / 150 mm
2 in /
50 mm


