


7
MOTHER-32 FIRMWARE UPDATE V2.0
April 2020
THE SWING INTERVAL (Continued)
NOTE:
The selected clock division will be shown in green using the
OCTAVE / LOCATION
LEDs.
NOTE:
The Swing Amount and Swing Interval are stored per pattern.
NOTE:
A step will play for a duration determined by the current Swing Interval and Swing Amount settings. If the
on-beat Swing Interval ends in the middle of a step, the step will complete its remaining duration at the rate of
the off-beat Swing Interval, and vice versa.
TIP:
To initialize the Swing Amount and Swing Interval to default values, first set or reset your Sequencer Clock Division
(this will also reset your Swing Interval), then press
SHIFT
+
TURN
.
TEMPO
knob to 12 o’clock for a 50% Swing Amount.
Alternatively, initializing or reloading the pattern is a quick way to reset Swing settings, but these are destructive actions,
so be sure you aren’t losing any work since your last save!
NEW PATTERN SAVE MODES
SAVING A PATTERN
In addition to the Manual Save mode, two additional save modes have been added in Version 2.0 – Auto
Save and Write Protect. Selecting the Save mode can be done on Page 6 of the Mother-32 Setup mode.
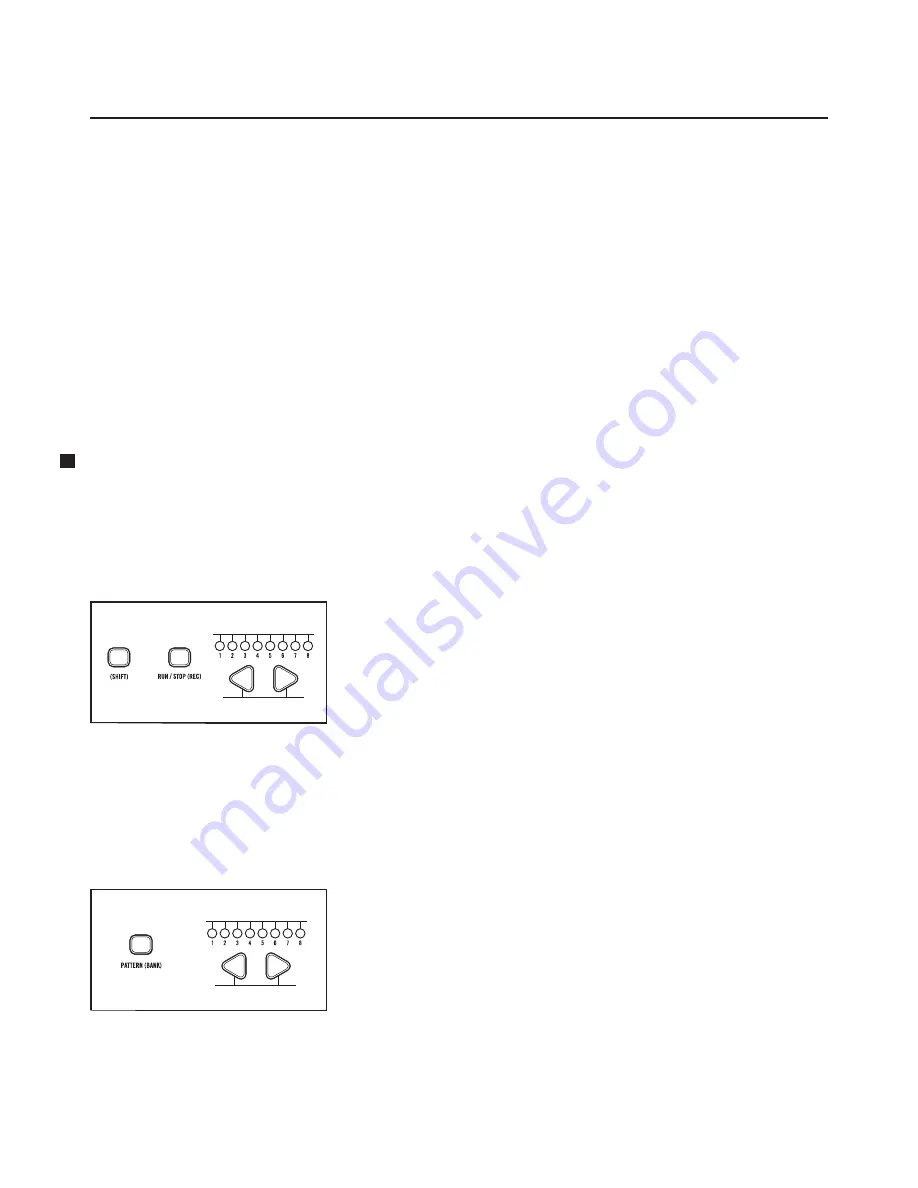
MANUAL SAVE MODE
In this mode, you must manually save any changes. If you change
patterns before saving your changes, the changes will be lost. To
manually save the pattern press the
(SHIFT)
+
RUN / STOP
buttons
simultaneously for about a second. One of the
OCTAVE / LOCATION
LEDs (1-8) will begin to blink rapidly, indicating the location where
the pattern will be saved. To save the pattern to this location, simply
press the
(SHIFT)
+
RUN / STOP
buttons again. Otherwise, use
the
(KB)
button or the
(STEP)
button to select a different pattern
location Again, the blinking LED will indicate the specified location.
Press the
(SHIFT)
+
RUN / STOP
buttons to save your pattern to this
location, or simply press the
RUN / STOP
button to exit without saving.
NOTE:
You can also hold
(SHIFT)
and press one of the eight corresponding
pattern location buttons.
To manually save the pattern to a location in a different bank (1-8),
first press and hold the
(BANK)
button while using the
(KB)
button
or the
(STEP)
button to select a different bank. Release the
(BANK)
button and you can now use the
(KB)
button or the
(STEP)
button
to select a pattern location within that bank. Press the
(SHIFT)
+
RUN / STOP
buttons to save your pattern to this location, or simply
press the
RUN / STOP
button to exit without saving.
NOTE:
You can also hold
(BANK)
and press one of the eight corresponding
bank location buttons.
+
Select Setup Mode Page
(Indicated by Yellow LED)
Select Pattern Location
Blinking Green LED
Indicates Save Destination
+
Select Setup Mode Page
(Indicated by Yellow LED)
Select Bank Location
Yellow LED Indicates
Save Destination Bank


