


- 4 -
SWITCH SETTING DEFINITION
Flickerless Mode
1
Setting this switch to "On" and
switch 3 (MIRIS) to "Off" will
help to reduce the flicker in
fluorescent lights
Helps prevent an object from
being washed out when the
object is directly in front of a
light source.
When the switch is in the
on position the auto iris lens
controls the amount of light on
the chip. If in the off position
the light level is controlled
electronically.
Used to help improve the
color quality of the camera
picture under different light-
ing conditions. The Fac-
tory Default is Switch 7 "ON",
switches 6 and 8 "OFF".
NOTE: ANY ADJUSTMENTS
TO THESE SETTINGS
SHOULD ONLY BE MADE
BY A QUALIFIED CCTV
TECHNICIAN
See examples below to help
with any adjustments.
Helps balance the contrast in
the picture.
BLC (Back Light
Compensation)
MIRIS (Manual/
Electronic Iris
GAMMA
AGCMAX
(auto/gain control)
(Automatic White
Balance Control)
AW2
AW3
AEREF
AEME
2
3
4
5
6
9
10
AW1
7
8
This sets the electronic
convergence level. In the "off"
position the level is set to 100
IRE; in the "on" position the
user can set the level. Not
used with auto Iris
With this switch in the "On"
position users can manually
adjust the shutter speed and
gain using other switches See
the tables below for specific
settings
MC CAMERA DIP SWITCH SETTINGS CHART
SHUTTER SPEED
Flickerless (1) BLC (2) MIRIS (3) Shutter Speed
On Off Off 1/100 Sec.
Off On Off 1/60 Sec.
GAIN
MIRIS (3) AEREF (9) AGCMAX (5) Gain
On Off Off 0dB
On On Off 6dB
On Off On 12dB
On On On 18dB
Allows day/night cameras to
switch to b/w in low light conditions,
also helps with low light conditions
in standard and hi-res cameras
NOTE:
This hi-res color camera uses a 1/4" chip and a 3-6mm
auto iris lens. It is comparable to a 1/3" chip using a
4-9mm auto iris lens.
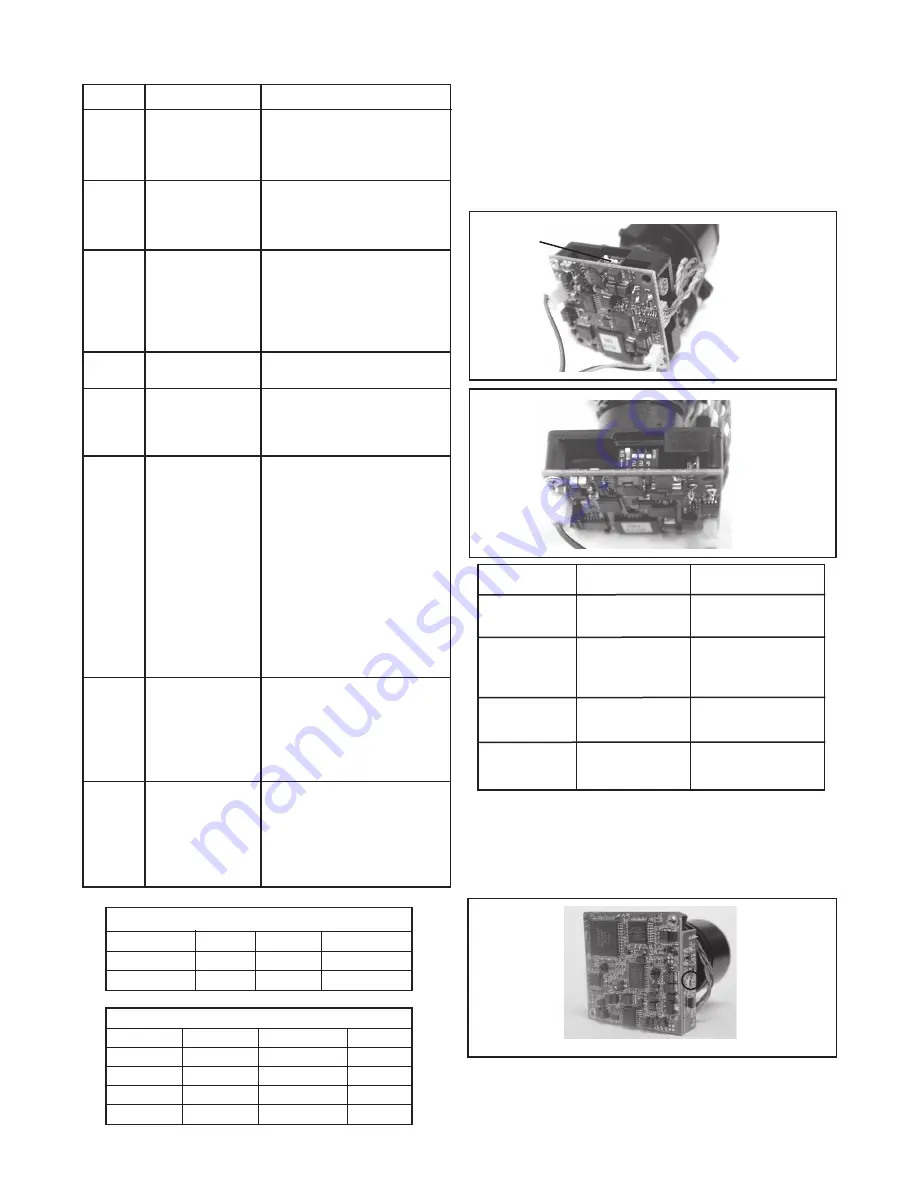
The operational settings are defined by four dip switches located on
the side of the PC Board (Figure 11 and 12). Moving the switches
to the UP position will activate specific settings. Refer to the chart
below.
Figure 11
Dip Switches
Figure 12
Dip Switch UP DOWN
1
(Iris) Auto Iris On Position for Fixed Lens
2
(Flickerless) Shutter speed Normal
fixed at 1/100 sec.
3 (Back Light ON Normal
Compensation
4
(Synch Mode) Internal Synch Line Lock Mode
SERIAL NUMBERS BEGINNING WITH CB
SERIAL NUMBERS BEGINNING WITH CT
FIXED AND FIXED VARI-FOCAL LENSES. There are no user adjust-
able settings on these units (Figure 13).
Figure 13


