


MP7200® user instructions
20
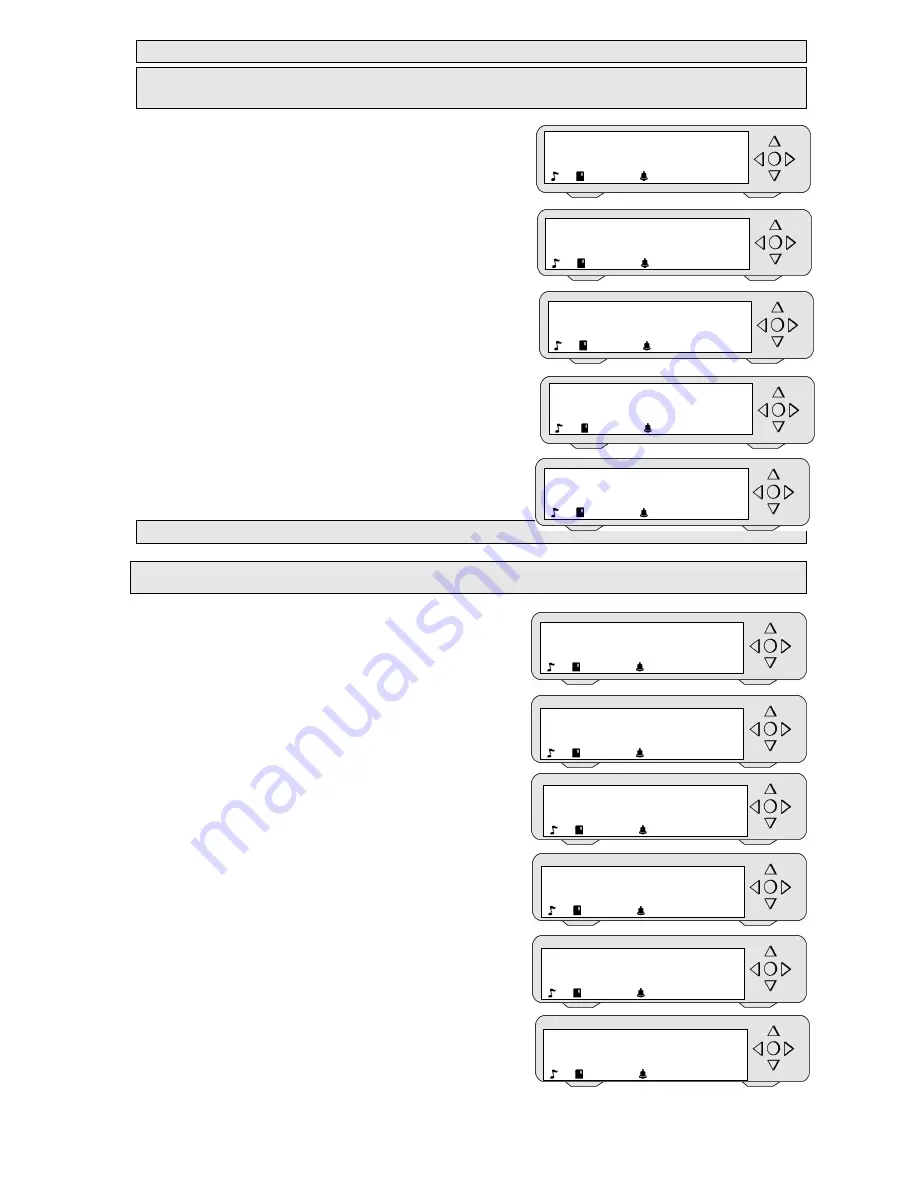
1)
Listen to messages
This function allows listening, with the internal speaker, to messages found on the appliance
without interrupting the broadcasting.
Steps 1 + 2 (page 19)
a) The display shows "Listen to messages – GO".
Press the central "OK" key to access
this submenu.
b) The display then shows "Select.message – _".
With the arrow keys
◄
/
▲
/
▼
/
►
select the message that you wish to
listen to. Press the central "OK" key
to confirm.
You can listen to the message instantly
without interrupting the music and without
broadcasting the message.
Here, you will hear an opening message in French.
c) To exit "Select.message", select the dash (-).
Press the central "OK" key to validate.
The display shows "Listen to messages – GO".
With the arrow keys
◄
/
▲
/
▼
/
►
select another function or pass on
to step 5 (page 19).
2)
See scenario
This function allows consulting the list of messages and their broadcasting timetable.
Steps 1 + 2 + 3 (page 19)
a) The display shows "Listen to messages – GO".
b) With the
►
arrow key
select
"See scenario". Press the central "OK" key to
access this submenu.
c) The display shows "List messages – GO".
Press the central "OK" key to validate.
d) The display then shows on what (radio) zone
you are on.
With the arrow keys
◄
/
▲
/
▼
/
►
select the zone in which you want to
consult the list of messages.
For only one zone, you can scroll through
the timetable and the messages with the
►
arrow key
.
To exit "List messages" press the
central "OK" key.
The display shows "See scenario"
With the arrow keys
◄
/
▲
/
▼
/
►
select another function or pass on
to step 5 (page 19).
Listen to messages
< >
GO
!
We
18
Select.message
_
We
18
Select.message
Fr_open
We
18
Select.message
_
We
18
Listen to messages
< >
GO
!
We
18
Listen to messages
< >
GO
!
We
18
See scenario
< >
GO
!
We
18
List messages
< >
GO
!
We
18
List messages
Msg RADIO 1
We
18
List messages
08:30 open_mp3
We
18
See scenario
< >
GO
!
We
18


