PRESS
GENTLY
INSTALLATION
STEP 1
Before installing anything, try out different shapes and patterns
with your segments on the floor or a large table to decide what
you would like to create!
Consult the Design Guide for ideas.
STEP 2
IMPORTANT:
• Plan to install your Digit near enough to a power outlet.
• Place the controller somewhere on the bottom of your pattern.
• To ensure all segments light up, make sure all the connector
cables always point GREEN side
AWAY
from the controller.
• Only one
GREEN
plug should ever be connected a single segment.
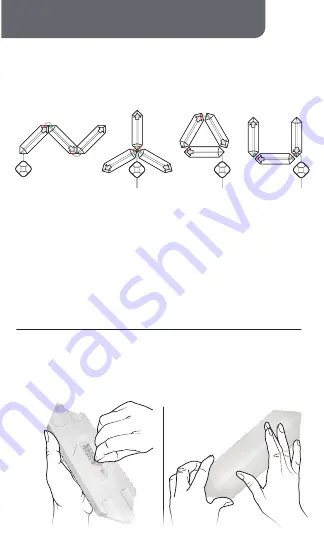
DESIGN TIP:
Pointing the directional markers on the back of each segment
towards or away from each other will create different lighting effects when
segments are combined, but you can easily change this after installation!
examples:
First, clean the mounting surface with rubbing alcohol and let dry.
When you’re ready to start, peel off the adhesive backing from
one Digit segment, position the segment on the wall where you
would like to begin your pattern, and press gently on the center.
NOTE:
Do not attach this product to wallpaper, brick, the ceiling, or the floor.
If desired, you can use a level to help align and place this first panel.
Once complete, your device will be connected to the network.
Confirm or change the settings for your device and then click “Done”.
Your Digit is now setup and you can proceed to installation.
Confirm that the LED indicator is RAPIDLY blinking.
Confirm that the network displayed is your
2.4GHz Wi-Fi
network
, then enter your Wi-Fi password and click “Confirm”.
5
4


