Monacor DVT-440SET Instruction Manual Download Page 17

5) Switch on the monitor with the button ON/OFF

(6). As long as no camera picture is received, the
message “Out of Range” appears on the screen.

6) For video surveillance via a monitor connected

to the jack AV OUT press the button AV (8). The
screen goes dark and the picture can only be
viewed on the monitor connected. To switch
back, press the button AV again.

7) After operation, switch off the monitor with the

button ON/OFF. If the monitor is not used for a
longer time, disconnect the power supply unit
from the socket. Even with the unit switched off,
there is a low current consumption.

4.2 Assigning cameras

The following text describes how to assign the first
camera. Repeat the steps for each further camera
and select another camera channel in each case.

1) Screw the antenna (18) onto the jack (22) of the

camera and place it in a vertical position.

2) Connect one of the smaller power supply units

(25) to the inline jack (24) and connect the power
supply unit to a socket. Thus, the camera is
switched on.

3) Press the button MENU (14) on the monitor. The

main menu appears; the submenu “Camera
Setup” is selected.

4) Activate the submenu “Camera Setup” with the

button ENTER (11).

5) The menu item “Camera setting” is selected. Go

to the menu item “Pairing” with the button 

(10).

6) The first camera channel is selected. Another

channel can be selected with the buttons 

and

(12).

7) Press the button ENTER. The message ap 

-

pears:

Please Press

Pair Key

on Camera side

30

8) Press the button “Pairing” (23) at the camera

within 30 seconds. (The number below the mes-
sage shows the remaining time in seconds.)

Thus, the camera is assigned to the selected
channel and the camera picture appears on the
screen.

4.3 Installing cameras

1) Install the cameras at the desired places. For

this purpose, screw the supplied camera sup-
port into the threaded jack (21) on the lower
side.

2) Connect the power supply units again and align

the cameras to the surveillance zones.

5 Remote Controller

All functions may also be made by the remote con-
troller, except for the intercom function with the but-
ton TALK (9). The button ENTER (11) is marked
on the remote controller, but it has the same func-
tion.

1) When actuating a button, always hold the re -

mote controller in the direction of the sensor (7).
There must be no obstacles between the remote
controller and the sensor.

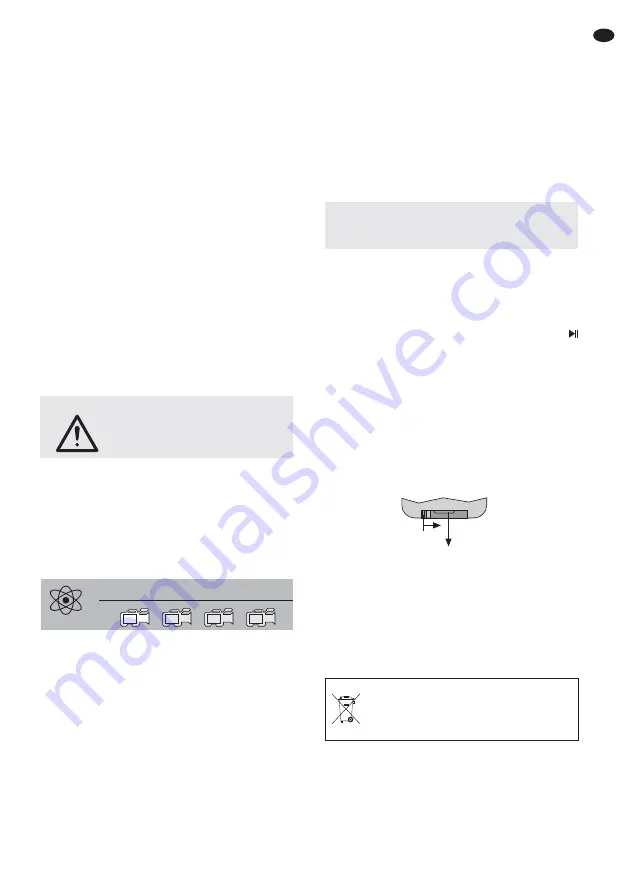
2) To insert or replace the batteries, press the small

bar with the groove on the rear side of the
remote controller to the right and remove the
battery support at the same time.

Two 1.5 V button cells of type L 1130 are re 

-

quired. When inserting, make sure that the pos-
itive pole of the front button cell and the negative
pole of the rear button cell show upwards.

If the remote controller is not in use for a

longer time, remove the batteries so that it will
not be damaged in case the batteries should
leak.

Do not put exhausted batteries into the
household rubbish but take them to a
special waste disposal (e. g. collective
container at your retailer).

1.

2.

Important!

The inline jack (24) for the power

supply unit is not weatherproof. For an outdoor
connection it must be protected accordingly.

Pairing

1

2

3

4

CAUTION

Never look directly into the lit IR
LEDs at close range. Although
the infrared light in invisible, it
may cause eye damage.

17

GB

Summary of Contents for DVT-440SET

Page 1: ...DVT 440SET Bestellnummer 18 8720 BEDIENUNGSANLEITUNG INSTRUCTION MANUAL MODE D EMPLOI ISTRUZIONI PER L USO FUNK BERWACHUNGSSET WIRELESS SURVEILLANCE SET...

Page 2: ...r use The English text starts on page 14 Avant toute installation Nous vous souhaitons beaucoup de plaisir uti liser cet appareil MONACOR Lisez ce mode d emploi enti rement avant toute utilisation Uni...

Page 3: ...AV REC MENU 7 TFT LCD DVR MONITOR 12V ON OFF AV OUT M 1 SD REC X2 Mic Pairing 5 6 7 8 9 10 11 12 13 14 15 16 17 LCD REMOTE MENU REC AV 18 19 20 21 22 23 24 1 2 3 4 a b c d e f g h i j 8 11 12 13 10 12...

Page 4: ...schirm Wird eines der vier Kamerabilder angezeigt k nnen folgende Symbole eingeblendet sein a Antennensymbol mit Anzeige der Signal st rke des Kamerasignals b Anzeigemodus M manuelle Wahl einer Kamera...

Page 5: ...einer Einstellung oder zum Anw hlen einer Einstellm glichkeit 4 wenn eine Aufzeichnung abgespielt wird Zum Aktivieren des schnellen Vor oder R cklaufs 5 wenn die Zoom Funktion eingeschaltet ist Zum Ve...

Page 6: ...hwarzwei betrieb um und die 24 Infrarot LEDs leuchten einen Bereich bis ca 10 m aus Die bertragungsreichweite h ngt stark von den rtlichen Gegebenheiten ab Bei Sichtverbindung zwischen einer Kamera un...

Page 7: ...0 8 Die Taste Pairing 23 an der Kamera innerhalb von 30 Sek dr cken Die Zahl unter der Mel dung zeigt die verbleibenden Zeit in Sekunden an Die Kamera ist damit dem gew hlten Kanal zugewiesen und das...

Page 8: ...er die Live Bilddar stellung ausw hlen Single Einzelbilddarstellung mit manueller Kameraanwahl Scan Einzelbilddarstellung mit automatischem Umschalten auf die n chste Kamera nach jeweils 5 Sekunden Qu...

Page 9: ...n die Taste MENU dr cken 7 Live berwachung Gegensprechfunktion 1 Solange kein Men aufgerufen ist und keine Aufzeichnung betrachtet wird zeigt der Bild schirm entsprechend der Einstellung im Men punkt...

Page 10: ...Setup ist ange w hlt Mit der Taste 12 das Untermen Recorder Setup anw hlen und mit der Taste ENTER 11 aufrufen 2 Der erste Men punkt Motion detect ist ange w hlt Hier kann f r jede Kamera separat der...

Page 11: ...rden den Vorgang durch erneutes Dr cken der Taste ENTER abbrechen c Zum Formatieren und L schen mit der Taste oder YES anw hlen erscheint dann gr n und die Taste ENTER dr cken 7 Um das Men zu verlasse...

Page 12: ...te Zum Anse hen die Taste ENTER dr cken 6 W hrend des Ansehens eines Fotos lassen sich die Fotos im Ordner mit den Tasten und durchbl ttern BeimAbspielen einer Videoaufzeichnung wird oben im Bild die...

Page 13: ...mW Einsatztemperatur 0 40 C Monitor mit Rekorder Bildschirm TFT LCD Aufl sung 480 234 Bildpunkte Bildschirmdiagonale 17 8 cm 7 Format 16 9 Videokomprimierung M JPEG Max Gr e einer Speicherkarte 32 GB...

Page 14: ...creen If one of the four camera pictures is shown the following symbols may be inserted a antenna symbol with indication of the signal power of the camera signal b display mode M manual selection of a...

Page 15: ...rding is replayed To activate the fast forward or reverse 5 When the zoom function is switched on To move the picture cutout 13 Button REC to take a photo or to start or to stop a video recording 14 B...

Page 16: ...Ds illuminate an area of up to 10 m approx The transmission range largely depends on the local conditions If there are no obstacles between a camera and the monitor it may be up to 80 m In buildings h...

Page 17: ...ge shows the remaining time in seconds Thus the camera is assigned to the selected channel and the camera picture appears on the screen 4 3 Installing cameras 1 Install the cameras at the desired plac...

Page 18: ...lected Select the live picture display with the button or Single single picture display with manual cam era selection Scan single picture display with automatic switching over to the next camera after...

Page 19: ...utton MENU 7 Live Surveillance Intercom Function 1 As long as no menu is activated and no record ing is viewed the screen shows a live picture according to the adjustment in the menu item Preview mode...

Page 20: ...can be activated separately for each camera at this menu item If a move ment is detected a video recording starts for 3 minutes or a photo is taken a The first camera is selected To select another ca...

Page 21: ...If the screen shows the live picture of a camera the following symbols may be inserted according to the adjustments symbol for the activated motion sensor symbol for the overwrite mode clock symbol wh...

Page 22: ...ton To view press the button ENTER 6 While viewing a photo it is possible to browse the photos in the folder with the buttons and While replaying a video recording the time already played and the tota...

Page 23: ...re 0 40 C Monitor with recorder Screen TFT LCD Resolution 480 234 pixels Diagonal screen size 17 8 cm 7 Format 16 9 Video compression M JPEG Max size of a memory card 32 GB Video output 1 Vpp 75 PAL N...

Page 24: ...4 Ecran Si une des quatre images de cam ras est affi ch e les symboles suivants sont visibles a Symbole antenne avec affichage de la puis sance du signal de la cam ra b Mode d affichage M s lection m...

Page 25: ...glage 4 Si un enregistrement est en cours de lecture pour activer l avance ou retour rapide 5 Si la fonction Zoom est activ e pour d pla cer le segment d image 13 Touche REC pour prendre une photo ou...

Page 26: ...ns un bo tier r sistant IP 55 et peuvent tre utilis es en ext rieur Si l clairage est insuffisant les cam ras commutent sur un fonctionnement noir et blanc les 24 LEDs infrarouges clairent une zone ju...

Page 27: ...Pairing 23 sur la cam ra dans les 30 secondes le chiffre sous le message indique la dur e restante en se condes La cam ra est alors attribu e au canal s lectionn et l image de la cam ra appara t sur...

Page 28: ...emier point du menu Preview mode est s lectionn Avec la touche ou s lection nez la visualisation live Single visualisation image unique avec s lec tion manuelle de cam ra Scan visualisation image uniq...

Page 29: ...7 Surveillance Live fonction interphone 1 Tant qu aucun menu n est appel et qu un enre gistrement n est visualis l cran affiche une image Live en fonction du r glage dans le point Preview mode chapit...

Page 30: ...est prise a La premi re cam ra est s lectionn e Pour s lectionner une autre cam ra appuyez sur la touche ou b Avec la touche ENTER on peut allumer et teindre le capteur pour la cam ra s lection n e Le...

Page 31: ...la touche MENU Si l cran affiche l image live d une cam ra les symboles suivants peuvent s afficher en fonction des r glages symbole pour un d tecteur de mouvements activ symbole pour le mode d crase...

Page 32: ...he aller de nouveau la page pr c dente Pour voir ap puyez sur la touche ENTER 6 Lorsque vous regardez une photo on peut les feuilleter dans le dossier avec les touches et Lorsque vous regardez un enre...

Page 33: ...ssion 2 4 GHz Puissance d mission 10 mW Temp rature fonc 0 40 C Moniteur avec enregistreur Ecran TFT LCD R solution 480 234 points Diagonale cran 17 8 cm 7 Format 16 9 Compression vid o M JPEG Taille...

Page 34: ...ini delle telecamere possibile vedere i seguenti simboli a Simbolo dell antenna con indicazione della potenza del segnale della telecamera b Modo di visualizzazione M selezione manuale di una telecame...

Page 35: ...liere una possibilit d impostazione 4 se in corso la riproduzione di una registra zione per attivare l avanzamento o ritorno veloce 5 se stata attivata la funzione zoom per spo stare la sezione dell i...

Page 36: ...anto pos sono essere impiegate anche all esterno Se la luce insufficiente le telecamere passano al fun zionamento in b n e i 24 LED a infrarossi illuminano un settore fino a 10 m La portata dipende fo...

Page 37: ...amera side 30 8 Entro 30 secondi premere il tasto Pairing 23 sulla telecamera Il numero sotto il messaggio indica il tempo restante in secondi In questo modo la telecamera assegnata al canale sele zio...

Page 38: ...sistema 1 Chiamare il sottomen System Setup MENU ENTER 2 selezionata la prima voce del men Preview mode Con il tasto o selezionare la rap presentazione dell immagine dal vivo Single rappresentazione...

Page 39: ...sto MENU 7 Sorveglianza dal vivo Funzione interfono 1 Finch non chiamato nessun men e non si guarda nessuna registrazione lo schermo fa vedere un immagine dal vivo secondo le impo stazioni nella voce...

Page 40: ...una foto a selezionata la prima telecamera Per sce glierne un altra premere il tasto o b Con il tasto ENTER si pu attivare e disatti vare il sensore per la telecamera selezionata ll relativo simbolo d...

Page 41: ...le impostazioni possono apparire i seguenti simboli Simbolo per il sensore di movimento atti vato Simbolo per il modo di sovrascrittura Simbolo dell orologio se programmata una registrazione temporizz...

Page 42: ...gina precedente Per guardare premere il tasto ENTER 6 Mentre si guarda una foto con i tasti e possibile sfogliare le foto nella cartella Riproducendo una registrazione video in alto nell immagine visu...

Page 43: ...cizio 0 40 C Monitor con registratore Schermo TFT LCD Risoluzione 480 234 pixel Diagonale dello schermo 17 8 cm 7 Formato 16 9 Compressione video M JPEG Dimensione max di una scheda di memoria 32 GB U...

Page 44: ...MONACOR INTERNATIONAL GmbH Co KG Zum Falsch 36 28307 Bremen Germany Copyright by MONACOR INTERNATIONAL All rights reserved A 1310 99 01 03 2012...

Reviews: