


3
OPERATION OF THE CamIO
3.1
Activating the CamIO
Once the CamIO and the MOBOTIX camera have been properly installed (see
chapter 2), you can set up the camera for proper operation. To begin with, it is nec-
essary to establish the power supply of the CamIO (either 230 V/115 V directly or in-
directly via the network cabling using a PoE switch).
Once the power supply to the CamIO has been established, the connected MO-
BOTIX camera should also have power and you should be able to access the cam-
era from any browser via the network (chapter 3,
Operating the Camera, of the cor-
responding
Camera Manual contains more information on this topic).
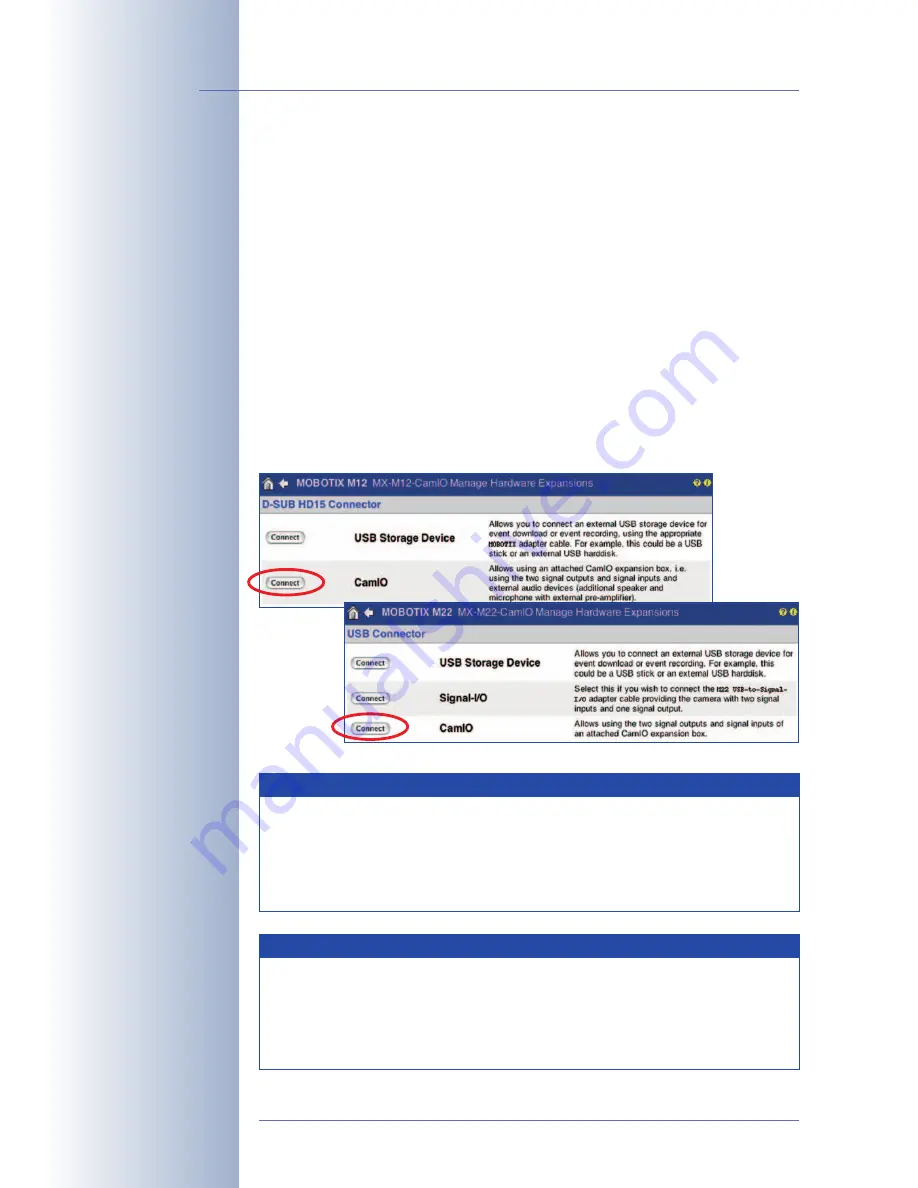
After you have established the connection to the camera (Live screen in the
browser window), you need to activate the CamIO in the camera software (
Admin
Menu > Manage Hardware Expansions
). Activating the CamIO is a mandatory
step for using all features of the CamIO.
© MOBOTIX AG • Security-Vision-Systems • Made in Germany
www.mobotix.com • [email protected]
42
/56
MOBOTIX CamIO User Manual
MOBOTIX M12 Cameras
MOBOTIX
M22M Cameras
Hint
To test the CamIO for proper operation with a MOBOTIX M12, simply
check if the additional speaker in the foot of the wall mount works (
Ad-
min Menu > Loudspeaker and Microphone > Audio Output
). When
clicking on the
Test
button, you should hear the alarm from the cam-
era speaker and the additional speaker of the CamIO.
Note
In order to use all features of the CamIO, make sure that you are
activating it in the camera software (Admin Menu > Manage
Hardware Expansions). Please note that you will need a software
version 3.3.1.x or higher on the MOBOTIX M22M and a software
version 3.1.0.x or higher on the MOBOTIX M12.


