i-Sat
Mounting and usage instructions
Page 8 of 12
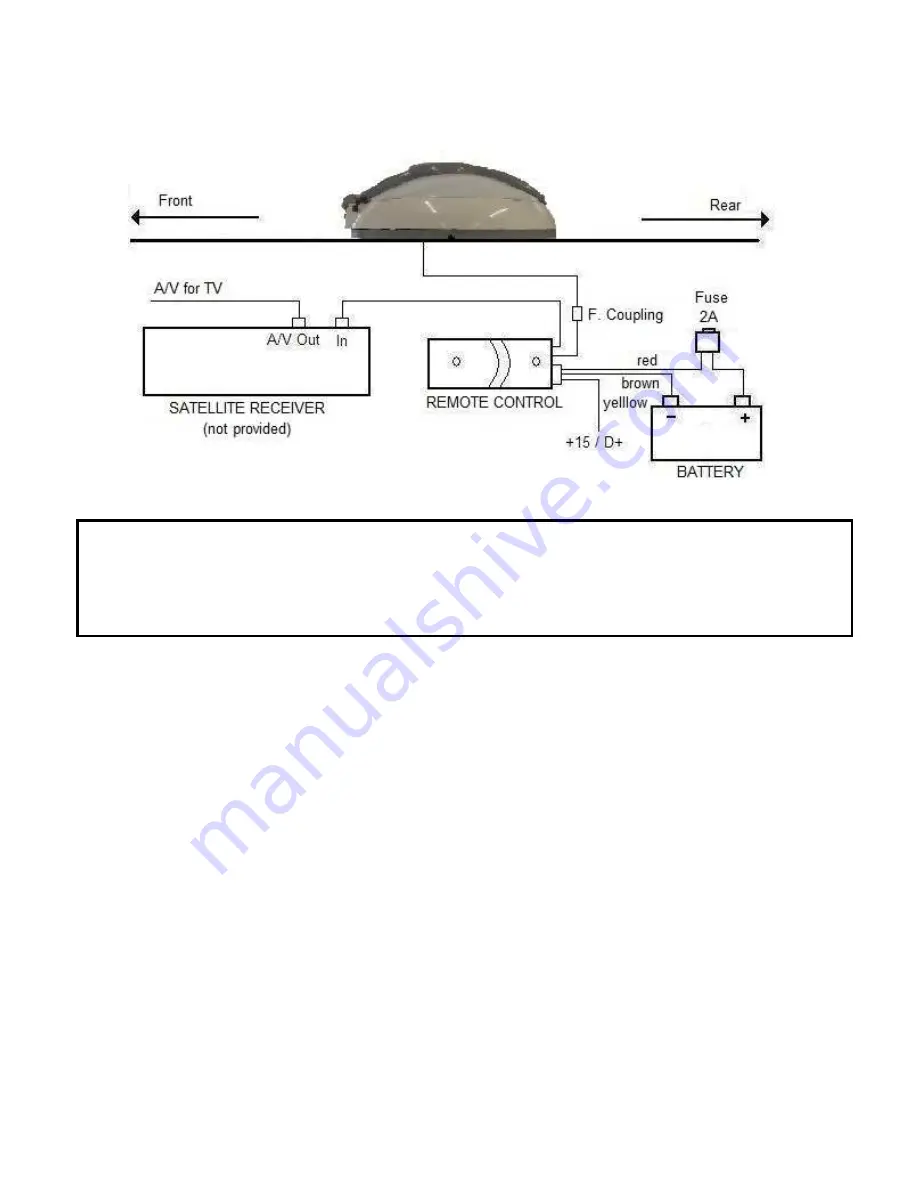
In the following picture is displayed the electric diagram:
6.1.7.
Protection circuit
IMPORTANT
In order to avoid damages by inadvertently driving with the external unit folded-up, connect the
yellow cable to the +15 vehicle line or the D+ line that carries voltage when the engine is on and
no-voltage when the engine is switched off. In this way the external unit will be automatically
retracted when the caravan engine will be switched on.
6.1.8.
Connection to the satellite receiver
connect the antenna system to the satellite receiver, using the male F-connector cable coming
from the remote control. Now the system can be considered as completely mounted
6.1.9.
Dismounting of the antenna
When needed (e.g. caravan parked under the trees or an obstacle present in the satellite
direction) it is possible to quickly dismount the antenna from the fixing plate, and to position it in
a point where the satellite signal can be received better.
Execute the following steps:
-
Unscrew the screw that blocks the antenna to the fixing plate
-
Turn the antenna 10 degrees clockwise
-
Raise it taking care of do not exceed in the movement, to avoid to rip the connection
cable
-
Unscrew the F connector, using the 11mm key supplied with the system
Now the antenna can be positioned where desired, taking care of placing it horizontally and to
connect it to the remote control using a good quality 75Ohm satellite cable equipped with a F
connector.
In these cases the antenna can be mounted on a tripod, available as option, equipped with a
fixing plate identical to the one mounted on the roof of the caravan.


