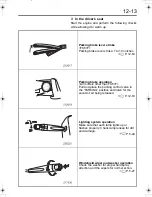
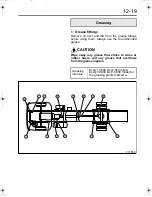
background image

12-4

Simple inspection and service

      CAUTION

Do not climb onto the engine. Stepping on

engine pipes or accessories could cause

damage and malfunctions.

Always use genuine parts for replacements

such as filters or filter elements. Also, oil

and grease should be those recommended

in this manual.

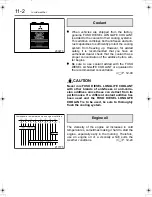
 P. 14-3

Use of non-genuine parts, or oil and grease

not recommended by Mitsubishi, may lead to

failures.

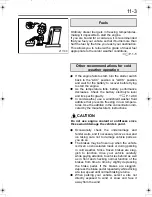
When replacing the oil or coolant, be sure to

have a container suitable for catching

drained fluid ready.

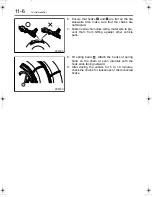
Dispose of drained oil and coolant in the

specified manner. Disposing of them irre-

sponsibly could cause environmental harm.

The DPF contains a catalytic converter. Do

not kick or knock the DPF since the inside

catalyst and ceramic filter could be dam-

aged.

Water collecting in the DPF is slightly acidic

and should not be touched. If you touch this

water, rinse it off under a faucet.

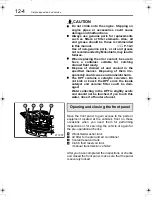
Open the front panel to gain access to the parts or

equipment located at the vehicle’s front on those

occasions when you need them for performing

inspections or for servicing the vehicle or again for

the pre-operational checks.

Windshield washer tank

Air filter for heater and air conditioner

Coolant reservoir tank

Clutch fluid reservoir tank

<manual transmission vehicle>

After you have completed the inspections or checks

and closed the front panel, make sure that the panel

is securely locked.

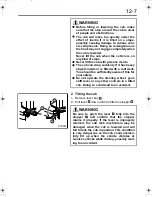
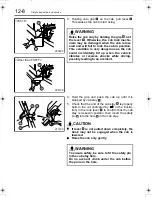
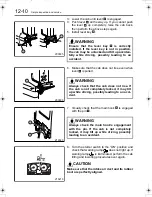
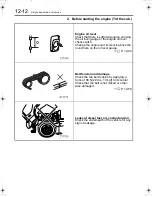
Opening and closing the front panel

Z17287

FKFM.book  Page 4  Wednesday, January 28, 2009  9:21 AM

Summary of Contents for Fuso FK 2010

Page 1: ...Owner s Manua l Owner s Manual 2010 Model 2010 Model ...

Page 2: ...OWNER AND VEHICLE INFORMATION OWNER NAME USER COMPANY NAME MAILING ADDRESS CITY STATE ZIP VEHICLE IDENTIFICATION NUMBER DATE OF DELIVERY WARRANTY START DATE MO DAY YR SELLING DEALER IMPRINT HERE ...

Page 3: ......

Page 4: ...ve your vehicle safely and comfortably As improper use of the vehicle may result in a breakdown or cause an accident we urge you to read this manual thoroughly before operating the vehicle Please keep this manual in the vehicle so it is always available for reference If you sell the vehicle make sure the next owner receives this manual and is aware of its contents 2009 Mitsubishi Fuso Truck Bus Co...

Page 5: ... the following four headings which identify the nature of the instructions and infor mation Q California Proposition 65 Warning DANGER Precautions that should be taken when handling danger ous substances such as battery fluid in order to prevent a serious injury WARNING Precautionary instructions which if not observed could result in serious injury or death CAUTION Precautionary instructions which...

Page 6: ...6 1 7 Starting and driving 7 1 8 ABS driving hints 8 1 9 Heating and air conditioning 9 1 10 Interior equipment and accessories 10 1 11 In cold weather 11 1 12 Simple inspection and service 12 1 13 Useful advice for emergencies 13 1 14 Service data 14 1 15 Maintenance schedule 15 1 16 Alphabetical index 16 1 17 Maintenance record 17 1 Each chapter has a table of contents on its first page ...

Page 7: ......

Page 8: ...d engine numbers 1 2 Powerline label 1 2 Vehicle identification number VIN 1 3 Maintenance 1 4 Fuels 1 5 Handling of the new vehicle 1 8 Reporting safety defects 1 9 Obtaining service 1 9 1 Recommendation to drivers ...

Page 9: ...is indicated on the left side of the crankcase The powerline label located in the position shown indicates the vehicle model chassis number and information relevant to the vehicle s power trans mission components Chassis and engine numbers Powerline label Z17218 Example FK61FJ Vehicle model Chassis number Z13844 Example 6M6 Engine number Engine model Z17219 ...

Page 10: ...0 lbs Full air H 19 501 to 26 000 lbs Full air Line F FK61F J FM65F K FK62F L FK65F Series Wheel base F 3 5 to 3 79 m 11 48 to 12 43 ft J 4 4 to 4 69 m 14 43 to 15 38 ft K 4 7 to 4 99 m 15 41 to 16 37 ft L 5 0 to 5 29 m 16 40 to 17 35 ft M 5 3 to 5 59 m 17 38 to 18 33 ft P 5 9 to 6 19 m 19 35 to 20 30 ft S 6 2 to 6 59 m 20 34 to 21 62 ft Cab chassis type and make 1 Chassis cab for Mitsubishi Fuso ...

Page 11: ...on and adjustments to compensate for the initial run in of various parts When the distance has been reached have your vehicle inspected by an autho rized dealer by showing them this Owner s Manual 2 Pre operational check Make a habit of checking your vehicle at the start of every day s operation This will ensure safe and comfortable operation P 12 11 3 Periodic inspection In addition to maximizing...

Page 12: ...eputable fuel oil supplier Both fuel suppliers and users are responsible for keeping fuel clean 2 Diesel fuel to be used in your engine Use only a ultra low sulfur diesel fuel with a sulfur content of 15 ppm or lower for refueling your Mitsu bishi Fuso diesel engine Otherwise the catalyst inside the diesel particulate filter DPF will not work effectively and the DPF s performance of removing small...

Page 13: ... the engine will result due to a reduced cetane number CAUTION The lower the cetane number the more likely internal engine damage will occur If dirt blocks the fuel tank breather air hole the tank may deform and the fuel injection system may fail Be sure to clean them regu larly 5 Refueling DANGER NEVER MIX DIESEL FUEL WITH GASO LINE GASOHOL OR ALCOHOL USE OF FUEL MIXED WITH ONE OR MORE OF THESE C...

Page 14: ...mpty tank could cause damage to the fuel injection sys tem NOTE Air will be present in the fuel system after the engine has run out of fuel This air will prevent the engine from restarting even after it is adequately refueled You must bleed the fuel system before the engine can be started P 13 26 Fuel tank capacity 200 liters 52 8 gallons WARNING If you inadvertently put gasoline in the fuel tank ...

Page 15: ...ure to give the dealer this manual at that time During the initial run in period oil is quickly contam inated Replace the following oils at the time of the new vehicle inspection At 4 000 km 2 500 miles Engine oil Manual transmission gear oil Axle housing gear oil 2 Maximum engine speed during run in period To avoid overburdening the new engine limit engine RPM to those listed below for the first ...

Page 16: ...icle safety from the Vehicle Safety Hotline For further information please visit the following NHTSA website http www safercar gov At Mitsubishi Fuso Truck of America Inc MFTA we are proud of the quality and workmanship that is built into every MFTA Truck We are equally proud of our corporate commitment to promote the highest possible degree of customer satisfaction with our products and services ...

Page 17: ...ter the completion of Step 1 and in the event that your nearest Authorized Dealer has been unable to satisfactorily resolve the problem please contact MFTA s Customer Service Representative at 1 877 711 0707 Please be prepared to provide the following infor mation when you call Your Name Company Name Address Tele phone Number Vehicle Model Vehicle Model Year Vehicle Identification Number Mileage N...

Page 18: ...2 1 Locations in cab 2 3 Locations outside cab 2 4 2 Warning labels ...

Page 19: ...inform an authorized dealer The warning and caution labels apply only to the vehicle itself not to any equipment mounted on the vehicle For information on cau tion and warning labels that apply to equipment mounted on the vehicle please refer to the Owner s Manual supplied by the manufacturer of the equipment The caution and warning labels are located in the cab as shown below Samples of these lab...

Page 20: ...ion vehicles Fuse Starting the engine while the cab is tilting Automatic transmission Towing Automatic transmission vehicles Parking brake To shift into the P position Automatic transmission vehicles DPF system DPF system Tire and rim Height control Air suspension vehicle Fuel Z19711 ...

Page 21: ...ations outside cab Clutch fluid Manual transmission vehicles Tilting the cab Wiper linkage Fuel Fuel High voltage Tilting the cab Engine oil Connectors for body lights and van body dome lights No step Other than FK61F Z18706 ...

Page 22: ...smission oil cooler Battery FK FM Battery Air cleaner Starting the engine Starting the engine High current fuses High current fuses FM65F automatic transmission vehicles Other than FK61F Brake chamber Air cleaner Z18707 ...

Page 23: ......

Page 24: ...3 1 Starter key 3 2 Doors 3 2 Central door locks 3 4 Keyless entry system 3 5 Entering and leaving the vehicle 3 11 Door window glass 3 12 Rear quarter window 3 14 3 Opening and closing ...

Page 25: ...ors are com pletely closed before starting Exercise caution when opening a door in strong wind Otherwise the wind could catch the door and suddenly blow it open Exercise caution when opening a door on a downward slope Otherwise the inclina tion of the vehicle could cause the door to suddenly fall open When leaving the vehicle take with you any children or pets who were riding in the cab Never leav...

Page 26: ...he button close the door NOTE When you lock the driver s door using the starter key or by lowering the lock knob the passen ger s door is automatically also locked When you leave your vehicle be sure to remove the starter key from the starter switch and lock all doors to prevent theft Be careful not to lock the doors with the starter key inside the vehicle 2 From the inside To close pull door wais...

Page 27: ...K side of the switch is pressed both doors are locked When the UNLK side of the switch is pressed both doors are unlocked When the lock knob on the driver s door is lowered the passenger s door is also automati cally locked If the lock knob on either door is subsequently lifted only that door is unlocked When the driver s door is locked from the out side using the starter key the passenger s door ...

Page 28: ...FCC Rules Operation is subject to the following two conditions This device may not cause harmful interference This device must accept any interference received including interference that may cause undesired operation 3 Changes or modifications not expressly approved by U shin could void the FCC compli ance and negate your authority to operate the product Keyless entry system ...

Page 29: ... FCC Rules Operation is subject to the following two conditions This device may not cause harmful interference This device must accept any interference received including interference that may cause undesired operation 2 Changes or modifications not expressly approved by U shin could void the FCC compli ance and negate your authority to operate the product ...

Page 30: ...remote control switch Point the remote control switch toward the cen ter of the cabin Operate the remote control switch within 3 m 9 8 ft from the center of the cabin Press the LOCK button to lock all doors Press the UNLOCK button once to unlock the driver s door You can unlock the assistant driver s door if you press the UNLOCK button one more time within 3 seconds NOTE The assistant driver s doo...

Page 31: ...e and the room lamp lights up for about 10 seconds If you do not open a door within 30 seconds after unlocking with the remote control switch the doors will automatically be locked again NOTE The range in which you can operate the remote control varies somewhat depending on the sur roundings such as proximity to a TV tower power station broadcasting station etc If you lose the remote control switc...

Page 32: ...or insulation so that the battery cannot contact other metal objects or be exposed to water Do not expose the inside of the remote con trol switch to water and keep it away from dirt and dust Otherwise the switch could fail 1 Use a crosshead screwdriver to turn the screw and remove the cover If the cover is difficult to open insert a flat blade screwdriver into the slot to pry the cover open WARNI...

Page 33: ...r with the mark on the battery facing up Then install the battery holder in the cover with the mark on the battery facing against the mark on the cover 4 Fit the cover on the remote control switch and fasten it with the screw 5 Operate the remote control switch and check that it works correctly Z17228 Z17229 ...

Page 34: ...u could slip when climbing down from the vehicle or when operating the brake or clutch pedal Wipe any oil and grease off the soles of your shoes before entering or leaving the vehicle When putting your foot on the step make sure your body is supported in three places for safety Do not hold luggage or other items in your hands when entering or leaving the vehi cle since this can be dangerous Do not...

Page 35: ...ead outside a window or let anyone in your vehicle do so Serious injury could result from exter nal objects or in the event of sudden brak ing Be particularly careful when carrying a child in your vehicle Always make sure that no one has their head or hands out of the window when closing it A body part could be injured if caught in a closing window Never allow a child to open or close the window W...

Page 36: ...er s window Press the switch to open the window Raise the switch to close the window 2 Power window lock switch Press the power window lock switch to prevent the assistant driver s window from being opened or closed Pressing the switch a second time releases the lock CAUTION Do not keep any door or window open in rainy weather and be careful not to spill a drink on any of the window switches If wa...

Page 37: ...3 14 Opening and closing Pull latch and push it outward to open Rear quarter window Z14188 ...

Page 38: ...4 1 Seats 4 2 Seat belts 4 5 Steering wheel 4 9 4 Seat and steering wheel adjustments ...

Page 39: ...ectly P 4 5 Adjust the steering wheel to a position at which you can operate it comfortably with your arms slightly bent P 4 9 Seats WARNING Avoid adjusting the seat while the vehicle is moving since the seat may move more than you intend and cause an accident by impeding operation of the vehicle Be sure to stop the vehicle and set the parking brake before performing any adjustment of the seat Aft...

Page 40: ...ull the reclining lever and set the seatback at the desired angle 2 3 Seat height adjustment The seat rises or lowers by one step every time you pull up or push down the height adjustment lever To raise To lower WARNING When adjusting the recline angle sit back against the seatback or place your hand on it Unless restrained the seatback could return forward suddenly and injure your face or other b...

Page 41: ...n 3 Assistant driver s seat To adjust the angle of the seatback of the assistant driver s seat move reclining lever NOTE The forward backward adjusting feature is not adjustable on the assistant driver s seat WARNING During vehicle operation the seatback must not be reclined further than neces sary In the event of sudden braking the occupant could slide forward and suffer severe injuries When adju...

Page 42: ...on Unless seated and properly belted up the risk of injury is greatly increased Seat belts should be worn as low as possi ble over the hips Wearing a seat belt across the abdomen could be dangerous since undue pressure would be placed on internal organs in the event of a collision Make sure that the seat belt is not twisted when fastening it A twisted seat belt could be dangerous since its reduced...

Page 43: ...roperly tightened the risk of it slip ping off in a collision is reduced Fastening 1 Hold tang and gently extend the belt If the belt locks or is difficult to extend let it retract and pull it gently again 2 Take care that the belt does not become twisted Insert the tang into the buckle until you hear a click 3 Pull on the tang to confirm that it is locked in 4 Adjust the belt so it is across your...

Page 44: ...eel on the seats For maximum safety we recommend fitting and using a restraint system that complies with Fed eral Motor Vehicle Safety Standards The use of child and or baby restraint systems is mandatory in some states Please abide by your state s regulations Older children may sit on the regular seats and use the regular seat belts However make sure that the shoulder belts do not cross their nec...

Page 45: ... cut rayed or other wise damaged Replace any seat belt that has received a shock due to a collision Keep sharp or other potentially damaging objects away from the seat belts especially the webbing Keep the seat belts clean and dry Use a mild soap and lukewarm water to clean seat belts Such solvents as gasoline and thinner may seri ously affect the strength of webbing Never attempt to bleach or dye...

Page 46: ... adjustments firmly push the lock lever down to lock the steering wheel in position Steering wheel WARNING After every adjustment try to move the steering wheel back and forth to make sure that it is securely locked Unless the lever returns to the locking position the steering wheel may move while the vehicle is in motion and cause an accident Adjusting the steering wheel while driving is dangerou...

Page 47: ......

Page 48: ...dals 5 13 Gearshift lever 5 14 Allison automatic transmission 1000RDS 2200RDS 5 15 Allison automatic transmission 3000RDS series 5 19 Parking brake 5 22 Combination switch 5 24 Van body dome light switch 5 28 Brightness control switch 5 29 Cruise control 5 29 Air suspension height control 5 34 DPF cleaning switch 5 36 5 Switches and controls ...

Page 49: ... Combination switch Van body dome light switch Brightness control switch Cruise control main switch Power mode switch other than FM65F Height control switch Air suspension vehicle Oil level check switch P 12 25 DPF cleaning switch Central door locking switch P 3 4 Overdrive switch Arrangement of switches and controls Manual transmission vehicles Z17107 Automatic transmission vehicles Z17108 ...

Page 50: ...er If the engine stops while the vehicle is on the road turning the starter switch to the S position will have no effect Starter switch WARNING Never turn the starter switch to any position other than the ON position while driving the vehicle Turning the starter switch to the ACC position would be dangerous because the engine would stop and the following problems would occur The compressed air use...

Page 51: ...eel locks The light switch brightness control switch haz ard warning lamps interior lamp personal lamp horn and central door lock can be used ACC The engine is shut off or is not running in this position The turn signal lamp wipers washer power windows and cigarette lighter can be used Any audio system such as a radio that has been installed in the vehicle and correctly wired can also be used ON T...

Page 52: ...n monox ide CO which if breathed can cause unconsciousness or death If you smell exhaust gases inside the cab inspect the exhaust pipe and check whether exhaust gases are leaking through holes or cracks caused by corro sion or damage If exhaust gases are leak ing have the exhaust pipe inspected by an authorized dealer If exhaust gases that have leaked from the exhaust pipe come into the cab ventil...

Page 53: ...t start in cold weather check if the preheating circuit fuse has blown P 13 10 On a vehicle that has not been operated for a long period or after replacement of engine oil or engine oil filter element be sure to crank the engine before turning it over P 5 8 1 Pre starting steps 1 Pull parking brake lever or parking brake control valve to fully apply the parking brake 2 Manual transmission vehicle ...

Page 54: ... only when absolutely necessary for example if the engine stops while the vehicle is on a railroad crossing In an automatic transmission vehicle of the FM65F the engine cannot be started unless the range selector lever is in the N position 2 Starting procedure 1 Turn the starter key to the ON position NOTE If a buzzer sounds when the starter key is turned to the ON position activate the parking br...

Page 55: ...thod to distribute oil throughout the engine CAUTION For safety apply the parking brake fully and chock the wheels to prevent the vehicle from moving Cranking the engine as described here is essential for protection of the turbocharger 1 Pull the parking brake lever or knob to fully apply the parking brake 2 Manual transmission vehicle Place the gearshift lever in the neutral position On automatic...

Page 56: ... other than FM65F check that the range selector lever is in the P position With the FM65F automatic transmission vehicle check that the range selector lever is in the N position Place the starter switch in the S position to start the engine Do not drive the vehicle immediately after starting the engine Allow the engine to warm up at least until the needle moves in the water temperature gauge The e...

Page 57: ... or entering or leaving a garage do not run the engine for longer than is nec essary as the accumulation of exhaust gas in closed areas is very dangerous Exhaust emissions contain carbon monox ide CO which if breathed can cause unconsciousness or death If you smell exhaust gases inside the cab inspect the exhaust pipe and check whether exhaust gases are leaking through holes or cracks caused by co...

Page 58: ...d remove your foot from the clutch pedal 2 Continue warming up the engine until the water temperature gauge needle moves Stopping the engine WARNING Never allow the vehicle to coast with the engine stopped as braking may be ineffec tive and steering difficult when engine is not running This may also cause trouble in the fuel injection system The engine and exhaust pipe are extremely hot just after...

Page 59: ...he posi tion between the ACC and LOCK posi tions marked with a 1 Apply the parking brake while depressing the brake pedal 2 Manual transmission vehicle Place gearshift lever in the neutral position Automatic transmission vehicle Place range selector lever in the P position other than FM65F or N position FM65F 3 Allow the engine to idle for more than 3 minutes before stopping it When the vehicle is...

Page 60: ...is dangerous for a floor mat to cover the accelerator pedal or for floor mats to be laid in multiple layers since the acceler ator pedal may be prevented from returning when released WARNING Do not allow the floor mat gravel or empty beverage cans or bottles to get under the brake pedal as they will interfere with brake pedal movement Keep the floor free of any objects obstructive to operation of ...

Page 61: ...e has come to a complete stop When backing up always double check to make sure that there is nothing in your path When the gearshift lever is in the neutral position never keep your hand on it Such forward or backward pressure on the lever could cause the transmission to malfunc tion especially if you use a gearshift lever extender because the gearshift lever is very likely to move even if the pre...

Page 62: ...dicator lamp Transmission fluid temperature warning lamp Transmission warning lamp Shift lock release button 1 How to use the range selector lever Allison automatic transmission 1000RDS 2200RDS WARNING When shifting from the P or N position to other positions be sure to keep the brake pedal depressed or set the parking brake Do not move the range selector lever to the D or R position when the engi...

Page 63: ...r lever in the P posi tion proceed as follows Depress the foot brake pedal to bring the vehicle to a halt then apply the parking brake Move the range selector lever from either the forward or reverse range which ever the gear is in at the time to the N posi tion Then finally move the lever to the P position until the lever cannot be moved any fur ther If this procedure is not followed the vehicle ...

Page 64: ... engine braking and long uphill driving The transmission will operate in the 4 speed mode 3 Power mode switch A choice of two driving modes is available to suit the road conditions and the load being carried Press the ON side of this switch to activate the power mode Pressing the OFF side of the switch will cause the transmission to revert to the normal mode The lamp inside the switch will light u...

Page 65: ...lamp This lamp illuminates when there is something wrong in the transmission s electronic control system If it illuminates when the starter key is moved to the ON position but then goes out after a few seconds this means the electronic control sys tem is working properly If the lamp illuminates while the vehicle is mov ing drive to a safe place and stop If the electronic control system fails the f...

Page 66: ... warning lamp Transmission warning lamp 1 How to use the range selector lever Range selector lever position Corresponding range gear in manual mode P Park R Reverse N Neutral D Fixed in 3rd 3 Fixed in 3rd 2 Fixed in 3rd L Fixed in 3rd Allison automatic transmission 3000RDS series WARNING When shifting from the N position to other positions be sure to keep the brake pedal depressed or set the parki...

Page 67: ...regular idling speed before placing the range selector lever in the D or R position If you try to move the range selector lever to the D or R position while the engine is running faster than a regular idling speed or the vehicle is in motion the safety system may cause the transmis sion to remain in neutral If this happens a buzzer will sound and you must then perform the range selector lever oper...

Page 68: ...ion 1 Check that the electric fans on both sides of vehicle are operating 2 If the fan is not operating check the fuse replace it if blown P 13 10 Check the oil cooler for mud or other dirt and clean it if necessary P 12 87 3 Check the automatic transmission for fluid leak age If any leakage is found call an authorized dealer for repair Transmission warning lamp This lamp illuminates when there is...

Page 69: ...ning lamp does not go out or if it keeps illuminating from time to time the system needs repairing Contact an authorized dealer 1 Parking brake lever FK61F To set for parking The parking brake is activated when the parking brake lever is pulled At the same time indicator lamp lights up Parking brake WARNING Do not use the parking brake when driving except in an emergency link if the service brakes...

Page 70: ...ing brake control valve All models except FK61F To set for parking Pull knob of the parking brake control valve the rear wheels are blocked and the indicator lamp lights up To release Make sure that the warning lamp is not illumi nated Push the knob and confirm that the indi cator lamp goes out How to park P 7 13 CAUTION Brake line air pressure may temporarily drop after a release of the parking b...

Page 71: ... on for a long period without the engine running can drain the bat tery making the engine impossible to start NOTE Even when the vehicle is operated with the lighting switch in the OFF or position the daytime running light system causes the low beam head lamps to be lit The headlamps are dimmer than when activated using the lighting switch The indicator lamp is also lit When the parking brake is a...

Page 72: ... left turn the switch automatically moves back to the neutral position and the lamp stops flashing After making a moderate turn however the switch will some times not return automatically In this case put the switch in the neutral position by hand Lane changer Lightly pushing the lever forward or backward causes the corresponding turn signal lamp to flash while the lever is held in this position 5...

Page 73: ... parking The indicator however is not illu minated Pushing the lever forward activates the exhaust brake While the exhaust brake activated indicator lamp stays illuminated The exhaust brake is temporarily deactivated if any of the actions listed below are performed It will become active again as soon as the vehicle returns to its previous state Depressing the accelerator pedal Depressing the clutc...

Page 74: ... to the wind shield The wiper blades could get damaged and the wiper motor could fail When the wipers are not used for a long time dust sand and other substances can collect between the wiper blades and wind shield Clean the wipers before using them Otherwise the windshield may get scratched Operating the washer continuously for more than 20 seconds or when there is no fluid in the reservoir could...

Page 75: ...he washer fluid reservoir if the fluid level is low P 12 79 If there is washer fluid in the reservoir but none is sprayed when you operate the washer the nozzles may be blocked Clean the nozzles using a piece of thin wire If fluid is still not sprayed when you operate the washer have the vehicle inspected by an authorized dealer This switch operates the lighting inside the van body With the starte...

Page 76: ...ful for freeway driving that involves almost no chances of pulling over and stopping NOTE For the sake of safety do not use the cruise control in the following driving conditions In heavy traffic which does not allow sufficient vehicle to vehicle distance On roads with sharp turns or poor visibility On icy snow covered or otherwise slippery roads Steep downhill road The vehicle speed may become hi...

Page 77: ...o return to a previously memorized speed Cruise control indicator lamp If the cruise control is activated this lamp illumi nates during driving NOTE The indicator lamp will light up when the starter switch is turned to the ON position and the engine is not running It will go out in a few seconds if there are no problems 1 To set a desired speed 1 Check that the exhaust brake switch is in the OFF p...

Page 78: ...mission vehicle the selector lever must be in the D position Before pressing the ON side of the main switch to set a desired speed make sure the exhaust brake switch is in the OFF position You will not be able to set the speed if the exhaust brake switch is in the ON position When driving with the cruise control active exhaust braking can be used as usual but the cruise control function will be de...

Page 79: ...nt speed 3 To decrease the set speed in cruise con trol mode Turn the SET RESUME switch to the SET posi tion The vehicle will decelerate When the desired speed is reached release the switch The vehicle will cruise at the new lower speed 4 To accelerate temporarily in cruise con trol mode Depress the accelerator pedal as you do in normal accelerating When the pedal is released the vehi cle will cru...

Page 80: ...ing driving because engine braking will no longer be possi ble It will also cause malfunction of the auto matic transmission 6 To reactivate the temporarily deacti vated cruise control To reactivate the cruise control turn the SET RESUME switch to the RESUME position The indicator lamp will illuminate again and the vehicle will resume running at the set speed To reactivate the cruise control with ...

Page 81: ...vehicles It is possible to lower the cargo bed while the vehi cle is stationary This function can be used with the starter switch in ON or ACC position NOTE The height control switch should be turned off when adjustment of the cargo bed height is not being performed Compressed air will be required to move the cargo bed back to driving height It is important therefore that the engine be started up ...

Page 82: ...are per formed during the lowering process the cargo bed will automatically return to driving height The height control switch will automatically return to OFF The parking brake is released The starter switch is turned to positions other than ON or ACC The gear shift lever is moved out of neutral vehicle with manual transmission The range selector lever is moved out of the N or P range vehicle wit...

Page 83: ...eration is impossible this is called automatic DPF regeneration However the automatic DPF regeneration cannot work in such cases as extremely slow driving and fre quently repeated engine start and shutdown If the DPF is loaded with PM to its maximum capacity following these types of driving you must manually regenerate it after bringing the vehicle to a stop this is called parked DPF regeneration ...

Page 84: ...ng sound and when your vehicle is in park a rise in idling speed to approx 700 to 800 rpm accompanied by exhaust brake valve operation These do not indicate any abnormalities Exhaust temperature is higher when the auto matic DPF regeneration is taking place PM accu mulation Vehicle condition DPF regeneration inspection Ref page Small Large Normal speed driving During high speed or high load drivin...

Page 85: ...e indicator lamp to perform the parked DPF regeneration in order to remove the PM inside the DPF by oxidation Fast flashing 0 3 second interval You must bring the vehicle to a stop in a safe place as soon as possible then use the DPF cleaning switch to perform the parked DPF regeneration in order to remove the PM inside the DPF by oxidation 3 How to perform the parked DPF regener ation The parked ...

Page 86: ...smission or place the selector lever in the P position other than FM65F or N position FM65F if your vehicle is equipped with an automatic transmission Do not depress the accelerator pedal If you are in a manual transmission vehicle depress neither the accelerator pedal nor the clutch pedal 3 With the engine still in operation continuously press the ON side of the DPF cleaning switch until the indi...

Page 87: ... regeneration complete the remaining part of the sequence without delay by performing the above steps again 4 If the red warning lamp is illumi nated The red warning lamp will be illuminated if you continue to drive with the indicator lamp quickly flashing A red color warning lamp that remains illuminated while driving probably indicates a blocked DPF and or failure of the system Park the vehicle ...

Page 88: ...Arrangement of instruments and warning lamps 6 2 Speedometer 6 2 Tachometer 6 3 Air pressure gauge 6 3 Water temperature gauge 6 4 Fuel gauge 6 4 Warning indicator lamps 6 5 6 Instruments and warning lamps ...

Page 89: ...meter or TRIP trip meter reading Each time the trip knob is pushed the indica tion switches as shown in the illustration ODO odometer Indicates the total distance covered by the vehicle in miles TRIP trip meter Indicates the distance cov ered after the final resetting of the meter in one tenth miles The trip meter has TRIP A and TRIP B which operates independently The trip meter displayed can be z...

Page 90: ...he front brake line air pressure and the lower gauge indicates the rear brake line pressure Red zone indicates that air pressure is too low If the needle deflects into the red zone warning lamp lights up and a buzzer sounds Whenever the warning lamp illuminates pull off the road as soon as you can safely do so and let the engine rotate at a speed in the intermediate range until air pressure builds...

Page 91: ...etting it run at a speed slightly above the idling RPM until the coolant cools down Turning off the engine immediately after stopping will cause the coolant temperature to rise quickly and may cause the engine to seize up The fuel gauge indicates the amount of fuel still remaining in the fuel tank F Full E Empty When the needle approaches the E mark refuel as soon as possible P 1 5 CAUTION The fue...

Page 92: ... red warning lamps if illuminated warn you of vehicle component failures and possible dan ger of accident Never drive the vehicle while a red warning lamp is illuminated If any of them light up stop the vehicle as soon as it is safe to do so and make checks for locating the cause If necessary have your vehicle repaired by an authorized dealer Warning indicator lamps Z17297 Automatic transmission s...

Page 93: ...switch is operated 12 25 Brake warning lamp FK61F Brake fluid at an excessively low level Excessive brake shoe clearance 6 9 Air pressure warning lamp Low air pressure in air tank 6 10 Transmission fluid temperature warning lamp Automatic transmission vehi cles Automatic transmission fluid exces sively hot 5 18 5 21 Transmission warning lamp Automatic transmission vehi cles Fault in electronic con...

Page 94: ... Parking brake activated 5 22 Exhaust brake indicator lamp Exhaust brake activated 5 26 Engine preheat indicator lamp Engine being preheated 5 7 Overdrive OFF indicator lamp Allison automatic transmis sion 1000RDS 2200RDS series Overdrive switch OFF 5 17 Cruise control indicator lamp Cruise control activated 5 29 DPF indicator lamp Slow flashing 1 second interval DPF loaded with much PM 5 36 Fast ...

Page 95: ... down and then take necessary action against overheating P 13 9 CAUTION Be sure to stop the engine only after letting it run at a speed slightly above the idling RPM until the coolant cools down Turning off the engine immediately after stopping will cause the coolant temperature to rise quickly and may cause the engine to seize up If the water temperature gauge s needle does not point to the red z...

Page 96: ...d dealer 4 If fluid leaks are not detected fill with fluid to the normal level 5 If the lamp illuminates even when the brake fluid level is correct or after fluid has been added have the brakes inspected by an authorized dealer as soon as possible If the warning lamp illuminates when the brake pedal is depressed Brake shoe clearance the clearance between the brake drum and brake shoe lining is adj...

Page 97: ...ut if the engine is started 1 Let the engine run at an intermediate RPM until the warning lamp goes out 2 Check piping and its connections for air leaks 3 If the lamp does not go out or goes on again soon after it has gone out the system must be repaired Call an authorized dealer 5 Charge warning lamp The charge warning lamp lights up when the starter switch is turned to the ON position and goes o...

Page 98: ...lamp lights up when the oil filter element is clogged or the engine oil pressure becomes abnormally low Pull off the road as soon as it is safe to do so stop the engine and perform the following inspection NOTE The amber and red warning lamp will light up when the starter switch is turned to the ON posi tion and the engine is not running It goes out after the engine is started if there are no prob...

Page 99: ...nger and then restart the engine If the lamp stays off there is no problem If the lamp illuminates again stop the engine and contact the nearest authorized dealer The red lamp is also illuminated if you continue to drive while the DPF indicator lamp quickly flashes Illumination of this lamp may indicate a blocked DPF and or faulty DPF system If this lamp illumi nates during driving stop the vehicl...

Page 100: ...is started if there are no problems 8 Vehicle control warning lamp The vehicle control warning lamp lights up when problems occur in the vehicle s electrical control system If it lights up pull off the road as soon as it is safe to do so Place the starter switch to the ACC or LOCK position for more than five seconds then restart the engine If the warning lamp goes out there are no problems If it r...

Page 101: ......

Page 102: ...tions when driving a manual transmission vehicle 7 5 Precautions when driving an automatic transmission vehicle 7 6 Tips for improving fuel economy 7 7 Braking 7 7 On uphill and downhill roads 7 9 On rough roads and in bad weather 7 11 Parking 7 13 Loading cargo 7 15 7 Starting and driving ...

Page 103: ... Sudden starts place undue strain on the vehicle and should be avoided Also avoid slipping the clutch for extended periods since this can damage it In an automatic transmission vehicle depress the brake pedal and move the range selector lever out of the P or N position If the engine s idling speed is too high selecting the D or R ranges may make the vehicle lurch Normalize the engine s idling spee...

Page 104: ...e neces sary measures Contact an authorized dealer if the cause of the problem is unclear or if the problem requires complex repair work P 6 5 Precautions for driving WARNING Never place the starter switch in any position other than the ON position while operating the vehicle If you turn the starter switch to the ACC position the engine will stop This is highly dangerous If the engine stops during...

Page 105: ...and other vehicle parts Allow yourself enough time that you do not need to push the vehicle too hard Perform your pre operation checks with particu lar care when you expect to drive at high speeds When continuously driving at high speeds your sense of speed may become dull Pay constant attention to your speed and maintain an ade quate distance from the preceding vehicle If a tire bursts or gets pu...

Page 106: ...tion from the vehicle and from the vehicle and from the road ahead resulting in an accident Operate the radio and other items of equipment in the cab when the vehicle is stationary It is dangerous to operate such items of equipment or use a carphone other than a hands free type while driving Do not allow a child to touch the driver s controls and other equipment A child s interference could cause ...

Page 107: ...ition to D On FM65F it is also possible to pull away using the range selector lever in the same way as a manual gearshift lever starting in 1 then upshifting position by position to D Do not push the range selector lever into the N position while the vehicle is in motion This would make engine braking and exhaust braking impossible and force you to overuse the service brakes It could also damage t...

Page 108: ...ating RPM 1 400 rpm Moreover unnecessary acceleration and deceleration wastes fuel Do not keep the exhaust brake switch in the activation position at all times Frequent use of the exhaust brake reduces fuel economy Move the exhaust brake switch between the activation and non activation positions as necessary for road and traffic conditions Always keep the air pressure in tires correctly adjusted T...

Page 109: ...t the point at which you wish to come to a halt Do not pump the brake pedal as doing so reduces the air pressure which in turn could reduce braking power Using the exhaust brake on a wet frozen snow covered or otherwise slippery road surface when the vehicle is lightly loaded or not loaded can cause the tires to slip on the road surface resulting in a skid Do not use the exhaust brake on slippery ...

Page 110: ...ll roads Downshift early when the speed begins to drop to minimize the load on the engine With an automatic transmission vehicle down shifting can be performed either with the range selector lever or by depressing the accelerator pedal hard If you depress the accelerator pedal to maintain a constant speed when driving uphill the transmission may shift down and the engine speed increase On uphill a...

Page 111: ...o 2 or 1 position On slippery roads avoid sudden engine braking since this could cause a skid Never coast downhill with the gearshift lever in neutral manual transmission vehicles or the range selector lever in the N position auto matic transmission vehicles Doing so makes both engine braking and exhaust brake inopera tive which in turn excessively burdens the ser vice brakes This also causes the ...

Page 112: ...ailure Use a low gear and try to drive at a constant speed when driving on gravel roads or muddy roads Do not race the engine when attempting to move out of mud Racing the engine is useless and even worsens the condition as the spinning wheels will make ruts deeper Instead place thick waste cloth gravel or the like under tires and engage the 1st and reverse gears alter nately or in an automatic tr...

Page 113: ... while paying careful attention to sur rounding traffic and keeping light pressure on the brake pedal to dry the brake shoes and drums Avoid driving when the road is covered with much water because of torrential rain or other causes Should your vehicle be soaked by water have it inspected by an authorized dealer as soon as possible If water gets into the engine it can cause engine damage If water ...

Page 114: ... shift lever while sleep ing Also you could suffer carbon monox ide poisoning from exhaust gases if the vehicle is parked in a closed space Never leave lighters cans of carbonated drink and spectacles in the cabin when parking the vehicle in hot sunshine The cabin will become extremely hot so light ers and other flammable items may catch fire and unopened drink cans including beer cans may rupture...

Page 115: ... out of the P posi tion and back to other ranges CAUTION Do not park the vehicle only by setting the range selector lever to the P position Be sure to also apply the parking brake at the same time On a vehicle with automatic transmission FM65F apply the parking brake and then set the range selector lever to the N posi tion 3 Stop the engine by turning the starter switch to the ACC position P 5 11 ...

Page 116: ... may exceed the GVWR For example a vehicle with a GVWR of 23 000 lb 10 430 kg has a front GAWR of 7 935 lb 3 600 kg and a rear GAWR of 15 800 lb 7 165 kg Added together the GAWRs total 23 735 lb 10 765 kg thus exceeding the GVWR Be sure neither the GAWRs nor GVWR are exceeded 2 How to load cargo Improperly loaded cargo not only is unstable but also may result in uneven weight distribution which co...

Page 117: ...ent cargo from falling strap it down securely and cover it with a tarpaulin Secure the tarpaulin ends neatly so they do not flap WARNING When roping up cargo or covering it with a tarpaulin make sure that neither the rope nor the end of the tarpaulin hang down between the cab and the cargo deck as a loosely hanging rope or tarpaulin could catch fire from the engine heat When spreading the tarpauli...

Page 118: ...8 1 Anti lock brake system ABS 8 2 ABS warning lamp 8 4 8 ABS driving hints ...

Page 119: ...the vehicle ahead regardless of whether your vehicle is equipped with an ABS or not Also the braking distance of an ABS equipped vehicle on gravel or heavily snow covered roads may be longer than that for a vehicle without an ABS On these roads therefore be sure to drive at reduced speeds Also avoid sudden maneu vering or braking on such roads to prevent colli sion with the vehicle behind you Driv...

Page 120: ...r in a way which requires quick operation of the steering wheel There is likelihood of skidding due to the effect of engine braking on slippery surfaces when the vehicle carries little or no load In such a situa tion it is recommended to depress the clutch pedal first and then the brake pedal If cargo is loaded only on the back half of the cargo bed the rear wheel brakes must share an extremely la...

Page 121: ...nd not oper ate properly If illuminated this lamp indicates that there is a mal function in the anti lock brake system ABS Should this lamp illuminate during driving stop the vehicle in a safe place and perform the following inspection NOTE The ABS is normal if the warning lamp lights up when the starter switch is turned on and goes out approx 2 seconds later 1 Turn off the engine then set the ign...

Page 122: ...e faulty have the sys tem repaired by an authorized dealer as soon as possible NOTE Even with the ABS faulty and the warning lamp remaining lit the normal brake system is still func tioning satisfactorily Only the ABS function is lost ...

Page 123: ......

Page 124: ...9 1 Heater 9 2 Air conditioner 9 7 9 Heating and air conditioning ...

Page 125: ...vailable until the coolant temperature becomes sufficiently high 1 Control panel Fan speed dial Temperature control dial Mode selector dial Air selector switch Fan speed dial Fan speed dial allows you to select 4 fan speeds Select the desired speed 0 Turned off 1 Breeze 2 Weak 3 Medium 4 Strong Heater Z17375 Z17375 Z13757 ...

Page 126: ...djust the air flow by moving the lever right or left or shut off the airflow by moving the lever to the position Lever posi tion Air outlets Purpose B Fresh air to head B A Warm air to feet and relatively cooler air to head A Warm air to feet A C Most air to feet and remaining air to windshield defroster A C Air to feet and through the defroster to windshield C D Warm air to windshield and door wi...

Page 127: ...n you want to heat the cab quickly or the outside air is dusty or polluted If the air selector switch is left too long in the recirculation position the windshield and win dows will fog up so set the switch to the outside air position during normal driving You can also select the recirculation position when parking to stop dust from getting inside the cab 2 Heating Warm air is directed to your fee...

Page 128: ...e of the air from both outlets 4 Defrosting Warm air is directed toward the windshield and door windows Select the high blower speed if you need to defrost quickly To remove frost or ice on the outside surface of the windshield glass press the air selector switch to ON the indicator comes on When mode selector dial is placed in the position warm air is directed to feet in addition to the windshiel...

Page 129: ...he heater is not used turn the fan speed dial to the 0 position Pressing the air selector switch to ON the indicator comes on will prevent dust from enter ing the cab 7 Cleaning the air filter Clean the air filter every 6 months A dust clogged air filter may cause a blower motor malfunction P 12 85 Z17359 Z17360 ...

Page 130: ...tioner WARNING Never leave children alone in the vehicle In hot weather or when the vehicle is parked under the sun the temperature inside the vehicle may become extremely high and can cause heat stroke Even if the air condition ing is left on the temperature inside the vehi cle will rise rapidly if the system stops functioning This is very dangerous to chil dren ...

Page 131: ...air conditioner switch turns on the air con ditioner for cooling and dehumidifying When the air conditioner is on the indicator lamp inside the switch stays illuminated To turn off the air conditioner press switch a second time Fan speed dial Fan speed dial allows you to select 4 fan speeds Select the desired speed 0 Turned off 1 Breeze 2 Weak 3 Medium 4 Strong Z13756 Z13760 Z13757 ...

Page 132: ...just the air flow by moving the lever right or left or shut off the airflow by moving the lever to the position Lever posi tion Air outlets Purpose B Fresh air to head B A Warm air to feet and relatively cooler air to head A Warm air to feet A C Most air to feet and remaining air to windshield defroster A C Air to feet and through the defroster to windshield C D Warm air to windshield and door win...

Page 133: ...ide air position during normal driving You can also select the recirculation position when parking to stop dust from getting inside the cab 2 Cooling Press the air conditioner switch then turn the temperature control dial as desired for a com fortable temperature Unless necessary for ventilation the air selector switch should be in the ON position the indi cator is illuminated when the air conditi...

Page 134: ...lector switch to ON the indicator comes on 4 Heating Warm air is directed to your feet If you want to heat the cab quickly or if the air outside is dusty or polluted press the air selec tor switch to ON the indicator comes on If the windshield and windows fog up turn the mode selector dial to the position To dehumidify the interior press the air condi tioner switch to ON Z17362 Z17363 ...

Page 135: ...from both outlets 6 Defrosting Warm air is directed toward the windshield and door windows For quicker defrosting press the air conditioner switch and select the highest fan speed To remove frost or ice on the outside surface of the windshield glass press the air selector switch to ON the indicator comes on When the mode selector dial is placed in the position warm air is directed toward your feet...

Page 136: ...he air conditioner press the air con ditioner switch Check that the indicator lamp in the switch goes out When the heater is not used turn the fan speed dial to the 0 position Pressing the air selector switch to ON the indicator comes on will prevent dust from enter ing the cab Z17366 Z17367 ...

Page 137: ...ir conditioner compres sor Check the refrigerant level if the air conditioner stops working efficiently To protect the environment your vehicle s air conditioning system uses refrigerant HFC 134a which does not harm the ozone layer Since charging the system with this refriger ant requires a method different from the con ventional method be sure to contact an authorized dealer if your system needs ...

Page 138: ...10 1 Cigarette lighter 10 2 Ashtrays 10 3 Sun visors 10 3 Interior personal lamp 10 4 Small article compartments 10 4 Using the radio 10 6 Accessories 10 7 10 Interior equipment and accessories ...

Page 139: ...er pushed in Doing so could result in a fire Do not allow a child to touch the cigarette lighter The child could get burned Do not touch the metallic parts of the ciga rette lighter You could get burned The cigarette lighter is designed to oper ate on 12 V Never use a lighter with a 24 V rating If the cigarette lighter is dented or broken it will not pop out properly Replace the dented or broken l...

Page 140: ...o put out cigarettes and match sticks before putting them in the ashtrays Close ashtrays completely Put only cigarette stubs and matchsticks in the ashtray Empty the ashtray before it becomes full completely as too many stubs crammed into the ashtray could catch fire Do not throw cigarette ends out of the win dows since this is environmentally irre sponsible and could start a fire When cleaning th...

Page 141: ...tch is placed in the posi tion the lamp comes on when a door is opened and goes out when all the doors are closed The lamp always stays off when the lamp switch is in the OFF position CAUTION Leaving the interior personal lamp on for an extended period with the engine off will cause the batteries to go flat and prevent the engine from starting Interior personal lamp Small article compartments Z174...

Page 142: ...for holding highway toll cards etc Center console box Open the lid by lifting the black knob with your fin ger After closing press down lightly on the lid to lock it Pocket Use this pocket to store small things CAUTION Storing things that tend to roll in this pocket is not recommended because they could fall down during starts and stops Tray WARNING Keep the lid closed and the knob locked while dr...

Page 143: ...e cab WARNING Keep the lid closed while driving Do not keep anything heavy or that can roll easily in the glove compartment Oth erwise the object may open the lid and fall out while driving possibly injuring you WARNING The contents in a cup or can held in the cup holder may spill during movement of the vehicle Be careful of scalding if they contain hot beverages Using the radio WARNING Adjust the...

Page 144: ...or smoke or an abnormal smell is emitted by the audio system immediately stop using the audio system and have it inspected by an authorized dealer See an authorized dealer if you are considering adding accessories to your vehicle Your vehicle contains electronic devices Even though these are protected against interference from electromagnetic emissions you should refer to an authorized dealer befo...

Page 145: ......

Page 146: ...11 1 Coolant 11 2 Engine oil 11 2 Fuels 11 3 Other recommendations for cold weather operation 11 3 Installing tire chains 11 4 11 In cold weather ...

Page 147: ...O DIESEL LONGLIFE COOLANT or equivalent to the recommended concentration P 12 48 CAUTION Never mix FUSO DIESEL LONGLIFE COOLANT with other brands of anti freeze or anti corro sion additives since these can detract from its performance If a different coolant additive has been used and the FUSO DIESEL LONGLIFE COOLANT is to be used be sure to thoroughly flush the cooling system The viscosity of the ...

Page 148: ... the additive in the concentration indi cated by the manufacturer s instructions CAUTION Do not use engine coolant or antifreeze since these would damage the vehicle s paint Occasionally check the undercarriage and fender wells and if necessary remove snow and ice taking care not to damage vehicle parts as you do so The brakes may be frozen up when the vehicle is driven on snow laden roads or duri...

Page 149: ...t once a month to maintain its functions even during the cold season when it is not being used Make sure that tire chains are installed properly so that they do not become loose and interfere with other vehicle parts while the vehicle is in motion Use triple chains corresponding to tire size CAUTION Do not put tire chains on the front wheels Use of winter tires is recommended Make sure that the ch...

Page 150: ...in the inside chain by pulling cross chains for the inside tire outward NOTE Pull the hook section outward to the possible maxi mum extent 3 Temporarily connect hook of outside chain as shown 4 Pull the middle chain as far as possible and connect its hook 5 Pull both ends of outside chain to the possible maximum extent and connect hook Z09325 Z09326 Z11190 Z11190 Z11191 ...

Page 151: ...sten extra chain links with a metal wire to pre vent them from hitting against other vehicle parts 8 Fit spring band Attach the hooks of spring band on the chain at even intervals with the hook ends facing outward 9 After driving the vehicle for 5 to 10 minutes check the chains for looseness or disconnected hooks Z09329 Z09330 ...

Page 152: ...brakes check 12 61 Air pressure check 12 62 Parking brake check 12 63 Clutch check 12 64 Air drier check 12 65 Air tank check 12 66 Draining sediment from fuel tank 12 66 Tires check 12 66 Tires replacement 12 70 Wheel nuts check and retightening 12 75 Tire rotation 12 77 Wiper blade replacement 12 78 Windshield washer fluid level check and refilling 12 79 Battery check and cleaning 12 80 Ashes of...

Page 153: ... rings and neckties and wear clothing that will not obstruct movement or snag on parts of the vehicle Wear all safety gear necessary for your task for example hard hat or goggles Use the correct tools for your task Do not make adjustments or repairs unless you know exactly what you are doing For servicing that is difficult or not shown in this manual take your vehicle to an authorized dealer When ...

Page 154: ... for the engine to cool down then grip the cap with a cloth and turn it slowly to release the internal pres sure before removing it completely Never crawl under the vehicle when it is supported only by a hydraulic jack since the jack could slip out of position and cause the vehicle to crush you The battery cables and starter cables carry extremely high voltages Be careful not to short circuit them...

Page 155: ...nmental harm The DPF contains a catalytic converter Do not kick or knock the DPF since the inside catalyst and ceramic filter could be dam aged Water collecting in the DPF is slightly acidic and should not be touched If you touch this water rinse it off under a faucet Open the front panel to gain access to the parts or equipment located at the vehicle s front on those occasions when you need them ...

Page 156: ...el blowing it off its stay Never operate the wipers when the front panel is open your hands or other items could become trapped in the wiper links WARNING Fit the stay securely into the hole in the front panel to prevent the front panel from fall ing and possibly causing an injury WARNING Make sure your hands are not behind the front panel when closing it since they could be crushed WARNING Never ...

Page 157: ... with chocks In a manual transmission vehicle put the gear shift lever in the neutral position In an automatic transmission vehicle other than FM65F put the range selector lever in the P position For FM65F put the range selector lever in the N position Remove water or other liquids from inside the cab before tilting Loose items left in the cab could fall and break the windshield or other equipment...

Page 158: ...cab with persons inside The cab can drop suddenly if it has heavy objects inside or is fitted with a roof deck You should be sufficiently aware of this for your safety Do not operate the steering wheel gear shift lever or any other controls in a tilted cab Doing so could lead to an accident WARNING Be sure to push the lever fully into the stopper and confirm that the stopper retains it properly If...

Page 159: ...not pulled down completely the hook may not be engaged when the cab is lowered Raise the cab only gently WARNING Raise the cab only by holding the grip not the lever Otherwise the cab lock mecha nism may be damaged when the cab is low ered and will fail to lock the cab in position This condition is very dangerous as the cab could accidentally tilt up when the vehicle vibrates or receives shocks wh...

Page 160: ...ile supporting it WARNING When pushing the lever and folding the cab stay take care that your fingers do not get trapped Lower the cab only by holding the grip not the lever Otherwise the cab lock mechanism may be damaged and will fail to lock the cab in position This condition is very dangerous as the cab could acci dentally tilt up when the vehicle vibrates or receives shocks while driving possi...

Page 161: ...d perform the cab tilting and lowering procedures over again CAUTION Make sure that the intake air duct and its rubber boot are perfectly aligned WARNING Ensure that the lever key is correctly installed If the lever key is not in position the cab may be unlocked and tilt up acciden tally while driving possibly leading to an accident WARNING Always check that the cab does not rise If the cab is not...

Page 162: ...perating it 1 Before starting the engine Open the front panel Pre operational checks Coolant level Check that the coolant level is between the FULL and LOW marks on the reservoir tank P 12 48 Clutch fluid level Manual transmission vehicle Check that the clutch fluid level is between the H and L marks on the reservoir tank P 12 34 Windshield washer fluid level Confirm that the windshield washer flu...

Page 163: ... level check switch Change the engine oil if its level is above the round hole on the oil level gauge P 12 24 Belt tension and damage Check the fan belt tension by applying a force of 98 N 22 lbs 10 kgf to its center Check that the belt is not nicked or other wise damaged P 12 56 Leaks of diesel fuel oil coolant and air Check the underneath of the vehicle for any sign of leakage ...

Page 164: ...eration All models other than FK61F Pull and place the parking control valve in the PARKING position and listen for the sound of air being released P 12 63 Lighting system operation Make sure that each lamp lights up or flashes properly Check lamp lenses for dirt and damage P 5 24 Windshield wiper and washer operation Check the washer for proper fluid spray direction and the wipers for normal acti...

Page 165: ...60 Air pressure built up rage 0 to 100 psi pressure build up time FK61F Within 6 minutes Other than FK61F Within 9 minutes P 12 62 Gauge and warning lamp operation Check that gauges and warning indicator lamps are working properly P 6 4 Rearview mirrors Seated in the driver s seat adjust the angles for clear views of the sides and rear Make sure the mirrors are clean ...

Page 166: ...that the brake fluid level is between the H and L marks on the reservoir tank P 12 34 Draining condensate from air tank Pull the ring on the air tank drain cock to remove condensate from the air tank P 12 66 Battery fluid level Check that the battery fluid level is between the UPPER and LOWER level lines marked on the sides of the battery case P 12 80 ...

Page 167: ...d uneven wear P 12 69 Tire inflation pressure Check that all tires are properly inflated P 12 66 Broken suspension springs Check for broken springs and tilt of vehicle body toward either side Check also U bolts and nuts for looseness Reflector condition Make sure that the reflectors are clean not damaged and securely installed ...

Page 168: ...and check that the brakes work effectively and evenly on all wheels P 12 62 Steering wheel operation Check that the steering wheel does not vibrate or pull to one side and that it is not unduly heavy Also make sure that the steering wheel returns to its neutral position smoothly P 12 60 Exhaust brake effectiveness Activate the exhaust brake and check that it works effectively ...

Page 169: ...ropriate to your driving conditions Use only the lubricants specified P 14 3 Special lubricants must be used if the vehicle is used at temperatures below 23 C 10 F For details refer to an authorized dealer CAUTION Apply and replace lubricants regularly Use of lubricants beyond their designed service life could cause bearings or other compo nents to seize up and cause an accident Any checking appli...

Page 170: ...ing them Always use the recommended grease CAUTION Wipe away any grease that sticks to wires or rubber hoses and any grease that overflows from the grease nipples Greasing Greasing intervals Every 10 000 km 6 000 miles Every 30 000 km 18 000 miles for the greasing points marked Z17850 ...

Page 171: ...12 20 Simple inspection and service Other than FM65F FM65F Z12063 Z12065 Z12067 Z11646 Z12064 Z12066 Z12068 ...

Page 172: ... front ends Front spring rear end two points each for left and right spring rear ends Rear spring front end two points each for left and right spring front ends Rear spring rear end two points each for left and right spring rear ends Cab hinge two points each for left and right hinges Z12069 Z00361 Z12072 Z12070 Z12071 Z15212 ...

Page 173: ...or left and right sides Manual transmission vehicles The point marked should be greased every 30 000 km 18 000 miles CAUTION Do not over lubricate the clutch shifter Exces sive grease can make the clutch slip NOTE The greasing points for the propeller shaft varies depending on vehicle model When greasing the propeller shaft slip joint pump in grease until it comes out of the dust plug hole When gr...

Page 174: ...ch for left and right hinges Apply to rotating and sliding sections Recommended lubricant Chassis grease NLGI No 1 Li soap 3 Cab rear mount cushion two inside points each for left and right cushions Recommended lubricant Chassis grease NLGI No 1 Li soap Greasing intervals Every 10 000 km 6 000 miles Greasing intervals Every 30 000 km 18 000 miles Z12073 Z17340 Z17341 ...

Page 175: ...es that cause the ceramic filter inside the DPF to be loaded with particulate matter PM prematurely to the capacity and thus shorten the effectively functioning period of the DPF Change the engine oil at the specified inter vals During the regeneration process of the DPF part of the fuel may mix into the engine oil while the PM is being removed by oxida tion If the engine oil is not changed at the...

Page 176: ...f engine oil may increase due to the fuel that may have mixed with it when the DPF trapped PM is removed by oxidation This does not indicate any abnormality For the same reason the engine oil can smell like fuel this also does not indicate any abnormality 1 1 Engine oil level check using oil level check switch simple method 1 Turn the starter switch to ON 2 Press the CHK side of the oil level chec...

Page 177: ...ine oil immediately Because this is a sign of deteriorated engine oil performance continued use of the same oil will cause engine failure and could even cause uncontrolled revving of the engine 6 After the check insert the oil level gauge into position and secure it properly 1 3 Adding oil 1 Tilt the cab P 12 6 2 Clean the area around oil filler cap to prevent dust and dirt from entering the engin...

Page 178: ...e filter 4 Remove drain plug from the oil pan to remove the oil 5 Tighten the oil pan drain plug and the oil filter drain plug 6 Carefully pour fresh engine oil through the oil filler 7 Wait for more than 6 minutes then check the oil level using the oil level gauge provided 8 Crank the engine and then start it P 5 8 WARNING Take care not to spill engine oil as engine oil on the exhaust manifold or...

Page 179: ...h speeds or under heavy loads the engine oil will deteriorate quickly and must be replaced sooner than specified 2 Manual transmission gear oil The first transmission gear oil replacement during the run in period should be performed at first 4 000 km 2 500 miles Recommended oil Gear oil API classification GL 3 SAE80 general or SAE90 warm regions API classification GL 4 SAE90 tropical regions Long ...

Page 180: ...N The added oil should be of the same grade and viscosity as the oil originally placed in the trans mission Otherwise malfunction of the trans mission will result 4 Install the inspection plug Model Quantity Other than FM65F Approx 6 7 7 1 Add approx 0 5 0 5 if vehicle has PTO FM65F Approx 8 1 8 6 WARNING Do not check or replace the gear oil immedi ately after operating the vehicle since the engin...

Page 181: ... minute then put a finger in the inspection plug hole as shown in the illustration and check that the oil has come up to the bottom of the hole 5 Install the inspection plug 3 Automatic transmission fluid WARNING The gear oil is extremely hot immediately after the vehicle has been operated Take care to avoid being scalded when draining hot oil Give the oil time to cool before drain ing it Drain pl...

Page 182: ...luid DEXRON III type Quantity required for replacement Liters qts 3 1 Check and replacement Refer to the separate Allison Automatic Transmis sion Operator s Manual In the FM65F model the automatic transmission fluid level can be checked using the range selector lever COLD RUN band HOT RUN band Check the automatic transmission fluid level Add fluid as required through the dipstick tube Model Quanti...

Page 183: ...e 10 C 50 F Quantity required guideline Liters qts 4 1 Check 1 Remove the inspection plug and check that the oil has come up to the bottom of the hole 2 If insufficient add oil through the inspection plug hole until it is full to the brim CAUTION The added oil should be of the same grade and viscosity as the oil originally placed in the dif ferential gears Otherwise malfunction of the rear axle wi...

Page 184: ...the inspection plug hole until it reaches the bottom of the hole 4 Install the inspection plug Inspection plug tightening torque 98 to 115 N m 72 to 87 ft lbs 10 to 12 kgf m WARNING The gear oil is extremely hot immediately after the vehicle has been operated Take care to avoid being scalded when draining hot oil Give the oil time to cool before drain ing it Drain plug tightening torque 98 to 115 ...

Page 185: ... fluid Brake fluid SAE J1703 FMVSS No 116 type DOT3 Fluid Inspection intervals Replacement intervals Brake fluid At the time of pre operational check and every 10 000 km 6 000 miles Every 60 000km 36 000 miles or every 12 months Clutch fluid At the time of pre operational check and every 10 000 km 6 000 miles Every 60 000 km 36 000 miles or every 12 months ...

Page 186: ... become slug gish or to drag Also do not use contain ers which have been used for mineral oil for brake fluid Because brake fluid is highly hygroscopic it should be kept in a dry place both during refilling and storage If brake fluid absorbs moisture the boiling point is lowered a condition which could result in vapor lock This is very dangerous Do not open the reservoir tank cap when checking the...

Page 187: ... 5 2 Adding fluid 1 If the fluid level is lower than the L line clean the surfaces around cap of reservoir tank open the cap and add the recommended brake fluid up to the H line 2 Close the cap firmly WARNING The container used for adding brake fluid should be a clean one free of moisture mineral oil and dust If the fluid level is unusually low there is a fluid leak in the brake line In this case ...

Page 188: ...cause a failure 6 1 Checking and adding fluid 1 Stop the engine with the front wheels in the straight ahead position Prevent the vehicle from moving by fully setting the parking brake and blocking the wheels with chocks 2 Check the fluid level in power steering fluid tank located in the rear of the cab The fluid level should be between the MAX and MIN lines Also check whether the power steering fl...

Page 189: ...nt WARNING Close the tank cap firmly otherwise power steering fluid will leak and could catch fire Also wipe clean spilled fluid If the fluid level is far below the specified range fluid may be leaking Have your vehicle inspected at an authorized dealer Filter elements Replacement intervals Every 20 000 km 12 000 miles WARNING Do not replace the oil filter immediately after operating the vehicle s...

Page 190: ...3 Replace the filter element assembly with a new one The replacement part should be a genuine part 4 Install the filter element assembly using this pro cedure Apply a thin coat of engine oil to the gasket sur face of the filter element assembly Turn the assembly clockwise by hand until the gasket contacts the sealing surface of the filter head From this point give the filter element assembly an ad...

Page 191: ...to catch fuel 4 Disconnect the connector of the sensor 5 Loosen the sensor in the arrow direction shown in the drawing and drain the fuel from the case After draining retighten the sensor WARNING Fuel is highly flammable and should be kept away from hot objects and open flames owing to the risk of fire or explo sion Wipe up any fuel that spills into the engine compartment Keep cigarettes and other...

Page 192: ...e 9 Replace the O ring and O ring with new ones Apply a thin coat of engine oil to each of the new O rings and install the O ring on the filter case and the O ring on the sensor CAUTION Use the O rings that are supplied with the new replacement element 10 Clean the surfaces of the filter head and fil ter case that will come in contact with the O ring 11 Install the element with the hole of its end...

Page 193: ...replacement interval has not elapsed clean or replace the element if clogging of the ele ment causes a decrease in engine output Tightening torque 30 2 N m 22 1 5 ft lbs 3 0 2 kgf m WARNING If the fuel filter is tightened to an inappro priate torque fuel could leak and the filter itself could become damaged possibly resulting in a fire and or explosion Be careful not to damage the filter case as t...

Page 194: ... case and cover aligned CAUTION Install the element correctly If the packing is broken or the clamps are loose the engine will suck in dust or other foreign mat ter and premature piston and cylinder liner wear could result 3 2 Check 1 Remove the cover and check the case for dust accumulated inside 2 If much dust has accumulated inside the case remove the element and wipe clean the inside of the ca...

Page 195: ... the element or hit it against another object If the element is contaminated with oily soot or dust replace it regardless of the sched uled replacement time 1 From the inside of the element blow com pressed air evenly up and down along the pleats of the filer paper 2 Place a light in the element and check the filer paper for damage or places where it has worn thin Also check the packing for damage...

Page 196: ...Do not use a wet air cleaner element or safety element as this will adversely affect the exhaust emission control system 4 Replacement of PCV Positive Crank case Ventilation valve element CAUTION The valve element is not designed for washing and reuse Replacement intervals Every 10 000 km 6 000 miles WARNING Do not try to replace the PCV valve element immediately after the engine has stopped as it...

Page 197: ...p with a new one Lightly coat the new O ring with engine oil before installing it onto the cap CAUTION Be sure to use the O ring supplied with the new valve element 7 Install the new valve element Always use a genuine part 8 Install the cap turning it by hand in the direction of the arrow Continue to turn the cap until it slightly lifts up and comes to a stop CAUTION Install the cap carefully so t...

Page 198: ...RNING Fuel is highly flammable and should be kept away from hot objects and open flames owing to he risk of fire or explo sion Wipe up any spilt fuel Keep cigarettes and other sources of heat away from the vehicle while draining water from the fuel filter They are dangerous because they could set fire to the fuel Be careful not to injure yourself on the edges of nearby components while drain ing w...

Page 199: ...equivalent could cause corrosion and dam age to the radiator 1 Recommended coolant Use a coolant containing the FUSO DIESEL LONGLIFE COOLANT additive and soft water in the specified proportions Having both corrosion preventive and anti freezing properties the additive protects the cooling system all year around Replace and top off the coolant only with water con taining FUSO DIESEL LONGLIFE COOLAN...

Page 200: ...valent FUSO DIESEL LONGLIFE COOLANT is an ethylene glycol based antifreeze SAE J814 C with both anti freeze and anti corrosion properties Dilute it with soft water to the specified concentration Total hardness 300 ppm or less Sulfate SO4 100 ppm or less Chloride Cl 100 ppm or less Total dissolved solids 500 ppm or less pH 6 to 8 Z09270 ...

Page 201: ...THES IMMEDIATELY FLUSH FUSO LONGLIFE COOLANT WITH WATER AND SOAP DO NOT USE FUSO DIESEL LONGLIFE COOLANT IN A CLOSED OR POORLY VENTILATED SPACE SHOULD YOU INHALE A LARGE AMOUNT OF GAS OF FUSO DIESEL LONGLIFE COOLANT MOVE TO A PLACE WITH FRESH AIR AND KEEP YOURSELF WARM AND AT REST IF YOU FEEL NAUSEOUS OR OTHERWISE ABNORMAL IMMEDIATELY SEEK MEDI CAL ATTENTION CLOSE THE CAP OF THE FUSO DIESEL LONGLI...

Page 202: ...table to determine the correct concentration of FUSO DIESEL LONGLIFE COOL ANT according to the lowest temperature at which your vehicle is to be operated FUSO DIESEL LONGLIFE COOLANT concentra tion in volume percentage See the instructions on adding coolant P 12 52 Liters qts NOTE Vehicles are shipped with a 50 concentration of FUSO DIESEL LONGLIFE COOLANT and can therefore be used at temperatures...

Page 203: ...s If the level is below the LOW line you must add coolant See the next page for the method 3 Check for coolant leaks from the radiator and radiator hoses If you find water on the ground from which your vehicle has been moved after parking coolant is probably leaking If the coolant level is abnormally low and quickly drops again when coolant has been added coolant may be leaking from the cooling sy...

Page 204: ...ter temperature gauge If the needle points in the red zone the engine has overheated Let the engine run slightly faster than the normal idling speed to cool down the engine P 13 9 Stop the engine when the needle moves to near the center of the scale If the needle is elsewhere other than in the red zone it indicates insufficient coolant Stop the engine and proceed to the next step 2 Tilt up the cab...

Page 205: ...reservoir tank 4 After the coolant has been completely drained close both engine and radiator drain cocks 5 Flush the cooling system Pour soft water preferably after heating moder ately through the radiator cap opening and start the engine WARNING Do not replace the coolant immediately after operating the vehicle since the engine radiator coolant and other items will be extremely hot The coolant y...

Page 206: ...d expands during engine operation 7 With radiator cap left removed run the engine for a while in order to remove air from the cool ing system 8 Stop the engine and add more coolant if neces sary CAUTION If air is not completely removed from the cool ing system this may lead to reduced cooling efficiency and engine parts failure After replac ing the coolant drive the vehicle and then check the cool...

Page 207: ...ts will slip and this will shorten their service life If a belt needs to be replaced owing to dam age replace 3 belts at the same time 1 Check 1 Fully set the parking brake and block the wheels with chocks to prevent the vehicle from moving Then tilt the cab P 12 6 2 Press the belt with an approximately 98 N 22 lbs 10 kgf force at the point midway between the pulleys and measure the amount of defl...

Page 208: ...ires component disassembly Please contact an authorized dealer to have the work done Belt condition Remaining service life reference The driving distance or time period over which the belt can still be used is at least as long as that over which the belt has been used since the vehi cle was new or since the belt was replaced whichever is more recent The driving distance or time period over which t...

Page 209: ... distance or time period over which the belt can still be used is about a quarter of that over which the belt has been used since the vehi cle was new or since the belt was replaced whichever is more recent The belt has reached the end of its service life and must be replaced Z14647 Z14648 Z14649 ...

Page 210: ...ension Turn it clockwise to increase tension After performing the adjust ment fully tighten the pulley mounting nut The steering wheel is a safety critical part of the vehicle If an inspection reveals any abnormality contact an authorized dealer and have the abnor mality rectified before you again drive the vehicle Driving the vehicle with the abnormality unrectified could result in a serious acci...

Page 211: ...nd also right and left to check for excessive looseness If any thing abnormal is found during the check have your vehicle inspected by an authorized dealer 3 Steering wheel operation While driving slowly approx 10 km h 6 MPH in a safe place make sure that the steering wheel is neither too heavy nor too light to turn Also check for abnormal sound or irregular resistance during operation If any abno...

Page 212: ...d of discharged air should be heard from the brake valve If anything abnormal is detected during the above check call an authorized dealer 2 Brake pedal play To check the pedal play use your finger to press the brake pedal to the point where resistance is felt and measure the distance that the pedal has moved If the pedal play is not as specified have the brake system inspected by an authorized de...

Page 213: ...is can be checked as follows 1 Set the parking brake and stop the engine 2 Open the drain cock to release all compressed air from the air tank 3 Start the engine and run it at idling speed while timing how long it takes for the pressure to reach 100 psi The time should be as indicated below Inspection intervals At the time of pre operational check and every 10 000 km 6 000 miles WARNING Perform br...

Page 214: ...6 lbs 30 kgf force click are generated by notches 3 The lever stroke is normal if the number of clicks is from 7 to 10 4 Make sure that the lever is locked securely in the pulled up position 2 Parking brake operation Other than FK61F Pull and place the parking control valve in the PARKING position and listen for the sound of air being released Parking brake check Inspection intervals At the time o...

Page 215: ...al play 1 Check that the engine is not running 2 Check that the parking brake is firmly set 3 Press the clutch pedal by hand You may feel a distinctive resistance twice The pedal move ment from the point you feel the first resis tance to the point you feel the second resistance is the clutch pedal play If the clutch pedal play is not within the specified range or there is no free movement to the f...

Page 216: ...is released slowly The air drier contains a desiccant that removes moisture from compressed air As part of pre operational checks open the drain cock of the air tank If a large amount of condensate drains out the desiccant has become ineffective and must be replaced If the condensate coming out from the exhaust port of the air drier contains an abnormal quantity of oil have the vehicle inspected b...

Page 217: ...en when you open the drain cock in the early morning after you have stopped and parked the vehicle during the day time on the preceding day Remove the drain plug from the fuel tank to let sedi ment including water and foreign substances flow out of the tank Air tank check Inspection intervals At the time of pre operational check Draining sediment from fuel tank Sediment draining interval Every 24 ...

Page 218: ... There is a plate affixed to the driver s door indi cating the standard inflation pressures Tire size Model Pressure kPa psi kgf cm2 225 70R 19 5 FK61F Front 660 95 6 75 Rear 660 95 6 75 10R22 5 14PR FK62F FK65F Front 790 115 8 20 Rear 790 115 8 20 11R22 5 14PR FM Front 720 105 7 50 Rear 720 105 7 50 WARNING Excessively high or low tire pressures not only give a poor ride but can also cause damage...

Page 219: ...e valve caps after checking or adjusting the air pressure Unless the valve caps are replaced foreign bodies may interfere with the valves and cause air to leak out NOTE The tire inflation pressures will be higher just after vehicle operation than before vehicle oper ation The increases in pressure are not abnor mal they occur because the air in the tires expands as the tires get hot while the vehi...

Page 220: ... a film of water caus ing the driver to lose control of both steering and braking 3 Checking for cracks damage and objects embedded in tread Check both the tread and the sides of each tire for cracks damage and excessive or unusual wear Check also for metal pieces nails and stones that might be embedded in the tread or caught between the tires of dual wheels Tire groove depth Normal roads 1 6 mm 2...

Page 221: ...block traffic and acti vate your hazard warning lamps to flash and use a red or white flag or cloth to give warning pass ing vehicles 3 Have all passengers get out of the vehicle 4 Block the tire with a chock diagonally opposite to the tire to be replaced Example Block the left front tire if the right rear tire is to be replaced 5 Prepare a replacement tire NOTE Your vehicle is not provided with a...

Page 222: ...hand side of the vehicle turn the wheel nuts in the direction of arrow On the left hand side of the vehicle turn the wheel nuts in the direction of arrow WARNING Apply the jack only to designated jacking points Applying the jack elsewhere could damage the vehicle and cause the jack to slip out of position Never rock or climb below the vehicle when it is jacked up since movement of the jack could r...

Page 223: ...ing Threads on wheel bolts and nuts Spherical surface of wheel nuts Disc wheel mounting surface Disc wheel mating surface Wheel nut contact surface on disc wheel Disc wheel inside surface 2 Apply a thin coat of chassis grease or wheel bearing grease to threads on wheel bolts and nuts and to the spherical surfaces of the nuts On dual wheels also apply grease to the exter nal threads of the inner wh...

Page 224: ...ft hand threads The bolts and nuts have stamped marks for easy identification an R mark for right hand wheels and an L mark for left hand wheels Wheel nuts wheel bolts outer wheel nuts and inner wheel nuts are marked with ST or S A The ST mark indicates that these fas teners are for steel wheels and the S A mark that they are for both steel and aluminum wheels WARNING When mounting the wheel take ...

Page 225: ...outer wheel of the dual wheels is replaced retighten the inner wheel nuts to the specified torque before mounting the outer wheel Wheel nut tightening torque FK61F 370 to 410 N m 275 to 304 ft lbs 38 to 42 kgf m Other than FK61F 540 to 590 N m 395 to 430 ft lbs 55 to 60 kgf m WARNING Do not jump or jerk on the wrench handle when tightening the nut by using your own weight Doing so can overtighten ...

Page 226: ...ar intervals Do not paint disc wheel mounting surfaces dual wheel mating surfaces wheel nut seating surfaces and wheel hub mounting surfaces as resulting thicker paint film could cause the wheel nuts to loosen up Wheel nuts check and retightening Inspection intervals Every 10 000 km 6 000 miles WARNING After changing a tire the wheel nuts will loosen somewhat during the initial stages of driving d...

Page 227: ...to the specified torque 3 Apply a thin coat of chassis grease wheel bear ing grease or engine oil to the external threads of inner wheel nuts and the spherical surfaces of outer wheel nuts Tighten the outer wheel nuts to the specified torque 2nd process 4 Perform the above steps 1 through 3 for the remaining outer wheel nuts and inner wheel nuts WARNING Wheel nuts that are tightened loosely or too...

Page 228: ...he vehicle tends to pull to one side during braking and could cause you to lose directional control of the vehicle Be sure to use the following type of tires FK61F 225 70R 19 5 FK62F FK65F 10R 22 5 14PR FM 11R 22 5 14PR WARNING In the case of dual wheels one often retight ens outer wheel nuts while forgetting to retighten inner wheel nuts Always follow the above procedure to tighten all the nuts T...

Page 229: ...Replacing wiper blade 1 Raise the wiper arm push the clip spring in the direction of the arrow and keep the spring held in that state 2 Push the wiper blade against the wiper arm WARNING Be sure to use the specified type of tires Mixing bias and radial tires results in poor steering and should be avoided at all costs As the vehicle is driven after a wheel has been replaced the wheel nuts loosen up...

Page 230: ...ted by arrows of blade rubber with your fingers and then pull the blade rubber so that claws are unhooked from grooves in the blade rubber 2 Slide out the blade rubber 3 Replace the old blade rubber with a new genu ine wiper blade rubber To install reverse the removal procedure Make sure that the claws fit into the grooves in blade rubber 1 Fluid level check 1 Open the front panel P 12 4 2 Check t...

Page 231: ...d the ratio of windshield washer fluid to water should be increased in order to pre vent the mixture from freezing up Washer fluid tank capacity Approx 5 5 liters 5 8 qts Battery check and cleaning DANGER BATTERY POSTS TERMINALS AND RELATED ACCESSORIES CONTAIN LEAD AND LEAD COMPOUNDS WASH HANDS AFTER HANDLING NEVER TOUCH THE BATTERY FLUID BATTERY FLUID IS DILUTE SULFURIC ACID AND CAN HARM MOST THI...

Page 232: ...least 30 seconds after placing the switch in the LOCK posi tion data during engine running time will not be stored correctly in the engine control computer This could disrupt the engine con trol system and other related systems WARNING The battery generates flammable hydro gen gas and should be kept away from open flame and spark When removing the battery always dis connect the negative terminal f...

Page 233: ...nstalling the battery for charging or replacing with a new one 1 Remove the battery cover 2 Loosen the connector nut on the negative terminal and disconnect the cable In the same way disconnect the cable from the posi tive terminal 3 Undo the battery holding screws to remove the battery 4 When reinstalling the battery carry out these steps in reverse connecting the negative cable last WARNING When...

Page 234: ...UPPER LEVEL and LOWER LEVEL lines Replace the vent plugs and then charge the bat tery 2 If the battery fluid level is correct or between the UPPER LEVEL and LOWER LEVEL lines simply recharge the battery Replace the battery if the indicator does not turn blue after charging WARNING Be sure to observe the following instructions when storing a battery Select a storage place where the battery fluid wi...

Page 235: ...ng a booster cable P 13 24 Your vehicle is equipped with a diesel particulate fil ter DPF system This device collects particulate matter PM contained in diesel engine exhaust with a ceramic filter and continuously regenerates the fil ter by the effect of the inside oxidation catalyst this process is called oxidation removal of PM Although the collected PM is removed by combus tion during the DPF r...

Page 236: ...ervals 6 months or so Clogged filters may cause inefficient heating or air conditioning and even malfunction of the blower motor CAUTION Clean the air filters at shorter intervals if your vehicle is used frequently in dusty areas 1 Outside air filter 1 Remove the air filter by bending its frame inward to disengage the lugs and pulling the filter down ward Air filters cleaning WARNING When cleaning...

Page 237: ...ll press the air filter all the way into position If the front of the intercooler is heavily clogged with dust or mud the engine performance may be affected Clean it from time to time by using a soft brush or something also appropriate CAUTION The intercooler could be damaged if a bristle brush or an object with a sharp point is used for its cleaning Intercooler cleaning Z00393 Z00640 Z09338 ...

Page 238: ...ric cooling fan Do not use a high pressure cleaning equip ment Damage to the oil cooler may result Transmission oil cooler cleaning Cleaning your vehicle WARNING Some cleaning fluids are poisonous or flammable Carefully follow the safety pre cautions shown on the container Use solvent based cleaning materials only in a well ventilated area Open the win dows when using solvent based cleaning materi...

Page 239: ...enced any of the following Been driven on coastal roads Been driven on roads where road chemicals have been applied Become contaminated by coal tar smoke soot powder dust iron powder lime powder sap bird droppings etc Adhesion of dust and or mud Using a hose wash the mud and dirt off the body surfaces Wash not only the surfaces around the cab but also the wheel housings and the underside of the ch...

Page 240: ...the key holes and rubber parts of the door sometimes freeze making it hard to open the door After washing remove moisture on and around the doors Applying silicone with antifreeze capabilities is one solution to this problem Do not clean the interior by splashing water on it as this could damage relays the com puter and other electrical devices Thoroughly wash the vehicle especially the wheelhouse...

Page 241: ...rts Doing so could cause a malfunction and damage to components Connectors on the alternator starter and other electrical components and connectors of electri cal wiring to them ABS devices behind tires and electric wiring to them Steering shaft Dust covers on steering system parts Transmission oil cooler FM65F automatic transmission vehicles ABS parts and harnesses Front Z17372 Rear Z17373 Z12148...

Page 242: ...rrosion Rust and corrosion developing on the underside and or undercarriage of the vehicle could cause an unexpected failure and even lead to an acci dent Check these areas occasionally such as after washing for rust corrosion and resulting holes If rust is found remove it using a wire brush and coat the affected area with a touchup paint or rust preventive material If you find a hole have your ve...

Page 243: ... also usable 1 Clean out all loose dust with a vacuum cleaner or soft brush 2 Dilute the cleaner in water to the specified con centration The best results can usually be obtained with a thinner solution When soap suds are used apply them with a sponge or soft cloth 3 Wipe up any remaining cleaner with a towel or other absorbent cloth 4 Finish cleaning by gently wiping the surface with a dry soft c...

Page 244: ...auce 1 Carefully clean off the contamination then wash the area with water and dry it 2 If any spot remains clean with a fabric cleaning solvent 3 6 Cleaning vinyl surfaces Vinyl can usually be cleaned with warm water and mild soap e g saddle soap Apply a little soapy water and leave it for several minutes Then rub the area hard with a cloth wet in water Repeat this process until the area is compl...

Page 245: ......

Page 246: ...mp has burned out 13 17 When braking is sluggish 13 22 If parking brake cannot be released normally 13 22 If the engine stalls while the vehicle is in motion 13 24 If a tire goes flat while the vehicle is in motion 13 24 When the battery has run down 13 24 When the fuel has run out Bleeding the fuel system 13 26 Towing 13 27 13 Useful advice for emergencies ...

Page 247: ...e speci fied amperage 13 10 Battery has run down Charge or replace the battery 12 80 Battery cable is disconnected loose or corroded Remove corrosion and connect the cable correctly 13 24 Connection to ground terminal is open Connect securely Engine oil viscosity is too high Replace the oil with an oil of proper viscosity 12 24 The starter is malfunctioning Have an authorized dealer perform necess...

Page 248: ...f page The starter switch is faulty Have an authorized dealer perform necessary inspection There is a fault in the fuel injection system Have an authorized dealer perform necessary inspection Possible cause Remedy Ref page The DPF system is malfunctioning Have an authorized dealer perform necessary inspection Possible cause Remedy Ref page The front of the intercooler or radiator is plugged with d...

Page 249: ... is clogged Clean or replace the air cleaner ele ment 12 42 Tire pressure is too low Adjust to the adequate inflation pres sure 12 67 The clutch is slipping Manual transmission vehicles Have an authorized dealer perform necessary inspection Possible cause Remedy Ref page The wrong oil is being used Replace the engine oil with a proper one 12 24 There is too much oil Adjust the quantity to the prop...

Page 250: ...with dust and dirt Clean 12 86 The DPF is blocked Have an authorized dealer perform necessary inspection Possible cause Remedy Ref page Clutch fluid is insufficient Add clutch fluid 12 34 Clutch pedal play is excessive Have an authorized dealer perform necessary inspection 12 64 Possible cause Remedy Ref page Air pressure is insufficient Increase the engine speed to boost air pressure 12 62 Brake ...

Page 251: ...se Tighten the wheel nuts to specifica tion 12 75 Tires are not uniformly inflated Inflate tires properly 12 66 Tires wear unevenly Replace tires 12 70 Wheels are not balanced properly Have an authorized dealer perform necessary inspection Left and right braking forces are uneven Have an authorized dealer perform necessary inspection Possible cause Remedy Ref page Parts are insufficiently greased ...

Page 252: ...n 12 56 The battery is short of electrolyte Add battery electrolyte 12 80 The life of the battery has expired Replace the battery 12 80 Idling speed setting is too low Have an authorized dealer perform necessary inspection Vehicle is used only at nighttime Charge the battery 12 80 Switches are left on Be sure to turn off the switches The alternator is faulty Have an authorized dealer perform neces...

Page 253: ...ur vehicle carries reflective triangles erect them by the side of the road behind the vehicle 2 Repair Check the mechanical failure and if you judge it readily repairable fix it while paying attention to the traffic If you are unable to repair it call an autho rized dealer for help Stopping your vehicle in an emergency WARNING Stopping your vehicle in a tunnel could be dangerous Wherever possible ...

Page 254: ...ormal idling speed so that the engine will cool down CAUTION Be sure to stop the engine only after letting it run at a speed slightly above the idling RPM until the coolant cools down Turning off the engine immediately after stopping will cause the coolant temperature to rise quickly and may cause the engine to seize up 2 When the gauge s needle stays near the center of the scale stop the engine a...

Page 255: ...ontact an authorized dealer for assistance If a lamp fails to illuminate or electrical equip ment does not function a fuse may have blown Check and replace fuses as necessary Before checking or replacing fuses turn the starter switch to the LOCK position and push all switches to the OFF position WARNING Open the radiator cap only after the coolant temperature has dropped sufficiently If the cap is...

Page 256: ...nel align the lugs on the panel with the cuts in the dashboard insert the pins in 8 places in the holes and push the panel into position by hand 2 To remove a blown fuse use fuse puller located in the fuse box Pinch and pull fuse with the fuse puller The circuit protected by each fuse and its amperage A are indicated on the reverse side of the panel Z17493 Z17494 Z09117 ...

Page 257: ...se of a blown fuse cannot be deter mined or the same fuse blows frequently have your vehicle inspected at an authorized dealer Use care not to splash water on or around the glove compartment Should water be splashed over the glove compartment check the inside of the compartment for water WARNING Use genuine fuses of the specified amper ages A fire could result if a fuse of incorrect amperage is us...

Page 258: ...U B06 30A ABS B07 10A Stop lamps B08 15A Low beam headlamp LH B09 15A High beam headlamps B10 15A Low beam headlamp RH B11 20A Tail lamps B13 20A Accessory power supply optional socket circuit B14 5A Tail lamp relay M11 B17 B24 M18 M01 M16 B30 M20 B39 B09 B10 M03 B32 B16 M08 B28 B08 B36 B11 M10 B34 B13 M06 B33 B07 B22 B14 M17 B21 B04 B23 B02 A05 S01 B06 A04 B20 B03 B18 A02 B19 B01 A01 B38 Z17496 Z...

Page 259: ...ower supply battery circuit B27 15A Horn B28 5A Daytime running light system B30 15A Automatic transmission B32 15A Tester B33 10A Accessory power supply ACC circuit B34 10A Heated mirrors B36 15A Van body lamp B38 30A Automatic transmission cooler fan LH B39 30A Automatic transmission cooler fan RH M01 10A MVCU M03 10A MUTIC RELAY CONT M06 10A Power windows M08 10A Accessory power supply starter ...

Page 260: ...ized dealer and have them check your vehicle For high current fuses first remove their mounting nuts and then remove the fuses For other fuses simply pull them off CAUTION Close the cover completely to prevent rain water from entering the fuse box M15 10A Meter cluster daytime running light system M16 10A Backup lamps M17 20A Wipers M18 10A Automatic transmission M20 5A ABS S01 10A Starter 5A Spar...

Page 261: ...ry and then replace the fuse with a genuine one 127A No Amperage casing color Protected circuit FH1 60A yellow Fuse box A01 A05 M01 M20 S01 FH2 60A yellow Fuse box B01 B06 FH3 60A yellow Fuse box B07 B16 FH4 60A yellow Fuse box B17 B27 FH5 50A red Glow FH6 140A russet Alternator FH7 60A yellow Fuse box B27 B37 FH8 60A yellow Fuse box B38 B39 WARNING Replacement high current fuses should always be ...

Page 262: ...utch system Contact with such a substance could discolor or crack the lenses If such a substance gets on a plastic lens immediately wipe it off or rinse it off with water Burnt bulbs should be replaced as soon as possible WARNING Electricity is always present at one end of the glow relay To be safe always discon nect the negative cable from the battery before replacing the fuse Use genuine fuses o...

Page 263: ... lamp bulb as its high inner pressure increases chance of injury NOTE Inside lenses in lamps such as headlamps tempo rarily fog during driving in the rain or vehicle wash Just as in the case of window glass fogging in the rain fogging is formed by difference of the tempera ture between inside and outside of the lamp No functional problem develops and fogging will disap pear by itself Ref No Lamp B...

Page 264: ...twisting and correct it if necessary 4 Fit the cover while aligning its mark with the boss removal position index on the headlamp body then rotate the cover clockwise until the mark points at the other boss lock position index 5 Lower the cab back to its original position Front side turn signal lamp FK61F 12V 10W R10W 2 Front side turn signal lamp Other than FK61F Identification lamp 12V 7 5W 89 3...

Page 265: ...placing front turn signal lamp 1 Open the front panel P 12 4 2 Remove socket by turning it counterclock wise 3 Push bulb and turn counterclockwise to remove it 4 Install the lamp by reversing the order of removal 5 If the packing is dirty clean it 4 Replacing front side turn signal lamp FK61F 1 Push the bottom of the lamp rearward to release the tab Then remove the lamp unit 2 Turn the socket coun...

Page 266: ...to the holes in the lamp body and then pushing the bottom of the lens into position 6 Replacing other lamps 1 Loosen the screw that secures the lens then remove the lens 2 Turn the bulb counterclockwise while pressing it and remove it 3 Insert a new bulb and turn it clockwise 4 Fit the lens ensuring that the packing is cor rectly positioned If the packing is incorrectly installed or twisted water ...

Page 267: ...rofessional towing service When braking is sluggish WARNING Activating the parking brake while driving could cause the vehicle to topple over The brake system is of a dual circuit design one circuit for the front wheels and the other for the rear wheels Even if one circuit fails you can stop the vehicle with the other intact circuit However under these circumstances braking power is very much redu...

Page 268: ...Give the release bolt 1 4 of a turn clockwise then check that it cannot be pulled out 5 Fit the washer and nut onto the release bolt Then turn the nut down the bolt using a wrench with a face to face dimension of 19 mm 3 4 in The parking brake will be completely released when the distance L from the nut s top surface to the bolt s free end is equal to the following value CAUTION To avoid damaging ...

Page 269: ...lace the tire select a flat surface where your vehicle will not hinder traffic Perform the following procedure to start your engine by connecting your battery to the well charged bat tery of another vehicle with booster cables CAUTION Use booster cables able to handle large cur rents Use a booster battery of the same voltage as your vehicle s battery Your vehicle s electrical system operates on a ...

Page 270: ... receiving the boost before attempting to turn over the engine WARNING Check the battery s fluid level before con necting booster cables If the fluid is below the LOWER LEVEL line add battery fluid or distilled water If the battery was charged with an excessively low fluid level it would deteriorate rapidly and could overheat or explode Be careful not to connect the booster cables in the wrong seq...

Page 271: ...e vents the engine from being started even after the engine is refueled In these cases bleed the fuel system by performing the following steps CAUTION The fuel injection system may fail if the engine stops due to lack of fuel The fuel filter is either at the front or rear of the fuel tank which is located on the left hand side of the vehicle When the fuel has run out Bleeding the fuel system WARNI...

Page 272: ... some dozen times approximately 60 to 80 times until the fuel no longer contains any air bubbles 4 After making sure that there are no air bubbles in the fuel emerging from the air bleeder plug fasten the plug tightly Operate the priming pump again several times until you feel an increase in resistance Be sure to operate the pump several times even if the resistance does not increase because the f...

Page 273: ...o prevent them from damaging Attach the towing chain securely to the front axle CAUTION Do not attach the chain to the bumper since the bumper would be damaged upon raising the front wheels or towing Before raising the front wheels or towing confirm that the chain will not damage any parts of the vehicle Remove the parts that may be damaged Tow the vehicle only with a specially designed towing tru...

Page 274: ...14 1 Recommended lubricants hydraulic fluids and quantities 14 2 Service data 14 4 14 Service data ...

Page 275: ... use the oil level gauge inspection plug holes and level lines as appropriate Recommended lubricants hydraulic fluids and quantities Item Quantity Engine Oil pan Approx 11 11 6 Oil filter Approx 2 3 2 4 Manual transmission Other than FM65F Approx 6 7 7 1 Add approx 0 5 0 5 if vehicle has PTO FM65F Approx 8 1 8 6 Automatic transmission Other than FM65F 1000RDS Approx 7 0 7 4 2200RDS Approx 10 0 10 ...

Page 276: ...ming to GL 5 SAE140 or SAE85W 140 if the vehicle is to be driven under heavy load conditions as for example driving up long uphill grades Remember however that this oil is be used only when the temperature is above 10 C 50 F 140 or 85W 140 Power steering Automatic transmission fluid DEXRON II DEXRON III type Brake Clutch Brake fluid SAE J1703 FMVSS No 116 Grade DOT3 Chassis grease fittings Chassis...

Page 277: ...dup time from 0 to 100 psi with the engine idling FK61F Within 6 minutes Other than FK61F Within 9 minutes Parking brake lever stroke FK61F when pulled with a 295 N 66 lbs 30 kgf force 7 to 10 notches Wheel nut tightening torque FK61F 370 to 410 N m 275 to 304 ft lbs 38 to 42 kgf m Other than FK61F 540 to 590 N m 395 to 430 ft lbs 55 to 60 kgf m Tire tread groove depth Normal roads 1 6 mm 2 32 in ...

Page 278: ...15 1 Maintenance schedule 15 2 Lubrication schedule 15 11 15 Maintenance schedule ...

Page 279: ...ds see the section entitled Lubrication schedule 1 30 000 km 18 000 miles or 6 months whichever occurs first 2 60 000 km 36 000 miles or 12 months whichever occurs first 3 FK61F FK62F FK65F 4 FK62F FK65F FM65F 5 FK65F 6 FK61F Exhaust emission items Noise control items Item Time of inspection and maintenance Working procedures Ref page Pre operational checks New vehicle at 4 000 km 2 500 miles Insp...

Page 280: ...de the engine compartment Replace if necessary Belt tension and damage I I Press midpoint of belt firmly with finger to measure deflection and check for belt damage 12 56 Coolant level and leaks from cooling system I Check coolant level and if level is low check for coolant leaks 12 48 Coolant replacement Every 24 months Replace with new coolant 12 48 Radiator cap condition I Check radiator cap fo...

Page 281: ...ment Every 24 months Replace DPF pressure sensor hose Starter function I Operate starter switch and check the switch for proper func tion Alternator function I Check for function with a circuit tester DPF Every 10 000 km 6 000 miles or 12 months Check DPF for blocking First 320 000 km 200 000 miles Every 240 000 km 150 000 miles thereafter DPF Ash Cleaning 12 84 POWER TRAIN Air or oil leaks from p...

Page 282: ...ess I Turn propeller shaft manually to check for loose spline cou pling Check for looseness between spider and needle roller bear ing FRONT AND REAR AXLES Axle shaft torsion and cracks I Remove axle shaft and check for torsion bend and cracks Front wheel hub bear ing looseness I With front axle jacked up move wheel up and down by holding tire s top and bottom to check for bearing looseness Rear wh...

Page 283: ...r spring diaphragm replacement 5 Every 36 months Check diaphragm and replace if necessary Oil leaks and damage of shock absorbers I Check for oil leaks from and damage of cylinders and other parts BRAKING SYSTEM Air pressure and its charging speed I After discharging air from air tank start and run the engine at idle and measure time taken to charge air to specified pressure in air tank 12 62 Air ...

Page 284: ... drainage 12 65 Check drain from air drier exhaust port I Check to see that oil is not dis charged abnormally from exhaust port of air drier 12 65 Replacement of drying agent in air drier Every 60 000 km 36 000 miles or 12 months Disassemble air drier and replace drying agent and rubber parts 12 65 Brake shoe clearance A Measure clearance with thick ness gauge Brake lining wear I Check for lining ...

Page 285: ...replacement Every 12 months Check check valve packing and rubber parts replace if neces sary Brake valve packing and rubber parts replacement Every 12 months Check brake valve packing and rubber parts replace if neces sary Air compressor to air drier hose replacement Every 12 months Replace the hose connecting the air compressor to the air drier Brake booster power cylinder packing replacement 6 E...

Page 286: ...seness Wheel alignment I Measure toe in camber caster and kingpin inclination angles Right and left turning angles and power steering function I Check that stopper bolt is suf ficiently tight without damage and that steering linkage operates smoothly until blocked by stopper bolt Check that steering wheel does not contact other parts Power steering booster and oil pump internal rubber parts replac...

Page 287: ...very 20 000 km 12 000 miles Check electrolyte level Measure electrolyte specific gravity with hydrometer 12 80 Operation and damage of lighting system and turn signal lamps I I Check operation damage and installation of an lighting units Also check turn signal lamps operated by turn signal switch 12 13 Operation of horn I I Check operation damage and mounting condition 12 15 Operation and fluid le...

Page 288: ...y 10 000 km 6 000 miles Every 30 000 km 18 000 miles 1 Every 60 000 km 36 000 miles 2 Engine oil contamination and oil level I 12 24 Engine oil replacement R R Clutch reservoir tank fluid level I I 12 34 Clutch fluid replacement R Lubrication of clutch fork shaft L 12 18 Manual transmission oil level I 12 28 Manual transmission oil replacement R Every 50 000 km 30 000 miles Item Time of inspection...

Page 289: ...g gear oil replacement R R Hub bearing grease and oil seal replacement R Brake reservoir tank fluid level 3 I I 12 34 Brake fluid replacement 3 R Power steering fluid level I 12 37 Power steering fluid replacement R Lubrication of propeller shaft universal joint slip joint center bearing L 12 18 Lubrication of cab rear mount cushion L 12 23 Lubrication of king pins L 12 18 Lubrication of chassis p...

Page 290: ...16 1 16 Alphabetical index ...

Page 291: ...igarette lighter 10 2 Cleaning your vehicle 12 87 Clutch 12 64 Clutch fluid 12 34 Clutch pedal 5 14 Coolant 12 48 Cruise control 5 29 Cup holder 10 6 Dimmer switch 5 25 Door pocket 10 5 Door window glass 3 12 Doors 3 2 DPF cleaning switch 5 36 Draining water from fuel filter 12 46 Driver s seat 4 3 Dust indicator 12 43 Emergencies 13 1 Engine number 1 2 Engine oil 12 24 Engine overheats 13 9 Enter...

Page 292: ...13 Power window switches 3 13 Powerline label 1 2 Pre operational check 1 4 12 11 Refueling 1 6 Reporting safety defects 1 9 Seat belts 4 5 Seats 4 2 Service brakes 12 61 Service data 14 1 Speedometer 6 2 Starter key 3 2 Starter switch 5 3 Starting the engine 5 5 Steering wheel 4 9 12 59 Stopping the engine 5 11 Sun visors 10 3 Tachometer 6 3 Tilting the cab 12 6 Tire chains 11 4 Tire rotation 12 ...

Page 293: ......

Page 294: ...17 MAINTENANCE RECORD NOTE The symbols and prefixed to some check items stand for Exhaust Emission Control item and Noise Control item respectively 17 1 ...

Page 295: ......

Page 296: ...ntification number 1 4 000 km 2 500 miles 4 000 km 2 500 miles Lubrication Engine oil replacement Manual transmission oil replacement Axle housing gear oil replacement Inspection and maintenance Power train Propeller shaft flange yoke bolts and center bearing bolts looseness Front and rear axle Retightening wheel nuts Suspension system Retightening U bolts ...

Page 297: ......

Page 298: ...ering fluid level Lubrication of propeller shaft universal joint slip joint center bearing Lubrication of king pins Lubrication of chassis parts Inspection and maintenance Engine Air fuel oil or coolant leaks from engine Engine starting performance speed noise and exhaust gas conditions Retightening the fuel tank bracket bolts Belt tension and damage Radiator cap condition Cooling system hose clam...

Page 299: ...on Parking brake effectiveness Parking brake lever stroke Steering system Fluid leaks from steering system Steering wheel play Steering operating condition Looseness and play of steering system including hoses and pipes Drag link ball joint dust boots Cab and frame Looseness and damage of chassis and body Heater and defroster operation Door lock function Seat belt mounting condition Electrical sys...

Page 300: ...oint center bearing Lubrication of king pins Lubrication of chassis parts Inspection and maintenance Engine Air fuel oil or coolant leaks from engine Engine starting performance speed noise and exhaust gas conditions Oil filter replacement Retightening the fuel tank bracket bolts Belt tension and damage Radiator cap condition Cooling system hose clamp position and clamping condition Check the air ...

Page 301: ...iveness Parking brake lever stroke Steering system Fluid leaks from steering system Steering wheel play Steering operating condition Looseness and play of steering system including hoses and pipes Drag link ball joint dust boots Cab and frame Looseness and damage of chassis and body Heater and defroster operation Door lock function Seat belt mounting condition Electrical system Looseness and damag...

Page 302: ...mounting pads Lubrication of king pins Lubrication of chassis parts Inspection and maintenance Engine Air fuel oil or coolant leaks from engine Engine starting performance speed noise and exhaust gas conditions Fuel filter replacement Retightening the fuel tank bracket bolts Belt tension and damage Radiator cap condition Cooling system hose clamp position and clamp ing condition Check the air clea...

Page 303: ...ir drier Check drain from air drier exhaust port Brake shoe clearance Brake lining wear Parking brake operation Parking brake effectiveness Parking brake lever stroke Steering system Fluid leaks from steering system Steering wheel play Steering operating condition Looseness and play of steering system including hoses and pipes Drag link ball joint dust boots Cab and frame Looseness and damage of c...

Page 304: ... Power steering fluid level Lubrication of propeller shaft universal joint slip joint center bearing Lubrication of king pins Lubrication of chassis parts Inspection and maintenance Engine Air fuel oil or coolant leaks from engine Engine starting performance speed noise and exhaust gas conditions Oil filter replacement Retightening the fuel tank bracket bolts Belt tension and damage Radiator cap c...

Page 305: ...tion Parking brake effectiveness Parking brake lever stroke Steering system Fluid leaks from steering system Steering wheel play Steering operating condition Looseness and play of steering system including hoses and pipes Drag link ball joint dust boots Cab and frame Looseness and damage of chassis and body Heater and defroster operation Door lock function Seat belt mounting condition Electrical s...

Page 306: ...ller shaft universal joint slip joint center bearing Lubrication of king pins Lubrication of chassis parts Inspection and maintenance Engine Air fuel oil or coolant leaks from engine Engine starting performance speed noise and exhaust gas conditions Retightening the fuel tank bracket bolts Belt tension and damage Radiator cap condition Cooling system hose clamp position and clamping condition Chec...

Page 307: ...ion Parking brake effectiveness Parking brake lever stroke Steering system Fluid leaks from steering system Steering wheel play Steering operating condition Looseness and play of steering system including hoses and pipes Drag link ball joint dust boots Cab and frame Looseness and damage of chassis and body Heater and defroster operation Door lock function Seat belt mounting condition Electrical sy...

Page 308: ...Engine Air fuel oil or coolant leaks from engine Engine starting performance speed noise and exhaust gas conditions Retightening intake and exhaust manifold bolts Valve clearance Oil filter replacement Fuel filter replacement Retightening the fuel tank bracket bolts Belt tension and damage Radiator cap condition Cooling system hose clamp position and clamping con dition Check the air cleaner eleme...

Page 309: ...inder piston cup and dust seal replacement Air compressor to air drier hose replacement Brake booster packing cup and rubber parts replacement Brake hose replacement Check valve packing and rubber parts replacement Brake valve packing and rubber parts replacement Steering system Fluid leaks from steering system Steering wheel play Steering operating condition Looseness and play of steering system ...

Page 310: ...joint slip joint center bearing Lubrication of king pins Lubrication of chassis parts Inspection and maintenance Engine Air fuel oil or coolant leaks from engine Engine starting performance speed noise and exhaust gas conditions Retightening the fuel tank bracket bolts Belt tension and damage Radiator cap condition Cooling system hose clamp position and clamping condition Check the air cleaner ele...

Page 311: ...ion Parking brake effectiveness Parking brake lever stroke Steering system Fluid leaks from steering system Steering wheel play Steering operating condition Looseness and play of steering system including hoses and pipes Drag link ball joint dust boots Cab and frame Looseness and damage of chassis and body Heater and defroster operation Door lock function Seat belt mounting condition Electrical sy...

Page 312: ...ion of propeller shaft universal joint slip joint center bearing Lubrication of king pins Lubrication of chassis parts Inspection and maintenance Engine Air fuel oil or coolant leaks from engine Engine starting performance speed noise and exhaust gas conditions Oil filter replacement Retightening the fuel tank bracket bolts Belt tension and damage Radiator cap condition Cooling system hose clamp p...

Page 313: ...tion Parking brake effectiveness Parking brake lever stroke Steering system Fluid leaks from steering system Steering wheel play Steering operating condition Looseness and play of steering system including hoses and pipes Drag link ball joint dust boots Cab and frame Looseness and damage of chassis and body Heater and defroster operation Door lock function Seat belt mounting condition Electrical s...

Page 314: ...enance Engine Air fuel oil or coolant leaks from engine Engine starting performance speed noise and exhaust gas conditions Fuel filter replacement Retightening the fuel tank bracket bolts Belt tension and damage Radiator cap condition Cooling system hose clamp position and clamping condition Check the air cleaner element Damage of air intake system looseness of clamp and loss of parts Exhaust syst...

Page 315: ...rking brake operation Parking brake effectiveness Parking brake lever stroke Steering system Fluid leaks from steering system Steering wheel play Steering operating condition Looseness and play of steering system including hoses and pipes Drag link ball joint dust boots Cab and frame Looseness and damage of chassis and body Heater and defroster operation Door lock function Seat belt mounting condi...

Page 316: ...universal joint slip joint center bearing Lubrication of king pins Lubrication of chassis parts Inspection and maintenance Engine Air fuel oil or coolant leaks from engine Engine starting performance speed noise and exhaust gas conditions Oil filter replacement Retightening the fuel tank bracket bolts Belt tension and damage Radiator cap condition Cooling system hose clamp position and clamping co...

Page 317: ...iveness Parking brake lever stroke Steering system Fluid leaks from steering system Steering wheel play Steering operating condition Looseness and play of steering system including hoses and pipes Drag link ball joint dust boots Cab and frame Looseness and damage of chassis and body Heater and defroster operation Door lock function Seat belt mounting condition Electrical system Looseness and damag...

Page 318: ... Lubrication of king pins Lubrication of chassis parts Inspection and maintenance Engine Air fuel oil or coolant leaks from engine Engine starting performance speed noise and exhaust gas conditions Retightening the fuel tank bracket bolts Belt tension and damage Radiator cap condition Cooling system hose clamp position and clamping condition Check the air cleaner element Damage of air intake syste...

Page 319: ...Parking brake lever stroke Steering system Fluid leaks from steering system Steering wheel play Steering operating condition Looseness and play of steering system including hoses and pipes Drag link ball joint dust boots Cab and frame Looseness and damage of chassis and body Heater and defroster operation Door lock function Seat belt mounting condition Electrical system Looseness and damage of ele...

Page 320: ...ssis parts Inspection and maintenance Engine Air fuel oil or coolant leaks from engine Engine starting performance speed noise and exhaust gas conditions Retightening intake and exhaust manifold bolts Valve clearance Oil filter replacement Fuel filter replacement Draining water and sediment in fuel tank Retightening the fuel tank bracket bolts Check fuel line outside the engine compartment Belt te...

Page 321: ...r packing cup and rubber parts replacement Brake hose replacement Check valve packing and rubber parts replacement Brake valve packing and rubber parts replacement Air compressor to air drier hose replacement Brake booster power cylinder packing replacement Brake fluid reservoir tank tube replacement Brake chamber s packing and rubber parts replacement Steering system Fluid leaks from steering sys...

Page 322: ... Lubrication of king pins Lubrication of chassis parts Inspection and maintenance Engine Air fuel oil or coolant leaks from engine Engine starting performance speed noise and exhaust gas conditions Retightening the fuel tank bracket bolts Belt tension and damage Radiator cap condition Cooling system hose clamp position and clamping condition Check the air cleaner element Damage of air intake syste...

Page 323: ...Parking brake lever stroke Steering system Fluid leaks from steering system Steering wheel play Steering operating condition Looseness and play of steering system including hoses and pipes Drag link ball joint dust boots Cab and frame Looseness and damage of chassis and body Heater and defroster operation Door lock function Seat belt mounting condition Electrical system Looseness and damage of ele...

Page 324: ...joint center bearing Lubrication of king pins Lubrication of chassis parts Inspection and maintenance Engine Air fuel oil or coolant leaks from engine Engine starting performance speed noise and exhaust gas conditions Oil filter replacement Retightening the fuel tank bracket bolts Belt tension and damage Radiator cap condition Cooling system hose clamp position and clamping condition Check the air...

Page 325: ...iveness Parking brake lever stroke Steering system Fluid leaks from steering system Steering wheel play Steering operating condition Looseness and play of steering system including hoses and pipes Drag link ball joint dust boots Cab and frame Looseness and damage of chassis and body Heater and defroster operation Door lock function Seat belt mounting condition Electrical system Looseness and damag...

Page 326: ...Lubrication of cab rear mounting pads Lubrication of king pins Lubrication of chassis parts Inspection and maintenance Engine Air fuel oil or coolant leaks from engine Engine starting performance speed noise and exhaust gas conditions Fuel filter replacement Retightening the fuel tank bracket bolts Belt tension and damage Radiator cap condition Cooling system hose clamp position and clamp ing cond...

Page 327: ...air drier Check drain from air drier exhaust port Brake shoe clearance Brake lining wear Parking brake operation Parking brake effectiveness Parking brake lever stroke Steering system Fluid leaks from steering system Steering wheel play Steering operating condition Looseness and play of steering system including hoses and pipes Drag link ball joint dust boots Cab and frame Looseness and damage of ...

Page 328: ...tion of propeller shaft universal joint slip joint center bearing Lubrication of king pins Lubrication of chassis parts Inspection and maintenance Engine Air fuel oil or coolant leaks from engine Engine starting performance speed noise and exhaust gas conditions Oil filter replacement Retightening the fuel tank bracket bolts Belt tension and damage Radiator cap condition Cooling system hose clamp ...

Page 329: ...tion Parking brake effectiveness Parking brake lever stroke Steering system Fluid leaks from steering system Steering wheel play Steering operating condition Looseness and play of steering system including hoses and pipes Drag link ball joint dust boots Cab and frame Looseness and damage of chassis and body Heater and defroster operation Door lock function Seat belt mounting condition Electrical s...

Page 330: ...g Lubrication of king pins Lubrication of chassis parts Inspection and maintenance Engine Air fuel oil or coolant leaks from engine Engine starting performance speed noise and exhaust gas conditions Retightening the fuel tank bracket bolts Belt tension and damage Radiator cap condition Cooling system hose clamp position and clamping condition Check the air cleaner element Damage of air intake syst...

Page 331: ...Parking brake lever stroke Steering system Fluid leaks from steering system Steering wheel play Steering operating condition Looseness and play of steering system including hoses and pipes Drag link ball joint dust boots Cab and frame Looseness and damage of chassis and body Heater and defroster operation Door lock function Seat belt mounting condition Electrical system Looseness and damage of ele...

Page 332: ... Engine Air fuel oil or coolant leaks from engine Engine starting performance speed noise and exhaust gas conditions Retightening of intake and exhaust manifold bolts Valve clearance Oil filter replacement Fuel filter replacement Retightening the fuel tank bracket bolts Belt tension and damage Radiator cap condition Cooling system hose clamp position and clamping con dition Check the air cleaner e...

Page 333: ...eal replacement Air compressor to air drier hose replacement Brake booster packing cup and rubber parts replacement Brake hose replacement Check valve packing and rubber parts replacement Brake valve packing and rubber parts replacement Replacement of rubber parts at brake chamber s wheel parking brake spring and expander Steering system Fluid leaks from steering system Steering wheel play Steerin...

Page 334: ...g Lubrication of king pins Lubrication of chassis parts Inspection and maintenance Engine Air fuel oil or coolant leaks from engine Engine starting performance speed noise and exhaust gas conditions Retightening the fuel tank bracket bolts Belt tension and damage Radiator cap condition Cooling system hose clamp position and clamping condition Check the air cleaner element Damage of air intake syst...

Page 335: ...Parking brake lever stroke Steering system Fluid leaks from steering system Steering wheel play Steering operating condition Looseness and play of steering system including hoses and pipes Drag link ball joint dust boots Cab and frame Looseness and damage of chassis and body Heater and defroster operation Door lock function Seat belt mounting condition Electrical system Looseness and damage of ele...

Page 336: ...level Power steering fluid level Lubrication of propeller shaft universal joint slip joint center bearing Lubrication of king pins Lubrication of chassis parts Inspection and maintenance Engine Air fuel oil or coolant leaks from engine Engine starting performance speed noise and exhaust gas conditions Oil filter replacement Retightening the fuel tank bracket bolts Belt tension and damage Radiator ...

Page 337: ...tion Parking brake effectiveness Parking brake lever stroke Steering system Fluid leaks from steering system Steering wheel play Steering operating condition Looseness and play of steering system including hoses and pipes Drag link ball joint dust boots Cab and frame Looseness and damage of chassis and body Heater and defroster operation Door lock function Seat belt mounting condition Electrical s...

Page 338: ...ear mounting pads Lubrication of king pins Lubrication of chassis parts Inspection and maintenance Engine Air fuel oil or coolant leaks from engine Engine starting performance speed noise and exhaust gas conditions Fuel filter replacement Retightening the fuel tank bracket bolts Belt tension and damage Radiator cap condition Cooling system hose clamp position and clamp ing condition Check the air ...

Page 339: ...air drier Check drain from air drier exhaust port Brake shoe clearance Brake lining wear Parking brake operation Parking brake effectiveness Parking brake lever stroke Steering system Fluid leaks from steering system Steering wheel play Steering operating condition Looseness and play of steering system including hoses and pipes Drag link ball joint dust boots Cab and frame Looseness and damage of ...

Page 340: ... joint center bearing Lubrication of king pins Lubrication of chassis parts Inspection and maintenance Engine Air fuel oil or coolant leaks from engine Engine starting performance speed noise and exhaust gas conditions Oil filter replacement Retightening the fuel tank bracket bolts Belt tension and damage Radiator cap condition Cooling system hose clamp position and clamping condition Check the ai...

Page 341: ...iveness Parking brake lever stroke Steering system Fluid leaks from steering system Steering wheel play Steering operating condition Looseness and play of steering system including hoses and pipes Drag link ball joint dust boots Cab and frame Looseness and damage of chassis and body Heater and defroster operation Door lock function Seat belt mounting condition Electrical system Looseness and damag...

Page 342: ...g Lubrication of king pins Lubrication of chassis parts Inspection and maintenance Engine Air fuel oil or coolant leaks from engine Engine starting performance speed noise and exhaust gas conditions Retightening the fuel tank bracket bolts Belt tension and damage Radiator cap condition Cooling system hose clamp position and clamping condition Check the air cleaner element Damage of air intake syst...

Page 343: ...Parking brake lever stroke Steering system Fluid leaks from steering system Steering wheel play Steering operating condition Looseness and play of steering system including hoses and pipes Drag link ball joint dust boots Cab and frame Looseness and damage of chassis and body Heater and defroster operation Door lock function Seat belt mounting condition Electrical system Looseness and damage of ele...

Page 344: ...ce Engine Air fuel oil or coolant leaks from engine Engine starting performance speed noise and exhaust gas conditions Retightening intake and exhaust manifold bolts Valve clearance Oil filter replacement Fuel filter replacement Draining water and sediment in fuel tank Retightening the fuel tank bracket bolts Check fuel line outside the engine compartment Belt tension and damage Coolant replacemen...

Page 345: ...r packing cup and rubber parts replacement Brake hose replacement Check valve packing and rubber parts replacement Brake valve packing and rubber parts replacement Air compressor to air drier hose replacement Brake booster power cylinder packing replacement Brake fluid reservoir tank tube replacement Brake chamber s packing and rubber parts replacement Steering system Fluid leaks from steering sys...

Page 346: ... universal joint slip joint center bearing Lubrication of king pins Lubrication of chassis parts Inspection and maintenance Engine Air fuel oil or coolant leaks from engine Engine starting performance speed noise and exhaust gas conditions Retightening the fuel tank bracket bolts Belt tension and damage Radiator cap condition Cooling system hose clamp position and clamping condition Check the air ...

Page 347: ...ion Parking brake effectiveness Parking brake lever stroke Steering system Fluid leaks from steering system Steering wheel play Steering operating condition Looseness and play of steering system including hoses and pipes Drag link ball joint dust boots Cab and frame Looseness and damage of chassis and body Heater and defroster operation Door lock function Seat belt mounting condition Electrical sy...

Page 348: ... joint center bearing Lubrication of king pins Lubrication of chassis parts Inspection and maintenance Engine Air fuel oil or coolant leaks from engine Engine starting performance speed noise and exhaust gas conditions Oil filter replacement Retightening the fuel tank bracket bolts Belt tension and damage Radiator cap condition Cooling system hose clamp position and clamping condition Check the ai...

Page 349: ...iveness Parking brake lever stroke Steering system Fluid leaks from steering system Steering wheel play Steering operating condition Looseness and play of steering system including hoses and pipes Drag link ball joint dust boots Cab and frame Looseness and damage of chassis and body Heater and defroster operation Door lock function Seat belt mounting condition Electrical system Looseness and damag...

Page 350: ...ear mounting pads Lubrication of king pins Lubrication of chassis parts Inspection and maintenance Engine Air fuel oil or coolant leaks from engine Engine starting performance speed noise and exhaust gas conditions Fuel filter replacement Retightening the fuel tank bracket bolts Belt tension and damage Radiator cap condition Cooling system hose clamp position and clamp ing condition Check the air ...

Page 351: ... of air drier Check drain from air drier exhaust port Brake shoe clearance Brake lining wear Parking brake operation Parking brake effectiveness Parking brake lever stroke Steering system Fluid leaks from steering system Steering wheel play Steering operating condition Looseness and play of steering system including hoses and pipes Drag link ball joint dust boots Cab and frame Looseness and damage...

Page 352: ...el Power steering fluid level Lubrication of propeller shaft universal joint slip joint center bearing Lubrication of king pins Lubrication of chassis parts Inspection and maintenance Engine Air fuel oil or coolant leaks from engine Engine starting performance speed noise and exhaust gas conditions Oil filter replacement Retightening the fuel tank bracket bolts Belt tension and damage Radiator cap...

Page 353: ...tion Parking brake effectiveness Parking brake lever stroke Steering system Fluid leaks from steering system Steering wheel play Steering operating condition Looseness and play of steering system including hoses and pipes Drag link ball joint dust boots Cab and frame Looseness and damage of chassis and body Heater and defroster operation Door lock function Seat belt mounting condition Electrical s...

Page 354: ...g Lubrication of king pins Lubrication of chassis parts Inspection and maintenance Engine Air fuel oil or coolant leaks from engine Engine starting performance speed noise and exhaust gas conditions Retightening the fuel tank bracket bolts Belt tension and damage Radiator cap condition Cooling system hose clamp position and clamping condition Check the air cleaner element Damage of air intake syst...

Page 355: ...Parking brake lever stroke Steering system Fluid leaks from steering system Steering wheel play Steering operating condition Looseness and play of steering system including hoses and pipes Drag link ball joint dust boots Cab and frame Looseness and damage of chassis and body Heater and defroster operation Door lock function Seat belt mounting condition Electrical system Looseness and damage of ele...

Page 356: ...unting pads Lubrication of king pins Lubrication of chassis parts Inspection and maintenance Engine Air fuel oil or coolant leaks from engine Engine starting performance speed noise and exhaust gas conditions Retightening intake and exhaust manifold bolts Valve clearance Oil filter replacement Fuel filter replacement Retightening the fuel tank bracket bolts Belt tension and damage Radiator cap con...

Page 357: ...um and lining wear Damage on boot of brake chamber expander Wheel cylinder piston cup and dust seal replacement Air compressor to air drier hose replacement Brake booster packing cup and rubber parts replacement Brake hose replacement Check valve packing and rubber parts replacement Brake valve packing and rubber parts replacement Steering system Fluid leaks from steering system Steering wheel pla...

Page 358: ...ation of king pins Lubrication of chassis parts Inspection and maintenance Engine Air fuel oil or coolant leaks from engine Engine starting performance speed noise and exhaust gas conditions Retightening the fuel tank bracket bolts Belt tension and damage Radiator cap condition Cooling system hose clamp position and clamping condition Check the air cleaner element Damage of air intake system loose...

Page 359: ...tiveness Parking brake lever stroke Steering system Fluid leaks from steering system Steering wheel play Steering operating condition Looseness and play of steering system including hoses and pipes Drag link ball joint dust boots Cab and frame Looseness and damage of chassis and body Heater and defroster operation Door lock function Seat belt mounting condition Electrical system Looseness and dama...

Page 360: ... chassis parts Inspection and maintenance Engine Air fuel oil or coolant leaks from engine Engine starting performance speed noise and exhaust gas conditions Oil filter replacement Retightening the fuel tank bracket bolts Belt tension and damage Radiator cap condition Cooling system hose clamp position and clamp ing condition Air cleaner element replacement or 12 months Damage of air intake system...

Page 361: ...oke Steering system Fluid leaks from steering system Steering wheel play Steering operating condition Looseness and play of steering system including hoses and pipes Drag link ball joint dust boots Cab and frame Looseness and damage of chassis and body Heater and defroster operation Door lock function Seat belt mounting condition Electrical system Looseness and damage of electrical wiring and conn...

Page 362: ...Pub No MH996034 Owner s Manua l 2010 Model TOYO CF10884 DIC F101 BLACK FEBRUARY 09 ...

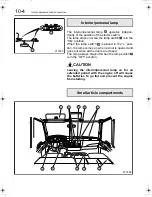
Reviews: