background image

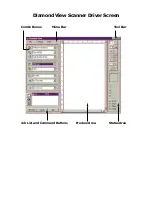
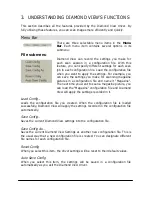
Diamond View Scanner Driver Screen

Menu Bar

Combo Boxes

Tool Bar

Job List and Command Buttons

Preview Area

Status Area

Summary of Contents for DIAMOND VIEW DV1248ST

Page 1: ...DIAMOND VIEW DV1248ST Professional Desktop Scanner User s Manual for Microsoft Windows...

Page 2: ......

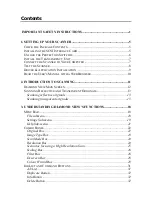
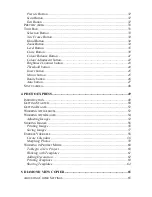
Page 3: ...CANNING 11 DIAMOND VIEW MAIN SCREEN 12 SCANNING REFLECTIVE AND TRANSPARENT ORIGINALS 13 Scanning reflective originals 13 Scanning transparent originals 15 3 UNDERSTANDING DIAMOND VIEW S FUNCTIONS 18 M...

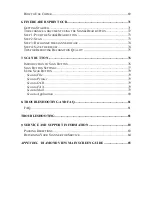
Page 4: ...button 45 Rotate button 46 Auto button 47 STATUS AREA 48 4 PHOTO EXPRESS 49 INTRODUCTION 49 GETTING STARTED 50 GETTING IMAGES 52 WORKING WITH ALBUM 52 WORKING WITH IMAGES 54 Adjusting Images 54 SHARI...

Page 5: ...TIPS FOR IMPROVING RECOGNITION QUALITY 75 7 SCAN BUTTON 76 INTRODUCTION TO SCAN BUTTON 76 SCAN BUTTON SETTINGS 77 USING SCAN BUTTON 79 Scan to File 79 Scan to Printer 79 Scan to OCR 79 Scan to FAX 79...

Page 6: ...ds and product names are trademarks or registered trademarks of their respective owners IMPORTANT SAFETY INSTRUCTIONS 1 Read these instructions carefully Save these instructions for future reference 2...

Page 7: ...dangerous voltage points or other risks Refer all servicing to qualified service personnel 13 Unplug this product from the wall outlet and refer servicing to qualified service personnel under the fol...

Page 8: ...is no guarantee that interference will not occur in a particular installation If this equipment dose cause harmful interference to radio or television reception which can be determined by turning the...

Page 9: ...Diamond View Scanner Driver Screen Menu Bar Combo Boxes Tool Bar Job List and Command Buttons Preview Area Status Area...

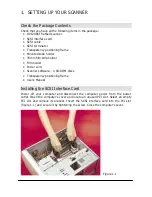
Page 10: ...r Film holder Power cord Scanner software 4 CD ROM discs Transparency positioning frame User s Manual Installing the SCSI Interface Card Power off your computer and disconnect the computer power from...

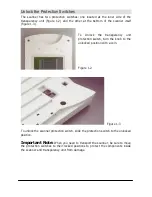
Page 11: ...k the transparency unit protection switch turn the knob to the unlocked position with a coin Figure 1 2 Figure 1 3 To unlock the scanner protection switch slide the protection switch to the unlocked p...

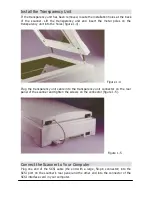
Page 12: ...figure 1 4 Figure 1 4 Plug the transparency unit cable into the transparency unit connector on the rear panel of the scanner and tighten the screws on the connector figure 1 5 Figure 1 5 Connect the...

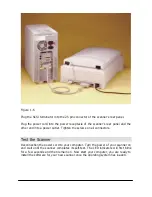
Page 13: ...power outlet Tighten the screws on all connectors Test the Scanner Reconnection the power cord to your computer Turn the power of your scanner on and wait until the scanner completes its self test The...

Page 14: ...sc 1 into your CD ROM drive The software installation menu will appear on the screen automatically figure 1 7 If the software installation menu does not appear automatically a few seconds later please...

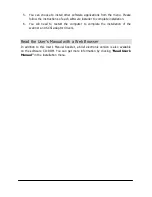
Page 15: ...ion 6 You will need to restart the computer to complete the installation of the scanner and SCSI adaptor drivers Read the User s Manual with a Web Browser In addition to this User s Manual booklet a b...

Page 16: ...cies into your image editing software 2 Select the colour depth for scanning either 24 or 48 bit 3 Select the scanning resolution 4 Adjust the quality of your scanned image before you actually start e...

Page 17: ...need to select the scanner image source before you can use the scanner and select Diamond View to scan and import image For details please refer to the instructions that come with your particular soft...

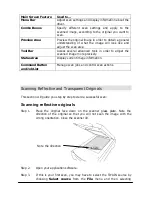
Page 18: ...cisely Status Area Display current image information Command Button and Job List Manage scan jobs and control scan actions Scanning Reflective and Transparent Originals This section will guide you ste...

Page 19: ...ick Preview A preview image will appear in the Preview Area Step 6 Adjust the scan area in the Preview Area Step 7 Use the options in the Combo Boxes to specify the Resolution Scale etc that will appl...

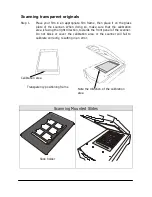
Page 20: ...make sure that the calibration area is facing the right direction towards the front panel of the scanner Do not block or cover the calibration area or the scanner will fail to calibrate correctly resu...

Page 21: ...r application software Step 3 If this is your first scan you may have to select the TWAIN source by choosing Select source from the File menu then selecting Diamond View in your application software y...

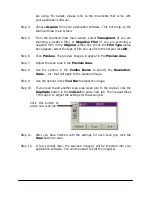
Page 22: ...in the Preview Area Step 7 Adjust the scan area in the Preview Area Step 8 Use the options in the Combo Boxes to specify the Resolution Scale etc that will apply to the scanned image Step 9 Use the o...

Page 23: ...e it Magazine The next time you want to scan a magazine picture you can load the Magazine configuration file and Diamond View will apply the settings recorded in it Load Config Loads the configuration...

Page 24: ...st box and then enter the desired width and height into the Width and Height text boxes The default unit is inch To change the unit click in the list box with your mouse and choose the desired unit fr...

Page 25: ...splayed midtones so that the monitor can approximate the colour details of the original images Drag the scroll bars to adjust the gamma values of red green blue and grey until the monitor displays the...

Page 26: ...Click on the Help submenu if you are either not clear about certain Diamond View functions or if you want information about your scanner Contents Click this item to bring up the on line help system Be...

Page 27: ...e three items available on the list Reflective Flatbed Select Reflective Flatbed if you are scanning images from printed pages such as magazine pictures photographs or paper documents Transparent Sele...

Page 28: ...in Tool Buttons will be disabled automatically Grey Each pixel of a grey image occupies 8 bits A total of 256 grey levels may be represented The Grey mode is used mainly for scanning greyscale images...

Page 29: ...ut the colours of the original as 48 bit colour with 16 bits for Red 16 bits for Green and 16 bits for Blue Resolution Box Resolution is used to determine how much detail the scanner captures from the...

Page 30: ...generally used for professional applications where there is a need to retain the sharpness and overall quality of the original images Select a resolution ranging from 75 dpi to 19200 dpi from the Res...

Page 31: ...e original image will be altered To avoid this you can check the Sync check box to adjust the scales of the X and Y axes simultaneously This will retain the original shape of the image When you get th...

Page 32: ...mage You can also directly enter the desired value into the Amount entry box to change the sharpness When you get the desired effect click on the OK button to confirm your settings and close the dialo...

Page 33: ...custom the descreen setting When Custom is selected the following dialog box will appear In this dialog box you can adjust the descreen value manually between 50 and 200 lines per inch by dragging th...

Page 34: ...he modification applied will appear in the lower part of the dialog box If you find a satisfactory effect to use click OK to exit the dialog box and apply the effect while scanning Otherwise click Can...

Page 35: ...profile is a file that tells a device how to manage colours so it can reproduce Colours more accurately and close to the origin These profiles are usually provided by the device manufactures or you ca...

Page 36: ...485 65 842 Line Art 35mm film slide 1 4 16 61 237 938 3 x5 83 331 1 332 5 282 21 111 84 410 4 x6 133 529 2 114 8 448 33 771 135 042 5 x7 193 772 3 082 12 316 49 243 196 924 A4 548 2 181 8 716 34 846...

Page 37: ...n one scan session Info Button The Info button is used to display the detailed information of selected scan job You can first click to select the job in the Job List and then click this button to disp...

Page 38: ...s inch and M represents millimetre The Preview Area displays the preview image that is acquired after the Preview button is selected Also any parameter change made to the image is instantly displayed...

Page 39: ...tton then move the mouse cursor into the Preview Area When the cursor becomes a cross click and drag your mouse to create a new selection area The new selection area scan job you just created will als...

Page 40: ...ge follows Colour Channel box Use the Colour Channel box to select a Colour channel to adjust This will allow you to adjust the histogram property of each Colour channel respectively Histogram A Histo...

Page 41: ...ich means that there are only a few midtone pixels in the image In image 2 pixels in objects possess greater levels of brightness and darkness The distribution is more even than that in Image 1 as wel...

Page 42: ...hreshold triangle to the left the pixels with higher brightness level than the Highlight Threshold will be turned into white This makes the image look brighter The Midtone triangle is used to control...

Page 43: ...nput Level is set as 20 to 230 then 210 230 minus 20 Colour levels can be represented in the image If you set the Output Level as 10 to 250 then the original 210 levels of Colour can be expanded to 24...

Page 44: ...to select the colour channel to be adjusted This allows you to adjust the curve property of each Colour channel independently Tonal Map The x axis in the Tonal Map represents the input brightness lev...

Page 45: ...th adjustments you can click OK to apply or click Reset to restore the default settings To abort and exit the dialog box click Cancel The original image and its Tonal Map The curve is straight and dia...

Page 46: ...ion you can also enter the desired values directly into the three entry boxes to the right of the Colour bars to adjust the Colour balance For example if the colour of the brighter area in the origina...

Page 47: ...specify the hue and saturation of the colour you want to use Move your mouse cursor on the Colour Wheel and then click on it Drag within the Colour Wheel to select the hue of the Colour you want to u...

Page 48: ...t the brightness and contrast more precisely you can use the Curve and Level function Brightness control You can drag the triangle below the bar to increase decrease the overall brightness of the imag...

Page 49: ...nition Note this function is only applicable when you select Line Art as the Image Type Select the Threshold button and the Threshold dialog box will appear The x axis in the histogram represents the...

Page 50: ...ny unwanted dots in an image you can eliminate them When you have finished with the threshold adjustment you can click OK to confirm or click Cancel to abort and exit the dialog box Otherwise you can...

Page 51: ...ually or click the Auto button to let Diamond View align the image automatically You can also enter the rotation angle in the Angle entry box directly When you have finished with the rotation you can...

Page 52: ...n area automatically and select only the necessary size for scanning the image Auto Descreen Clicking this button will detect and apply an appropriate descreen value for scanning Auto Type Click this...

Page 53: ...the colour of the pixel that the mouse cursor is currently pointing to Pixel Information Area The location of the pixel expressed in X Y coordinates and the RGB values of the pixel are also displayed...

Page 54: ...them into high quality works of art With its guided work flow and intuitive interface you ll be printing out personalised birthday cards calendars and posters in no time at all Photo Express brings a...

Page 55: ...display is set for a resolution of 800 x 600 or 1024 x 768 pixels and using Hi Colour 15 16 bit or True Colour 24 bit mode The following screen will appear when you start Photo Express It s best to fa...

Page 56: ...en tool Tool Bar The Toolbar contains all of the tools you need to edit your photos Each group of tools is divided into categories when you select a new category the tools on the Toolbar change accord...

Page 57: ...er images to the template please see Working with Templates Working with Album Album lets you organise the photos in your computer into convenient books similar to real world photo albums These books...

Page 58: ...link lost images right click over the album in the Options panel and select either Relink or Refresh Printing album thumbnails 1 Click the Album icon on the Get toolbar and then choose an album from t...

Page 59: ...Adjust tools appear on the Toolbar 3 Click the Transform button on the Adjust toolbar The Transform options appear in the Options panel To freely rotate a photo select the spin wheel in the upper rig...

Page 60: ...category This opens the Size options in the Options panel 2 Select either a predefined size from the Standard drop down menu or enter custom dimensions for the image in the User defined option 3 Sele...

Page 61: ...2 Click the Print button on the Command panel The print tools appear on the Toolbar 3 Select a print tool to use Normal lets you print images normally on various different types of paper from Letter...

Page 62: ...n album from the Save to album drop down menu 5 Click Save Data type describes how much colour information the image is saved with The more colour information included in the file the larger the file...

Page 63: ...drag the photo or date object to move it Or resize it using the control handles on the image s border Edit text and dates by selecting the object that contains it then click the Planner button on the...

Page 64: ...move your mouse cursor into the workspace and start painting 5 On the Shortcut bar click the Add Item to Storyboard button This adds the current image to the Storyboard You can remove the effects of a...

Page 65: ...ss of customising them To Begin a New Project 1 Click the Project tab when you start Photo Express Photo Express then switches over to Project mode which contains slightly different options and comman...

Page 66: ...ck Place The Place tools appear on the Toolbar 2 Click the Album icon 3 In the Options panel select the image you want to insert from an available album 4 Click Replace To move one object over another...

Page 67: ...ton on the Edit submenu of the Command panel 3 Click the Edges icon on the Toolbar 4 From the Edges drawer click the Magic icon This opens the Magic Edges options in the Options panel 5 Select a Magic...

Page 68: ...ions appear in the Options panel 3 Enter the number of rows and columns This establishes how many name cards are printed per page 4 Select your printer from the Printer name drop down menu 5 Select th...

Page 69: ...l client from the Mail client drop down list for help on how to set it to work properly To fax a template 1 Click the Share Fax button on the Command panel 2 Set the desired Layout options 3 Click Sen...

Page 70: ...can specify an area of the document to copy using the scan preview window Save as a file The scanned image can be saved as a file Note You can also refer to the Copier on line help for more details o...

Page 71: ...the printer and paper size you want or click on Setup to configure your printer To save the output as a file select Image Type Sets the image type as Text Colour Picture and Grey Picture To set image...

Page 72: ...or brightness The sliders appear in red when they are in the middle or grey elsewhere Number of Copies The numeric keys are used to set the copy number Valid copy number for output to printer is from...

Page 73: ...button changes to when you are in the Preview Menu Click this button to exit Preview Copier has two preview windows scan preview and print preview Press to scan the preview image When copying the butt...

Page 74: ...Place the document you want to copy facing down on the scanner glass plate Set the Copier parameters properly 3 Click on the button to start copying Note that when copying in under progress this butto...

Page 75: ...Memo...

Page 76: ...eral instruction on how to use the quick scanning and recognition function provided by Fine Reader For detailed description on Fine Reader s features and advanced functions please refer to the electro...

Page 77: ...been installed properly You do not have to select the scanner every time you use FineReader To recognize a document using the Scan Read button After you have selected your scanner as the image source...

Page 78: ...in screen will pop up Set the scanning parameters as follows Original Reflective Flatbed Image type Line Art Resolution 300dpi Step 2 Scan Preview the document Adjust the scan area in the Diamond View...

Page 79: ...ill start to recognize the scaned image Step 4 Save the result After the recognition process is completed the result will be displayed in the Main window You can click to save the result as a text fil...

Page 80: ...the Diamond View scanner s Threshold function then rescan the image Make sure the page is clean of any pencil marks dust etc and clean it off if necessary A poorly recognised text can be due to incorr...

Page 81: ...utton is installed a shortcut will be added into the Start folder Every time you turn on your computer the Scan Button toolbar will appear on the screen for easy access and a small icon will also be d...

Page 82: ...eral tab Button View You can choose to display the Scan Button toolbar in two different sizes Large Icon and Small Icon If you choose to display the Scan Button tool bar in Small Icon it will look lik...

Page 83: ...ation tab In addition to the basic functions Scan Button provides you can choose to add or delete the applications that are used to work with Scan Button If you want to add an application to the list...

Page 84: ...scanner will start to scan the original and the scanned image data will be sent to the specified printer Scan to OCR Click the Scan to OCR button and the scanned image will be imported into the OCR s...

Page 85: ...into the application directly For example if you click the PhotoExpress button the scanner will start to scan the original automatically When scanning is completed PhotoExpress will be activated autom...

Page 86: ...e colour sometimes deviate from that of the original Answer Because the image data area of the film is not sufficient for the scanner driver to calibrate image colour accurately Try to use another fil...

Page 87: ...scanner The TPO unit is working properly The TPO unit cable is firmly connected to the scanner 5 FineReader doesn t work First of all please make sure you have chosen the right data source for FineRea...

Page 88: ...ic com au For questions on using the bundled application please consult the following web addresses http www ulead com Photo Express http www abbyy com FineReader Packing Directions To avoid possible...

Page 89: ...s that you encountered including the version numbers of the programs or applications that you were using when you encountered the problem 5 Details of the computer that you are using the type of comp...

Page 90: ...APPENDIX DIAMOND VIEW MAIN SCREEN GUIDE See next page...

Page 91: ...Diamond View Main Driver Screen Guide continued...

Reviews: