


English-4
Recommended use
Safety Precautions and Maintenance
FOR OPTIMUM PERFORMANCE,
PLEASE NOTE THE FOLLOWING
WHEN SETTING UP AND USING
THE DIAMOND PLUS 230
SB
COLOUR MONITOR:
•
DO NOT OPEN THE MONITOR.
There are no user serviceable
parts inside and opening or removing covers may expose you to
dangerous shock hazards or other risks. Refer all servicing to
qualified service personnel.
•
Do not spill any liquids into the cabinet or use your monitor near
water.
•
Do not insert objects of any kind into the cabinet slots, as they may
touch dangerous voltage points,which can be harmful or fatal or
may cause electric shock,fire or equipment failure.
•
Do not place any heavy objects on the power cord. Damage to the
cord may cause shock or fire.
•
Do not place this product on a sloping or unstable cart, stand or
table, as the monitor may fall, causing serious damage to the
monitor.
•
Keep the monitor away from high capacity transformers, electric
motors and other devices such as external speakers or fans, which
may create strong magnetic fields.
•
If possible, position the monitor so that it is facing the east to
minimise the effects of the earth’s magnetic field.
•
Changing the direction of the monitor while it is powered on may
cause image discolouration. To correct this, turn the monitor off for
20 minutes before powering it back on.
•
When operating the Diamond Plus 230
SB
with its AC 100-120/220-
240V worldwide power supply, use a power supply cord that
matches the power supply voltage of the AC power outlet being
used. The power supply cord you use must have been approved by
and comply with the safety standards of your country. (Type
H05VV-F 3G 0.7 mm
2
should be used in Europe)
•
In UK, use a BS-approved power cord with molded plug having a
black (5A) fuse installed for use with this monitor. If a power cord is
not supplied with this monitor, please contact your supplier.
Immediately unplug your monitor from the wall outlet and refer
servicing to qualified service personnel under the following conditions:
•
When the power supply cord or plug is damaged.
•
If liquid has been spilled, or objects have fallen into the monitor.
•
If the monitor has been exposed to rain or water.
•
If the monitor has been dropped or the cabinet damaged.
•
If the monitor does not operate normally by following operating
instructions.
•
Allow adequate ventilation around the monitor so that
heat can properly dissipate. Do not block ventilated
openings or place the monitor near a radiator or other
heat sources. Do not put anything on top of monitor.
•
The power cable connector is the primary means of
detaching the system from the power supply. The
monitor should be installed close to a power outlet
which is easily accessible.
•
Handle with care when transporting. Save packaging
for transporting.
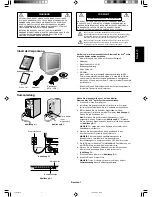
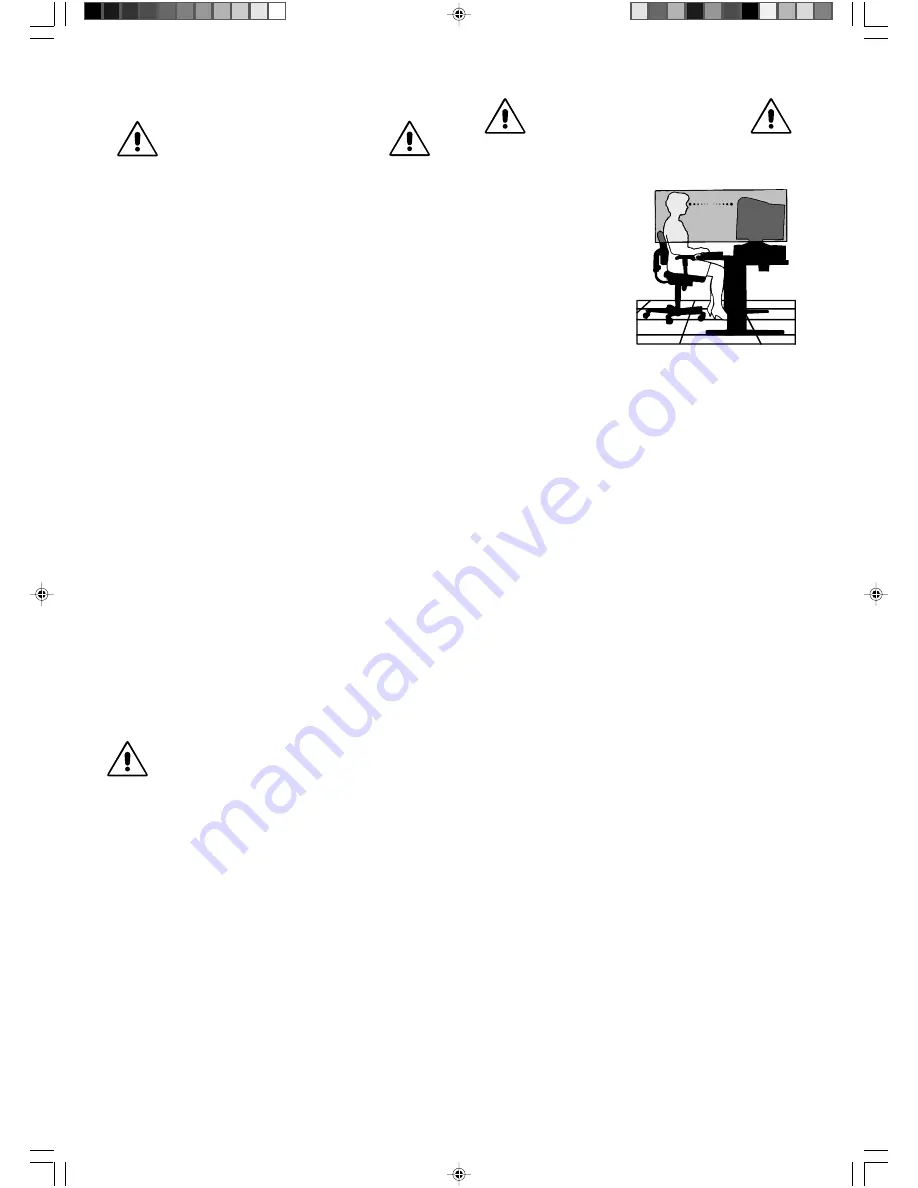
CAUTION
CORRECT PLACEMENT AND
ADJUSTMENT OF THE MONITOR
CAN REDUCE EYE, SHOULDER AND
NECK FATIGUE. CHECK THE
FOLLOWING WHEN YOU POSITION
THE MONITOR:
•
Adjust the monitor height so
that the top of the screen is
at or slightly below eye level.
Your eyes should look
slightly downward when
viewing the middle of the
screen.
•
Position your monitor no
closer than 40 cm and no
further away than 70 cm
from your eyes. The optimal
distance is 60 cm.
•
Rest your eyes periodically
by focusing on an object at least 6 m away. Blink often.
•
Position the monitor at a 90° angle to windows and other light
sources to minimise glare and reflections. Adjust the monitor tilt
so that ceiling lights do not reflect on your screen.
•
If reflected light makes it hard for you to see your screen, use
an anti-glare filter.
•
Clean your monitor
A special coating is provided on the glass (CRT) surface of this
monitor to reduce a reflection and static electricity on the glass
surface.
Due to the delicate coating on the glass surface, use a lint-free,
nonabrasive cloth (cotton or equivalent) and a non-alcohol,
neutral, nonabrasive cleaning solution to minimise dust. If the
screen requires more than a light cleaning, apply water or
soften neutral detergent with much water directly to a soft cloth
and use it upon wringing water, to clean the glass surface.
CAUTION: The following agents will cause damage to the CRT
when cleaning the glass surface: Benzene, thinner, acid/
alkaline detergent, alcohol detergent, detergent with abrasive
powder, detergent with antistatic agent, detergent for cleaning.
•
Adjust the monitor’s brightness and contrast controls to
enhance readability.
•
Use a document holder placed close to the screen.
•
Position whatever you are looking at most of the time (the
screen or reference material) directly in front of you to minimise
turning your head while you are typing.
•
Get regular eye checkups.
Ergonomics
To realise the maximum ergonomics benefits,we recommend the
following:
•
Adjust the Brightness until the background raster disappears
•
Do not position the Contrast control to its maximum setting
•
Use the preset Size and Position controls with standard signals
•
Use the preset Colour Setting and Sides Left/Right controls
•
Use non-interlaced signals with a vertical refresh rate between
75-160Hz
•
Do not use primary colour blue on a dark background, as it is
difficult to see and may produce eye fatigue due to insufficient
contrast
01_English
08/05/2002, 15:34
4


