Mitsubishi Diamond Plus 230 SB User Manual Download Page 7

English

English-3

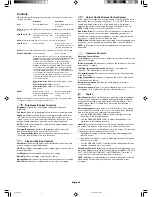
Tools 2

Language: 

OSM controls menus are available in six languages.

OSM Position: 

You can choose where you would like the OSM controls

menu to appear on your screen. Selecting OSM Position allows you to
manually adjust the OSM controls menu left, right, up or down.

OSM Turn  Off: 

The OSM controls menu will stay on as long as it is in

use. In the OSM Turn Off sub-menu, you can select how long the
monitor waits after the last touch of a button for the OSM controls
menu to disappear. The preset choice is in 5 seconds step between 5–
120 seconds.

OSM Lock Out: 

This control completely locks out access to all OSM

controls functions except Brightness and Contrast. When attempting to
activate OSM controls while in the lock out mode, a screen will appear
indicating that OSM controls are locked out. To activate the OSM Lock
Out function, press SELECT, then press + and hold down
simultaneously. To deactivate the OSM Lock Out, press SELECT, then
press + and hold down simultaneously.

IPM System Off Mode:

Enable: The IPM System works normally and all stages of energy
savings are utilised.
Disable:  The Off Mode of the IPM System is not used.

NOTE:

 For standard systems and graphics boards, keep the factory

setting at ENABLE.

NOTE:

 Don’t keep the monitor on when ‘No Signal’ is applied.

This could cause image burn in on the screen due to the ‘No Signal’
message being displayed.

EdgeLock Control: 

Operating your monitor at a non-standard timing

may cause images to appear darker than normal or have colour
distortion. Use of the EdgeLock control will adjust images to their
normal state.

Hot Key: 

This selection allows you to use 

 / 

 as brightness control

and –/+ as contrast control.

Factory Preset: 

Selecting Factory Preset allows you a reset most

OSM control settings back to the factory settings. A warning statement
will appear to confirm that you do want to reset ALL settings. Individual
settings can be reset by highlighting the control to be reset and
pressing the 

RESET

 button.

Information

Display Mode: 

Indicates the current mode and frequency setting of the

monitor.

Monitor Info:

 Indicates the model and serial numbers of your monitor.

Refresh Notifier: 

A message will advise you if the refresh rate of the

signal being applied to the monitor by the computer is too low. For
further information, please refer to your display card or system manual.

Declaration of the Manufacturer

We hereby certify that the colour monitor
Diamond Plus 230

SB

 is in compliance with

Council Directive 73/23/EEC:

– EN 60950

Council Directive 89/336/EEC:

– EN 55022
– EN 61000-3-2
– EN 61000-3-3
– EN 55024

and marked with

NEC-Mitsubishi Electric Visual

Systems Corporation

4-13-23, Shibaura,

Minato-Ku

Tokyo 108-0023, JAPAN

01_English

08/05/2002, 15:34

3

Summary of Contents for Diamond Plus 230 SB

Page 1: ...www nec mitsubishi com 01_cover p65 08 05 2002 15 34 1...

Page 2: ...re designed to provide reasonable protection against harmful interference in a residential installation This equipment generates uses and can radiate radio frequency energy and if not installed and us...

Page 3: ...01_cover p65 08 05 2002 15 34 3...

Page 4: ...1 Attention Fran ais 1 Contenu Fran ais 1 Mise en marche rapide Fran ais 1 Commandes Fran ais 2 D claration du constructeur Fran ais 3 Avvertenza Italiano 1 Attenzione Italiano 1 Contenuto Italiano 1...

Page 5: ...ual 3 For the PC Connect one end of the signal cable to the connector of the display card in your system Figure A 1 Tighten all screws For the Mac Connect the Macintosh cable adapter not included to t...

Page 6: ...r Control Colour Control System Colour presets 1 through 5 selects the desired colour setting The bar is replaced by the colour setting choice from 1 2 3 sRGB 5 Each colour setting is adjusted at the...

Page 7: ...when No Signal is applied This could cause image burn in on the screen due to the No Signal message being displayed EdgeLock Control Operating your monitor at a non standard timing may cause images to...

Page 8: ...op of monitor The power cable connector is the primary means of detaching the system from the power supply The monitor should be installed close to a power outlet which is easily accessible Handle wit...

Page 9: ...grafick karty 3 PC P ipojte jeden konec sign ln ho kabelu ke konektoru grafick karty po ta e obr A 1 Dot hn te v echny rouby Macintosh P ipojte kabelov adapt r nen sou st dod vky monitoru pro Macintos...

Page 10: ...edvolby nastaven barev 1 a 5 slou k nastaven po adovan ch barev M sto li ty se objev k la pro nastaven barev s hodnotami 1 2 3 sRGB 5 P i v rob je ka d mu barevn mu nastaven p i azena hodnota ve stup...

Page 11: ...e monitor zapnut Zobrazen hl en No Signal by mohlo zp sobit vyp len obrazu na obrazovku EdgeLock Control Kontrola mezn ch hodnot Pokud monitor budete pou vat s nestandardn m obnovovac m kmito tem obra...

Page 12: ...elektrick ho nap t Monitor je t eba nainstalovat bl zko elektrick z suvky k n m te snadn p stup P i doprav a manipulaci zach zejte se za zen m opatrn Obal uschovejte pro p padnou p epravu UPOZORN N SP...

Page 13: ...nden Sie im Handbuch zur Grafikkarte 3 PC Verbinden Sie ein Ende des Signalkabels mit dem Anschluss der Grafikkarte an Ihrem Computer Abbildung A 1 Ziehen Sie die Schrauben fest Mac Schlie en Sie den...

Page 14: ...Einst Automatische Einstellung der horizontalen und vertikalen Bildgr e sowie Positionseinstellungen f r unterschiedliche Timings HINWEIS Die automatische Einstellung steht nicht zur Verf gung wenn ke...

Page 15: ...ngezeigt Um die Funktion OSM Abschaltung zu aktivieren halten Sie die Tasten SELECT und gleichzeitig gedr ckt Um die Funktion OSM Abschaltung zu deaktivieren halten Sie die Tasten SELECT und gleichzei...

Page 16: ...estellt werden die leicht zug nglich ist Transportieren Sie den Monitor vorsichtig Bewahren Sie die Verpackung f r sp tere Transporte auf VORSICHT DURCH RICHTIGE AUFSTELLUNG UND EINSTELLUNG DES MONITO...

Page 17: ...sh Macintosh B 1 Macintosh B 1 Macintosh Macintosh 4 CRT 5 Windows 95 98 2000 Me XP CD ROM 6 1 7 1 8 Diamond Plus 230SB Diamond Plus 230SB VGA VGA Sales Office List CD ROM PDF Windows Acrobat Reader 4...

Page 18: ...SB MODE2 SB 2 SB 3 SB MODE SB MODE SB MODE OFF 3 SB MODE SB MODE1 SB sRGB SB Super Bright Super Bright Mode 1 Super bright Mode 2 DVD RESET AutoAdjust AutoAdjust Left Right Down Up Narrow Wide Short...

Page 19: ...OSM Turn Off OSM OSM OSM OSM 5 5 120 OSM Lock Out OSM OSM OSM OSM OSM SELECT OSM SELECT Diamond Plus 230SB 73 23 EN 60950 89 336 EN 55022 EN 61000 3 2 EN 61000 3 3 EN 55024 NEC Mitsubishi Electric Vi...

Page 20: ...4 DIAMOND PLUS 230SB 20 Diamond Plus 230SB 100 120 220 240V H05VV F 3G 0 7 mm2 BS 5A 40 70 60 6 90 CRT CRT non interlaced 75 160 Hz 04_Greek 08 05 2002 15 34 4...

Page 21: ...los PC conecte un extremo del cable de se al al conector de la tarjeta de visualizaci n de su sistema figura A 1 Apriete todos los tornillos Para los Mac conecte el adaptador para Macintosh no incluid...

Page 22: ...ntrol del color Con los valores predefinidos 1 a 5 se selecciona la configuraci n del color deseada La barra desaparece y en su lugar se muestra la configuraci n del color 1 2 3 sRGB y 5 Cada configur...

Page 23: ...e el monitor cuando aparezca el mensaje No hay se al De este modo evitar que se produzca una excesiva iluminizaci n sobre una superficie de la pantalla que har que la imagen persista Control borde si...

Page 24: ...o de emergencia tire del conector del cable de alimentaci n si debe desconectar el sistema de la tensi n de alimentaci n El monitor deber a estar instalado cerca de una caja de enchufe de f cil acceso...

Page 25: ...mit du c ble signal au connecteur de la carte graphique de votre syst me Figure A 1 Serrez toutes les vis Pour un Mac branchez l adaptateur de c ble non fourni pour Macintosh l ordinateur Figure B 1...

Page 26: ...est utilis e dans le menu principal ou d un sous menu une fen tre d avertissement appara tra afin de vous permettre de s lectionner la fonction de r initialisation Contr le des couleurs Syst me de con...

Page 27: ...Ceci pourrait provoquer une image persistante sur l cran en raison de l affichage du message Aucun signal Commande EdgeLock l utilisation de votre moniteur avec des r solutions non standard peut cr e...

Page 28: ...chaleur Ne posez rien sur le moniteur La prise du cordon d alimentation est le moyen principal de d brancher le syst me de l alimentation lectrique Le moniteur doit tre install proximit d une prise d...

Page 29: ...lteriori informazioni fare riferimento al manuale della scheda video 3 Per PC Collegare un estremit del cavo segnali al connettore della scheda video del sistema Figura A 1 Serrare tutte le viti Per M...

Page 30: ...di colore desiderata selezionata attraverso la predisposizione da 1 a 5 La barra viene sostituita dalla possibilit di scegliere l impostazione colore da 1 2 3 sRGB 5 L impostazione di ogni colore reg...

Page 31: ...ovocare la bruciatura dei fosfori dello schermo causata dal messaggio Nessun segnale visualizzato Controllo EdgeLock Il funzionamento del monitor ad una temporizzazione non standard pu comportare imma...

Page 32: ...principale per scollegare il sistema dalla rete di alimentazione Il monitor deve essere posto vicino ad una presa di alimentazione facilmente accessibile Maneggiare con cura durante il trasporto Cons...

Page 33: ...j de videokaart voor meer informatie 3 Voor PC sluit n uiteinde van de signaalkabel aan op de connector van de videokaart in uw systeem zie illustratie A 1 Draai alle schroeven vast Voor de Macintosh...

Page 34: ...us Extra helderheid 2 AAN voor bewegende beelden zoals DVD films Hiermee zet u voor de geselecteerde optie de fabrieksinstelling terug Hiermee zet u voor alle besturingselementen in het geselecteerde...

Page 35: ...rd kunt u de tijd voor deze inactiviteit opgeven in stappen van 5 seconden tussen 5 en 120 seconden OSM Lock Out OSM vergrendelen hiermee vergrendelt u de toegang tot alle OSM functies Alleen de helde...

Page 36: ...warmtebronnen Plaats nooit voorwerpen op de monitor U kunt het beste de monitor van de stroombron loskoppelen door de stekker van de voedingskabel uit het stopcontact te nemen Plaats de monitor dicht...

Page 37: ...era 2 Je li to konieczne zainstaluj kart graficzn Dodatkowych informacji nale y szuka w dokumentacji karty graficznej 3 Komputery PC Pod cz wtyczk przewodu sygna owego do gniazda karty graficznej komp...

Page 38: ...Control Colour Control System Wybieraj c ustawienia od 1 do 5 mo na okre li w a ciwy zestaw kolor w Pasek jest zamieniany na odpowiednie ustawienie koloru 1 2 3 sRGB 5 Ka de ustawienie jest skonfiguro...

Page 39: ...acji kontrastu mo na u ywa przycisk w Ustawienia fabryczne Factory Preset Wybranie opcji Factory Preset powoduje przywr cenie fabrycznych warto ci wi kszo ci ustawie menu OSM W wczas na ekranie pojawi...

Page 40: ...r de ciep a Nie wolno k a adnych przedmiot w na g rn cz monitora Wyj cie wtyczki przewodu zasilaj cego jest podstawowym sposobem na od czenie monitora od zasilania Monitor powinien by zainstalowany w...

Page 41: ...B 1 Macintosh B 1 Macintosh Macintosh 4 5 INF Windows 95 98 2000 Me XP INF CD ROM 6 AC C 1 7 D 1 8 Diamond Plus 230SB Diamond Plus 230SB VGA VGA Sales Office List CD ROM PDF Windows INF Acrobat Reade...

Page 42: ...2 SB 3 SB MODE SB MODE SB MODE OFF 3 SB MODE SB MODE1 SB sRGB SB Super Bright Super Bright Mode 1 Super bright Mode 2 DVD RESET AutoAdjust Left Right Down Up Narrow Wide Short Tall 1 5 1 2 3 sRGB 5 Ke...

Page 43: ...f OSM OSM OSM OSM 5 120 5 OSM Lock Out OSM OSM OSM OSM OSM SELECT OSM SELECT IPM System Off Mode IPM Enable IPM Disable IPM Diamond Plus 230SB 73 23 EEC EN 60950 89 336 EEC EN 55022 EN 61000 3 2 EN 61...

Page 44: ...4 DIAMOND PLUS 230SB 20 Diamond Plus 230SB 100 120 220 240 H05VV F 3G 0 7 2 BS 5 A 40 70 60 6 90 75 160 10_Russian 08 05 2002 15 35 4...

Page 45: ...ak n 3 PC in Sinyal kablosunun bir ucunu sisteminizdeki ekran kart n n ba lay c s na tak n ekil A 1 T m vidalar s k n Mac in Macintosh kablo adapt r n dahil de ildir bilgisayara ba lay n ekil B 1 Siny...

Page 46: ...lanak sa layan bir uyar penceresi belirir Renk Kontrol Renk Kontrol Sistemi 1 den 5 e kadar olan Color Presets nceden Belirlenmi Renk Ayarlar istenilen renk ayar n se er ubuk 1 2 3 sRBG 5 aras ndaki r...

Page 47: ...un NOT No Signal Sinyal Yok durumunda monit r a k b rakmay n Bu g sterilen Sinyal Yok mesaj ndan dolay ekranda g r nt yanmas na yol a abilir EdgeLock Control U Kilit Kontrol Monit r n z standart d zam...

Page 48: ...bir ey koymay n G kablosu ba lay c s sistemi g kayna ndan ay rman n birincil yoludur Monit r kolayca eri ilebilen bir prize yak n olarak kurulmal d r Ta rken dikkatli olun Ambalaj ta ma i in saklay n...

Page 49: ...xx_Back 08 05 2002 15 35 1...

Page 50: ...Printed in Japan 7A812431 Printed on recycled paper xx_Back 08 05 2002 15 35 2...

Reviews: