background image

— 42 —

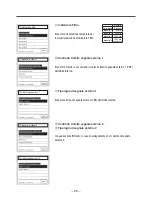
     Visualizzazione dei dati di anomalia

Vengono visualizzati i dati di funz. rilevati appena prima dell’apparizione 
dell’errore.
Le voci di visualizzaz. sono le stesse di <Voci relative ai dati di funzionamento> 
(vedere 

).

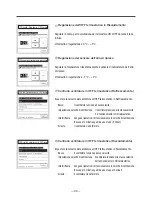
   Cancellazione dei dati di anomalia

Premendo il pulsante  Sì  sulla schermata relativa alla Cancellazione dei dati 
di anomalia, i dati di anomalia vengono cancellati.

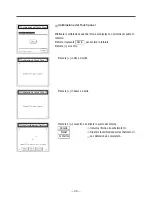
   Salvataggio delle impostazione dell’Unità Interna

I contenuti dell’impostazione dell’U.I. sono salvati nel Filocomando o trasmessi 
all’U.I..
(a) Salvataggio delle impostazioni U/I
(b) Salvataggio automatico
(c) Trasferimento e salvataggio dei dati

   Reset controllo periodico

Premendo il pulsante  Sì  sulla schermata relativa al controllo periodico, il 
controllo periodico e il conteggio del tempo vengono resettati.

Visualizzazione dei dati di errore

Cancella i dati di errore

Reset controllo periodico

Salvataggio impostazioni U.I.

22

23

25

Summary of Contents for eco touch RC-EX1A

Page 1: ...eco touch REMOTE CONTROL RC EX1A RC EX1N INSTALLATION MANUAL PJZ012D077 B ...

Page 2: ...tall the remote control 4 Installation procedure 5 Main Sub setting when more than one remote controls are used 7 4 Functions and menu items of Remote control 9 5 The indication when power source is supplied 13 6 Installation settings 15 7 R C function settings 20 8 IU settings 26 9 Service Maintenance 38 10 Select the Language 46 ...

Page 3: ...nstallation Manual should be given to a new owner WARNING Ask a professional contractor to carry out installation work according to the installation manual Improper installation work may result in electric shocks fire or break down Shut OFF the main power supply before starting electrical work Otherwise it could result in electric shocks break down or malfunction Do not install the unit in appropr...

Page 4: ...o medical or communication equipment could disrupt medical activities video broadcasting or cause noise interference CAUTION Do not install the remote control at following places It could cause break down or deformation of remote control 1 Where it is exposed to direct sunlight 2 Near the equipment to generate heat 3 Where the surface is not flat Do not leave the remote control with its upper case...

Page 5: ... x 2 core 3 Remote control installation procedure Determine where to install the remote control Installation Using a switch box Installed directly on a wall Wiring direction Backward Upper center Upper left Cautions for selecting installation place 1 Installation surface must be flat and sufficiently strong R C case must not be deformed 2 Where the R C can detect room temperatures accurately This ...

Page 6: ...lation procedure Dimensions Viewed from front Take care to protect the removed upper case from moisture or dust PCB side Viewed from rear To remove the upper case from the bottom cases of R C Insert the tip of flat head screwdriver or the like in the recess at the lower part of R C and twist it lightly to remove Connect wires from X and Y terminals of R C to X and Y terminals of indoor unit R C wi...

Page 7: ...ith care not to pinch wires of R C 8 50 200 Wall Conduit Locknut Switch box Seal with putty R C cable Wiring hole on bottom case Bushing In case of exposing wiring When the wiring is taken out from the upper center or upper left of R C Cut out the thin wall sections on the cases for the size of wire Upper center Upper left Upper case Bottom case When taking the wiring out from the upper center ope...

Page 8: ...ng for use of two or more R C Up to two units of R C can be used at the maximum for 1 indoor unit or 1 group One is main R C and the other is sub R C Operating range is different depending on the main or sub R C R C function Main Sub Run Stop setting temperature fan speed and flap direction operations High power and energy saving operations Energy saving setting R C sensor Test run menu operation ...

Page 9: ...multaneously with other USB devices It could cause malfunction or breakdown of R C or personal computer USB port Cover Note Initializing of password Administrator password for daily setting items and service password for installation test run and maintenance are used The administrator password at factory default is 0000 This setting can be changed Refer to User s Manual When the administrator pass...

Page 10: ... on Operations of switches and are excluded USB port USB connector mini B allows connecting to a personal computer For operating methods refer to the User s manual attached to the software for personal computer Utility software of Eco touch remote control RC EX1 series See User s manual for details Touch panel system which is operated by tapping the LCD screen with a finger is employed for any ope...

Page 11: ...splays the temperature which is set currently Tap this button to change the set temperature Flap direction button Displays the flap direction which is selected currently Tap this button to change the flap direction Fan speed change button Displays the fan speed which is selected currently Tap this button to change the fan speed Timer button Displays simplified contents of the timer which is set cu...

Page 12: ...mer Automatic temp set back Timer Set ON timer by hour Set OFF timer by hour Set ON timer by clock Set OFF timer by clock Confirm Initial setting Clock setting Date time display Summer time Contrast Backlight Controller sound Weekly timer Home leave mode Administrator settings Permission prohibition setting Silent mode timer Setting temp range Temp increment setting R C display setting Change admi...

Page 13: ... Anti frost temp 31 Anti frost control 31 Drain pump operation 31 Residual fan operation in cooling 31 Residual fan operation in heating 32 Intermittent fan operation in heating 32 Fan circulator operation 32 Control pressure adjust 32 Auto operation mode 33 Thermo rule setting 36 Auto fan speed control 37 IU overload alarm 37 38 Service Maintenance IU address 39 Next service date 39 Operation dat...

Page 14: ... of the initializing operation 2 When the main and sub R C units have already been set Ackowledge screen to continue setting is displayed 3 When using 2 units of RC EX1 as the main and sub if the first one is set for the main the second is set for the sub automatically When only one unit of R C is used tap the Main button In the state of initial setting if either one of buttons Main Sub is not tap...

Page 15: ... not tapped for more than 15 seconds the Yes Continue is selected and the display changes to the screen of Yes No After the initializing it returns to the default state TOP screen Set continue acknowledge Initialize acknowledge Initialize set on ...

Page 16: ... static pressure adjustment function 5 Change auto address In case of the Multi Series KX models the IU address can be changed after the auto address setting 6 Address setting of main IU In case of the Multi Series KX models set the address of main sub IU to prevent from mixing operation modes Cooling heating 7 IU back up function IU rotation IU capacity back up IU fault back up are set Main menu ...

Page 17: ...tons and tap the Set button Installation settings menu Installation date Installation settings menu 7 8 11 15 16 19 18 Company information Enter the company information Company Phone No Enter the contact Up to 10 1 byte alpha numeric letters can be used Tap the Set button after the input Company information 9 10 Enter the contact ...

Page 18: ...re of the unit Enter the Phone No of the contact Test run 12 13 14 Cooling test run When the room temperature is too low to start the cooling test run it operates for 30 minutes by decreasing the set temperature to 5 C Drain pump test run Drain pump can be operated independently Compressor Hz fixed operation Compressor operation frequency of the inverter outdoor unit can be fixed It may not be abl...

Page 19: ...is changed with buttons and the Set button is tapped it returns to the Change auto address screen on which the new address is displayed Tap the Finish button to register the new address Address setting of main IU In case of Multi Series KX models it is possible to let indoor units Sub IUs follow the operation mode Heating cooling of the indoor unit Main IU Set the address of the Main IU to the Sub...

Page 20: ...tched to one unit operation Set the temp diff for back up IU fault back up If one of the IU has a fault and stops the other one starts operation Enable Disable setting of each function can be done When IU rotation or IU capacity beck up is set Enable IU fault back up is set Enable automatically Set the timer for changeover In IU rotation function the timer to changeover the operation of 2 indoor u...

Page 21: ...r F is used 7 Fan speed Changes the fan speed 8 External input Set the range to apply the external input CNT connected to plural indoor units 9 Ventilation setting Set this when a ventilation device is connected 10 Flap control Set one of 4 flap stop positions or free flap stop 11 Auto restart Set Enable or Disable of Auto restart function 12 Auto temp set Set Enable or Disable of Auto temp set fu...

Page 22: ...ber The service password is 9999 Unable to change Display the R C setting menu screens Service password input R C setting menu 1 R C setting menu 2 R C setting menu 3 8 9 10 11 14 20 21 22 15 16 17 18 19 Main Sub of R C Use this when changing the Main Sub setting of R C Main Sub of R C ...

Page 23: ...e Judging to make thermostat ON or OFF by detecting temperature R C sensor Thermo rule is applied based on the temp detected with the R C sensor Enable Thermo rule is applied based on the temp detected with the R C sensor in all operation modes Enable Heating only Thermo rule is applied based on the temp detected with the R C sensor in heating operation only In case of other operation modes includ...

Page 24: ...he auto is also disabled Adjustment in cooling Adjustment in heating Operation mode C F Select the unit of temperature displayed on the R C C Temperature is displayed in C F Temperature is displayed in F C F Fan speed Fan speed can be changed to the selected one It may not be available to select some of fan speeds depending on indoor unit models Fan speed ...

Page 25: ... the ventilation device is operated or stopped independently External input Ventilation setting Flap control Set the flap stop control Stop at fixed position The flap can be set to stop at one of 4 positions Stop at any position The flap can be set to stop at any position immediately after operating the R C switch Auto restart Set the state of operation to be started when the power supply is resto...

Page 26: ...ted Disable Auto set temp cannot be selected No select switch is displayed on the screen Auto fan speed Select Enable or Disable on the Auto fan speed screen Enable Auto fan speed can be selected Disable Auto fan speed cannot be selected No select switch is displayed on the screen Auto set temp Auto fan speed ...

Page 27: ...t the Anti frost control temperature 12 Anti frost control Set the fan control during the Anti frost control 13 Drain pump operation Set the operation mode to operate the drain pump 14 Residual fan operation in cooling Select the residual fan operation time after stopping and thermo OFF in cooling operation 15 Residual fan operation in heating Select the residual fan operation time period after st...

Page 28: ...e to change When plural indoor units are connected select the IU for the IU settings When the name address of IU connected are displayed select the unit to be set If all units are selected the same setting is done for all units Menu screen 1 Menu screen 3 Service password input Select IU IU settings menu screens are displayed after receiving data from the IU IU setting menu 1 11 12 13 15 14 ...

Page 29: ... setting menu 3 IU setting menu 4 16 17 18 20 19 21 22 23 25 24 26 27 28 40 29 High ceiling Set the fan speed tap for the IU It may not be available to set depending on IU models connected IU setting menu 5 High ceiling 44 45 ...

Page 30: ...nput 1 Standard No display None Setting 1 180Hr Setting 2 600Hr Setting 3 1 000Hr Setting 4 1 000Hr Operation stop External input 1 signal Set the signal type to input to the external input 1 CNT of IU External input 2 External input 2 signal This is operable when the IU equipped with the external input 2 is connected External input 1 signal External input 2 External input 2 signal ...

Page 31: ...fan operation for 2 minutes and stop for 5 minutes are repeated Stop The fan is stopped Fan control in cooling thermo OFF Set the fan speed at the cooling thermo OFF Low The fan runs at the low speed Set fan speed The fan runs at the same speed as that during the thermo ON operation Intermittent Cycles of Lo fan operation for 2 minutes and stop for 5 minutes are repeated Stop The fan is stopped Re...

Page 32: ... pump Standard in cooling dry Operates in cooling and dry mode Operate in standard heating Operates in cooling dry and heating mode Operate in heating fan Operates in heating and fan mode Operate in standard fan Operates in cooling dry and fan mode Residual fan operation in cooling Select the residual fan operation time period after stopping and the thermo OFF in cooling mode Setting1 0 5 hr Setti...

Page 33: ...air sensor Intermittent fan operation in heating Select the fan control after the residual fan operation following stop and thermo OFF in heating mode Stop Intermittent fan operation is not done Stop for 20 min and run for 5 min Check the operating conditions at every 25 min and run the fan for 5 min Stop for 5 min and run for 5 min Check the operating conditions at every 10 min and run the fan fo...

Page 34: ...outdoor temperatures Auto 1 details Set the temperatures switching to cooling and heating Switching temperatures can be set within the range of 1 C to 4 C Set temp Temp switching to cooling Indoor return air temp Operation mode Cooling Set temp Temp switching to heating Indoor return air temp Operation mode Heating 1 0 1 0 4 0 3 0 2 0 3 0 2 0 4 0 3 0 Indoor temp Cooling operation Cooling operation...

Page 35: ...mp Operation mode Heating 30 28 26 24 22 20 18 26 28 16 14 12 0 3 2 1 10 18 20 22 24 14 16 Outdoor temp Set temp Heating Cooling Temp diff Thermo OFF Forced Thermo OFF Thermo OFF Temp diff Selection range of outdoor temp in heating Selection range of outdoor temp in cooling Indoor temp 16 14 28 26 24 22 20 18 30 12 10 Outdoor temp Indoor temp 28 30 16 18 20 22 24 26 10 12 14 Selection range of out...

Page 36: ...and heating Outdoor temp cooling Can be set within the range of 10 C to 30 C Outdoor temp heating Can be set within the range of 10 C to 22 C Temp switching to cooling Temp switching to heating Outdoor temp set for cooling Outdoor temp set for heating Indoor temp set for cooling Indoor temp set for heating In the Auto 3 set the indoor temperatures for cooling and heating Indoor temp cooling Can be...

Page 37: ...r temp basis Cooling offset Heating offset The thermostat judges based on the outdoor temperature and the cooling and heating offset values a Cooling offset The thermostat judges based on Outdoor temp Cooling offset value during cooling The thermostat trips ON when Indoor temp Outdoor temp Cooling offset value This value can be set in the range of 0 C to 10 C b Heating offset The thermostat judges...

Page 38: ...mo OFF IU overload alarm When the room temperature differs to some extent from the setting tempera ture at 30 minutes after the start of operation the overload alarm signal is transmitted from the external output CNT Auto fan speed control Set the switching range of the fan tap at the auto fan speed setting Auto 1 The fan tap is changed in the range of High Medium Low Auto 2 The fan tap is changed...

Page 39: ...currence of error which are in the memory of R C are displayed 5 Saving IU settings Contents of IU settings are saved in the R C or transferred to IU 6 Special settings This is used for the erasing of IU address resetting of CPU initializing etc Tap the Menu button on the TOP screen Main menu screen is displayed Tap the Service Maintenance on the menu screen TOP screen Menu screen 1 Menu screen 3 ...

Page 40: ...un mode In case that the address of the selected IU is registered but its installation place is unknown when the fan operation is implemented individually the installation place of IU can be identified with this procedure Tap the Run button to start the fan operation Tap the Stop button to stop the fan operation Next service date Service message When next service date is entered messages are displ...

Page 41: ...2 24 Compressor Hz 35 63H1 07 IU heat exch temp 3 25 High pressure 36 Defrost 08 IU fan speed 26 Low pressure 37 Comp running Hrs 09 Required Hz 27 Discharge pipe temp 38 OU EEV1 opening 10 Answer Hz 28 Comp bottom temp 39 OU EEV2 opening 11 IU EEV opening 29 Current Operation data After read the indoor unit data the operation data at the time of reading are displayed Operation data are not update...

Page 42: ...omaly data d Reset periodical check Error history Date and time when error occurred IU address and Error Code are displayed If none is recorded in the error history no error is displayed Delete error history If the Delete button on the Error history screen is tapped the Delete error history acknowledge screen is displayed Tap Yes to erase the display of error history Error display Error history No...

Page 43: ...dge screen the anomaly data are erased Saving IU settings Contents of setting for IU are saved in the R C or transmitted to IU a Save IU settings b Automatic saving c Transfer the saved data Reset periodical check When tapping the Yes button on the Reset periodical check acknowledge screen the periodical check is reset and the time count is reset Display anomaly data Erase anomaly data Reset perio...

Page 44: ...isplayed Tap Yes to transfer the data IU setting item for saving High ceiling Fan control in heating thermo OFF Control pressure adjust Filter sign Anti frost temp Auto operation mode External input 1 Anti frost control Thermo rule setting External input 1 signal Drain pump operation Auto fan speed control External input 2 Residual fan operation in cooling Individual flap control External input 2 ...

Page 45: ...t matched Restore of default setting Settings on the R C and IU connected are restored to the default setting State of factory default Tap Yes to restore the default setting CPU reset All microcomputers on the R C operated other R Cs IUs and OUs are reset State of restoration after power failure Tap Yes to reset CPU Erase IU address Memory of the IU address for Multi KX unit is erased This is oper...

Page 46: ...r of according to the prompt Tap the center of and check the deviation from the display Cancel The display returns to the screen Redo Retry the calibration on the screen Finish Calibration is completed Tap on the lower right Tap on the upper left Touch panel calibration Touch panel calibration 1 Touch panel calibration 2 Touch panel calibration end ...

Page 47: ...nput password screen is displayed enter the administrator password 4 digit number Default number of the administrator password is 0000 Able to change Service password input TOP screen Menu screen Menu screen 2 Select the language to be displayed on the R C English Deutsch Français Espanõl Italiano Nederlandse Türk Português Русский Select the language ...

Page 48: ...eco touch FERNBEDIENUNG RC EX1A RC EX1N INSTALLATIONSANLEITUNG PJZ012D077A B ...

Page 49: ...U settings 26 9 Service Maintenance 38 10 Select the Language 46 1 Sicherheitshinweise 2 2 Zubehör Vorbereitung vor Ort 4 3 Installationsverfahren für die Fernbedienung 4 Festlegung des Installationsortes für die Fernbedienung 4 Installationsverfahren 5 Konfiguration als Master Slave Fernbedienung wenn mehrere Fernbedienungen verwendet werden 7 4 Funktionen und Menüoptionen der Fernbedienung 9 5 A...

Page 50: ...soll Wenn das Gerät an einen anderen Eigentümer übergeht dem neuen Eigentümer die Installationsanleitung aushändigen WARNUNG Ein Fachunternehmen mit den Installationsarbeiten gemäß der Installationsanleitung beauftragen Die fehlerhafte Ausführung der Installation kann zu Stromschlag Feuer oder Geräteausfällen führen Vor Aufnahme von Arbeiten an der Elektrik die Netzspannungsversorgung ausschalten ...

Page 51: ...unkkommunikation usw auftreten Die Störeinflüsse die von der Fernbedienung an medizinische Geräte oder Kommunikationsausrüstung übertragen werden können zur Unterbrechung medizinischer Eingriffe oder Videoübertragungen sowie zu Störinterferenzen führen VORSICHT Die Fernbedienung nicht an den folgenden Orten installieren Andernfalls kann es zum Ausfall oder zur Verformung der Fernbedienung kommen 1...

Page 52: ...ren für die Fernbedienung Festlegung des Installationsortes für die Fernbedienung Installation mit Schaltkasten Installation an einer Wand Kabelrichtung Nach hinten Oben Mitte Oben links Folgendes ist bei der Auswahl des Installationsortes zu beachten 1 Die Installationsoberfläche muss eben und ausreichend fest sein Das Fernbedienungsgehäuse darf sich nicht verformen 2 Raumtemperaturen müssen von ...

Page 53: ...t und Staub schützen Platinenseite Ansicht von hinten Trennen der oberen Gehäusehälfte von der unteren Gehäus ehälfte der Fernbedienung Die Spitze eines flachen Schraubendrehers oder ein ähnliches Werkzeug in die Aussparung im unteren Teil der Fernbedienung führen und leicht drehen um die Gehäusehälfte zu entfernen Die Kabel der X und Y Anschlüsse der Fernbedienung mit den X und Y Anschlüssen des ...

Page 54: ...ken 8 50 200 Wand CondKabelkanal uit Sicherungsmutter Schaltkasten Mit Dichtungskitt abdichten Fernbedienungskabel Kabelbohrung in der unteren Gehäusehälfte Durchführung Überputz Verkabelung Kabelaustritt oben Mitte oder oben links an der Fernbedienung Die dünnwandigen Bereiche an den Gehäusehälfte in Abhängigkeit vom Kabelquerschnitt ausschneiden Oben Mitte Oben links Obere Gehäusehälfte Untere G...

Page 55: ...g wenn zwei oder mehr Fernbedienungen verwendet werden Maximal zwei Fernbedienungen können für 1 Innengerät oder 1 Gerätegruppe verwendet werden Die eine Fernbedienung ist die Master Fernbedienung die andere die Slave Fernbedienung Für Master und Slave Fernbedienung gelten unterschiedliche Betriebsbereiche Fernbedienungsfunktion Master Slave Betrieb Stopp Einstellung von Temperatur Lüfterdrehzahl ...

Page 56: ...luss anschließen Andernfalls kann es zu Funktionsstörungen oder Ausfällen der Fernbedienung oder des Personal Computers kommen USB Anschluss Abdeckung Hinweis Initialisierung des Passworts Ein Administrator Passwort für die Einstellung der Optionen im täglichen Betrieb und ein Service Passwort für Installation Testbetrieb und Wartung werden verwendet Das Administrator Passwort ist ab Werk auf 0000...

Page 57: ...chaltet sich die Hintergrundbeleuchtung wieder ein Gilt nicht bei Betätigung der Schalter und USB Anschluss Am USB Anschluss mini B kann ein Personal Computer angeschlossen werden Die Betriebsarten sind im Benutzerhandbuch für die Software des Personal Computers beschrieben Dienst programm Software der Eco touch Fernbedienung RC EX Einzelheiten finden sich im Benutzerhandbuch Ein Touchscreen Syste...

Page 58: ...triebsart zu wechseln Zeigt die jeweils eingestellte Temperatur an Schaltfläche Lammellenposition aendern Diese Schaltfläche drücken um die Solltemperatur zu ändern Zeigt die jeweils ausgewählte Lamellenrichtung an Diese Schaltfläche drücken um die Lamellenrichtung zu ändern Schaltfläche Luefter aendern Zeigt die jeweils ausgewählte Lüfterdrehzahl an Diese Schaltfläche drücken um die Lüfterdrehzah...

Page 59: ...uecksetzen Temp Absenkbetrieb Timer Geraet einschalten nach Studen Geraet ausschalten nach Studer Geraet einschalten nach Uhrzeit Geraet ausschalten nach Uhrzeit Bestaet Grundeinstellungen Zeiteinstellung Datums und Zeitanzeige Sommerzeit Kontrast Hintergrundbeleuchtung Fernbedienungstoene Wochen Timer Abwesenheitsmodus Administrator Einstellungen Freigabe Verriegelung Silent Mode Timer Einstellun...

Page 60: ...ostschutztemperatur IG 31 Frostschutzsteuerung IG 31 Kondensatpumpenbetrieb 31 Ventilatornachlauf nach Kuehlbetrieb 31 Ventilatornachlauf nach Heizbetrieb 32 Intermitt Vent Nachlauf nach Heizbetr 32 Ventilator Umluftbetrieb 32 Steuerung Zieldruck bei Aussenluftbetr 32 Automatischer Betrieb 33 Thermo Steuerungseinst Kuehlen Heizen 36 Autom Luefterstufensteuerung 37 Innengeraet Ueber lastalarm 37 38...

Page 61: ...ch Abschluss der Initialisierung geändert werden 2 Wenn Master und Slave Fernbedienung bereits konfiguriert wurden erscheint die Bestätigungsanzeige zur Fortsetzung der Einstellung 3 Wenn 2 RC EX1 Geräte als Master und Slave verwendet werden wird die erste Fernbedienung automatisch als Master und die zweite als Slave konfiguriert Wenn nur eine Fernbedienung verwendet wird die Schaltfläche Master d...

Page 62: ...n nicht berührt wurde wird Ja Fortfahren ausgewählt und das Display wechselt zur Anzeige Ja Nein Nach der Initialisierung kehrt die Fernbedienung zur Standardanzeige zurück Touchscreen Anzeige Set weiterhin anerkennen Initialisieren anerkennen Initialisieren gesetzt auf ...

Page 63: ...om Adressierung aendern Sofern Modelle der Multi Serie KX verwendet werden kann die IG Adresse nach der automatischen Adressierung geändert werden 6 Adresseinstellung des Master IG Sofern Modelle der Multi Serie KX verwendet werden die Adresse des Master Slave IG zuweisen um eine Verwechslung der Betriebsarten Kühlbetrieb Heizbetrieb zu vermeiden 7 IG Back Up Funktion IU rotation IU capacity back ...

Page 64: ...auswählen und die Schal tfläche Set drücken Installation Einstellungen menü Installationsdatum Installation Einstellungen menü 7 8 11 15 16 19 18 Firma Die Firmendaten eingeben Firma Telefonnummer Den Kontakt eingeben Maximal 10 Zeichen 1 Byte alphanumerisch können verwendet werden Nach der Eingabe die Schaltfläche Set drücken Firma 9 10 Den Kontakt eingeben ...

Page 65: ...etriebsverfahren des Geräts gestartet DieTelefonnummerdesAnsprechpartnerseingeben Testbetrieb 12 13 14 Testbetrieb Kuehlen Wenn die Raumtemperatur zu niedrig ist um den Testbetrieb Kuehlen zu starten läuft das Gerät 30 Minuten lang um die Solltemperatur auf 5 C zu senken Testbetrieb Kondensatpumpe Die Kondensatpumpe kann unabhängig betrieben werden Kompressorbetr mit fixierter Frequenz Die Frequen...

Page 66: ... sie zur Anzeige Autom Adressierung aendern zurück Dort wird die neue Adresse angezeigt Die Schaltfläche Beenden Bestaet drücken um die neue Adresse zu registrieren Adresseinstellung des Master IG Bei Modellen der Serie Multi KX können Innengeräte die als Slave IGs konfi guriert wurden die Betriebsart Heizbetrieb Kühlbetrieb des Innengeräts das als Master IG konfiguriert wurde übernehmen Die Adres...

Page 67: ...eschaltet Temperaturdifferenz für Back Up einstellen IG Fehler Back Up Wenn ein IG einen Fehler aufweist und stoppt übernimmt das andere Gerät den Betrieb Jede Funktion kann mit Aktiv Inaktiv aktiviert oder deaktiviert werden Wenn IG Luefterbetrieb oder IG Leistung Back Up auf Aktiv gesetzt wurden wird IG Fehler Back Up automatisch auch auf Aktiv gesetzt Einst Zeit fuer Umschaltung Unter der Funkt...

Page 68: ...ufe Änderung der Lüfterdrehzahl 8 Externer Eingang Den Bereich für den externen Eingang CNT einstellen der mit mehreren Innengeräten verbunden ist 9 Luefterstufe Einstellung Diese Einstellung vornehmen wenn ein Lüfter angeschlossen ist 10 Lamellensteuerung Eine der 4 Lamellenstopp Positionen oder den freien Lamellenstopp einstellen 11 Wiedereinschaltung nach Spannungsausfall Die automatische Wiede...

Page 69: ...veränderbar Anzeigen im Menü Fernbedienungseinstellung Service Passwort eingeben Fernbedienungseinstellung menü 1 Fernbedienungseinstellung menü 2 Fernbedienungseinstellung menü 3 8 9 10 11 14 20 21 22 15 16 17 18 19 Master Slave Fernbedienung Mit dieser Funktion die Konfiguration als Master Slave Fernbedienung ändern Master Slave Fernbedienung ...

Page 70: ...mostats durch Messung der Temperatur Fernbed Sensor Die Thermo Steuerung wird auf der Basis der Temperatur angewendet die mit dem Fernbedienungssensor gemessen wird Aktiv Die Thermo Steuerung wird auf der Basis der Temperatur angewendet die der Fernbedienungssensor in allen Betriebsarten misst Aktiv nur Heizbetrieb Die Thermo Steuerung wird auf der Basis der Temperatur angewendet die der Fernbedie...

Page 71: ...iviert Abgleich Kuehlen Abgleich Heizen Betr Art C F Die Einheit der Temperatur für die Anzeige auf der Fernbedienung auswählen C Die Temperatur wird in C angezeigt F Die Temperatur wird in F angezeigt C F Luefterstufe Unter dieser Option kann die Lüfterdrehzahl geändert werden In Abhängigkeit von den Innengerätemodellen stehen eventuell nicht alle Lüf terdrehzahlen zur Verfügung Luefterstufe ...

Page 72: ...terstufe Einstellung Lamellensteuerung Die Lamellenstopp Steuerung einstellen Stoppt an fixierter Position Die Lamelle kann so eingestellt werden dass sie in einer von 4 Positionen stoppt Stoppt an beliebiger Position Die Lamelle kann so eingestellt werden dass sie unmittelbar nach Betätigung des Fernbedienungsschalters in einer beliebigen Position stoppt Wiedereinschaltung nach Spannungsausfall D...

Page 73: ...stellung kann nicht ausgewählt werden Auf dem Display erscheint keine Auswahlschaltfläche Autom Luefterstufe Einschalten oder Ausschalten für Autom Luefterstufe wählen Aktiv Autom Luefterstufe kann ausgewählt werden Inaktiv Autom Luefterstufe kann nicht ausgewählt werden Auf dem Display erscheint keine Auswahlschaltfläche Autom Temp Einstellung Autom Luefterstufe ...

Page 74: ...rostschutztemperatur IG Die Temperatur für die Frostschutzsteuerung auswählen 12 Frostschutzsteuerung IG Die Lüftersteuerung während der Frostschutzsteuerung einstellen 13 Kondensatpumpenbetrieb Die Betriebsart einstellen um die Kondensatpumpe zu aktivieren 14 Ventilatornachlauf nach Kuehlbetrieb Die Nachlaufzeit für den Lüfter nach dem Gerätestopp und bei Thermo OFF im Kühlbetrieb auswählen 15 Ve...

Page 75: ... Wenn mehrere Innengeräte angeschlossen sind das IG für die IG Einstellungen auswählen Wenn die Namen Adressen der angeschlossenen IGs angezeigt werden das Gerät für die Einstellung auswählen Wenn alle Geräte ausgewählt werden erfolgt die Einstellung für alle Geräte Menü Bildschirm 1 Menü Bildschirm 3 Service Passwort eingeben Inneng waehl Die Anzeigen für das Menü IG Einstellungen erscheinen nach...

Page 76: ...ungen menü 4 16 17 18 20 19 21 22 23 25 24 26 27 28 40 29 Hohe Deckenhoehe Die Lüfterdrehzahl für das IG einstellen In Abhängigkeit von den angeschlossenen IG Modellen steht diese Funktion eventuell nicht zur Verfügung IG Einstellungen menü 5 Hohe Deckenhoehe 44 45 ...

Page 77: ... Standard Keine Anzeige Keiner Einstellung 1 180Std Einstellung 2 600Std Einstellung 3 1 000Std Einstellung 4 1 000Std Stopp Betrieb Externer Eingang 1 Signal Den Typ des Signals festlegen das am externen Eingang 1 CNT des IG ankommt Externer Eingang 2 Externer Eingang 2 Signal Diese Funktion ist aktiv wenn das IG mit externem Eingang 2 angeschlossen ist Externer Eingang 1 Signal Externer Eingang ...

Page 78: ...iedriger Drehzahl und 5 Minuten Stopp werden wiederholt Stopp Der Lüfter wird gestoppt Lueftersteuerung Kuehlen bei Thermo OFF Die Lüfterdrehzahl während des Kühlbetriebs bei Thermo OFF einstellen Niedrig Der Lüfter läuft mit niedriger Drehzahl Luefterstufe einstellen Der Lüfter läuft mit derselben Drehzahl wie in der Betriebsart Thermo ON Intermittierend periodisch Zyklen aus 2 Minuten Lüfterbetr...

Page 79: ...d Entfeuchten In den Betriebsarten Kühlen und Entfeuchten aktiv Laeuft bei Kuehlen Entf und Heizbetrieb In den Betriebsarten Kühlen Entfeuchten und Heizen aktiv Laeuft bei Heizen und Vent Betrieb In den Betriebsarten Heizen und Lüfter aktiv Laeuft bei Kuehl Entf u bei Vent bet In den Betriebsarten Kühlen Entfeuchten und Lüfter aktiv Ventilatornachlauf nach Kuehlbetrieb Die Nachlaufzeit für den Lüf...

Page 80: ... Intermitt Vent Nachlauf nach Heizbetr Die Lüftersteuerung im Anschluss an den Lüfternachlauf nach einem Gerätestopp und bei Thermo OFF im Heizbetrieb auswählen Stopp Der intermittierende Lüfterbetrieb ist deaktiviert Stoppt fuer 20 min und läuft 5 min Kontrolle der Betriebsbedingungen alle 25 Minuten und Lüfterbetrieb für 5 min Stoppt fuer 5 min und läuft 5 min Kontrolle der Betriebsbedingungen a...

Page 81: ... Außentemperatur umgeschaltet Auto3 Kühlbetrieb und Heizbetrieb werden auf der Basis der Raum und Außentemperaturen umgeschaltet Auto 1 Details Die Temperaturen für die Umschaltung auf Kühlbetrieb und Heizbetrieb einste llen Die Umschalttemperaturen können in einem Bereich von 1 C bis 4 C eingest ellt werden Soll Temp Temp Umschaltung Kuehl Innenrücklufttemp Betriebsart Kühlen Soll Temp Temp Umsch...

Page 82: ...sentemperatur Betriebsart Heizen 30 28 26 24 22 20 18 26 28 16 14 12 0 3 2 1 10 18 20 22 24 14 16 Außentemp Soll Temp Heizen Kühlen Temp diff Thermo OFF Gezwungen Thermo OFF Thermo OFF Temp diff Selection Reihe von Außentemp im Heizbetrieb Selection Reihe von Außentemp im Kühlbetrieb Innentemp 16 14 28 26 24 22 20 18 30 12 10 Außentemp Innentemp 28 30 16 18 20 22 24 26 10 12 14 Heizen Gezwungen Th...

Page 83: ...einstellen Außentemp Kühlbetrieb Einstellung in einem Bereich von 10 C bis 30 C Außentemp Heizbetrieb Einstellung in einem Bereich von 10 C bis 22 C Temp Umschaltung Kuehl Temp Umschaltung Heizen Außentemp Einstellung für Kühlen Außentemp Einstellung für Heizen Innentemp Einstellung für Kühlen Innentemp Einstellung für Heizen Unter Auto 3 die Raumtemperaturen für Kühlbetrieb und Heizbetrieb einste...

Page 84: ...en Offset Heizen Offset Der Thermostat entscheidet auf der Basis der Außentemperatur und der Offset Werte für Kühlbetrieb und Heizbetrieb a Kuehlen Offset Der Thermostat entscheidet während des Kühlbetriebs auf der Basis Außentemp Kuehlen Offset Wert Der Thermostat löst die Aktivierung aus wenn Innentemp Außentemp Kuehlen Offset Wert Dieser Wert kann in einem Bereich von 0 C bis 10 C eingestellt w...

Page 85: ...rm Wenn die Raumtemperatur 30 Minuten nach dem Start des Betriebs in gewiss emUmfang von der Solltemperatur abweicht wird das Überlast Alarmsignal vom externen Ausgang CNT übertragen Autom Luefterstufensteuerung Den Umschaltbereich für die Lüfterstufen unter der Einstellung Autom Luef terstufe festlegen Auto 1 Die Lüfterstufe wird wie folgt umgeschaltet High Medium Low Auto 2 Die Lüfterstufe wird ...

Page 86: ...r Fehler auftrat werden angezeigt 5 Innengeraeteeinstellungen speichern Die IG Einstellungen werden in der Fernbedienung gespeichert oder an das IG übertragen 6 Spezialeinstellungen Unter dieser Option können IG Adressen gelöscht die CPU zurückgesetzt die Initialisier ung durchgeführt werden usw Die Schaltfläche Menu in der Touchscreen Anzeige drücken Das Hauptmenü wird angezeigt Die Schaltfläche ...

Page 87: ...snr Check run mode Sofern die Adresse des ausgewählten IG registriert wurde aber sein Installa tionsort unbekannt ist lässt er sich mit diesem Verfahren identifizieren sofern der individuelle Lüfterbetrieb festgelegt wurde Die Schaltfläche Betrieb drücken um den Lüfterbetrieb zu starten Die Schaltfläche Stopp drücken um den Lüfterbetrieb zu stoppen Naechstes Servicedatum Service Meldung Wenn das n...

Page 88: ...uenz 35 63H1 07 IG Waermet Temp 3 25 Hochdruck 36 Abtauung 08 IG Luefterstufe 26 Niederdruck 37 Kompressor Betr Std 09 Angeforderte Frequenz 27 Heissgastemperatur 38 AG EEV 1 Oeffnung 10 Antwort Frequenz 28 Oelwannenheiz Temp 39 AG EEV 2 Oeffnung 11 IG EEV Oeffnung 29 Stromaufnahme Betriebsdaten Nach dem Auslesen der Innengerätedaten werden die Betriebsdaten angezeigt Betriebsdaten werden nicht au...

Page 89: ...etriebsdaten d Reset Pruefintervall Fehlerhistorie Datum und Uhrzeit des Fehlers IG Adresse und Fehlercode werden angezeigt Wenn die Fehlerhistorie keine derartigen Einträge enthält wird kein Fehler angezeigt Fehlerhistorie loeschen Wenn die Schaltfläche Loeschen in der Anzeige der Fehlerhistorie gedrückt wird erscheint die Bestätigungsanzeige zum loeschen der Fehlerhistorie Ja drücken um die Anze...

Page 90: ...n gelöscht Innengeraeteeinstellungen speichern Die Einstellungen für das IG werden in der Fernbedienung gespeichert oder an das IG übertragen a Innengeraeteeinstellungen speichern b Automatisch speichern c Gespeicherte Daten uebertragen Reset Pruefintervall Wenn die Schaltfläche Ja auf der Bestätigungsanzeige für Reset period Kontrolle gedrückt wird erfolgt das Zurücksetzen der periodischen Kontro...

Page 91: ...peicherten Daten Ja drücken um die Daten zu übertragen IG Einstellungen die gespeichert werden können Hohe Deckenhoehe Lueftersteuerung Heizen bei Thermo OFF Steuerung Zieldruck bei Aussenluftbetr Filtermeldung Frostschutztemperatur IG Automatischer Betrieb Externer Eingang 1 Frostschutzsteuerung IG Thermo Steuerungseinst Kuehlen Heizen Externer Eingang 1 Signal Kondensatpumpenbetrieb Autom Luefte...

Page 92: ...ernbedienung und den angeschlossenen IGs werden auf die Standardeinstellungen zurückgesetzt Zustand mit Werkseinstellungen Ja drücken um die Standardeinstellungen wiederherzustellen CPU Reset Alle Mikrocomputer in der aktivierten Fernbedienung sowie in anderen Fernbe dienungen IGs und AGs werden zurückgesetzt Zustand der Wiederherstellung nach Spannungsausfall Ja drücken um die CPU zurücksetzen In...

Page 93: ...die Mitte der Schaltfläche drücken Die Mitte der Schaltfläche drücken und die Abweichung vom Display kontrollieren Loesch Das Display kehrt zu Anzeige zurück Nochmal Die Kalibrierung auf Anzeige wiederholen Bestaet Die Kalibrierung ist abgeschlossen unten rechts drücken oben links drücken Touch Panel Kalibrierung Touch Panel Kalibrierung 1 Touch Panel Kalibrierung 2 Touch Panel Kalibrierung ende ...

Page 94: ...ingabe des Passworts erscheint das Administrator Passwort eingeben 4 stellige Zahl Die Standardzahl für das Administratorpasswort lautet 0000 Veränderbar Service Passwort eingeben Touchscreen Anzeige Menü Bildschirm Menü Bildschirm 3 Die Sprache für die Anzeige auf der Fernbedienung auswählen English Deutsch Français Español Italiano Nederlandse Türk Português Русский Sprache waehlen ...

Page 95: ...Télécommande à distance TD eco touch RC EX1A RC EX1N Notice d installation PJZ012D077B B ...

Page 96: ...tings 20 8 IU settings 26 9 Service Maintenance 38 10 Select the Language 46 1 Consignes de sécurité 2 2 Travaux de préparation et accessoires requis 4 3 Installation de la télécommande à distance 4 Détermination du lieu d installation de la télécommande 4 Procédure d installation 5 Configuration Maître Esclave quand plusieurs télécommandes sont utilisées 7 4 Menu et fonctions de la télécommande 9...

Page 97: ... installer cet appareil Une installation non conforme réalisée par un personnel non qualifié peut provoquer des chocs électriques le feu ou la chute de l appareil Couper l alimentation électrique principale avant tout travail électrique Sinon des chocs électriques un dysfonctionnement ou une panne pourraient se produire Ne pas installer l unité dans un lieu où des gaz inflammables peuvent être gén...

Page 98: ...à distance vers les équipements médicaux ou de communication pourraient perturber les activités médicales la programmation vidéo ou provoquer des interférences sonores ATTENTION Ne pas installer la télécommande dans les endroits suivants sous peine de possible dysfonctionnement ou déformation 1 Où elle est exposée à la lumière directe du soleil 2 Près d un équipement générateur de chaleur 3 Sur su...

Page 99: ...ore 400 m 1 25 mm2 x 2 core 600 m 2 0 mm2 x 2 core 3 Installation de la télécommande à distance Détermination du lieu d installation de la télécommande Installation Avec un boitier électrique Directement sur le mur Orientation du câblage Arrière Centré en haut En haut à gauche Précautions à prendre pour le choix du lieu d installation 1 La surface d installation doit être plane et suffisamment sol...

Page 100: ...rendre soin de protéger le boitier supérieur de la poussière ou de l humidité Accès PCB vu de l arrière Pour séparer le boitier supérieur du boitier inférieur de la télécommande Insérer l embout d un tournevis plat ou similaire dans l emplacement prévu à cet effet dans la partie inférieure de la TD et tourner légèrement pour le détacher Raccorder les câbles entre les borniers X et Y de la TD et le...

Page 101: ...e de ne pas pincer les câbles de la TD 8 50 200 Mur Gaine Contre écrou Boitier électrique Scellement Mastic câble TD Passage de câble à l arrière Bague En cas de câblage visible quand le passage de câble se fait en haut au centre ou en haut à gauche Réaliser une petite découpe dans la paroi du boitier de la taille des câbles En haut au centre En haut à gauche Boitier supérieur Boitier arrière En c...

Page 102: ...ave pour l utilisation de 2 TD ou plus Au maximum 2 TD peuvent être utilisées pour contrôler 1 unité ou 1 groupe L une sera la TD principale maître et l autre la secondaire esclave La gamme de fonctions est différente selon la configuration Fonction TD Maître Esclave Marche Arrêt Réglages température de consigne vitesse de ventilation et orientation des volets Modes puissance max et économie d éne...

Page 103: ...a pourrait provoquer le dysfonctionnement ou la panne de la TD ou du PC Port USB Cache Note Initialisation du mot de passe Un mot de passe administrateur pour le réglage des fonctions habituelles et un mot de passe service pour l installation la mise en service et la maintenance sont utilisés Le mot de passe administrateur par défaut est 0000 Pour le modifier se référer à la notice d utilisation E...

Page 104: ...e port de connexion USB mini B permet le raccordement à un ordinateur individuel PC Pour le paramétrage se référer à la notice jointe au logiciel spécifique à la connexion par ordinateur portable Télécommande eco touch RC EX Logiciel de paramétrage Voir la notice d utilisation pour plus de détails L écran tactile qui est mis en fonctionnement par appui avec le doigt sur l écran à cristaux liquides...

Page 105: ...onsigne Affiche la température de consigne actuelle Appuyer sur cette touche pour la modifier Touche Choix de l orientation du volet d air Affiche l orientation actuelle du volet d air Appuyer sur cette touche pour la modifier Touche Choix de la vitesse de ventilation Affiche la vitesse de ventilation actuelle Appuyer sur cette touche pour la modifier Touche Timer Affiche la programmation horaire ...

Page 106: ...Réglage ON par décompte 31 Réglage OFF par décompte 33 Réglage ON par définition d une heure 33 Réglage OFF par définiton d une heure 33 Confirm 34 Paramétrage initial 26 Réglage HEURE 27 Affichage Date de Heure 28 Heure d été 28 Contraste 28 Rétro éclairage 29 Niveau sonore 29 34 Timer hebdomadaire 38 Mode Absence Réglages Administrateur 52 Sélectionner la langue 41 Réglage Autorisation Interdict...

Page 107: ...mpe de relevage 31 Fonctionnement Ventilateur thermostat OFF en froid 31 Fonctionnement Ventilateur thermostat OFF en chaufage 32 Fonctionnement intermittent ventilateur en chauffage 32 Fonctionnement circulateur d air 32 Ajustment contrôle de pression 32 Mode de fonctionnement Auto 33 Paramétrage des règles de température 36 Contrôle de la vitesse de ventilation automatique 37 Alarme de surcharge...

Page 108: ... a été appuyée par erreur le réglage peut être modifié avant la fin de l opération d initialisation 2 Quand les TD maître et esclaves ont été configurées l écran de confirmation s affiche 3 Si 2 télécommandes RC EX1 sont utilisées et que l une est définie comme maître l autre est automatiquement paramétrée comme esclave Dans le cas d une seule télécommande appuyer sur la touche Maître Si lors des ...

Page 109: ...cran n a lieu pendant plus de 15 secondes Oui Continuer est sélectionné et l affichage passe à l écran Oui Non Après l initialisation on revient à l état par défaut L écran démarrage Réglez continuer reconnaître Initialiser reconnaître Initialiser mis sur ...

Page 110: ... statique externe 5 Modifier l adressage dans le cas d installation de type KX les adresses des UI peuvent être modifiées après l adressage automatique 6 Adressage des UI principales dans le cas d installation de type KX adresser les unités maîtres esclaves pour éviter la confusion des modes de fonctionnement Froid chauffage 7 Fonctionnement en mode secours des UI paramétrage de l alternance des U...

Page 111: ...ider en appui sur la touche Validation Valider Menu Réglage installation Date d installation Menu Réglage installation 7 8 11 15 16 19 18 Coordonnées SAV Saisir les coordonnées Société Téléphone Entrer le nom Jusqu à 10 caractères alphanumériques 1 byte peuvent être utilisés Valider en appuyant sur la touche Validation Valider Coordonnées SAV 9 10 Entrer le nom ...

Page 112: ...o de téléphone Test de fonctionnement 12 13 14 Test de fonctionnement en Froid Si la température ambiante est trop basse pour activer le mode froid la température de consigne sera fixée à 5ºC pendant 30 minutes Test de fonctionnement pompe de relevage La pompe des condensats peut être activée indépendamment Compresseur fonctionnement fréquences fixe Possibilité de stabiliser la fréquence du compre...

Page 113: ...evient ensuite à l écran d auto adressage sur lequel la nouvelle adresse est affichée Appuyer sur la touche Confirm pour enregistrer les nouvelles adresses Adressage de l unité intérieure principale Dans le cas des installations de type KX il est possible d imposer que les unités esclaves aient le même mode de fonctionnement que l unité maître de leur groupe Configurer l adresse de l unité maître ...

Page 114: ...lie seule une unité fonctionne Configuration de la différence de température pour activation du mode Renfort Sauvegarde défaut si une UI présente un défaut et s arrête l autre démarre L Valider Inval de chaque fonction peut être réalisée Si l Rotation ou le mode Sauvegarde puissance est Valider Sauvegarde défaut est automatiquement Valider Régler du temps pur le changeover Dans la fonction alterna...

Page 115: ...ion modification de la vitesse de ventilation 8 Entrée externe réglage du champ d application d une entrée externe CNT raccordée à plusieurs unités 9 Réglage de la ventilation externe paramétrage lorsqu un accessoire externe de ventilation est raccordé 10 Contrôle des volets d air réglage d une des 4 positions d arrêt des volets ou leur arrêt libre 11 Redémarrage automatique activation ou désactiv...

Page 116: ...st 9999 Non modifiable Affichage des écrans de configuration de la TD Mot de passes Service Configuration de la TD 1 Configuration de la TD 2 Configuration de la TD 3 8 9 10 11 14 20 21 22 15 16 17 18 19 TD Maître Esclave Utiliser cette fonction pour modifier le paramétrage Maître ou Esclave de la TD TD Maître Esclave ...

Page 117: ...enclenchement ou non du thermostat par détection de la température Sonde TD La loi thermique se base sur la température détectée par la sonde de la télécommande Valide La loi thermique se base sur la température détectée par la sonde de la télécommande dans tous les modes de fonctionnement Valide Chauffage seul La loi thermique se base sur la température détectée par la sonde de la télécommande en...

Page 118: ...matique est également désactivé Ajustement en Froid Ajustement en Chauffage Mode de fonctionnement C F Choix de l unité d affiche de la température sur la TD C La température est affichée en C F La température est affichée en F C F Vitesse de ventilation Modification de la vitesse de ventilation En fonction des modèles d UI certaines vitesses peuvent ne pas être disponibles Vitesse de ventilation ...

Page 119: ... l accessoire externe de ventilation Entrée externe Réglage ventilation externe Contrôle des volets motorisés Réglage du point d arrêt des volets Arrêt sur position fixe la position d arrêt peut être choisie entre 4 positions pré définies Arrêt dans n importe quelle position le volet s arrête quelque soit sa position au moment de l arrêt du climatiseur Redémarrage automatique Réglage du mode de fo...

Page 120: ... paramétrée Aucune touche de sélection ne s affiche sur l écran Vitesse de ventilation automatique Réglage de l activation ou non sur l écran de configuration de la ventilation automatique Valide Il est possible de choisir la vitesse de ventilation automatique Inval le choix automatique de la vitesse de ventilation ne peut pas être paramétré Aucune touche de sélection ne s affiche sur l écran Temp...

Page 121: ...rôle anti givre contrôle de la ventilation lorsque le mode anti givre est activé 13 Fonctionnement de la pompe de relevage des condensats régler le mode de fonctionnement pour l enclenchement de la pompe 14 Fonctionnement résiduel du ventilateur en mode froid choisir la durée de fonctionnement résiduel du ventilateur après arrêt de l unité ou arrêt en régulation en mode froid 15 Fonctionnement rés...

Page 122: ...difiable Quand plusieurs unités intérieures sont raccordées sélectionner l UI à paramétrer Quand les nom adresse des UI connectées sont affichés sélectionner l UI à paramétrer Si toutes les unités sont sélectionnées la même configuration s applique à toutes les unités L écran du menu 1 L écran du menu 3 Mot de passes Service Choisir U Int Les écrans du menu de configuration des UI sont affichés ap...

Page 123: ... des UI 3 Configuration des UI 4 16 17 18 20 19 21 22 23 25 24 26 27 28 40 29 Plafond haut Sélectionner la vitesse de ventilation max de l UI Selon le modèle d UI ce réglage peut ne pas être possible Configuration des UI 5 Plafond haut 44 45 ...

Page 124: ... 1 Standard Pas d affichage Aucun Réglage 1 180h Réglage 2 600h Réglage 3 1 000h Réglage 4 1 000h Arrêt du fonctionnement Entrée externe 1 signal Configurer le type de signal de l entrée externe 1 du CNT de l UI Entrée externe 2 Entrée externe 2 signal Cette configuration est possible lorsque l UI équipée d une entrée externe 2 est connectée Entrée externe 1 signal Entrée externe 2 Entrée externe ...

Page 125: ...tion à basse vitesse et de 5 minutes d arrêt de la ventilation Arrêt le ventilateur est arrêté Régulation Ventilateur en Tº off en clim Choisir la vitesse de ventilation lors de la régulation en mode froid Bas le ventilateur fonctionne à basse vitesse Réglage vitesse de ventilation le ventilateur fonctionne à la même vitesse que celle en fonctionnement normal Intermittent cycles alternés de 2 minu...

Page 126: ...ode froid et en mode déshumidification Fonctionne en chauffage normal la pompe s enclenche en mode froid en mode déshumidification et en mode chauffage Fonctionne en chauffage ventilation la pompe s enclenche en mode ventilation et en mode chauffage Fonctionne en ventilation normal la pompe s enclenche en mode froid en mode déshumidification et en mode ventilation Fonct Ventilateur thermostat OFF ...

Page 127: ...Sélectionner le mode de contrôle de la ventilation après le fonctionnement résiduel de la ventilation en régulation et après l arrêt en mode chauffage Arrêt Ventilateur à l arrêt Stop pendant 20 min et ON pendant 5 min vérification des conditions de fonctionnement toutes les 25 minutes et fonctionnement de la ventilation pendant 5 minutes Stop pendant 5 min et ON pendant 5 min vérification des con...

Page 128: ...tionnement en froid est basée sur les températures extérieure et intérieure Détails Auto 1 Réglage des températures de commutation entre froid et chauffage Les températures de commutation peuvent être fixées dans une plage de 1 C à 4 C Temp consigne Temp commutation à mode froid Temp Intérieure reprise d air Fonctionnement en mode froid Temp consigne Temp commutation à mode chauffage Temp Intérieu...

Page 129: ...érieure Temp de consigne Mode chauffage Mode Froid Temp diff Thermo OFF Thermo OFF forcé Thermo OFF Temp diff Plage de fonctionnement en mode Chauffage selon la température extérieure Plage de fonctionnement en mode Froid selon la température extérieure Température intérieure 16 14 28 26 24 22 20 18 30 12 10 Température extérieure Température intérieure 28 30 16 18 20 22 24 26 10 12 14 Plage de fo...

Page 130: ...res d activation du mode froid et du mode chauffage Temp extérieure limite en froid comprise entre 10 C et 30 C Temp extérieure limite en chauffage comprise entre 10 C et 22 C Température de commutation Froid Température de commutation Chauffage Climatisation Tº limite exté Chauffage Tº limite extér Climatisation Tº limite inté Chauffage Tº limite intéri Pour le réglage Auto 3 paramétrer les tempé...

Page 131: ...pensation en froid Compensation en chauffage Le jugement du thermostat est basé sur la température extérieure et les valeurs de compensation en froid et en chauffage a Compensation en froid Le jugement du thermostat est basé sur Temp Extérieure Valeur compensation en froid en mode froid Le thermostat enclenche le fonctionnement quand Temp int Temp ext Valeur compensation en froid Cette valeur peut...

Page 132: ...arge unité intérieure L alarme de surcharge s active et est transmise en signal de sortie du CNT si plus de 30 minutes après la mise en fonctionnement la température ambiante diffère grandement de la température de consigne Controle de la vitesse de ventilation automatique Définir la plage de fonctionnement des vitesses lors de l utilisation en Mode AUTO Auto 1 La vitesse de ventilation évolue dan...

Page 133: ...rs du défaut qui sont en mémoire de la TD sont affichées 5 Sauvegarde des paramètres de l UI le contenu de la configuration de l UI est enregistré dans la TD ou transmis à l UI 6 Configuration spéciale cette fonction est utilisée pour effacer l adresse de l UI reprogrammer la CPU la réinitialisation etc Appuyer sur la touche Menu de l écran de démarrage L écran du menu principal s affiche Appuyer ...

Page 134: ... Mode Vérification Dans le cas où l UI sélectionnée est prise en compte mais son emplacement réel est inconnu la mise en marche de la ventilation uniquement sur cette unité permet de l identifier physiquement Appuyer sur la touche Marche pour activer la ventilation Appuyer sur la touche Arrêt pour l arrêter Prochaine date pour l entretien Message SAV Quand la date de prochaine intervention est ren...

Page 135: ... 25 Haute pression 36 Dégivrage 08 Vitesse ventilation UI 26 Basse pression 37 Nbreheuresfonctionnementcompresseur 09 Fréquence requise Hz 27 Temp Tuyauterie refoulement 38 Ouverture EEV1 UE 10 Fréquence réelle Hz 28 Temp Cloche compresseur 39 Ouverture EEV2 UE 11 Ouverture EEV UI 29 Intensité Données de fonctionnement Après lecture des données de l UI les données de fonctionnement au moment de la...

Page 136: ...c Effacement des données de l anomalie d Effacement contrôle périodique Historique des Erreurs La date et l heure du défaut ainsi que l adresse de l UI et le code défaut sont affichés S il n y a pas de défaut en mémoire aucune donnée ne s affiche Effacer les annales de fonctionnement En cas d appui sur la touche Effacer Delete un écran de confirmation de l effacement apparaît Pour confirmer appuye...

Page 137: ...i Sauvegarder le réglage de L Unité Int Le contenu de la configuration de l UI est enregistré dans la TD ou transmis à l UI a Enregistrer les paramètres de l UI b Sauvegarde automatique c Transmission des données sauvegardées Réinitialisation du contrôle périodique En cas d appui sur la touche Oui sur l écran de confirmation d annulation du contrôle périodique ce contrôle est annulé ainsi que le d...

Page 138: ...sauvegarde Plafond haut Contrôle Ventilation lors de la régulation en mode chauffage Réglage du contrôle de pression Signal Filtre encrassé Temp anti givre Mode automatique Entrée externe 1 Contrôle anti givre Réglages loi thermique Type de signal de l entrée externe 1 Fonctionnement pompe des condensats Contrôle vitesse ventilation automatique Entrée externe 2 Fonctionnement résiduel de la ventil...

Page 139: ...n par défaut Etat en sortie d usine des TD et des UI est restaurée Appuyer sur la touche Oui pour réinitialiser les réglages par défaut Initialisation CPU Toutes las platines électroniques de contrôle des TD des UI et des UE sont réinitialisées Etat de restauration après une coupure de courant Appuyer sur la touche Oui pour reprogrammer les CPU Efface l adresse de l unité intérieure Sur les instal...

Page 140: ...ppuyer au centre de selon le message affiché à l écran Appuyer au centre de et contrôler les écarts avec l affichage Annuler L affichage revient à l écran Confirm Nouvel essai de calibrage écran Refaire Calibrage terminé Appuyer sur en bas à droite Appuyer sur en haut à gauche Etalonnage de l écran Etalonnage de l écran 1 Etalonnage de l écran 2 Etalonnage de l écran ...

Page 141: ...l écran de saisie du mot de passe Administrateur Saisir le mot de passe administrateur nombre de 4 chiffres Le mot de passe Administrateur par défaut est 0000 modifiable Mot de passes Administrateur L écran de démarrage L écran du menu L écran du menu 3 Choisir la langue d affichage de la TD English Deutsch Français Español Italiano Nederlandse Türk Português Pyсский Sélectionner la langue ...

Page 142: ...MANDO A DISTANCIA eco touch RC EX1A RC EX1N MANUAL DE INSTALACIÓN PJZ012D077C B ...

Page 143: ...ion settings 20 8 IU settings 26 9 Service Maintenance 38 10 Select the Language 46 1 Precauciones de seguridad 2 2 Accesorios y preparación 4 3 Procedimiento de instalación del mando a distancia 4 Lugar de instalación del mando a distancia 4 Procedimiento de instalación 5 Configuración como M D principal secundario si se usa más de un mando a distancia 7 4 Funciones y menús del mando a distancia ...

Page 144: ...gue el Manual de instalación al nuevo propietario PELIGRO Recurra a un instalador profesional para que realice la instalación según este manual Una instalación incorrecta puede causar choques eléctricos incendios o averías Desconecte la alimentación antes de realizar trabajos eléctricos De lo contrario se podrían producir choques eléctricos o averías No instale la unidad en un lugar inadecuado o d...

Page 145: ...perturbar el desarrollo de actividades médicas transmisiones de vídeo o provocar interferencias PRECAUCIÓN No instale el mando a distancia en los siguientes lugares Podría causar la avería o deformación del mando a distancia 1 Lugares expuestos a la luz solar directa 2 Lugares próximos a equipos que generen calor 3 Lugares donde la superficie no sea plana No deje el mando a distancia sin la cubier...

Page 146: ... 0 mm2 x 2 core 3 Procedimiento de instalación del mando a distancia Lugar de instalación del mando a distancia Instalación Con cuadro de distribución Instalación en pared Posición de conexión Trasera Superior central Superior izquierda Precauciones a la hora de seleccionar el lugar de instalación 1 La superficie de instalación debe ser lisa y tener la resistencia necesaria No se debe deformar la ...

Page 147: ... superior contra el polvo y la humedad Lado de la tarjeta de circuitos vista posterior Retire la cubierta superior del mando a distancia Introduzca la punta plana de un destornillador u otra herramienta similar en el hueco que hay en la parte inferior del M D y gire ligeramente para extraer la cubierta Conecte los cables de los terminales X e Y del mando a distancia a los terminales X e Y de la un...

Page 148: ...a superior procurando no aplastar los cables del M D 8 50 200 Pared Conducto Contratuerca Cuadro de distribución Sellar con masilla Cable del M D Orificio para cables en la cubierta inferior Casquillo Si las conexiones quedan expuestas cuando salen desde la posición superior central o superior izquierda del M D Haga un corte del tamaño del cable en las secciones de pared fina de las cubiertas Supe...

Page 149: ...más mandos a distancia Se puede utilizar un máximo de dos M D para una unidad interior o un grupo Uno de ellos se configura como M D principal y el otro como M D secundario El rango de operación varía dependiendo de si el M D es principal o secundario Función del M D Principal Secundario Encender Apagar Cambiar temperatura Cambiar velocidad de ventilador Cambiar dirección de láminas Modo de alta p...

Page 150: ...to USB y a otros dispositivos USB al mismo tiempo Podría causar errores o averías en el M D o el ordenador personal Puerto USB Cubierta Nota Inicialización de contraseña Se utilizan contraseñas de administrador para configurar parámetros y de servicio para instalación prueba de funcionamiento y mantenimiento El valor predeterminado de la contraseña de administrador es 0000 aunque se puede cambiar ...

Page 151: ...inación de la pantalla excluyendo el uso de los botones y Puerto USB El conector USB mini B permite la conexión a un ordenador personal Puede consultar los métodos de operación en el manual de instrucciones del software para ordenador personal software de herramientas del mando a distancia Eco touch RC EX Consulte el Manual de usuario si desea más información El panel táctil que funciona golpeando...

Page 152: ...se este botón para cambiar la temperatura Flap direction button Muestra la dirección seleccionada de la lámina Pulse este botón para cambiar la dirección de la lámina Fan speed change button Muestra la velocidad del ventilador seleccionada Pulse este botón para cambiar la velocidad del ventilador Timer button Muestra datos resumidos del temporizador seleccionado Si hay dos o más temporizadores con...

Page 153: ...ambio automático de temperatura Temporizador Temporizador de encendido por hora Temporizador de apagado por hora Temporizador de encendido por reloj Temporizador de apagado por reloj Configuración inicial Reloj Formato de fecha y hora Horario de verano Contraste Iluminación Sonido de controlador Temporizador semanal Modo de ausencia Parámetros de administrador Permitir Prohibir Temporizador de mod...

Page 154: ... Anti frost 31 Control de Anti frost 31 Operación de la bomba de drenaje 31 Operación residual de ventilador en refrigeración 31 Operación residual de ventilador en calefacción 32 Operación intermitente de ventilador en calefacción 32 Ventilador como circulador 32 Ajuste de presión de control 32 Modo de funcionamiento automático 33 Regla de termostato 36 Control automático de velocidad de ventilad...

Page 155: ... proceso de inicialización 2 Si los M D principal y secundario ya no están configurados se muestra la pantalla de confirmación 3 Si se utilizan dos unidades RC EX1 y una de ellas está configurada como M D principal la otra queda configurada automáticamente como M D secundario Pulse el botón Principal si sólo va a usar un M D La pantalla no cambia si no se pulsa ninguno de los dos botones Principal...

Page 156: ...lla durante 15 segundos se selecciona Sí Continuar y se muestra la pantalla de Sí No La unidad vuelve al estado predeterminado después de la inicialización Pantalla principal Configurar reconocimiento continuo Iniciar reconocimiento Iniciar configurado ...

Page 157: ...o En el caso de modelos de la serie Multi KX la dirección de la unidad interior se puede cambiar después de configurar la dirección automática 6 Config Direccionado de U I principal En el caso de modelos de la serie Multi KX configure la dirección de la unidad interior principal secundaria para evitar conflictos entre modos de funcionamiento refrigeración calefacción 7 U I reserva Permite configur...

Page 158: ...lse el botón Config Config Instalación menú Fecha instalación Config Instalación menú 7 8 11 15 16 19 18 Contacto servicio técnico Introduzca los datos de la empresa Compañía Teléfono Introduzca el nombre de contacto Es posible usar hasta 10 caracteres alfanuméricos de 1 byte Pulse el botón Config Contacto servicio técnico 9 10 Introduzca el nombre de contacto ...

Page 159: ...rueba de funcionamiento 12 13 14 Prueba de funcionamiento frío Si la temperatura ambiente es demasiado baja para iniciar la prueba de refrigeración la unidad funciona durante 30 minutos para reducir la temperatura configurada hasta 5 C Prueba de funcionamiento bomba drenaje La bomba de drenaje puede funcionar de forma independiente Operación fijar Hz compresor Permite cambiar la frecuencia de func...

Page 160: ...e a aparecer la pantalla de cambio de dirección automática con la nueva dirección Pulse el botón Confirm para confirmar la nueva dirección Config Direccionado de U I principal En el caso de modelos de la serie Multi KX es posible hacer que las unidades interiores secundarias sigan el modo de funcionamiento calefacción refrigeración de la unidad interior principal Configure la dirección de la unida...

Page 161: ...especificado Configure la diferencia de temperaturas U I reserva de fallo Una unidad interior empieza a funcionar si la otra está averiada o se apaga Cada una de estas funciones se puede configurar como Invál Detalles Si U I rotación o U I reserva capacidad está Invál U I reserva de fallo estará Invál automáticamente Fijar tiempo para cambio Permite configurar el temporizador de conmutación de dos...

Page 162: ... cambiar la velocidad de ventilador 8 Entrada externa Especifica las condiciones en que se aplica la entrada externa CNT conectada a varias unidades interiores 9 Config ventilación Se utiliza cuando se conecta un sistema de ventilación 10 Control álabe Especifica una de cuatro posibles posiciones de parada o bien parada libre 11 Auto arranque Permite activar o desactivar la función de reinicio aut...

Page 163: ...99 no se puede modificar Aparece la pantalla del menú de configuración del M D Introducción de contraseña de servicio Config Funciones mando menú Config Funciones mando menú Config Funciones mando menú 8 9 10 11 14 20 21 22 15 16 17 18 19 Principal Sub control Utilice esta opción para cambiar la configuración del M D como Principal Sub Principal Sub control ...

Page 164: ... unidades interiores conectadas Regla de termostato Criterio para encender o apagar el termostato en función de la temperatura medida Sensor control La regla de termostato se aplica en función de la temperatura medida con el sensor del M D Válido La regla de termostato se aplica en función de la temperatura medida con el sensor del M D en todos los modos de funcionamiento Válido calor solo La regl...

Page 165: ...automático Ajuste en frío Ajuste en calor Modo operación C F Permite seleccionar la unidad de temperatura empleada en el M D C La temperatura se indica en C F La temperatura se indica en F C F Velocidad ventilador Permite seleccionar la velocidad de ventilador Dependiendo de los modelos de unidades interiores es posible que no se puedan seleccionar algunas velocidades de ventilador Velocidad venti...

Page 166: ...y se apaga de forma independiente Entrada externa Cofig Ventilación Control álabe Permite configurar el control de parada de láminas Parar posición fijada Permite configurar la lámina para que se detenga en una de cuatro posiciones posibles Parar cualquier posición Permite configurar la lámina para que se detenga en cualquier posición inmediatamente después de pulsar el botón del M D Auto arranque...

Page 167: ...nar el control automático de temperatura el botón no aparece en la pantalla Auto velocidad ventilador Seleccione Activar o Desactivar en la pantalla de configuración Válido Es posible seleccionar la velocidad de ventilador automática Invál No es posible seleccionar la velocidad de ventilador automática el botón no aparece en la pantalla Auto config Temperatura Auto velocidad ventilador ...

Page 168: ...e control de Anti frost 12 Control anti hielo Activa el control de ventilador durante el control de Anti frost 13 Funcionamiento bomba drenaje Define el modo de funcionamiento para la bomba de drenaje 14 Operación ventilador residual en frío Permite seleccionar el tiempo de operación residual del ventilador después de detener la unidad y apagar el termostato en refrigeración 15 Operación ventilado...

Page 169: ...ar Si hay varias unidades conectadas seleccione la unidad interior que desee configurar Seleccione la unidad interior cuando la pantalla muestre su nombre y dirección Si selecciona todas las unidades todas ellas quedarán configuradas de la misma forma Pantalla del menú principal Pantalla del menú principal Introducción de contraseña de servicio Selec U I El menú de configuración aparece cuando se ...

Page 170: ...n U I 16 17 18 20 19 21 22 23 25 24 26 27 28 40 29 Techos altos Permite seleccionar la velocidad de ventilador para la unidad interior Dependiendo de los modelos de unidades interiores es posible que no se pueda utilizar esta opción Guardar configuración U I Techos altos 44 45 ...

Page 171: ...terna 1 Estándar Sin mostrar None Config 1 180horas Config 2 600horas Config 3 1 000horas Config 4 1 000horas Parar operación Señal entrada externa 1 Define el tipo de señal que se recibe en la entrada externa 1 CNT de la unidad interior Entrada externa 2 Señal entrada externa 2 Se puede utilizar si la unidad interior conectada dispone de entrada externa 2 Señal entrada externa 1 Entrada externa 2...

Page 172: ...en ciclos de 2 minutos a baja velocidad y 5 minutos apagado Paro El ventilador se detiene Control ventilador corte termostato frío Especifica la velocidad del ventilador cuando se apaga el termostato en refrigeración Baja El ventilador funciona a baja velocidad Fijar velocidad ventilador El ventilador funciona a la misma velocidad que cuando el termostato está encendido Intermitente El ventilador ...

Page 173: ...iona en modo de frío y seco Funcionamiento en estándar y calor La bomba funciona en modo de frío seco y calor Funcionamiento en calor y ventilador La bomba funciona en modo de calor y ventilador Funcionamiento en estándar y ventilador La bomba funciona en modo de frío seco y ventilador Operación ventilador residual en frío Permite seleccionar el tiempo de operación residual del ventilador después ...

Page 174: ...ilador al terminar la operación residual del ventilador después de detener la unidad y apagar el termostato en calefacción Paro El ventilador no funciona en modo intermitente Parar para 20 min y arrancar para 5 min Las condiciones de funcionamiento se comprueban cada 25 minutos y el ventilador funciona durante 5 minutos Parar para 5 min y arrancar para 5 min Las condiciones de funcionamiento se co...

Page 175: ...e las temperaturas de conmutación a refrigeración y calefacción Las temperaturas de conmutación se pueden seleccionar entre 1 C y 4 C Temperatura especificada Temperatura de conmutación a refrigeración Temperatura de aire de retorno interior Modo de funcionamiento Refrigeración Temperatura especificada Temperatura de conmutación a calefacción Temperatura de aire de retorno interior Modo de funcion...

Page 176: ...ratura de aire de retorno interior y Temperatura exterior calefacción Temperatura de aire exterior Modo de funcionamiento Calefacción 30 28 26 24 22 20 18 26 28 16 14 12 0 3 2 1 10 18 20 22 24 14 16 Temp unidad exterior Temperatura consigna Calor Frío Diferencia temp Termostato apagado Forzar termostato apagado Termostato apagado Diferencia temp Rango de temperatura exterior en calor Rango de temp...

Page 177: ...ratura exterior refrigeración Se puede seleccionar entre 10 C y 30 C Temperatura exterior calefacción Se puede seleccionar entre 10 C y 22 C Diferencial temp cambio a frío Diferencial temp cambio a calor Config Temp limitaroperfríotemp ext Config Temp limitar oper calor temp ext Temp cambio a frío según temp interior Temp cambio a calor según temp interior En el método Auto 3 especifique las tempe...

Page 178: ...ial calor El termostato se enciende o se apaga en función de la temperatura exterior y los valores de offset de refrigeración y calefacción a Diferencial frío El termostato se enciende o se apaga en función de Temperatura exterior Valor de offset de refrigeración en modo de refrigeración El termostato se enciende cuando Temperatura interior Temperatura exterior Valor de offset de refrigeración Est...

Page 179: ...carga La señal de alarma por sobrecarga se transmite desde la salida externa CNT cuando la diferencia entre la temperatura ambiente y la temperatura espe cificada alcanza un determinado valor después de 30 minutos de funciona miento Control auto velocidad ventilador Define las condiciones de conmutación del ventilador en el modo de velocidad de ventilador automática Auto 1 La velocidad del ventila...

Page 180: ... D y la fecha en que se produjo cada error 5 Guardar configuración U I La configuración de la unidad interior se guarda en el M D o se transmite a la unidad interior 6 Configuración especiales Permite borrar la dirección de la unidad interior reiniciar la CPU inicializar etc Pulse el botón Menú en la pantalla SUPERIOR Aparece la pantalla del menú principal Pulse Servicio y mantenimiento en la pant...

Page 181: ...est Si la dirección de la unidad interior seleccionada está registrada pero no se conoce su lugar de instalación este procedimiento permite identificar el lugar de instalación haciendo funcionar sólo el ventilador Pulse el botón Encender para que el ventilador empiece a funcionar Pulse el Apagar para detener el funcionamiento del ventilador Próxima fecha mantenimiento Mensaje de servicio Si se esp...

Page 182: ...e ventilador de unidad exterior 06 Temperatura de intercambiador térmico 2 de unidad interior 24 Frecuencia Hz de compresor 35 63H1 07 Temperatura de intercambiador térmico 3 de unidad interior 25 Alta presión 36 Descongelación 08 Velocidad de ventilador de unidad interior 26 Baja presión 37 Horas de funcionamiento del compresor 09 Frecuencia Hz requerida 27 Temperatura de tubería de descarga 38 A...

Page 183: ...anomalías d Resetear comprobación periódica Historial errores Muestra la fecha y hora en que se produjo el error la dirección de la unidad interior y el código de error No se muestra ningún dato si no hay errores en el historial Borrar historial errores Pulse el botón Borrar en la pantalla del historial de errores En la pantalla de confirmación pulse Sí para borrar el historial de errores Pantalla...

Page 184: ...anómalos Guardar configuración U I La configuración de la unidad interior se guarda en el M D o se transmite a la unidad interior a Guardar configuración U I b Guardar automático c Transferir los datos guardados Resetear comprobación periódica Pulse el botón Sí en la pantalla de confirmación para borrar reiniciar la comprobación periódica y poner a cero el contador Mostrar datos anomalías Borrar d...

Page 185: ... interior que se guardan Techo alto Control de ventilador en apagado de termostato en calefacción Ajuste de presión de control Signo de filtro Temperatura de Anti frost Modo de funcionamiento automático Entrada externa 1 Control de Anti frost Regla de termostato Señal de entrada externa 1 Operación de la bomba de drenaje Control automático de velocidad de ventilador Entrada externa 2 Operación res...

Page 186: ...izando El M D y la unidad interior conectada vuelven a su configuración predeterminada configuración de fábrica Pulse Sí para recuperar la configuración predeterminada Reconfig CPU Se reinician todos los microordenadores del M D utilizado de otros M D y de las unidades interiores y exteriores después de un corte de electricidad Pulse Sí para reiniciar las CPU Borrar dirección U I Se borra la memor...

Page 187: ...do se indique Pulse en el centro de y compruebe si hay alguna desviación Cancelar Se vuelve a mostrar la pantalla Rehacer Se repite la calibración en la pantalla Confirm Finaliza la calibración Pulse en la esquina inferior derecha Pulse en la esquina superior izquierda Calibración del panel táctil Calibración del panel táctil Calibración del panel táctil Calibración del panel táctil ...

Page 188: ...inistrador número de 4 dígitos en la pantalla de introducción de contraseña La contraseña de administrador predeterminada es 0000 se puede modificar Service password input Pantalla SUPERIOR Pantalla del menú principal Pantalla del menú principal Seleccione el lenguaje que desee utilizar en el M D English Deutsch Français Español Italiano Nederlandse Türk Português Русский Seleccionar lenguaje ...

Page 189: ...FILOCOMANDO eco touchRC EX1A RC EX1N MANUALE DI INSTALLAZIONE PJZ012D077D B ...

Page 190: ...8 IU settings 26 9 Service Maintenance 38 10 Select the Language 46 1 Precauzioni di Sicurezza 2 2 Accessori e Componenti da procurarsi localmente 4 3 Procedura di installazione del Filocomando 4 Selezionare il luogo di installazione del Filocomando 4 Procedura di Installazione 5 Settaggio Principale Secondario in caso di utilizzo di più di un Filocomando 7 4 Funzioni e voci di Menù del Filocomand...

Page 191: ...in caso di spostamento o riparazione dell Unità In caso di trasferimento ad altro Utente il Manuale di Installazione deve essere consegnato al nuovo Proprietario AVVERTENZE Contattare un Tecnico Specializzato per la realizzazione del lavoro di installazione che deve essere eseguito in conformità con il Manuale di Installazione Un installazione errata può provocare scosse elettriche incendio o guas...

Page 192: ...omunicazione radio ecc I segnali trasmessi dal Filocomando ai dispositivi medici o di comunicazione possono interrompere le attività mediche le trasmissioni video o causare interferenze ATTENZIONE Non installare il Filocomando nei seguenti luoghi Ciò può causare guasto o deformazione del Filocomando 1 Esposizione alla luce diretta del sole 2 Vicino a fonti di calore 3 Se la superficie non è perfet...

Page 193: ...ione del Filocomando Selezionare il luogo di installazione del Filocomando Installazione Utilizzo di una scatola elettrica Installazione direttamente a muro Retro In alto al centro In alto a sinistra Avvertenze per la selezione del luogo di installazione 1 La superficie di installazione deve essere piana e sufficientemente resistente L alloggiamento del Filocomando non deve essere deformato 2 La p...

Page 194: ...re smontato dall umidità e dalla polvere Lato della Scheda Elettronica Vista dal retro Per rimuovere il guscio superiore dal guscio inferiore del Filocomando Inserire la punta del cacciavite piatto o attrezzo similare nella rientranza sulla parte inferiore del Filocomando e torcere leggermente per rimuovere il guscio Collegare i fili provenienti dai terminali X e Y del Filocomando ai terminali X e...

Page 195: ...ilocomando 8 50 200 Muro Canale Controdado Scatola elettrica Sigillare con stucco Cavo del Filocomando Foro per i collegamenti elettrici sul guscio inferiore Rivestimento isolante In caso di fili esposti il colleg elettrico è estratto dall alto al centro o dall alto a sinistra Tagliare i pretranciati sul guscio in base alla sezione del filo In alto al centro In alto a sinistra Guscio superiore Gus...

Page 196: ...ocomandi per 1 Unità Interna o 1 Gruppo Uno è il Filocomando Principale e l altro è il Filocomando Secondario L intervallo di funzionamento è diverso a seconda del Filocomando Principale o Secondario Funzione del Filocomando Principale Secondario Funzionamento Stop temperatura impostata velocità di ventilazione e direzione alette Funzionamento High Power Potenziato e Energy saving Risparmio Energe...

Page 197: ...oraneamente ad altri dispositivi USB Ciò potrebbe causare malfunzionamenti o guasti al Filocomando o al personal computer porta USB Coperchio di protezione Nota Inizializzazione della password Utilizzo di Password Amministratore per settaggi giornalieri e Password di Servizio per installazione Collaudo e Manutenzione L impostazione di fabbrica della Password Amministratore è 0000 Questa impostazio...

Page 198: ...esa unicamente la retroilluminazione Il funzionamento mediante gli interruttori e è escluso Porta USB Il connettore USB mini B permette il collegamento ad un personal computer Per le procedure di funzionamento fare riferimento al Manuale per l Utente allegato al software per il personal computer Utility software del Filocomando eco touch RC EX Per i dettagli consultare il Manuale per l Utente Il s...

Page 199: ...remere questo pulsante per variare la temperatura impostata Pulsante modifica direzione aletta Visualizza la direzione dell aletta correntemente selezionata Premere questo pulsante per variare la direzione dell aletta Pulsante modifica velocità di ventilazione Visualizza la velocità di ventilazione correntemente selezionata Premere questo pulsante per variare la velocità di ventilazione Pulsante T...

Page 200: ...peratura impostata 21 Timer 30 Impostazione dell intervallo di tempo per timer ON 31 Impostazione dell intervallo di tempo per timer OFF 33 Impostazione dell ora di avvio automatico 33 Impostazione dell ora di arresto automatico 33 Conferma 34 Impostazioni iniziali 26 Impostazione ora corrente 27 Visualizzazione data e ora 28 Ora legale 28 Contrasto 28 Retroilluminazione 29 Suono 29 34 Timer setti...

Page 201: ... anti gelo 31 Controllo anti gelo 31 Funzionamento pompa di scarico condensa 31 Funzionamento residuo del ventilatore in Raffrescamento 31 Funzionamento residuo del ventilatore in Riscaldamento 32 Funzionamento intermittente del ventilatore in Riscaldamento 32 Funzionamento ventilazione 32 Regolazione della pressione 32 Modalità Automatico 33 Impostazione termostato 36 Controllo velocità ventilazi...

Page 202: ...zializzazione 2 Se il Filocomando Principale ed il Filocomando Secondario sono già stati impostati Viene visualizzata la schermata di Riconoscimento per il proseguimento dell impostazione 3 In caso di utilizzo di 2 Filocomandi RC EX1 Principale e Secondario se il primo viene impostato come Principale il secondo viene automaticamente impostato come Secondario In caso di utilizzo di un solo Filocoma...

Page 203: ...remuto per più di 15 secondi viene selezionato Sì ed il display passa alla schermata Sì No Dopo l inizializzazione ritorna allo stato predefinito Schermata INIZIALE Salvataggio delle impostaz prec Inizializzazione delle impostazioni Inizializzazione del R C ...

Page 204: ...lti KX l indirizzo dell Unità Interna può essere modificato dopo l impostazione automatica dell indirizzo 6 Impostazione dell indirizzo dell Unità Interna principale In caso di Modelli della Serie Multi KX impostare l indirizzo dell Unità Interna principale secondaria per evitare di mescolare i modi operativi Raffrescamento Riscaldamento 7 Funzione di ripristino dell Unità Interna rotazione dell U...

Page 205: ...nte Set Imposta Menù impostaz di installazione Data di installazione Menù impostaz di installazione 7 8 11 15 16 19 18 Contatto Servizio Tecnico Digitare le informazioni sulla Società Società No di telefono Digitare il contatto Possono essere utilizzati fino a 10 caratteri alfanumerici da 1 byte Dopo l inserimento premere il pulsante Set Imposta Contatto Servizio Tecnico 9 10 Digitare il contatto ...

Page 206: ...el contatto Collaudo 12 13 14 Collaudo in Raffrescamento Se la temp ambiente è troppo bassa per l avvio del Collaudo in Raffrescamento l Unità opererà per 30 min riducendo la temp impostata che verrà forzata al valore di 5 C Collaudo della pompa di scarico condensa La pompa di scarico della condensa può essere fatta funzionare autonomamente Frequenza di funz del Compressore Hz La frequenza di funz...

Page 207: ... il display passa alla videata di Modifica dell indirizzo automatico dove viene visualizzato il nuovo indirizzo Premere il pulsante Conferma per registrare il nuovo indirizzo Impostazione indirizzo dell U I Principale In caso di Modelli della Serie Multi KX è possibile far sì che le Unità Interne Secondarie seguano il modo operativo Riscaldamento Raffrescamento dell Unità Interna Principale Impost...

Page 208: ...iene spenta Impostare il differenziale per il ripristino Errore ripristino U I Se una U I si ferma per un malfunzionamento l altra si avvia Può essere effettuata Valido Inval di ogni funzione Se Rotazione U I o Ripristino potenza U I è abilitata la funzione Errore ripristino U I è automaticamente abilitata Impost tempo per il cambio Nella Rotazione U I si può impostare il timer per la commutaz del...

Page 209: ...e il valore in C o F 7 Velocità di ventilazione Modifica la velocità del ventilatore 8 Segnale di ingresso Impostare l intervallo di applicazione del segnale dall esterno CNT collegato a più Unità Interne 9 Impostazione ventilazione Impostare questa funzione in caso di collegamento di un dispositivo di ventilazione 10 Controllo aletta Impostare una delle 4 posizioni di stop libero dell aletta 11 R...

Page 210: ...9 Non modificabile Visualizza le schermate del Menù di impostazione R C Inserimento password di Servizio Menù 1 impostaz R C Menù 2 impostaz R C Menù 3 impostaz R C 8 9 10 11 14 20 21 22 15 16 17 18 19 R C Principale Secondario Utilizzare questa funzione in caso di modifica dell impostazione Princ Sec R C R C Principale Secondario ...

Page 211: ...ermo rule Termostato Valutaz di termostato ON o OFF tramite rilevaz di temp Sensore R C Il termostato è applicato sulla base della temp rilevata mediante il sensore del Filocomando Valido Il termostato è applicato sulla base della temper rilevata mediante il sensore del Filocomando in tutti i modi operativi Valido solo Riscaldamento Il termostato viene applicato sulla base della temperatura rileva...

Page 212: ...disabilitato Regolazione in Raffrescamento Regolazione in Riscaldamento Modo operativo C F Selezionare l unità di temperatura visualizzata sul Filocomando C La temperatura è visualizzata in C F La temperatura è visualizzata in F C F Velocità di ventilazione La velocità del ventilatore può essere modificata A seconda dei Modelli di U I alcune velocità di ventilaz potrebbero non essere disponibili V...

Page 213: ...fatto funzionare o arrestare indipendentemente Segnale di ingresso Impostazione ventilazione Controllo aletta Impostare il controllo di stop dell aletta Arresto in una determinata posizione Lo stop dell aletta può essere impostato su una delle 4 posizioni Arresto in qualsiasi posizione L aletta si ferma su qualsiasi posizione subito dopo aver azionato l interruttore del Filocomando Riavvio automat...

Page 214: ...Inval Non è possibile selezionare l impostaz autom della temperatura Velocità di ventilazione automatica Selezionare Valido o Inval sulla schermata della velocità di ventilazione automatica Valido È possibile selezionare la velocità di ventilazione automatica Inval Non è possibile selezionare la velocità di ventilazione automatica Impostazione automatica temp Velocità di ventilazione automatica ...

Page 215: ... Impostare il controllo del ventilatore durante l OFF termostatico in Riscaldamento 11 Temp anti gelo Selezionare il controllo temperatura anti gelo 12 Controllo anti gelo Impostare il controllo ventilatore durante il controllo anti gelo 13 Pompa di scarico condensa Impostare il modo operativo per tale funzionamento 14 Funzionamento residuo del ventilatore in Raffrescamento Selezionare il tempo re...

Page 216: ... più U I selezionare l Unità Interna per le impostazioni corrispondenti Quando vengono visualizzati il nome indirizzo delle U I Interne collegate selezionare l Unità da impostare Selezione di tutte le Unità viene effettuata la medesima impostazione per tutte le Unità Schermata Menù 1 Schermata Menù 3 Ins password di Servizio Selezione U I Le schermate del Menù delle impostazioni U I vengono visual...

Page 217: ...16 17 18 20 19 21 22 23 25 24 26 27 28 40 29 Impostazione alta prevalenza Impostare la velocità del ventilatore dell Unità Interna A seconda dei Modelli delle U I collegate questa impostaz potrebbe non essere possibile Menù 5 impostazioni U I Impostazioni alta prevalenza 44 45 ...

Page 218: ...gressi esterni 1 Standard Nessunavisualizz Nessuno Impostaz 1 180 ore Impostaz 2 600 ore Impostaz 3 1 000 ore Impostaz 4 1 000 ore Arresto del funz Tipologia di segnale esterno 1 Impostare il tipo di segnale esterno CNT dell Unità Interna Controllo tramite segnale esterno 2 Tipologia di segnale esterno 2 Ciò può essere effettuato in caso di collegamento di U I dotata di segnale esterno 2 Livelli i...

Page 219: ... da uno stop per 5 minuti Arresto Il ventilatore viene fermato Controllo ventilatore in OFF termostatico Raffrescamento Impostare la velocità del ventilatore all OFF termostatico in Raffrescamento Basso Il ventilatore funziona a bassa velocità Impostazione velocità di ventilazione Il ventilatore funziona alla stessa velocità del funzionamento in ON termostatico Intermittente Vengono ripetuti cicli...

Page 220: ...Deumidif Funziona in Raffrescamento e in Deumidificazione Funzionamento in Standard e Risc Funziona in Raffresc Deumidif e Risc Funzionamento in Risc e Ventilazione Funziona in Riscaldamento e in Ventilazione Funzionamento in Standard e Ventilaz Funziona in Raffresc Deumidif e Ventilaz Funzionamento residuo del ventilatore in Raffrescamento Selezionare il periodo di tempo residuo di funzionamento ...

Page 221: ...tore in Riscaldamento Selezionare il controllo del ventilatore dopo il funzionamento residuo che segue lo stop e l OFF termostatico in Riscaldamento Arresto Il funzionamento intermittente del ventilatore non avviene Stop per 20 min e funzionamento per 5 min Verificare le condizioni di funzionamento ogni 25 min e far funzionare il ventilatore per 5 min Stop per 5 min e funzionamento per 5 min Verif...

Page 222: ...erna ed esterna Dettagli modalità Automatica 1 Impostare la commutazione delle temperature a Raffrescamento e Riscaldamento È possibile impostare la temperatura di commutazione nell intervallo 1 C 4 C Temp impostata Commutazione della temp a Raffrescamento Temp aria di ripresa Modo operativo Raffrescamento Temp impostata Commutazione della temp a Riscaldamento Temp aria di ripresa Modo operativo R...

Page 223: ...na Riscaldamento Temp aria di ripresa interna e Temp esterna Riscaldamento Temp aria esterna Modo Riscaldamento 30 28 26 24 22 20 18 26 28 16 14 12 0 3 2 1 10 18 20 22 24 14 16 Temp esterna Temp impostata Riscaldamento Termostato OFF Termostato OFF forzato Thermo OFF Intervallo selezione temp esterna in Riscaldamento Indoor temp 16 14 28 26 24 22 20 18 30 12 10 Temp esterna Temp ambioente interno ...

Page 224: ...terna Raffrescamento Può essere impostata nell intervallo 10 C 30 C Temp esterna Riscaldamento Può essere impostata nell intervallo 10 C 22 C Differenz di temp per commutaz in freddo Differenz ditemp percommutaz incaldo Imp limite temp est in Raff Imp limite temp est in Risc Impostazione della temp interna per Raffrescamento Impostazione della temp interna per Riscaldamento In Auto 3 impostare la ...

Page 225: ...in base alla temperatura esterna e ai valori di compensazione in Raffrescamento e Riscaldamento a Compensazione in Raffrescamento Il termostato opera sulla base di Temp esterna Valore di compensazione in Raffrescamento durante il Raffrescamento Il termostato si attiva se Temp interna Temp esterna Valore di compensazione in Raffrescamento Tale valore può essere impostato nell intervallo 0 C 10 C b ...

Page 226: ...rico Unità Interna Se la temp ambiente differisce per un certo valore in rapporto alla temp impostata 30 min dopo l avvio del funz l allarme viene trasmesso da segnale in uscita esterno CNT Controllo Automatico della velocità di ventilazione Impostare la velocità Automatica del ventilatore Auto 1 Intervallo di vel del ventilatore High Alta Medium Media Low Bassa Auto 2 Intervallo di vel del ventil...

Page 227: ...data di apparizione dell errore memorizzati nel Filocomando 5 Salvataggio delle impostazioni dell Unità Interna I contenuti delle impostazioni dell Unità Interna sono salvati nel Filocomando o trasferiti all Unità Interna 6 Impostazioni speciali Utilizzate per cancellare l indirizzo dell Unità Interna resettare la CPU inizializzare ecc Premere il pulsante Menù sulla schermata INIZIALE Viene visual...

Page 228: ...indirizzo dell Unità Interna selezionata sia registrato ma il luogo di installazione è sconosciuto se il funzionamento del ventilatore è effettuato singolarmente il luogo di installazione dell Unità Interna può essere identificato mediante questa procedura Premere il pulsante Corsa per avviare il funzionamento del ventilatore Premere il pulsante Arresto per arrestare il funzionamento del ventilato...

Page 229: ...i ventilazione dell Unità Esterna 06 Temp 2 scambiatore Unità Interna 24 Hz Compressore 35 63H1 07 Temp 3 scambiatore Unità Interna 25 Alta pressione 36 Sbrinamento 08 Velocità ventilatore Unità Interna 26 Bassa pressione 37 Ore di funzionamento del compressore 09 Hz richiesti 27 Temp di mandata del compressore 38 Apertura EEV1 Unità Esterna 10 Hz in risposta 28 Temp base compressore 39 Apertura E...

Page 230: ...anomalie Vengono visualizzati la data e l ora dell errore l indirizzo dell U I e il Codice di Errore Se nello storico delle anomalie non è registrato alcun dato il display non visualizza nulla Cancellazione dello storico delle anomalie Se viene premuto il pulsante Cancella sulla schermata dello storico anomalie viene visualizzata la schermata relativa alla Cancellazione dello storico anomalie Prem...

Page 231: ...omalia vengono cancellati Salvataggio delle impostazione dell Unità Interna I contenuti dell impostazione dell U I sono salvati nel Filocomando o trasmessi all U I a Salvataggio delle impostazioni U I b Salvataggio automatico c Trasferimento e salvataggio dei dati Reset controllo periodico Premendo il pulsante Sì sulla schermata relativa al controllo periodico il controllo periodico e il conteggio...

Page 232: ...l Unità Interna per salvataggio Prevalenza Controllo del ventilatore in OFF termostatico Riscaldamento Regolazione della pressione di controllo Indicatore Filtro Temp anti gelo Modo operativo Automatico Controllo tramite segnale esterno 1 Controllo anti gelo Impostazione termostato Tipologia di segnale esterno 1 Funzionamento della pompa di scarico condensa Controllo Automatico della velocità del ...

Page 233: ...comando e sulle Unità Interne collegate vengono riportate all impostazione iniziale Impostazione di fabbrica Premere Sì per ripristinare l impostazione iniziale Reset della CPU Tutti i microcomputers sui Filocomandi operativi su altri Filocomandi sulle Unità Interne ed Esterne vengono resettati Stato di ripristino dopo interruzione di corrente Premere Sì per resettare la CPU Cancellazione dell ind...

Page 234: ...emere al centro Premere al al centro e verificare lo scarto dal display Annulla Il display ritorna alla schermata Riprist Ripetere la calibrazione sulla schermata Conferma La calibrazione è completata Premere in alto a sinistra Premere in basso a destra Calibrazione del Touch Panel Calibrazione Touch Panel 1 Calibrazione Touch Panel 2 Fine della calibrazione del Touch Panel ...

Page 235: ...ta la schermata di Inserimento della password digitare la password Amministratore numero di 4 cifre Il numero predefinito della password Amministratore è 0000 Modificabile Ins password di Servizio Schermata INIZIALE Schermata Menù Schermata Menù 3 Selezionare la lingua desiderata da visualizzare sul Filocomando English Deutsch Français Español Italiano Nederlandse Türk Português Pyсский Selezionar...

Page 236: ...eco touch AFSTANDSBEDIENINGRC EX1A RC EX1N INSTALLATIEHANDLEIDING PJZ012D077F B ...

Page 237: ...ngs 20 8 IU settings 26 9 Service Maintenance 38 10 Select the Language 46 1 Veiligheidsinstructies 2 2 Toebehoren voorbereiding op locatie 4 3 Installatieprocedure afstandsbediening 4 Bepaal waar u de afstandsbediening wilt installeren 4 Installatieprocedure 5 Hoofd Sub instelling bij gebruik van meerdere afstandsbedieningen 7 4 Functies en menuopties van afstandsbediening 9 5 Indicator voor nets...

Page 238: ...ing dan aan de nieuwe eignaar WAARSCHUWING Vraag een erkend bedrijf de installatie uit te voeren volgens de installatiehandleiding Een onjuiste uitgevoerde installatie kan resulteren in een elektrische schok brand of defect Schakel de hoofdvoeding UIT voordat u begint aan elektrotechnische werkzaamheden Anders loopt u het risico van een elektrische schok brand of defect Installeer de eenheid niet ...

Page 239: ...ommunicatie apparatuur beïnvloeden en medische activiteiten videouitzendingen verstoren en of elektrische interferentie veroorzaken LET OP Installeer de afstandsbediening niet op de volgende plaatsen Dit kan leiden tot een defect of vervorming van de afstandsbediening 1 Waar deze is blootgesteld aan direct zonlicht 2 In de buurt van een apparaat dat warmte genereert 3 Op oneffen niet platte opperv...

Page 240: ... afstandsbediening Bepaal waar u de afstandsbediening wilt installeren Installatie Met een schakelkast Installatie direct op een muur Bedradingsrichting Achter Middenboven Linksboven Richtlijnen voor keuze van installatieplaats 1 Installatie oppervlak moet effen plat en voldoende sterk zijn De behuizing van de afstandsbediening mag niet worden vervormd 2 Daar waar de afstandsbediening de kamertemp...

Page 241: ...t en stof Printplaatzijde achteraanzicht Bovenste deel van de behuizing verwijderen van de onderste delen van de behuizing van de afstandsbediening Steek een platkopschroevendraaier of iets vergelijkbaars in de uitsparing van het onderste deel van de afstandsbediening en draai het voorzichtig los Verbind de draden van de aansluitingspunten X en Y van de afstandsbediening met de aansluitingspunten ...

Page 242: ...200 Muur elektriciteitsbuis borgmoer schakelkast afdichten met kit afstandsbedieningskabel Bedradingsgat op onderste deel van behuizing doorvoer Bij openliggende bedrading als de bedrading van middenboven or linksboven uit de afstandsbediening wordt aangesloten Snijd de dunne wandgedeelten van de behuizingen uit voor de grootte van de draad Middenboven linksboven bovenste deel van behuizing onders...

Page 243: ...n middenboven Hoofd Sub instelling Master Slave bij gebruik van meerdere afstandsbedieningen U kunt maximaal twee afstandsbedieningen gebruiken voor 1 binnendeel of 1 groep De een is de hoofd RC master en de ander is de sub RC slave Het bedieningsfunctiebereik van de hoofd en sub RC is verschillend Afstandsbedieningsfunctie Hoofd Sub Functies voor start stop temperatuur instellen ventilatorsnelhei...

Page 244: ...an de afstandsbediening of de pc defect raken of storingen vertonen USB poort Afdekking Opmerking Initialisatie van wachtwoord Er wordt gebruik gemaakt van een administrator wachtwoord voor dagelijkse instellingen en een service wachtwoord voor installatie testrun en onderhoud Het administrator wachtwoord is standaard 0000 fabrieksinstelling U kunt deze instelling desgewenst wijzigen Raadpleeg hie...

Page 245: ...akeld Dit gebeurt niet bij bediening met de schakelaars en USB port Via de USB aansluiting mini B kunt u het apparaat aansluiten op een pc personal computer Raadpleeg de gebruikershandleiding bij de software voor uw pc utility software van Eco touch remote control RC EX voor informatie over bedieningsmogelijkheden Zie de gebruikershandleiding voor meer informatie Touchscreen systeem dat wordt bedi...

Page 246: ...e knop als u de temperatuurinstelling wilt wijzigen Flap direction button Weergave van de uitblaasrichting die momenteel is geselecteerd Druk op deze knop als u de uitblaasrichting wilt wijzigen Fan speed change button Weergave van de ventilatorsnelheid die momenteel is geselecteerd Timer button Druk op deze knop als u de ventilatorsnelheid wilt wijzigen Vereenvoudigde inhoudsweergave van de timer...

Page 247: ...jdklok Activeer tijdklok bij uur Deactiveer tijdklok bij uur Activeer tijdklok bij klok Deactiveer tijdklok bij klok Bevestig Initialisatie instellingen Tijdsinstellingen Datum en tijd weergeven Zomertijd Contrast Achtergrondverlichting Bedieningsgeluid Wekelijksetimer Afwezigheidsinstelling Administrator instellingen Toestemming Verbod instelling Tijdklok geluidsarme stand Instelling temperatuurb...

Page 248: ...mperatuur 31 Invries beveiliging instelling 31 Condenspomp in werking 31 Nadraaitijd ventilator na koeling 31 Nadraaitijd ventilator na verwarming 32 Intermittent ventilatorsturing verwarming 32 Ventilator circulatie werking 32 Drukverschil instellingen 32 Automatische bedrijfsmodus 33 Instelling thermisch bereik 36 Automatische ventilatorsnelheid bediening 37 Alarm voor overbelasting van binnende...

Page 249: ... van het initialisatieproces wijzigen 2 Als de hoofd en sub RC al zijn ingesteld wordt het bevestigingsscherm weergegeven om door te gaan met instellen 3 Als u twee RC EX1 eenheden gebruikt als hoofd en sub en u de eerste instelt als hoofd RC wordt de tweede automatisch als sub RC ingesteld Als u slechts 1 afstandsbediening gebruikt moet u drukken op de knop Main Als u tijdens het initialisatiepro...

Page 250: ...gedurende 15 seconden niet aanraakt wordt automatisch Ja Doorgaan geselecteerd en gaat u naar het scherm Ja Nee Na het initialisatieproces keert het systeem terug naar de standaardmodus TOP scherm Stel doorgaan erkennen Initialiseren Initializeren ...

Page 251: ...e Multi Series KX modellen kan het adres van het binnendeel worden gewijzigd na de auto addressering 6 Adresinstelling van hoofd binnendeel Bij de Multi Series KX modellen stelt u het adres van het hoofd sub binnendeel in ter voorkoming van verschillende bedrijfsmoduswaarden koelen verwarmen 7 Back upfunctie voor binnendeel Binnendeelrotatie Back up capaciteit binnendeel Back up binnendeelfout wor...

Page 252: ...ruk vervolgens op de knop Set Installatie instellingen menu Installatiedatum Installatie instellingen menu 7 8 11 15 16 19 18 Onderhoudscontract Voer de bedrijfsgegevens in Bedrijf Telnummer Voer de contactpersoon in U kunt maximaal 10 alfanumerieke tekens van 1 byte gebruiken Druk na het invoeren op de knop Set Onderhoudscontract 9 10 Voer de contactpersoon in ...

Page 253: ... gestart VoerhetTelnummervandecontactpersoonin Testrun 12 13 14 Testrun koeling Als de kamertemperatuur te laag is om de koelingstestrun te starten werkt deze 30 minuten lang door de ingestelde temperatuur te verlagen tot 5 C Testrun condenspomp De condenspomp kan afzonderlijk in werking worden gesteld Compressor Hz vaste waarde De bedrijfsfrequentie van de compressor van het ondulator buitendeel ...

Page 254: ...op de knop Set drukt keert u terug naar het scherm Wijzig auto adressering waar nu het nieuwe adres wordt weergegeven Druk op de knop Bevestig om het nieuwe adres vast te leggen Adresinstelling van hoofd binnendeel Bij de Multi Series KX modellen kunt u sub binnendelen de bedrijfsmodus verwarmen koelen van een hoofd binnendeel laten volgen Stel het adres van het hoofd binnendeel in op de sub binne...

Page 255: ...ikt Stel het temperatuurverschil voor de back upcapaciteit in B U fout back up Als een van beide binnendelen stopt vanwege een fout of storing wordt de andere eenheid gestart U kunt elke functie instellen op Geldig Ouqeld Als B U rotatie of Capaciteit back up wordt ingesteld op Geldig wordt B U fout back up automatisch ook ingesteld op Geldig Stel de tijdklok in voor de wisseling Bij de functie B ...

Page 256: ...8 Externe invoer Stel het bereik in voor toepassing van de externe invoer CNT die is verbonden met meerdere binnendelen 9 Ventilator instellingen Stel deze instellingen in als er een ventilator is aangesloten 10 Louvre instellingen Stel een van de 4 stopposities voor de louvre s in of laat dit vrij 11 Automatische herstart Stel Inschakelen of Uitschakelen in voor de functie Automatische herstart 1...

Page 257: ...woord kan niet worden gewijzigd Geef de schermen met RC functie instellingen weer Service wachtwoord R C functie instellingen menu 1 R C functie instellingen menu 2 R C functie instellingen menu 3 8 9 10 11 14 20 21 22 15 16 17 18 19 Master Slave RC Hoofd Sub Hiermee kunt u de instelling Master Slave RC Hoofd Sub wijzigen Master Slave RC Hoofd Sub ...

Page 258: ...f de thermostaat AAN of UIT moet zijn op basis van de gedetecteerde temperatuur RC sensor Thermisch bereik wordt toegepast op basis van de temperatuur die door de RC sensor wordt gedetecteerd Ongeld Thermisch bereik wordt toegepast op basis van de temperatuur die door de RC sensor wordt gedetecteerd in elke bedrijfsmodus Geldig Alleen verwarmen Thermisch bereik wordt toegepast op basis van de temp...

Page 259: ...ssing in verwarmen Bedrijfsmodus C F Selecteer de eenheid waarin de temperatuur moet worden weergegeven op de RC C De temperatuur wordt weergegeven in C graden Celsius F De temperatuur wordt weergegeven in F graden Fahrenheit C F Ventilatorsnelheid U kunt de ventilatorsnelheid wijzigen in de geselecteerde snelheid Mogelijk kunt u sommige ventilatorsnelheden bij bepaalde binnendeelmodellen niet sel...

Page 260: ...t of gestopt onafhankelijk van andere apparaten Externe invoer Ventilator instellingen Louvre instellingen Stel de louvrestopbesturing in Stoppen op vaste positie De louvre kan worden ingesteld om te stoppen op een van 4 posities Stoppen op willekeurige positie De louvre kan worden ingesteld om direct na bediening van de RC schakelaar te stoppen op een willekeurige positie Automatische herstart St...

Page 261: ...en geselecteerd Er wordt geen selectieschakelaar weergegeven in het scherm Automatische ventilator snelheid Selecteer Geldig of Ongeld in het scherm Automatische ventilator snelheid Geldig Automatische ventilator snelheid kan worden geselecteerd Ongeld Automatische ventilator snelheid kan niet worden geselecteerd Er wordt geen selectieschakelaar weergegeven in het scherm Automatische temperatuur i...

Page 262: ...nvriesbeveiligingstemperatuur 12 Invries beveiliging instelling Stel de werking van de ventilator tijdens de werking van de invriesbeveiliging in 13 Condenspomp in werking Stel de bedrijfsmodus in voor de werking van de condenspomp 14 Nadraaitijd ventilator na koeling Selecteer de nadraaitijd van de ventilator na het stoppen en koelen 15 Nadraaitijd ventilator na verwarming Selecteer de nadraaitij...

Page 263: ...n aangesloten selecteert u het gewenste binnendeel waarvan u de instellingen wilt wijzigen Als de naam of het adres van het aangesloten binnendeel wordt weergegeven selecteert u het binnendeel dat u wilt instellen Als alle units zijn geselecteerd wordt de instelling gewijzigd voor alle units Menu scherm 1 Menu scherm 3 Service wachtwoord I U selectie De menuschermen voor de binnendeelinstellingen ...

Page 264: ...nnendeelgegevens menu 4 16 17 18 20 19 21 22 23 25 24 26 27 28 40 29 Hoog plafond Stel de bediening van de ventilatorsnelheid voor het binnendeel in Deze instelling is mogelijk niet beschikbaar afhankelijk van het model binnendeel Opslaan binnendeelgegevens menu 5 Hoog plafond 44 45 ...

Page 265: ...y Geen Instelling 1 180uur Instelling 2 600uur Instelling 3 1 000uur Instelling 4 1 000uur Operatie stop Externe invoer 1 signaal Stel het soort signaal in dat wordt doorgegeven aan externe invoer 1 CNT van het binnendeel Externe invoer 2 Externe invoer 2 signaal Deze instelling is mogelijk wanneer het binnendeel dat is voorzien van de externe invoer 2 is aangesloten Externe invoer 1 signaal Exter...

Page 266: ...pt dan 5 minuten Deze cyclus wordt steeds herhaald Stop De ventilator wordt gestopt Ventilator tijdens koelingsbedrijf UIT Stel de gewenste ventilatorsnelheid tijdens koelingsbedrijf UIT in Laag De ventilator draait op lage snelheid Stel ventilatorsnelheid in De ventilator draait op dezelfde snelheid als wanneer thermish bedrijf AAN is Intermittent De ventilator draait 2 minuten op lage snelheid e...

Page 267: ...de werking van de condenspomp Standaard koelen drogen De condenspomp werkt zowel tijdens koelen als drogen Bedrijf tijdens standaard verwarming De condenspomp werkt tijdens koelen drogen en verwarmen Bedrijf tijdens verwarmen ventileren De condenspomp werkt tijdens verwarmen en ventileren Bedrijf tijdens standaard ventileren De condenspomp werkt tijdens koelen drogen en ventileren Nadraaitijd vent...

Page 268: ...die is gedecteerd door de retourluchtsensor Intermittent ventilatorsturing verwarming Selecteer de ventilatorsturing na de nadraaitijd van de ventilator na het stoppen en verwarmen Stop Intermittent ventilatorsturing wordt niet toegepast Stoppen bij 20 min en starten bij 5 min Controleer de bedrijfscondities elke 25 minuten en laat de ventilator 5 minuten draaien Stoppen bij 5 min en starten bij 5...

Page 269: ...o 1 details Stel de temperaturen in voor omschakeling naar koeling en verwarming U kunt de omschakelingstemperatuur instellen op een waarde van 1 C tot 4 C Ingestelde temperatuur Temperatuuromschakeling naar koeling Binnen retourluchttemperatuur Bedrijfsmodus Koeling Ingestelde temperatuur Temperatuuromschakeling naar verwarming Binnen retourluchttemperatuur Bedrijfsmodus Verwarming 1 0 1 0 4 0 3 ...

Page 270: ...temperatuur verwarming Buitenluchttemperatuur Bedrijfsmodus Verwarming 30 28 26 24 22 20 18 26 28 16 14 12 0 3 2 1 10 18 20 22 24 14 16 Buitentemp Inges telde temp Verwarming koeling Temp verschil Uitgeschakeld Uitgeschakeld Uitgeschakeld Temp diff Selectie van buitentemp bereik tijdens verwarming Selectie van buitentemp bereik tijdens koeling Binnentemp 16 14 28 26 24 22 20 18 30 12 10 Buitentemp...

Page 271: ...len op een waarde van 10 C tot 30 C Buitentemperatuur verwarming U kunt deze temperatuur instellen op een waarde van 10 C tot 22 C Temperatuuromschakelingnaarkoeling Temperatuuromschakelingnaarverwarming Buitentemperatuurinstelling voor koeling Buitentemperatuurinstellingvoorverwarming Binnentemperatuurinstelling voor koeling Binnentemperatuurinstelling voor verwarming Stel bij Auto 3 de binnentem...

Page 272: ...tuur basis Offset koeling Offset verwarming De thermostaat wordt geregeld op basis van de buitentemperatuur en de waarden van Offset koeling en Offset verwarming a Offset koeling De thermostaat wordt geregeld op basis van Buitentemperatuur Offset koeling bij koeling De thermostaat wordt ingeschakeld als Binnentemperatuur Buitentemperatuur Offset koeling U kunt een waarde instellen van 0 C tot 10 C...

Page 273: ...oorlijke mate verschilt van de ingestelde temperatuur nadat het systeem is gestart en 30 minuten in bedrijf is geweest wordt een overbelastings alarmsignaal verzonden via de externe uitvoer CNT Automatische ventilatorsnelheid bediening Stel het omschakelingsbereik van de ventilatorbediening in bij automatische ventilatorsnelheid Auto 1 De ventilatorbediening wordt omgeschakeld van Hoog Medium Laag...

Page 274: ... gegevens bij het optreden van de fout worden uit het geheugen van de RC opgehaald en weergegeven 5 Opslaan binnendeelgegevens De inhoud van de binnendeelinstellingen wordt opgeslagen in de RC of overgebracht naar het binnendeel 6 Gegevens speciaal Hiermee kunt u een binnendeeladres wissen CPU resetten initialiseren etc Druk op de knop Menu in het hoofdscherm Het scherm van het hoofdmenu wordt wee...

Page 275: ...van het geselecteerde binnendeel is geregistreerd maar de installatielocatie onbekend is wanneer de werking van de ventilator individeel is geïmplementeerd kan de installatielocatie worden geïdentificeerd met deze procedure Druk op de knop Start als u de werking van de ventilator wilt starten Druk op de knop Stop als u de werking van de ventilator wilt stoppen Inspectiedatum volgend onderhoud Serv...

Page 276: ...r Hz 35 63H1 07 I U verdampersensor 3 25 Hoge druk 36 Ontdooi cyclus 08 I U ventilatorsnelheid 26 Lage druk 37 Compressor draaiuren 09 Gevraagd vermogen Hz 27 Persgastemp 38 OU expansieventiel 1 opening 10 Beantw vermogen Hz 28 Comp cartertemp 39 OU expansieventiel 2 opening 11 IU expansieventiel opening 29 Stroomafname Data bedrijfsgegevens Na het lezen van de gegevens van het binnendeel worden d...

Page 277: ... Reset periodieke check Fouthistorie De datum en tijd waarop de fout is opgetreden het adres van het binnendeel en de foutcode worden weergegeven Als er geen enkele fout in de fouthistorie is vastgelegd wordt er ook geen fout weergegeven Verwijder afwijkende data Wanneer u in het scherm Fouthistorie op de knop Wissew drukt wordt het bevestigingsscherm voor het verwijderen van de fouthistorie weerg...

Page 278: ...afwijkende data gewist Opslaan binnendeelgegevens De inhoud van de binnendeelinstellingen wordt opgeslagen op de RC of overgebracht naar het binnendeel a Binnendeelinstellingen opslaan b Automatisch opslaan c Opgeslagen data verzenden Reset periodieke check Als u in het bevestigingsscherm van Reset periodieke check op de knop Ja drukt worden de periodieke check en de bijbehorende tijdklok gereset ...

Page 279: ...ven Druk op Ja om de gegevens over te brengen Item voor het opslaan van binnendeelinstellingen Hoog plafond Ventilator tijdens verwarmingsbedrijf UIT Drukverschil instellingen Filtersignaal Invries beveiliging temperatuur Automatische bedrijfsmodus Externe invoer 1 Invries beveiliging instelling Instelling thermisch bereik Externe invoer 1 signaal Condenspomp in werking Automatische ventilatorsnel...

Page 280: ...tellen De instellingen op de RC en het aangesloten binnendeel worden teruggezet op de standaardinstelling modus van fabrieksinstelling Druk op Ja om de standaardinstelling te herstellen CPU reset De microcomputers van de RC die u gebruikt andere RC s en de binnen en buitendelen worden gereset modus van herstel na stroomstoring Druk op Ja om CPU reset uit te voeren Wis binnendeeladres Het binnendee...

Page 281: ...rten Druk op het midden van volgens de prompt Druk op het midden van en controleer de afwijking van het display Cancel U keert terug naar scherm Opnieuw Voer de calibratie opnieuw uit op scherm Bevestig Het calibratieproces wordt voltooid Touchpanel calibratie Druk op linksboven Touchpanel calibratie 2 Druk op rechtsonder Touchpanel calibratie 1 Touchpanel calibratie ...

Page 282: ... Wachtwoord wordt weergegeven voert u het administrator wachtwoord 4 cijferige code in Het administrator wachtwoord is standaard 0000 Dit wachtwoord kan worden gewijzigd Service Wachtwoord TOP scherm Menu scherm Menu scherm 3 Selecteer de gewenste taal voor weergave op de RC English Deutsch Français Español Italiano Nederlandse Türk Português Русский Selecteer taal ...

Page 283: ...eco touch UZAKTAN KUMANDA RC EX1A RC EX1N KURULUM KILAVUZU PJZ012D077G B ...

Page 284: ...on settings 15 7 R C function settings 20 8 IU settings 26 9 Service Maintenance 38 10 Select the Language 46 1 Emniyet Tedbirleri 2 2 Aksesuarlar ve Saha Hazırlığı 4 3 Uzaktan kumanda kurulum prosedürü 4 Uzaktan kumandanın kurulacağı yerin belirlenmesi 4 Kurulum prosedürü 5 Birden fazla uzaktan kumanda kullanıldığında Ana Yardımcı ayarı 7 4 Uzaktan kumandanın fonksiyonları ve menü öğeleri 9 5 Güç...

Page 285: ...lum işinin kurulum kılavuzuna göre yapılmasını profesyonel bir yükleniciden isteyin Hatalı kurulum elektrik çarpmalarına yangın veya bozulmaya yol açabilir Herhangi bir elektrik işine başlamadan önce ana güç kaynağını kapatın Aksi takdirde elektrik çarpması yangın veya bozulma oluşabilir Üniteyi uygun olmayan ortamlara ya da yanıcı gaz akım birikim veya sızıntı oluşabilecek bir yere kurmayınız Hav...

Page 286: ...tkiler tıbbi aktiviteleri görüntü yayınını bozabilir ya da gürültülü parazite yol açabilir DİKKAT Uzaktan kumandayı aşağıda belirtilen yerlere kurmayın Uzaktan kumandanın bozulmasına ya da deformasyonuna yol açabilir 1 Doğrudan güneş ışığına maruz olduğu yerler 2 Isı üreten ekipmanların yanı 3 Yüzeyin düz olmadığı yerler Uzaktan kumandayı üst kapağı çıkarılmış şekilde bırakmayın Üst kapak çıkarıld...

Page 287: ...lı 400 m 1 25 mm2 x 2 Damarlı 600 m 2 0 mm2 x 2 Damarlı 3 Uzaktan kumanda kurulum prosedürü Uzaktan kumandanın kurulacağı yerin belirlenmesi Kurulum Şalter kutusu kullanarak kurulum Doğrudan duvara montaj Kablo yönü Geri Üst orta Sol üst Kurulum yeri seçimine ilişkin uyarılar 1 Kurulum yüzeyi düz ve yeterince sağlam olmalıdır Uzaktan kumanda kasası deforme olmamalıdır 2 Uzaktan kumandanın oda sıca...

Page 288: ...nden görünüm Çıkarılan üst kapağı nem ve tozdan korumaya dikkat edin PCB tarafı Arkadan görünüm Uzaktan kumandanın üst kapağını alt kapaklardan çıkarmak için Düz tornavidanın ucunu uzaktan kumandanın alt kısmındaki yuvaya takın ve çıkarmak için hafifçe çevirin Kabloları uzaktan kumandanın X ve Y terminallerinden dahili ünitenin X ve Y terminallerine bağlayın Uzaktan kumanda kablolarının X Y polari...

Page 289: ... üst kapağı takın 8 50 200 Duvar Kanal Tespit Somunu Şalter kutusu Macunla kapama Uzaktan Kumanda kablosu Alt kapaktaki kablo deliği Burç Açık kablolama yapılması halinde Kablo uzaktan kumandanın üst orta veya sol üst kısmından çıkarıldığında Kapakların ince cidarlı kısımlarına kablo ebadına göre kesin Üst orta Üst kapak Sol üst Alt kapak Kabloyu üst orta kısımdan dışarı çıkarırken üst ve alt kapa...

Page 290: ...dımcı ayarı 1 harici ünite ya da 1 grup için en fazla 2 adet uzaktan kumanda kullanılabilir Biri ana uzaktan kumanda diğer ise tali uzaktan kumandadır Çalışma aralığı ana veya Yardımcı uzaktan kumandaya göre farklılık gösterir R C fonksiyonu Ana Yardımcı Çalıştırma Durdurma sıcaklık fan sürati ve kanat yönünü ayarlama işlemleri Yüksek güçlü ve enerji tasarruflu işlemler Enerji tasarrufu ayarı Uzak...

Page 291: ...larıyla aynı anda USB ye bağlamayın Uzaktan kumandanın ya da bilgisayarın arızalanmasına yol açabilir USB portu Kapak Not Parolanın sıfırlanması Yönetici parolası günlük ayar öğeleri için ve servis parolası kurulum test uygulaması ve bakım için kullanılır Fabrika ayarı yönetici parolası 0000 dır Bu ayar değiştirilebilir Kullanım Kılavuzuna bakın Yönetici parolası unutulursa yönetici parolası giriş...

Page 292: ...r ve anahtarlarının işlemleri hariçtir USB portu USB konnektörü mini B kişisel bilgisayara bağlanmayı sağlar Çalışma yöntemleri için bilgisayar yazılımına ilişki kullanım kılavuzuna bakın Eco touch uzaktan kumanda RC EX cihaz yazılımı Detaylar için kullanım kılavuzuna bakın LCD ekrana dokunarak çalışan dokunmatik panel sistemi Çalıştırma Durdurma Yüksek güç ve Enerji tasarrufu anahtarları dışındak...

Page 293: ...sterir Sıcaklık ayarını değiştirmek için bu düğmeye dokunun Kanat yönü değiştirme düğmesi O anda seçilen kanat yönünü gösterir Kanat yönünü değiştirmek için bu düğmeye dokunun Fan sürati değiştirme düğmesi O anda seçilen fan süratini gösterir Fan süratini değiştirmek için bu düğmeye dokunun Zamanlayıcı düğmesi O anda ayarlanan zamanlayıcı içeriğini basitleştirilmiş olarak gösterir İki ya da daha f...

Page 294: ...yıcı Saat sayısına göre AÇILIŞ zamanlayıcısı ayarı Saat sayısına göre KAPANIŞ zamanlayıcısı ayarı Günün saatine göre AÇILIŞ zamanlayıcısı ayarı Günün saatine göre KAPANIŞ zamanlayıcısı ayarı Onay İlk ayar Saat ayarı Tarih ve saat ekranı Yaz saati Kontrast Arka ışık Ses denetçisi Haftalık zamanlayıcı Evden ayrılma modu Yönetici ayarları İzin yasak ayarı Sessiz konum zamanlayıcısı Sıcaklık aralığı a...

Page 295: ...trolü 30 Isıtma thermostat kapatma fan kontrolü 30 Donma önleme sıcaklığı 31 Donma önleme kontrolü 31 Tahliye pompası işletimi 31 Soğutmada fazladan fan çalışması 31 Isıtmada fazladan fan çalışması 32 Isıtmada aralıklı fan çalışması 32 Sadece fan çalışması 32 Kontrol basıncı ayarı 32 Otomatik işletim konumu 33 Thermo rule ayarı 36 Otomatik fan sürati kontrolü 37 IU aşırı yük alarmı 37 38 Servis Ba...

Page 296: ...anda üniteleri ayarlandığında Ayara devam etmek için onay ekranı gösterilir 3 Ana ve Yardımcı olarak 2 RC EX ünitesi kullanılıyorsa birincisi ana ünite olarak ayarlanırsa diğeri otomatik olarak yardımcı ünite olarak ayarlanır Yalnız bir uzaktan kumanda ünitesi kullanılıyorsa Ana düğmesine dokunun İlk ayarlama durumunda düğmelerden herhangi birine Ana Yardımcı dokunulmazsa ekran değişmez İki uzakta...

Page 297: ...15 saniyeden fazla bir süre ekrana dokunulmazsa Evet Devam seçilir ve ekran ekranına döner Evet Hayır Başlatmadan sonra geçerli duruma döner Ana ekran Önceki ayarların korunması Fabrika ayarlarına dönmek Fabrika ayarlarının kurulması ...

Page 298: ...ldığında statik basınç ayarlanır 5 Otomatik adres değiştirme Multi Series KX modellerinde IU adresi otomatik adres ayarından sonra değiştirilebilir 6 Ana UI adres ayarı Multi Series KX modellerinde işletim modlarının karışmasını önlemek için soğutma ısıtma ana yardımcı IU adresini ayarlayın 7 IU yedekleme fonksiyonu IU rotasyonu IU kapasite yedeklemesi IU arıza yedeklemesi ayarlanır Ana menü ekran...

Page 299: ...ine basın Montaj ayarları ekranı Montaj tarihi Montaj ayarları ekranı 7 8 11 15 16 19 18 Servis sorumlusu Şirket bilgilerini girin Şirket Telefon No İrtibat kişisini girin 10 adede kadar 1 bit alfanümerik harfler kullanılabilir Girişten sonra SET ayar düğmesine dokunun Servis sorumlusu 9 10 İrtibat kişisini girin ...

Page 300: ...r İrtibatkişisininTelefonNumarasınıgirin Test calıstırmasu 12 13 14 Soğutma modu test calıstırmasu Oda sıcaklığı soğutma testi uygulamasını başlatmayacak kadar düşükse ayarlı sıcaklığı 5 C ye düşürerek 30 dakika süreyle çalışır Drenaj pompası test calıstırmasu Tahliye pompası bağımsız işletilebilir Sabit frekans kompresör calıstırmasu İnverter harici ünitesinin kompresör işletim frekansı sabitlene...

Page 301: ...üğmesine basıldığında yeni adresin gösterildiği otomatik adres değiştirme ekranına döner Yeni adresi kaydetmek için Onay düğmesine dokunun Ana IU adres ayarı Multi Series KX modellerinde dahili üniteleri Yardımcı IU dahili ünitenin Ana IU işletim modunu Isıtma soğutma izleyecek şekilde ayarlamak mümkündür Ana IU adresini Yardımcı IU lara ayarladığınızda her bir Yardımcı IU ya bağlı her bir uzaktan...

Page 302: ... döner Yedekleme için sıcaklık farkı ayarı Arıza yedekleme IU lardan biri arızalandığında ve durduğunda diğeri çalışmaya başlar Her bir fonksiyonun Gecerli Gecersiz ayarı yapılabilir Rotasyon veya Kapasite destekleme Gecerli olarak ayarlandığında Arıza yedekleme otomatik olarak Gecerli olarak ayarlanır Değişim için zamanlayıcı ayarı IU rotasyonu fonksiyonunda 2 dahili üniteli işletime geçiş için z...

Page 303: ... değiştirir 8 Harici giriş Birden fazla dahili üniteye bağlı harici girişe CNT uygulanacak aralığı ayarlar 9 Havalandırma ayarı Havalandırma cihazı bağlandığında bu ayarı yapın 10 Kanat kontrolü 4 kanatı beraber belli bir pozisyonda kalmasını ya da her birini farklı pozisyonlarda kalmasını ayarlar 11 Otomatik yeniden başlama Otomatik yeniden başlatma fonksiyonunu Enable Etkin veya Disable Etkisiz ...

Page 304: ...lemez R C ayar menüsü ekranları Servis parolası giriş ekranı R C ayar menüsü ekranları 1 R C ayar menüsü ekranları 2 R C ayar menüsü ekranları 3 8 9 10 11 14 20 21 22 15 16 17 18 19 Ana Yardımcı Uzaktan Kumanda Uzaktan kumandanın Ana Yardımcı ayarını değiştirirken bunu kullanın Ana Yardımcı Uzaktan Kumanda ...

Page 305: ...sına karar vermeyi ifade eder Uzaktan kumanda sensörü Thermo rule kuralı uzaktan kumanda sensörünün algıladığı sıcaklığa dayanarak uygulanır Geçerli Thermo rule kuralı tüm işletim modlarında uzaktan kumanda sensörünün algıladığı sıcaklığa dayanarak uygulanır Geçerli ısıtma sadece Thermo rule kuralı yalnız ısıtma modunda uzaktan kumanda sensörünün algıladığı sıcaklığa dayanarak uygulanır Diğer işle...

Page 306: ...geçersizleştirilebilir Soğutma ayarı Isıtma ayarı İşletim modu C F Uzaktan kumanda üzerinde gösterilen sıcaklık birimini seçer C Sıcaklık derecesi C olarak gösterilir F Sıcaklık derecesi F olarak gösterilir C F Fan sürati Fan sürati seçilen değere dönüştürülebilir Dahili ünite modellerine göre bazı fan süratlerini seçmek mümkün olmayabilir Fan sürati ...

Page 307: ...bağımsız olarak çalışır ve durur Harici giriş Havalandırma ayarı Flap kontrolü Kanat durma kumandasını ayarlar Sabit konumda durdur Kanat 4 pozisyondan birinde duracak şekilde ayarlanabilir Herhangi bir konumda durdur Kanat R C çalıştırılmasından hemen sonra herhangi bir pozisyonda duracak şekilde ayarlanabilir Otomatik yeniden başlama Bir elektrik kesintisinin ardından elektrik geri geldiğinde iş...

Page 308: ...ilir Ge siz Otomatik sıcaklık ayarı seçilemez Ekranda hiçbir seçim anahtarı gösterilmez Otomatik fan sürati Otomatik fan sürati ayarı ekranında Etkin veya Etkisiz seçilir Geçerli Otomatik fan hızı seçilebilir Ge siz Otomatik fan hızı seçilemez Ekranda hiçbir seçim anahtarı gösterilmez Otomatik sıcaklık ayarı Otomatik fan sürati ...

Page 309: ...önleme sıcaklığı Donma önleme kontrol sıcaklığını seçer 12 Donma önleme kontrolü Donma önleme kontrolü esnasında fan kontrolünü ayarlar 13 Drenaj pompası işletimi Drenaj pompasının çalışacağı işletim modunu ayarlar 14 Soğutmada fazladan fan çalışması Soğutma çalışmasında durma ve thermo OFF sonrası fazladan fan çalışma süresini ayarlar 15 Isıtmada fazladan fan çalışması Isıtma çalışmasında durma v...

Page 310: ...r Değiştirilemez Birden fazla dahili ünite bağlı ise IU ayarları için IU yu seçin Bağlı IU nun isim adresi gösterildiğinde ayarlanacak üniteyi seçin Tüm üniteler seçildiğinde tüm üniteler için aynı ayar yapılır Ana menü ekran 1 Ana menü ekran 3 Servis parolası giriş ekranı İçuniteyi sec IU ayarları menüsü IU dan bilgi geldikten sonra gösterilir IU ayarları menüsu 1 11 12 13 15 14 ...

Page 311: ...arları menu 3 IU ayarları menu 4 16 17 18 20 19 21 22 23 25 24 26 27 28 40 29 Yüksek tavan IU için fan sürati vanasını ayarlar Bağlı IU modellerine bağlı olarak ayarlanması mümkün olmayabilir IU ayarları menu 5 Yüksek tavan 44 45 ...

Page 312: ...ici giriş 1 Standart Goruntuyok Hiçbiri Ayar 1 180Saat Ayar 2 600Saat Ayar 3 1 000Saat Ayar 4 1 000Saat Operasyon durdurma Harici giriş 1 sinyali IU nun 1 harici girişine CNT girilen sinyal türünü ayarlar Harici giriş 2 Harici giriş 2 sinyali 2 harici girişle donatılmış IU bağlandığında kullanılır Harici giriş 1 sinyali Harici giriş 2 Harici giriş 2 sinyali ...

Page 313: ...çalışma ve 5 dakika durma şeklindeki Lo fan çalışma döngüleri tekrarlanır Durdur Fan durdurulur Soğutma thermo OFF fan kontrolü Soğutma thermo OFF esnasında fan süratini ayarlar Düşük Fan düşük süratte çalışır Fan hız ayarı Fan thermo ON işletimindeki aynı süratte çalışır Şürekli olmayan 2 dakika çalışma ve 5 dakika durma şeklindeki Lo fan çalışma döngüleri tekrarlanır Durdur Fan durdurulur Dönüş ...

Page 314: ...andart soğutma modu nem alma Soğutma ve nem alma konumda çalışır Standart ısıtma modunda çalıştır Soğutma nem alma ve ısıtma modunda çalışır Isıtmamodunda havalandırmamoduçalıştır Isıtma ve fan modunda çalışır Standart havalandırmamodundaçalıştır Soğutma nem alma ve fan modunda çalışır Soğutmada fazladan fan çalışması Soğutma modunda durma ve thermo OFF sonrası fazladan fan çalışma süresini ayarla...

Page 315: ...ı fan çalışması Isıtma modunda durma ve thermo OFF sonrası fazladan fan çalışma süresini sonunda fan kontrolünü seçer Durdur Aralıklı fan çalışması yapılmaz 20 dak icinde durdur 5 dak icinde calıstır Her 25 dakikada bir çalışma koşullarını kontrol eder ve fanı 5 dakika süreyle çalıştırır 5 dak icinde durdur 5 dak icinde calıstır Her 10 dakikada bir çalışma koşullarını kontrol eder ve fanı 5 dakika...

Page 316: ...atik 1 detayları Soğutma ve ısıtmaya geçiş sıcaklıklarını ayarlar Geçiş sıcaklıklar farkı 1 C ila 4 C aralığında ayarlanabilir Ayarlı sıcaklık Soğutmaya geçiş sıcaklığı Dahili dönüş havası sıcaklığı İşletim modu Soğutma Ayarlı sıcaklık Isıtmaya geçiş sıcaklığı Dahili dönüş havası sıcaklığı İşletim modu Isıtma 1 0 1 0 4 0 3 0 2 0 3 0 2 0 4 0 3 0 İç ortam sıcaklığı Soğutma Termostat kapatma Sıcaklık...

Page 317: ...10 18 20 22 24 14 16 Dış hava sıcaklığı Ayarlı sıcaklık Isıtma Soğutma Sıcaklık farkı Zorunlu termostat kapama Isıtmamodundadışhavaçalışmasıcaklıkaralığıseçimi Soğutma modunda dış hava çalışma sıcaklık aralığı seçimi Termostat kapama Termostat kapama İç hava sıcaklığı Sıcaklık farkı 16 14 28 26 24 22 20 18 30 12 10 Dış hava sıcaklığı İç hava sıcaklığı 28 30 16 18 20 22 24 26 10 12 14 Soğutmamodund...

Page 318: ...aklıkları ayarlar Dış sıcaklık soğutma 10 C ila 30 C aralığında ayarlanabilir Dış sıcaklık ısıtma 10 C ila 22 C aralığında ayarlanabilir Soğutmaya geçiş sıcaklığı Isıtmaya geçiş sıcaklığı Soğutma için dış sıcaklık ayarı Isıtma için dış sıcaklık ayarı Soğutma için iç sıcaklık ayarı Isıtma için iç sıcaklık ayarı Auto 3 modunda soğutma ve ısıtma için iç sıcaklıkları ayarlar İç sıcaklık soğutma 18 C i...

Page 319: ...dart Dış sıcaklık esası Soğutma ofseti Isıtma ofseti Termostat dış sıcaklık soğutma ve ısıtma ofset değerlerine göre karar verir a Soğutma ofseti Termostat soğutma esnasında Dış sıcaklık Soğutma ofset değerine göre karar verir İç sıcaklık Dış sıcaklık Soğutma ofset değeri ise termostat açılır Bu değer 0 C ila 10 C aralığında ayarlanabilir b Isıtma ofseti Termostat ısıtma esnasında Dış sıcaklık Soğ...

Page 320: ...8 34 32 30 28 26 24 22 20 18 34 32 30 28 26 24 22 IU aşırı yük alarmı Oda sıcaklığı çalışma başladıktan sonra 30 dakikadaki sıcaklık ayarından farklı ise harici çıkıştan CNT aşırı yük alarm sinyali iletilir Otomatik fan sürati kontrolü Otomatik fan sürati ayarında fan hızı değişim aralığını ayarlar Otomatik 1 Fan hızı Yüksek Orta Düşük aralığında değişir Otomatik 2 Fan hızı Güçlü yüksek Yüksek Ort...

Page 321: ...unan hata tarihçesi ve hatanın oluşum verileri gösterilir 5 IU ayarlarının kaydedilmesi IU ayarlarının içeriği uzaktan kumandaya kaydedilir veya IU ya aktarılır 6 Özel ayarlar IU adresinin silinmesi CPU nun resetlenmesi sıfırlama vb için kullanılır ÜST ekrandaki Menü düğmesine dokunun Ana menü ekranı gösterilir Menü ekranında Servis Bakım düğmesine dokunun Ana ekran Ana menü ekran 1 Ana menü ekran...

Page 322: ...ü Seçilen IU nun adresi kayıtlı fakat kurulum tarihi bilinmiyorsa fan işletimi bireysel olarak yapıldığında IU nun kurulum yeri bu prosedürle tanımlanabilir Fan çalışmasını başlatmak için Çalıştır düğmesine dokunun Fan çalışmasını durdurmak için Durdur düğmesine dokunun Sonraki servis tarihi Servis mesajı Bir sonraki servis tarihi girildiğinde servis ayında çalışma başladığında durduğunda mesajlar...

Page 323: ...ürati 06 IU ısı değişimi sıcaklığı 2 24 Kompresör Hz 35 63H1 07 IU ısı değişimi sıcaklığı 3 25 Yüksek basınç 36 Buz çözme 08 IU fan sürati 26 Düşük basınç 37 Komp çalışma saati 09 Gerekli Hz 27 Deşarj borusu sıcaklığı 38 OU EEV1 açılışı 10 Yanıt Hz 28 Komp kesme sıcaklığı 39 OU EEV2 açılışı 11 IU EEV açılışı 29 Akım İşletim verileri Dahili ünite verileri okunduktan sonra okuma anındaki işletim ver...

Page 324: ...kodlarını sil d Periyodik kontrolü ilk duruma getir Hata tarihçesi Hatanın oluştu tarih ve saat IU adresi ve Hata Kodu gösterilir Hata tarihçesinde hiçbiri kayıtlı değilse hiçbir hata gösterilmez Hata tarihçesini sil Hata tarihçesi ekranında Sil tuşuna basıldığı takdirde Hata tarihçesi silme onay ekranı gösterilir Hata tarihçesi ekranını silmek için Evet düğmesine basın Hata ekranı Hata tarihçesi ...

Page 325: ...verileri silinir IU ayarlarının kaydedilmesi IU ayarlarının içeriği uzaktan kumandaya kaydedilir veya IU ya aktarılır a İç unite ayarlarını kaydet b Otomatik kayıt c Kaydedilen veri transferi Periyodik kontrolü sıfırla Periyodik kontrolleri sıfırlama onay ekranında Evet düğmesine basıldığında periyodik kontrol ve süre sayımı sıfırlanır Hata verilerini göster Hata verilerini sil Periyodik kontrolü ...

Page 326: ...leri aktarmak için Evet e basın Kaydedilecek UI ayarı öğesi Yüksek tavan Isıtma thermo OFF fan kontrolü Kontrol basıncı ayarı Filtre işareti Donma önleme sıcaklığı Otomatik işletim konumu Harici giriş 1 Donma önleme kontrolü Thermo kuralı ayarı Harici giriş 1 sinyal Drenaj pompası işletimi Otomatik fan hızı kontrolü Harici giriş 2 Soğutmada fazladan fan çalışması Bağımısız kanat kontrolü Harici gi...

Page 327: ...bağlı IU ayarları fabrika ayarlarına geri döndürülür fabrika ayarı durumu Fabrika ayarlarına dönmek için Evet e basın Mikro işlemcini yeniden başlat Çalıştırılan Uzaktan Kumanda diğer Uzaktan Kumandalar IU lar ve OU lar üzerindeki tüm mikro bilgisayarlar resetlenir Elektrik kesintisinden sonra düzelme durumu CPU yu resetlemek için Evet e basın İç unite adresini sil Multi KX ünitesinin IU adresinin...

Page 328: ...Komuta göre nın merkezi dokunun nın merkezi dokunun ve ekrandaki sapmayı kontrol edin İptal et Ekran ekrana geri döner Tekrar Ekran deki kalibrasyonu tekrarlar Onay Kalibrasyon tamamlanır Sağ alt köşede ya dokunun Sol üst köşede ya dokunun Dokunma panel kalibrasyonu Touch panel calibration 1 Touch panel calibration 2 Touch panel calibration end ...

Page 329: ...a giriş ekranı açıldığında yönetici parolasını girin 4 haneli sayı Yönetici parolası fabrika değeri 0000 dır Değiştirilebilir Servis parolası giriş ekran Ana ekran Ana menü ekran Ana menü ekran 3 Uzaktan kumanda ekranında gösterilecek dili seçin English Deutsch Français Español Italiano Nederlandse Türk Português Pyсский Dil seçimi ...

Page 330: ...CONTROLO REMOTO eco touch RC EX1A RC EX1N MANUAL DE INSTALAÇÃO PJZ012D077H B ...

Page 331: ...U settings 26 9 Service Maintenance 38 10 Select the Language 46 1 Precauções de segurança 2 2 Acessórios e preparação no local 4 3 Procedimento de instalação do controlo remoto 4 Determinar o local de instalação do controlo remoto 4 Procedimento de instalação 5 Configuração principal substituto quando se utiliza mais do que um controlo remoto 7 4 Funções e itens do menu do Controlo Remoto 9 5 A i...

Page 332: ...Instalação deve ser entregue ao novo proprietário ADVERTÊNCIA Peça a um técnico profissional para fazer o trabalho de instalação de acordo com o Manual de Instruções Um trabalho de instalação incorrecto pode provocar choques eléctricos incêndios ou avarias Desligue a alimentação eléctrica da rede antes de iniciar trabalhos eléctricos Caso contrário pode originar choques eléctricos avarias ou anoma...

Page 333: ...to médico ou de comunicações poderão perturbar as actividades médicas emissões de vídeo ou causar interferências de ruído CUIDADO Não instalar o controlo remoto nos seguintes locais Pode causar avarias ou deformação no controlo remoto 1 Onde fique exposto à luz solar directa 2 Perto de equipamento que gere calor 3 Onde a superfície não seja plana Não deixe o controlo remoto com a sua tampa superio...

Page 334: ... mm2 x 2 core 600 m 2 0 mm2 x 2 core 3 Procedimento de instalação do controlo remoto Determinar o local de instalação do controlo remoto Instalação Usando uma caixa de distribuição Instalado directamente numa parede Direcção da cablagem Para trás Topo centro Topo esquerda Cuidados a ter para a selecção do local de instalação 1 A superfície de instalação deve ser plana e suficientemente forte A cai...

Page 335: ... v Tome atenção para proteger da humidade ou poeira a tampa superior removida Lado PCB Vista posterior Para remover a tampa superior das tampas inferiores do C R Inserir a ponta de uma chave de parafusos plana ou similar no orifício na parte inferior do C R e rode ligeiramente para remover Ligar os cabos dos terminais X e Y do C R aos terminais X e Y da unidade interior Os cabos C R X Y não têm po...

Page 336: ...r abrir um orifício antes de separar as tampas superior e inferior Isto reduzirá o risco de danificar o PCB e facilitará o trabalho subsequente Quando puxar a cablagem a partir do topo esquerdo tome cuidado para não danificar o PCB e não deixe quaisquer aparas cortadas da parede fina no interior Cuidados na ligação de cabos Use cabos não superiores a 0 5 mm2 para cablagem que passe através da caix...

Page 337: ...áximo para 1 unidade interior ou 1 grupo Um é o C R principal e o outro o C R substituto O alcance operacional é diferente dependendo do C R principal ou substituto Função C R Principal Substituto Operações de ligar desligar temperatura definida velocidade do ventilador e direcção do deflector Funcionamento em alta potência e poupança de energia Configuração de poupança de energia Sensor C R Opera...

Page 338: ...as ou avarias no C R ou computador pessoal porta USB Tampa Nota Inicialização da palavra passe São utilizadas uma palavra passe de administrador para itens de configuração diários e palavra passe de serviço para instalação teste de funcionamento e manutenção A palavra passe de administrador de fábrica por omissão é 0000 Esta palavra passe pode ser alterada Ver o Manual do utilizador Quando se esqu...

Page 339: ... se á As operações dos interruptores e estão excluídas Porta USB O conector USB mini B permite a ligação a um computador pessoal Para os métodos operacionais ver o Manual do utilizador anexo ao software para computador pessoal software utilitário do controlo remoto eco touch RC EX1 Ver o Manual do utilizador para mais informações É utilizado um sistema táctil que é activado quando se carrega no ec...

Page 340: ...nte escolhida Carregue neste botão para alterar a configuração da temperatura Botão Mudar direcção do deflector Exibe a direcção do deflector que está actualmente seleccionada Carregue neste botão para mudar a direcção do deflector Botão Mudar a velocidade do ventilador Exibe a velocidade do ventilador actualmente seleccionada Carregue neste botão para alterar a velocidade do ventilador Botão temp...

Page 341: ...mp antes selecionada 21 Cronômetro 30 Programa hora de ligar 31 Programa hora de desligar 33 Programa a hora e minutos de ligar 33 Programa a hora e minutos de desligar 33 Comfirme 34 Selecções iniciais 26 Selecçao de relógio 27 Mostrar a data e hora 28 Horário de Verão 28 Contraste 28 Luz de fundo 29 Controlo do som 29 34 Programador semanal 38 Modo ausência prolongada Configurações do administra...

Page 342: ...trolo anticongelação 31 Funcionamento bomba drenagem 31 Func residual do vent em arref 31 Func residual do vent em aquec 32 Func intermitente do vent em aquec 32 Funcionamento do ventilador de circulação 32 Selecção do controlo de pressão 32 Modo de func automático 33 Selecção da regra thermo 36 Controlo automático de velocidade do ventilador 37 Alarme sobrecarga UI 37 38 Assistência e manutenção ...

Page 343: ...pode ser alterada no final da operação de inicialização 2 Quando as unidades C R principal e substituto já tiverem sido configuradas é exibido o ecrã de Confirmação para continuar a configuração 3 Quando utilizar 2 unidades de RC EX1 como principal e substituto se a primeira for configurada como principal a segunda é automaticamente configurada como substituta Quando apenas for utilizada uma unida...

Page 344: ...o for premido durante mais de 15 segundos é seleccionado Sim Continuar e o monitor muda para o ecrã de Sim Não Após a inicialização ele regressa ao estado por defeito Ecrã TOP Confirmar configuração Inicializar configuração Inicialização ligada ...

Page 345: ... estática externa 5 Alterar endereço automátio No caso dos modelos Multi Series KX o endereço UI pode ser alterado após a configuração de auto endereço 6 Definição de endereço da U I principal No caso dos modelos Multi Series KX configurar o endereço da UI principal substituto para evitar misturar os modos de funcionamento arrefecimento aquecimento 7 Função back up UI Estão configuradas a rotação ...

Page 346: ...tão Selecc Definições da instalação menu Data de instalação Definições da instalação menu 7 8 11 15 16 19 18 Contacto de manutenção Introduza a informação da empresa Companhia N º telefone Introduza o contacto Podem ser utilizados até 10 caracteres alfanuméricos 1 byte Carregue no botão Selecc após a introdução Contacto de manutenção 9 10 Introduza o contacto ...

Page 347: ...cionamento 12 13 14 Teste de funcionamento em arrefecimento Quando a temperatura da sala for demasiado baixa para iniciar o teste de funcionamento de arrefecimento ele funciona durante 30 minutos diminuindo a temperatura definida para 5 ºC Teste de funcionamento á bomba de drenagem A bomba de drenagem pode ser operada de modo independente Teste de func ao compressor em HZ selec A frequência de fun...

Page 348: ...a ao ecrã Mudar auto endereço em que o novo endereço é exibido Carregar no botão Confirme para registar o novo endereço Definição do endereço da U I principal No caso dos modelos Multi Series KX é possível deixar as unidades interiores UI substitutas seguir o modo de funcionamento aquecimento arrefecimento da unidade principal UI principal Configure o endereço do UI Principal para as UI Substituta...

Page 349: ...nfigurar o diferencial de temperatura para reserva Back up de avaria UI Se uma das UI tem uma avaria e pára a outra começa a funcionar Pode ser feita a configuração Válido Inval de cada função Válido Inval setting of each function can be done Quando Rotação UI ou Back up da cap UI estiver configurada em Válido Back up de avaria UI é automaticamente configurada em Válido Configure tempo do inversor...

Page 350: ...entilação Altera a velocidade do ventilador 8 Ordem exterior Configura a gama a aplicar na entrada externa CNT ligada às unidades interiores múltiplos 9 Definições da ventilação Configure a quando estiver conectado um aparelho de ventilação 10 Controlo do flap Configura uma das 4 posições de paragem do deflector ou paragem de deflector livre 11 Rearme automático Configuração de Válido ou Inval da ...

Page 351: ...999 Impossível de alterar Exibe os ecrãs do menu de definições funções C R Introdução da palavra passe de serviço Definições funções C R menu Definições funções C R menu Definições funções C R menu 8 9 10 11 14 20 21 22 15 16 17 18 19 C R principal secundário Use o quando alterar a configuração principal substituto do C R C R principal secundário ...

Page 352: ...e para pôr o termóstato ON ou OFF após a detecção de temperatura Sensor do C R A regulação de termóstato é aplicada com base na temperatura detectada com o sensor C R Válido A regulação de termóstato é aplicada com base na temperatura detectada com o sensor C R em todos os modos de funcionamento Válido Apenas aquec A regulação de termóstato é aplicada com base na temperatura detectada com o sensor...

Page 353: ... Selecções em arref Selecções em aquec Modo de funcionamento C F Seleccione a unidade de temperatura exibida no C R C A temperatura é exibida em ºC F A temperatura é exibida em ºF C F Velocidade de ventilação A velocidade do ventilador pode ser alterada para a seleccionada A selecção de algumas velocidades do ventilado pode não estar disponível dependendo dos modelos das unidades disponíveis Veloc...

Page 354: ...ado ou parado independentemente Ordem exterior Definições de ventilação Controlo do flap Configura o controlo de paragem do deflector Paragem numa posição fixa O deflector pode ser configurado para parar em uma de 4 posições Paragem em qualquer posição O deflector pode ser configurado para parar em qualquer posição imediatamente após usar o interruptor C R Rearme automático Configura o estado do f...

Page 355: ... seleccionada No ecrã é exibido o interruptor Sem selecção Selecção auto da velocidade do ventilador Selecciona Válido ou Inval no ecrã de Velocidade automática do ventilador Válido A velocidade automática do ventilador pode ser seleccionada Inval A velocidade automática do ventilador não pode ser seleccionada No ecrã é exibido o interruptor Sem selecção Selecção auto da temp Selecção auto da velo...

Page 356: ...ongelação Configura o controlo do ventilador durante o controlo Anticongelação 13 Funcionamento bomba drenagem Configure o modo de funcionamento para operar a bomba de drenagem 14 Func residual do vent em arref Selecciona o tempo de funcionamento residual do ventilador durante a paragem e termo OFF em funcionamento em arrefecimento 15 Func residual do vent em aquec Selecciona o tempo de funcioname...

Page 357: ...tiverem ligadas unidades interiores múltiplas seleccione a UI para as guardar definições UI Quando o nome endereço do UI ligado é exibido seleccione a unidade a ser configurada Se forem seleccionadas todas as unidades é feita a mesma configuração para todas as unidades Ecrã menu 1 Ecrã menu 2 Introdução da palavra passe de serviço Selec U I São exibidos os ecrãs de menu de guardar definições UI ap...

Page 358: ...rdar definições UI menu 4 16 17 18 20 19 21 22 23 25 24 26 27 28 40 29 Pé direito elevado Configura a velocidade do ventilador para a UI Configuração que pode não estar disponível dependendo dos modelos UI ligados Guardar definições UI menu 5 Pé direito elevado 44 45 ...

Page 359: ...1 Padrão Sem indicação no mostrador Nenhum Ajuste 1 180H Ajuste 2 600H Ajuste 3 1 000H Ajuste 4 1 000H Paragem de funcionamento Sinal de ordem exterior 1 Configura o tipo de sinal a enviar para a entrada externa 1 CNT da UI Ordem exterior 2 Sinal de ordem exterior 2 Esta operacional quando a UI equipada com a entrada externa 2 está ligada Sinal de ordem exterior 1 Ordem exterior 2 Sinal de ordem e...

Page 360: ...locidade durante 2 minutos e paragem durante 5 minutos Pargem O ventilador é parado Controlo do vent em arref termo OFF Configura a velocidade do ventilador durante arrefecimento termo OFF Baixa O ventilador funciona a baixa velocidade Selecção da vel do ventilador O ventilador funciona à mesma velocidade do funcionamento em termo ON Intermitente Repetem se os ciclos de funcionamento do ventilador...

Page 361: ...mba de drenagem Standard em arref desum Funciona nos modos arrefecimento e desumidificação Func em standard aquec Funciona nos modos arrefecimento desumidificação e aquecimento Func em aquec vent Funciona nos modos aquecimento e ventilação Func em standard vent Funciona nos modos arrefecimento desumidificação e ventilação Func residual do vent em arref Selecciona o tempo de funcionamento residual ...

Page 362: ...nte do vent em aquec Selecciona o controlo de ventilador após o funcionamento residual do ventilador no seguimento de paragem e termo OFF em modo de aquecimento Paragem O funcionamento intermitente do ventilador não é realizado Paragem em 20 minutos e func durante 5 min Verifica as condições de funcionamento a cada 25 minutos e faz funcionar o ventilador durante 5 minutos Paragem em 5 minutos e fu...

Page 363: ...ras de comutação entre arrefecimento e aquecimento As temperaturas de comutação podem ser configuradas no intervalo entre 1 ºC a 4 ºC Temperatura definida Temperatura de comutação para arrefecimento Temperatura de ar recirculado interior Modo de funcionamento Arrefecimento Temperatura definida Temperatura de comutação para aquecimento Temperatura de ar recirculado interior Modo de funcionamento Aq...

Page 364: ...to Temperatura de ar recirculado interior e Temperatura exterior aquecimento Temperatura de ar exterior Mododefuncionamento Aquecimento 30 28 26 24 22 20 18 26 28 16 14 12 0 3 2 1 10 18 20 22 24 14 16 Temp exterior Temp definida Aquecimento Arrefecimento Transição Transição Transição forçada Diferencial de temp Diferencial de temp Gama de selecção da temp ext em aquecimento Gama de selecção da tem...

Page 365: ...er configuradas dentro do intervalo de 10 ºC a 30 ºC Temperatura exterior aquecimento Podem ser configuradas dentro do intervalo de 10 ºC a 22 ºC Diferencial da temp para mudar para arref Diferencial da temp para mudar para aquec Conftempp limitarofuncarrefc tempext Conftempp limitarofuncaquecc tempext Temp mudança p arref baseada temp int Temp mudança p aquec baseada na temp int Em Auto 3 configu...

Page 366: ... base na temperatura exterior e os valores de compensação de arrefecimento e aquecimento a Compensação de arrefecimento O termóstato analisa com base em Temperatura exterior Valor de compensação de arrefecimento durante o arrefecimento O termóstato fica ON quando Temperatura interior Temperatura exterior Valor de compensação de arrefecimento Este valor pode ser configurado no intervalo entre 0 ºC ...

Page 367: ...atura da sala difere em alguma medida da temperatura definida 30 minutos após o início do funcionamento o sinal de alarme de sobrecarga é transmitido a partir da saída externa CNT Controlo automático da velocidade do vent Configura o intervalo de comutação do selector do ventilador à configuração de velocidade automática do ventilador Auto 1 O selector do ventilador é alterado na gama de Alto Médi...

Page 368: ...de erros e os dados da ocorrência do erro que estão na memória do C R 5 Guardar definições U I O conteúdo das configurações UI é guardado no C R ou transferidos para a UI 6 Configurações especiais Utiliza se para apagar os endereços da UI restaurar o CPU inicialização etc Carregue no botão Menu no ecrã TOP É exibido o ecrã do menu principal Carregue em Manutenção no ecrã de menu Ecrã TOP Ecrã menu...

Page 369: ...seu local de instalação ser desconhecido quando o funcionamento do ventilador é implementado individualmente o local de instalação da UI pode ser identificada com este procedimento Carregue no botão Arranque para iniciar o funcionamento do ventilador Carregue no botão Paragem para parar o funcionamento do ventilador Próxima data para manutenção Mensagem de serviço Quando for introduzida a próxima ...

Page 370: ...calor UI 2 24 Compressor Hz 35 63H1 07 Temp perm calor UI 3 25 Alta pressão 36 Anticongelação 08 Velocidade do ventilador UI 26 Baixa pressão 37 Horas funcionamento comp 09 Hz exigido 27 Temp tubo descarga 38 Abertura EEV1 UE 10 Hz resposta 28 Temp fundo comp 39 Abertura EEV2 UE 11 Abertura EEV UI 29 Corrente Dados de funcionamento Após ler os dados da unidade interior os dados de funcionamento do...

Page 371: ... Redefinir verificações periódica Histórico de erros Visualização da data e hora de ocorrência do erro Endereço UI e Código de erro Se nada estiver registado no histórico de erros nenhum erro é exibido Apagar relatório de erros Se o botão Apagar no ecrã do Histórico de erros for carregado é exibido o ecrã de confirmação de Eliminação do histórico de erros Carregue em Sim para apagar a visualização...

Page 372: ...s anomalias são apagados Guardar definições U I O conteúdo das configurações UI é guardado no C R ou transmitido para a UI a Guardar definições U I b Guardar automatica c Transf dados guardados Redefinir verificações periódicas Quando carregar no botão Sim no ecrã de reconhecimento de Reset verificação periódica a verificação periódica é reiniciada e a contagem de tempo é reiniciada Visualiz de re...

Page 373: ...ão Ui a guardar Tecto alto Controlo do ventilador em aquecimento termo OFF Ajustar a pressão de controlo Sinal de filtro Temperatura antigelo Modo de funcionamento automático Entrada externa 1 Controlo antigelo Configuração da regulação termo Sinal entrada externa 1 Funcionamento da bomba de drenagem Controlo automático de velocidade do ventilador Entrada externa 2 Funcionamento residual do ventil...

Page 374: ...nfigurações no C R e UI ligados são restauradas segundo as configurações por defeito definições de fábrica por defeito Carregue em Sim para restaurar as configurações por defeito Reset do CPU Todos os microcomputadores no C R utilizado outros C R UI e UE são reiniciados estado de restauração após falha de energia Carregue em Sim para fazer reset do CPU Apagar endereço U I A memória do endereço UI ...

Page 375: ...o centro de de acordo com a mensagem Carregue no centro de e verifique o desvio da visualização Cancelar O ecrã regressa ao ecrã 30 Repetir Voltar a tentar a calibração do ecrã 31 Confirme A calibração está completa Carregue em em baixo à direita Carregue em em cima à direita Calibrar ecran Touch panel calibration 1 Touch panel calibration 2 Touch panel calibration end ...

Page 376: ...vra passe é exibido introduzir a palavra passe de administrador número de 4 dígitos O número da palavra passe de administrador por defeito é 0000 Possibilidade de alteração Introdução da palavra passe de serviço Ecrã TOP Ecrã menu Ecrã menu Seleccione o idioma a ser exibido no C R English Deutsh Français Espanõl Italiano Nerderlandse Türk Português Русский Seleccione o idioma ...

Page 377: ...ПУЛЬТ ДИСТАНЦИОННОГО УПРАВЛЕНИЯ ПДУ RC EX1A RC EX1N eco touch РУКОВОДСТВО ПО УСТАНОВКЕ PJZ012D077J B ...

Page 378: ...15 7 R C function settings 20 8 IU settings 26 9 Service Maintenance 38 10 Select the Language 46 1 Правила техники безопасности 2 2 Принадлежности и подготовка рабочей площадки 4 3 Процедура установки пульта дистанционного управления 4 Определите место установки ПДУ 4 Процедура установки 5 Настройка основного вспомогательного ПДУ когда их используется несколько 7 4 Функции и пункты меню блока дис...

Page 379: ...оставленным инструкциям Храните настоящее руководство в безопасном месте c возможностью оперативного обращения к нему Предъявите данное руководство специалистам по установке при перемещении или ремонте агрегата При смене владельца агрегата ему также следует передать Руководство по установке ПРЕДУПРЕЖДЕНИЕ Поручите профессиональному подрядчику проведение установочных работ в соответствии с руководс...

Page 380: ...ионном предприятии примите меры для максимального устранения электрических помех Они могут вызвать сбои или неисправности из за опасного воздействия на инвертер автономный генератор питания высокочастотное медицинское оборудование радиокоммуникационное оборудование и т д Воздействие блока дистанционного управления на медицинское оборудование или средства связи может отрицательно сказаться на здоро...

Page 381: ... 2 core 600 m 2 0 mm2 x 2 core 3 Процедура установки пульта дистанционного управления Определите место установки ПДУ Установка С распределительной коробкой Установка непосредственно на стене Направление проводки Сзади Вверху по центру Вверху слева Предостережения при выборе места установки 1 Поверхность установки должна быть ровной и достаточной прочной Корпус блока ПДУ не должен деформироваться 2...

Page 382: ...те или выход из строя Процедура установки Г абариты вид спереди Примите меры по защите снятого верхнего кожуха от влаги или пыли Сторона БПУ вид сзади Для снятия верхнего кожуха с нижних кожухов ПДУ Вставьте отвертку или аналогичный инструмент в шлиц в нижней части ПДУ и слегка поверните для демонтажа Подсоедините провода от клемм X и Y ПДУ к клеммам X и Y внутреннего агрегата Провода ПДУ X Y не и...

Page 383: ...рхний кожух стараясь не защемлять провода ПДУ 8 50 200 Стена Короб Стопорная гайка Распределительная коробка Герметик с уплотняющим составом кабель Д С Отверстие для проводки в нижнем кожухе Изоляционная втулка В случае открытой проводки когда провода выходят на ПДУ сверху по центру или сверху слева Вырежьте тонкие секции стенки на кожухах по размеру проводов Сверху по центру Сверху слева Верхний ...

Page 384: ...х блоков ПДУ можно использовать для 1 внутреннего агрегата или 1 группы Один блок ПДУ является основным а другой постоянным Рабочий диапазон различается в зависимости от того основной это блок ПДУ или вспомогательный Функция ПДУ Основной Вспомога тельный Пуск стоп настройка температуры скорости вращения вентилятора и направления заслонки Операции работы с высокой мощностью и с энергосбережением На...

Page 385: ...е подключайте к персональному компьютеру через USB одновременно с другими устройствами USB Это может вызвать сбои в работе либо выход из строя ПДУ или компьютера USB порт Крышка Примечание Инициализация пароля Используются пароль администратора для наименований ежедневной настройки и сервисный пароль для установки тестового прогона и обслуживания Пароль администратора на заводе по умолчанию 0000 Э...

Page 386: ...я операции с переключателями и исключаются Порт USB Разъем USB мини B обеспечивает подключение к ПК По вопросам методов эксплуатации см руководство пользователя прилагаемое к программному обеспечению ПК утилита для блока дистанционного управления Eco touch RC EX Подробности см в руководстве пользователя Система с сенсорной панелью срабатывающая при касании пальцем ЖК дисплея применяется для любых ...

Page 387: ... заданную температуру Нажмите эту кнопку для изменения заданной температуры Кнопка изменения направления жалюзи Отображает текущее выбранное направление заслонки Нажмите эту кнопку для изменения направления заслонки Кнопка изменения скорости вращения вентилятора Отображает текущую выбранную скорость вращения вентилятора Нажмите эту кнопку для изменения скорости вращения Кнопка таймера Отображает у...

Page 388: ... температуры Таймер Включение таймера по часу время Отключение таймера по часу время Включение таймера по часам Отключение таймера по часам Подтверждение Начальные настройки Установка часов Установка даты и времени Летнее время Контрастность Фоновая подсветка Звуковой сигнал контроллера Недельный таймер Режим Никого нет дома Настройки администрирования Настройка Permission Prohibition разре шение ...

Page 389: ...OFF 30 Температура противообледенения 31 Управление противообледенением 31 Работа дренажного насоса 31 Остаточная работа вентилятора при охлаждении 31 Остаточная работа вентилятора при обогреве 32 Работа вентилятора прерывистого действия при обогреве 32 Работа вентилятора циркуляция 32 Регулировка контрольного давления 32 Режим автоматической работы 33 Настройка правила Thermo 36 Автоматическое уп...

Page 390: ...о будет изменить по завершении операции инициализации 2 Если основной и вспомогательный блоки заданы то отобразится экран продолжения настройки 3 При использовании 2 блоков RC EX1 в качестве основного и вспомогательного если первый задан как основной то второй автоматически задается как вспомогательный При использовании только одного блока ПДУ нажмите кнопку Г лавный Если в состоянии начальной нас...

Page 391: ...иваться до экрана дольше 15 секунд выбирается Да и дисплей меняется на экран Да Нет После инициализации дисплей возвращается в состояние по умолчанию Основной экран Подтвердите продолж устан Загрузить начальные настройки Запущен процесс инициализ ...

Page 392: ...ешнего статического давления 5 Изменение авто адреса В моделях Multi Series KX адрес В Б можно изменить после настройки авто адреса 6 Настройка адреса главного внутреннего агрегата В Б В моделях Multi Series KX задайте адрес основного вспомогательного В Б для предотвращения смешения рабочих режимов охлаждение обогрев 7 Функция резервирования В Б Задаются чередование В Б резервирование мощности В Б...

Page 393: ... кнопку Уст Настройки инсталяции Дата установки Настройки инсталяции 7 8 11 15 16 19 18 Информация о компании Введите информацию о компании Компания Телефон Введите контактное лицо Можно использовать до 10 1 байтовых буквенно цифровых символов После ввода нажмите кнопку Уст Информация о компании 9 10 Введите контактное лицо ...

Page 394: ...гата Введите номер телефона конт лица Тестовый прогон 12 13 14 Тестовый запуск в режиме охлаждения Если комнатная температура слишком низкая для запуска теста охлаждения то режим работает в течение 30 минут понижая заданную температуру до 5 C Тест дренажной помпы Дренажная помпа может работать независимо Работа компрессора с фиксированной частотой Рабочую частоту компрессора инвертора наружного аг...

Page 395: ...адреса нажмите клавишу Г отово Настройка адреса главного внутреннего блока В Б В моделях Multi Series KX работу внутренних вспомогательных агрегатов Подчин В Б можно настроить так чтобы они придерживались рабочего режима обогрев охлаждение основного внутреннего агрегата Главн В Б Задайте адрес основного В Б Главн В Б вспомогательным В Б Подчин В Б которые будут придерживаться Главн В Б используя к...

Page 396: ...емператур для резервирования Резервирование в случае неисправности Если один из В Б неисправен и останавливается то второй начинает работать Каждой функции можно задать настройку Активировано Неактивировано Если чередование В Б или резервирование мощности В Б установлены на Активировано то Резервирование в случае неисправности устанавливается на Неактивировано автоматически Установка таймера для з...

Page 397: ...именения внешнего ввода CNT подсоединенного к нескольким внутренним агрегатам 9 Настройка вентилятора Данная настройка выполняется только при подключенном вентиляционном устройстве 10 Управление жалюзи Задание одного из четырех положений останова или свободного останова заслонки 11 Автоматический рестарт Задание параметровАктивно или Неактивно функции автоматического перезапуска 12 Автоматическая ...

Page 398: ...ить его нельзя Отображаются экраны Настроек функций ПДУ Ввод сервисного пароля Настройки функций ПДУ меню 1 Настройки функций ПДУ меню 2 Настройки функций ПДУ меню 3 8 9 10 11 14 20 21 22 15 16 17 18 19 Г лавный Подчиненный ПДУ Используется при изменении режима Г лавный Подчиненный блока ПДУ Г лавный Подчиненный ПДУ ...

Page 399: ...применяется исходя из среднего значения температур рециркуляционного воздуха подключенных В Б Правило Thermo означает Принятие решения о включении и не включении термостата путем определения температуры Сенсор ПДУ Правило Thermo применяется исходя из температуры выявленной датчиком ПДУ Актив Правило Thermo применяется исходя из температуры выявленной датчиком ПДУ во всех рабочих режимах Активно то...

Page 400: ...аметр также деактивирован Изменение в режиме охл Изменение в режиме обогр Режим работы C F Выберите единицу измерения температуры отображаемой на ПДУ C Температура отображается в C F Температура отображается в F C F Скорость вращения вентилятора Скорость вращения вентилятора можно изменить на выбранную Некоторые скорости вращения недоступны в зависимости от моделей внутренних агрегатов Скорость вр...

Page 401: ...о вентилятор блока будет работать или останавливаться независимо Внешний сигнал Настройка вентиляции Управление жалюзи Задайте управление остановкой жалюзи Остановка в фиксированном положени Жалюзи можно установить в одном из четырех положений Остановка в любом положении Можно настроить остановку жалюзи в любом положении сразу после срабатывания выключателя ПДУ Автоматический рестарт Задайте состо...

Page 402: ...у выбрать нельзя Переключатель выбора на экране не отображается Автоматическая скорость вращения вентилятора Выберите Актив или Неактив на экране Автоматическая скорость вращения вентилятора Актив Можно выбрать автоматическую скорость вращения вентилятора Неактив Автоматическую скорость вращения вентилятора выбрать нельзя Переключатель выбора на экране не отображается Автомат установка темп Автома...

Page 403: ...рева при выключенном термостате 11 Температура оттайки Выберите температуру контроля оттайки 12 Управление режимом оттайки Задайте управление вентилятором во время режима оттайки 13 Работа дренажной помпы Задайте рабочий режим для эксплуатации дренажной помпы 14 Время функционирования вентилятора при режиме охлаждения Выберите время работы вентилятора после остановки и отключения термостата при оп...

Page 404: ... подключении нескольких внутренних агрегатов выберите В Б для настроек В Б При отображении имени адреса подключенного В Б выберите агрегат для которого будут выполнены настройки Если выбраны все агрегаты то для всех них выполняется одна настройка Г лавное меню 1 Г лавное меню 2 Ввод сервисного пароля Выбор В Б Экраны меню Настройки В Б отображаются после получения данных с В Б Настройки В Б меню 1...

Page 405: ...еню 3 Настройки В Б меню 4 16 17 18 20 19 21 22 23 25 24 26 27 28 40 29 Высокий потолок Задайте скорость вращения вентилятора для В Б Данная функция доступна в зависимости от подключенных моделей В Б Настройки В Б меню 5 Высокий потолок 44 45 ...

Page 406: ...ндарт Без индикации никто установка 1 180Ч установка 2 600Ч установка 3 1 000Ч установка 4 1 000Ч Операция остановки Внешнее управление сигнал 1 Задайте тип сигнала для передачи на внешний ввод 1 CNT внутреннего агрегата Внешнее управление 2 Внешнее управление сигнал 2 Это возможно если подключен В Б оборудованный внешним вводом 2 Внешнее управление сигнал 1 Внешнее управление 2 Внешнее управление...

Page 407: ...ах в течение 2 минут с остановкой на 5 минут Останов Вентилятор останавливается Управление вентилятором во время отключения охлаждение Задайте скорость вращения вентилятора во время охлаждения при выключенном термостате Низк Вентилятор вращается на малых оборотах Установить скорость вентилятора Вентилятор вращается с той же скоростью что и во время работы с включенным термостатом Прерывистый Повто...

Page 408: ...Работа в режиме охлаждения и сушки Работа в стандартном режиме и при обогреве Работа в режимах охлаждения сушки и обогрева Работа в режиме обогрева с вентилятором Работа в режиме обогрева и включенного вентилятора Работа в стандартном режиме с вентилятором Работа в режимах охлаждения сушки и включенного вентилятора Постоянная работа вентилятора при охлаждении Выберите период времени остаточной раб...

Page 409: ... при обогреве Выберите управление вентилятором после его остаточной работы после которой следует остановка и отключение термостата при операции обогрева Останов Прерывистая работа вентилятора не используется Остановка на 20 минут и работа в течение 5 минут Проверять рабочие условия каждые 25 минут и запускать вентилятор на 5 минут Остановка на 5 минут и работа в течение 5 минут Проверять рабочие у...

Page 410: ... в зависимости от наружной температуры Авто3 Охлаждение и обогрев переключаются исходя из внутренней и наружной температур Параметры режима Auto 1 Задайте переключение температур на охлаждение и обогрев Переключение температур можно задать в диапазоне от 1 C до 4 C Переключение температуры на охлаждение Температура рециркуляционного воздуха Рабочий режим Охлаждение Переключение температуры на охла...

Page 411: ...ы для ограничения охлаждения и обогрева Внутренняя температура охлаждение Температура рециркуляционного воздуха и Наружная температура охлаждение Температура наружного воздуха Рабочий режим Охлаждение Внутренняя температура обогрев Температура рециркуляционного воздуха и Наружная температура обогрев Температура наружного воздуха Рабочий режим Обогрев Переключение температуры на охлаждение Переключ...

Page 412: ... температура охлаждение может задаваться в диапазоне от 10 C до 30 C Наружная температура обогрев может задаваться в диапазоне от 10 C до 22 C Переключение тепм на охл Переключение тепм на обогр Ограничение нар темп при охл Ограничение нар темп при обогр Ограничение внутренней температуры при охлаждении Настройка внутренней температуры при обогрева В Auto 3 задайте внутренние температуры для охлаж...

Page 413: ...режиме обогрева Состояние термостата определяется по наружной температуре и значениям смещения охлаждения и обогрева a Смещение охлаждения Состояние термостата определяется по значению Наружная температура Смещение охлаждения во время охлаждения Термостат ВКЛЮЧАЕТСЯ когда Внутренняя температура Наружная температура Смещение охлаждения Данное значение может быть задано в диапазоне от 0 C до 10 C b ...

Page 414: ...грузке Автоматическое управление скоростью вращения вентилятора Задайте диапазон включения вентилятора в настройке автоматического управления скоростью вращения вентилятора Auto 1 Ход вентилятора изменяется в диапазоне Высокий Средний Низкий Auto 2 Ход вентилятора изменяется в диапазоне Высокая мощность Высокий Средний Низкий Автомат управл скор вращ вент Сигнал перегрузки В Б ...

Page 415: ...дикация Отображается архив ошибок и данных на момент возникновения ошибки которые хранятся в памяти ПДУ 5 Сохранение настроек В Б Содержание настроек В Б сохраняется в ПДУ или передается на В Б 6 Специальные настройки Используются для стирания адреса В Б сброса ЦПУ инициализации и т д Нажмите кнопку Меню в ОСНОВНОМ экране Отображается экран главного меню Нажмите Сервис и обслуживание на экране мен...

Page 416: ...оверки Если адрес выбранного В Б зарегистрирован но место установки неизвестно то вентилятор включается индивидуально при помощи данной процедуры можно определить место установки В Б Для запуска вентилятора нажмите кнопку Запуск Для остановки вентилятора нажмите кнопку Остановка Дата следующего обслуживания Сервисное сообщение При вводе даты следующего обслуживания сообщения отображаются с началом...

Page 417: ...пература 3 теплообменника В Б 25 Высокое давление 36 Оттаивание 08 Скорость вращения вентилятора В Б 26 Низкое давление 37 Время работы компрессора ч 09 Необходимая частота Гц 27 Температура сливной трубы 38 Открывание дросселирующего клапана 1 EEV наружного агрегата OU 10 Частота реагирования Гц 28 Температура дна компрессора 39 Открывание дросселирующего клапана 2 EEV наружного агрегата OU g 11 ...

Page 418: ... неисправности d Сброст периодической проверки История неисправностей Отображаются дата и время возникновения ошибки адрес В Б и код ошибки Если в архиве ошибок ничего не записано то ошибки не отображаются Удалить данные о неисправности Если нажать кнопку Удалить на экране Данные о неисправности то отобразится экран Удалить данные о неисправности Нажмите Да для удаления отображения архива ошибок С...

Page 419: ...номальные данные удаляются Сохранение настроек В Б Содержание настроек для В Б сохраняется в памяти ПДУ или передается на IU a Сохранить настройки IU b Автоматическое сохранение c Передать сохраненные данные Сброс периодической проверки При нажатии кнопки Да на экране Сброс периодической проверки периодическая проверка сбрасывается вместе со счетчиком времени Показать данные о неисправн Удаление д...

Page 420: ...ение вентилятором при обогреве с отключенным термостатом Регулировка контрольного давления Знак фильтра Температура оттайки Режим автоматической работы Внешнее управление 1 Управление противообледенением Настройка правила Thermo Внешнее управление сигнал 1 Работа дренажного насоса Автоматическое управление скоростью вращения вентилятора Внешний управление 2 Остаточная работа вентилятора при охлажд...

Page 421: ...е настроек по умолчанию Настройки ПДУ и подключенного В Б восстанавливаются на значения по умолчанию заводские настройки по умолчанию Нажмите Да для восстановления настроек по умолчанию Сброс ЦПУ Все микрокомпьютеры на рабочем ПДУ других ПДУ внутренние и внешние агрегаты сбрасываются перезагрузка после сброса Нажмите Да для сброса ЦПУ Удаление адреса В Б Адрес В Б для агрегата Multi KX стирается и...

Page 422: ...ки Нажмите в центр по подсказке Нажмите в центр и проверьте отклонение от дисплея Отмена Дисплей возвращается в экран Повтор Повторная попытка калибровки на экране Подтвердить Калибровка завершена Нажмите внизу справа 1 Нажмите вверху слева Калибровка сенсорной панели Нажмите внизу справа 1 Нажмите вверху слева 2 Нажмите в центр и проверьте позицию ...

Page 423: ...При отображении окна Введите пароль введите пароль администратора число из 4 цифр По умолчанию пароль администратора 0000 можно изменять Ввод сервисного пароля Основной экран Г лавное меню Г лавное меню 3 Выберите язык меню блока ПДУ English Deutsch Français Español Italiano Nederlandse Türk Português Pусский Выбор языка ...

Reviews: