6
GB
3. Operation
F1
F2
F3
F4
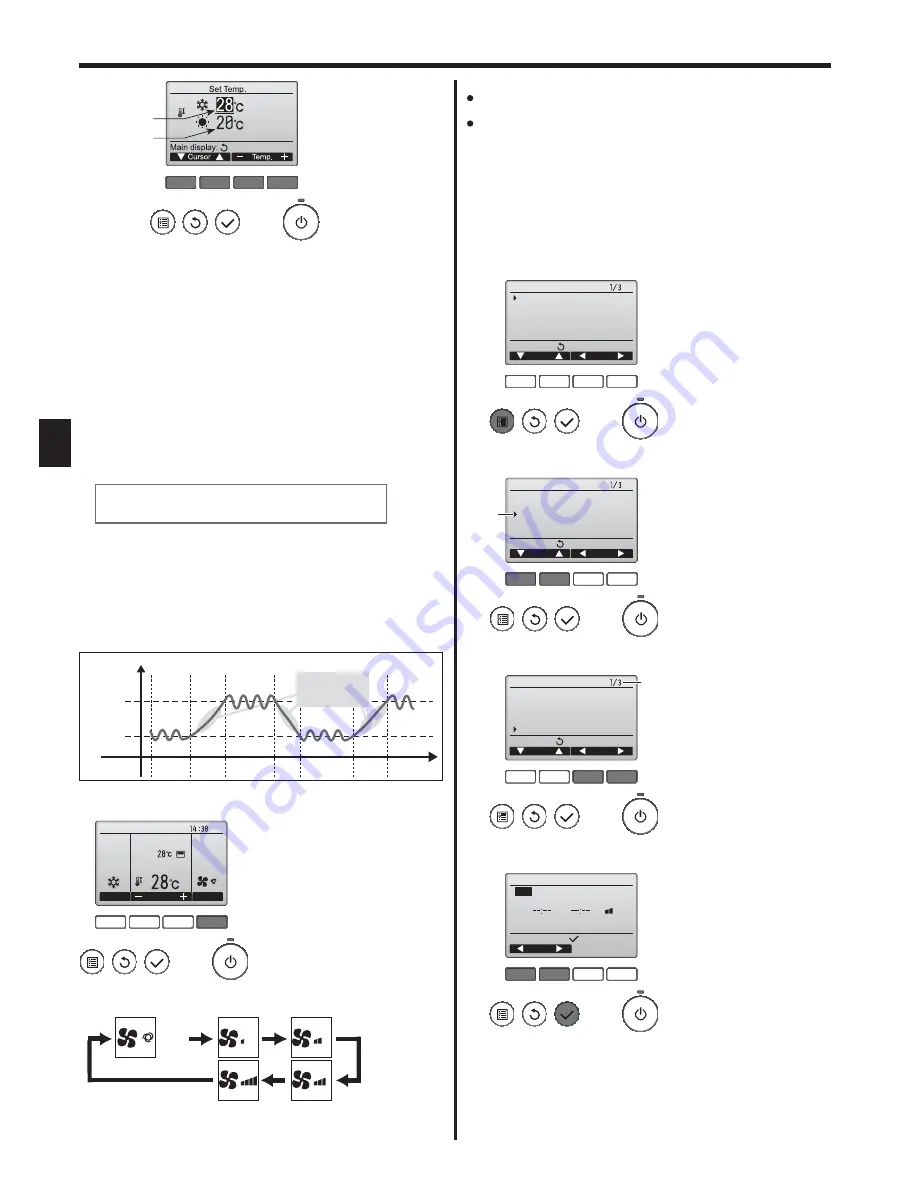
Preset temperature
for cooling
Preset temperature
for heating
2
Press the [F1] or [F2] button to move the cursor to the desired
temperature setting (cooling or heating).
Press the [F3] button to decrease the selected temperature, and [F4]
to increase.
5HIHUWRWKHWDEOHRQSDJHIRUWKHVHWWDEOHWHPSHUDWXUHUDQJHIRU
different operation modes.
The preset temperature settings for cooling and heating in the “Auto”
(dual set point) mode are also used by the “Cool”/“Dry” and “Heat”
modes.
7KHSUHVHWWHPSHUDWXUHVIRUFRROLQJDQGKHDWLQJLQWKH
“Auto” (dual
set point) mode must meet the conditions below:
3UHVHWFRROLQJWHPSHUDWXUHLVKLJKHUWKDQSUHVHWKHDWLQJWHPSHUDWXUH
7KHPLQLPXPWHPSHUDWXUHGLIIHUHQFHUHTXLUHPHQWEHWZHHQFRROLQJDQG
heating preset temperatures (varies with the models of indoor units
connected) is met.
* If preset temperatures are set in a way that does not meet the minimum
temperature difference requirement, both preset temperatures will
automatically be changed within the allowable setting ranges.
Navigating through the screens
7RUHWXUQWRWKH0DLQVFUHHQ>5(7851@EXWWRQ
Automatic operation (Dual set point)
When the operation mode is set to the “Auto” (dual set point) mode,
two preset temperatures (one each for cooling and heating) can be
set. Depending on the room temperature, indoor unit will automatically
operate in either the “Cool” or “Heat” mode and keep the room
temperature within the preset range.
The graph below shows the operation pattern of indoor unit operated in
the “Auto” (dual set point) mode.
Operation pattern during Auto (dual set point) mode
HEAT
COOL
HEAT
COOL
Preset temp.
(COOL)
Preset temp.
(HEAT)
Room
temperature
The room temperature
changes corresponding
to the change in the
outside temperature.
3.4. Fan speed setting
F1
F2
F3
F4
Cool
Room
Auto
Set temp.
Mode
Temp.
Fan
Fri
Press the [F4] button to go through the fan speeds in the following order.
Auto
The available fan speeds depend on the models of connected indoor units.
Note:
The number of available fan speeds depends on the type of unit
connected. Note also that some units do not provide an “Auto” setting.
In the following cases, the actual fan speed generated by the unit will differ
from the speed shown the remote controller display.
1. While the display is showing “STAND BY” or “DEFROST”.
2. When the temperature of the heat exchanger is low in the heat mode.
(e.g. immediately after heat operation starts)
3. In HEAT mode, when room temperature is higher than the temperature setting.
4. When the unit is in DRY mode.
3.5. Airflow direction setting
3.5.1 Navigating through the Main menu
<Accessing the Main menu>
Press the [MENU] button.
The Main menu will appear.
F1
F2
F3
F4
Main
Main display:
Cursor
Page
Main menu
Vane·Louver·Vent. (Lossnay)
High power
Timer
Weekly timer
OU silent mode
<Item selection>
F1
F2
F3
F4
Main
Main display:
Cursor
Page
Main menu
Vane·Louver·Vent. (Lossnay)
High power
Timer
Weekly timer
OU silent mode
Cursor
Press [F1] to move the cursor down.
Press [F2] to move the cursor up.
<Navigating through the pages>
Press [F3] to go to the previous
page.
Press [F4] to go to the next page.
F1
F2
F3
F4
Main
Main display:
Cursor
Page
Main menu
Vane·Louver·Vent. (Lossnay)
High power
Timer
Weekly timer
OU silent mode
page
<Saving the settings>
F1
F2
F3
F4
OU silent mode
Mon
Tue Wed Thu Fri Sat Sun
Start Stop Silent
-
Setting display:
day
Select the desired item, and press
the [SELECT] button.
The screen to set the selected item
will appear.


