2. TV Setup
13
•
Parental Locks.
Restrict TV viewing by
program rating, by channel, or by time of day.
You can also disable the side-panel buttons
if you have small children. See the
Lock
>
Parent
menu, the
Lock
>
Front Panel
menu,
and
Setup
>
Edit
>
Lock
.
•
Video Settings.
Change video adjustments to
get the best picture for your viewing conditions.
See “AV Menu.”
Note:
You may wish to change the Picture Mode from
the default
Brilliant
to either
Bright
or
Natural
,
which are suitable for most home viewing.
2
. To program the remote control to operate A/V
devices not under NetCommand control, see
Appendix D, “Programming the Remote Control.”
TV Care
General Cleaning.
See the cleaning recommendations
under “Important Information About Your TV.”
Assistance
• For troubleshooting, service, and product
support, see Appendix E.
• For warranty information, see the TV warranty
in the back of this book.
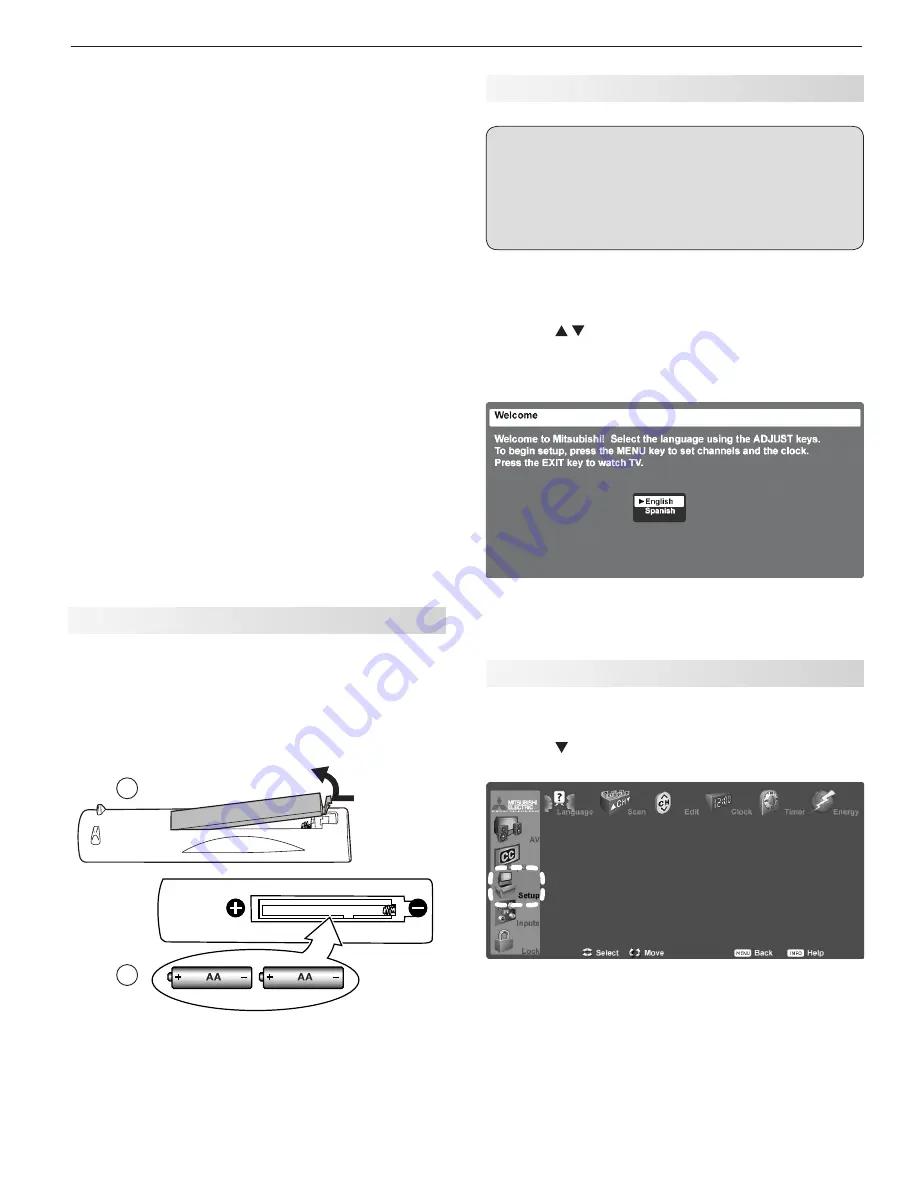
Installing the Remote Control Batteries
1. Remove the remote control’s back cover by gently
pressing in the tab and lifting off the cover.
2. Load the batteries, making sure the polarities (+)
and (-) are correct. For best results, insert the
negative (-) end first.
3. Snap the cover back in place.
2
1
The remote control requires two AA alkaline batteries.
When You First Power On the TV
Turning the TV On or Off
To turn the TV on or off, point the remote control at
the front of the TV and press the
POWER
key. Alter-
natively, press the
POWER
button on the side panel
of the TV.
Choosing a Language for Menus
1. Power on the TV for the first time.
2. Press to select either
English
or
Spanish
for all menus. You can later change the language
selection through the
Setup
menu Language
option.
When you first power on the TV, the Welcome screen lets
you change the menu language.
Initial TV Setup
Use the
Setup
menu for basic TV setup options.
1. Press
MENU
to open the
Main
menu.
2. Press to highlight the
Setup
icon and display the
Setup
menu.
Setup menu highlighted in TV Main menu


