


Safety, Operation, & Maintenance Manual
Linear Cut Processing Systems
Operation
001128
21
6.5.3.3
Cut Sets
After optimizing, the “Cut Sets” panel will display a cutting solution set up in a list of “Cut Sets”. Each row in this
list is a Cut Set. Each Cut Set represents a board or stack of boards as they will be run through the machine, how
they will be cut, and other details about the parts.
The Cut Sets window is interactive and can be used to:
1.
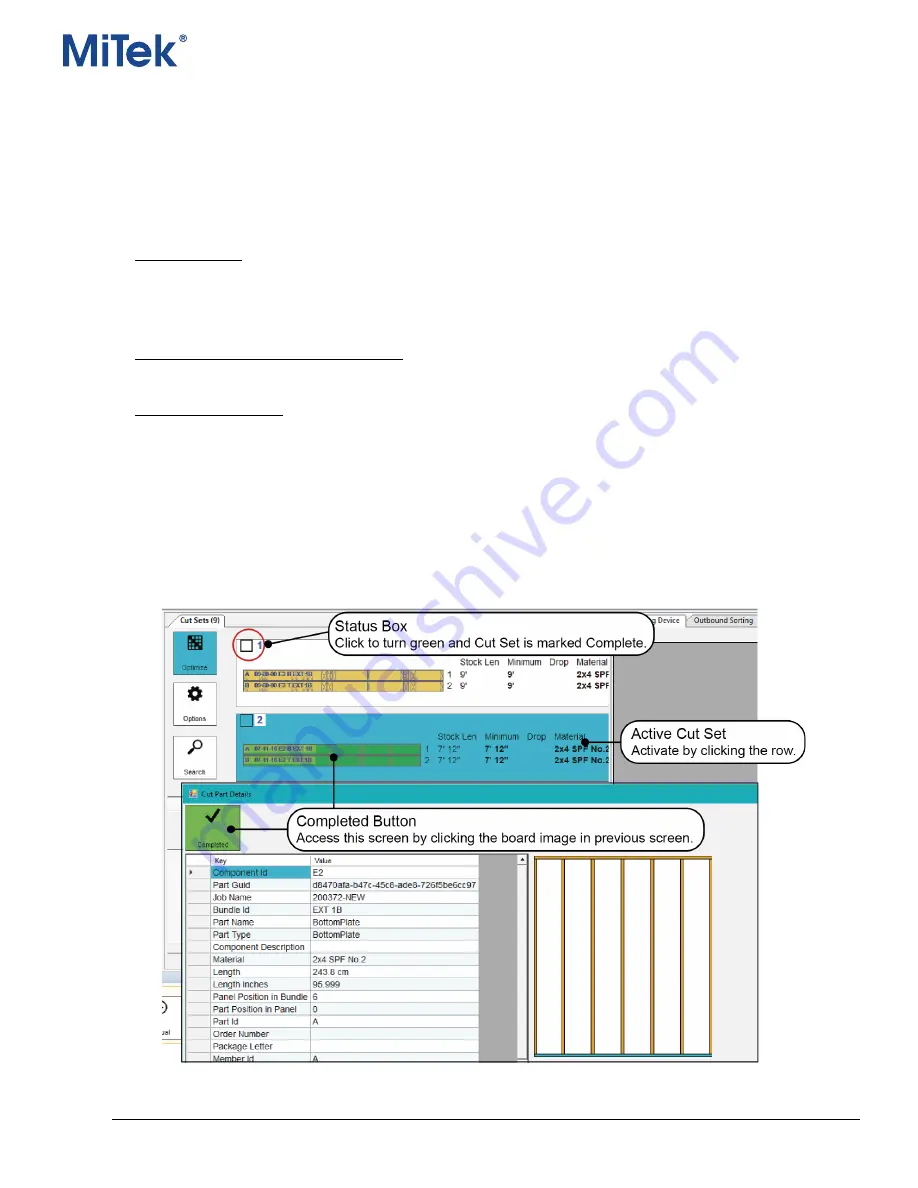
Activate Cut Set – The active cut set is always indicated by its turquoise color. In the example, Cut Set
number 1 is the active cut set. The active cut set is important as it is the start point for beginning cutting
and represents the currently active setup to be run or running through the machine. To manually indicate an
active cut set, select it by clicking anywhere there is text in the Cut Set row.
2.
View Cut Part Details and Printed Image – Click the board image, and the Cut Part Details screen displays
details about the Cut Set and shows an image of the printing that part will receive.
3.
Complete/Incomplete— During normal operation the Hornet will automatically "complete" each cut set as it
runs. On rare occasions, when a job fails to complete, use one of these methods to manually mark a set of
cuts complete:
•
Click the board image, and the Cut Part Details screen appears. Select the
Completed
button to toggle
between completed/not complete. The color green indicates a Completed status.
•
To complete all of the parts in a cut set at the same time, select the Status box located on the left-hand
side of the cut set number. When the status box and the board images turn green, every board in that
cut set is marked complete.


