MIOPS Mobile Remote User Manual Download Page 24

MIOPS MOBILE Remote User Manual


p.


Scenario Mode 

The  scenario  mode  is  the  most  advanced  mode  of  MIOPS  Mobile.  It  gives  you  the 
total  freedom  of  choosing  which  data  and  parameters  to  use  to  create  your  own 
unique trigger scenario. 

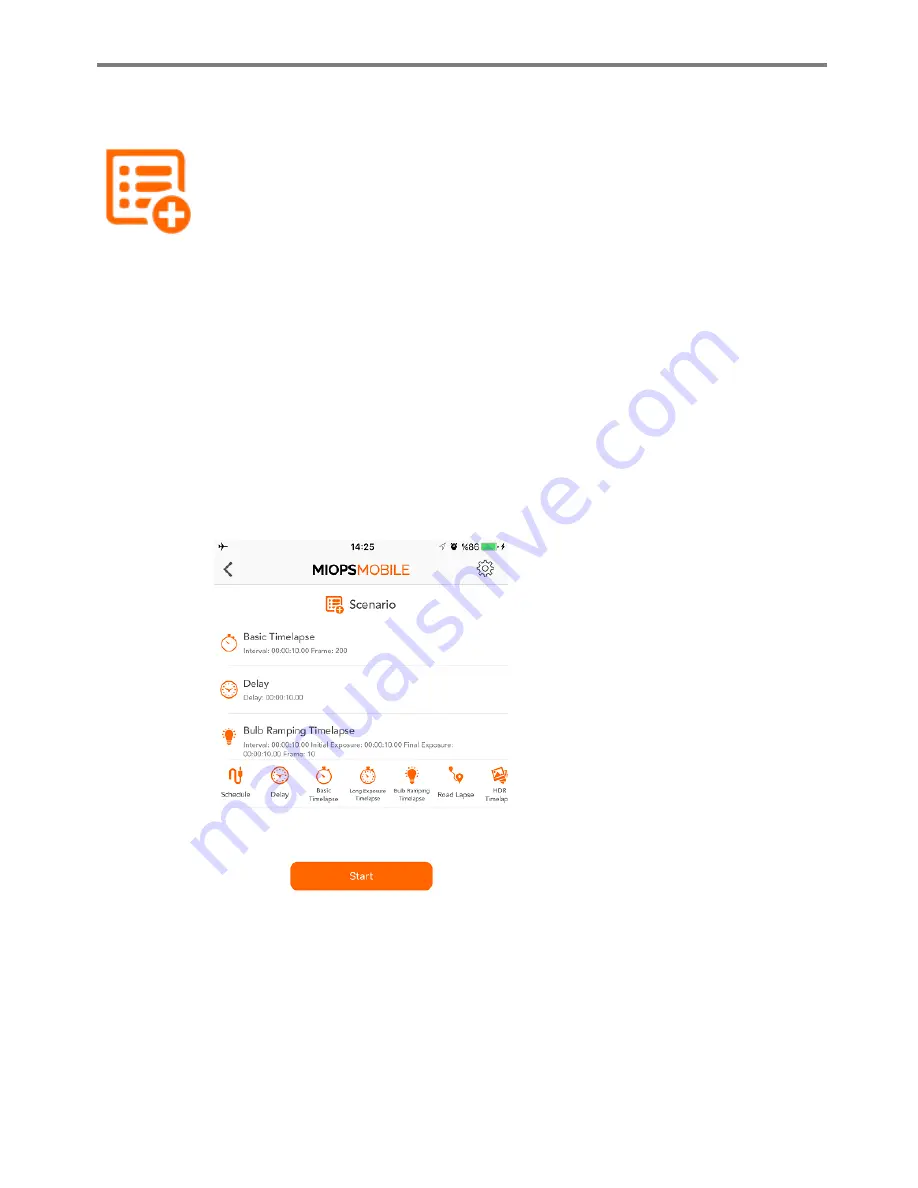
The scenario mode opens with a blank screen where all of the available modes are 
listed on the top. The idea is that you add the modes you want to use in a sequential 
order to create a custom scenario. You can use the delay parameter to add a certain 
delay as a step of the scenario. A scenario can have between 1 and 5 steps. You can 
configure  each  step  of  the  scenario  with  the  related  parameters  of  that  particular 
mode. 

To  start  creating  the  scenario,  touch  one  of  the  modes  listed  on  the  top.  The 
parameters screen of that mode will open. You can change the parameters of that 
mode per your needs. Once you are done, you can add this to the scenario as a step 
by touching the ‘Save’ button. If you touch the ‘Cancel’ button, you will go back to 
the selection screen.  

Each scenario can have up to 5 steps. You 
can  arrange  the  order  of  the  steps.  If  you 
hold your finger down on a step, it will pop 
out and  you  will be  able  to  move  it  up  or 
down.  If  you  want  to  change  the 
parameters of a step, you can touch it and 
the  parameters  screen  will  open.  You  can 
change  the  parameters  and  save  again  or 
cancel.  You  can  reuse  the  scenario 
anytime 

later. 

It 

will 

be 

saved 

automatically. 


Scenario Screen


Summary of Contents for Mobile Remote

Page 1: ...MIOPS MOBILE REMOTE Users Manual V0 6...

Page 2: ...Type 8 c User Interface 11 d Firmware Upgrade 13 4 Modes of MIOPS Mobile Remote 14 a Cable Release 14 b Press Hold 14 c Press Lock 14 d Timed Release 14 e Self Timer 15 f Timed Release Self Timer 15...

Page 3: ...dent solution If your camera has a shutter release port you can use MIOPS Mobile Remote It will communicate with your smartphone over Bluetooth connection and trigger your camera or flash unit using a...

Page 4: ...ing Started a Technical Specifications Model Name MIOPS Mobile Remote Dimensions 27 mm x 17 mm x 63 mm Weight 77 grams Battery 250 mAh Li Polymer Connectivity Bluetooth 4 0 1 USB Port 2 Camera Connect...

Page 5: ...e is a problem with your unit do not dissemble it This will void your warranty In such a case contact your point of sale to get customer assistance The unit is not water proof You need to protect the...

Page 6: ...second The LED frame will fade in and then dim Power Off Press the On Off switch for a second The LED frame will glow and then fade out Firmware Upgrade Mode Press the On Off switch for 3 seconds The...

Page 7: ...over Bluetooth connection Once you install the app you will see the MIOPS MOBILE logo on your screen The logo is the same for iOS and Android app The app provides the interface to the settings of MIOP...

Page 8: ...ll show a Connection Type screen The MIOPS MOBILE app is used for both MIOPS Mobile Remote and MIOPS Mobile Dongle If you are using the MIOPS Mobile Remote select Bluetooth connection If you are using...

Page 9: ...te and your smartphone If you confirm you will be taken back to the Connection Selection screen Here you can start over and select the connection type IMPORTANT NOTE The Cable Connection will only wor...

Page 10: ...equires you to set the distance unit You can either select Meters or Feet The Road Lapse mode will use that unit to trigger your camera as you travel on the road HDR Motion Frame Interval The HDR and...

Page 11: ...can start using them the moment you select it The second type of button has a parameter to be adjusted The name of the parameter and the current value are displayed in the button In order to change t...

Page 12: ...ou can start the mode by touching it If you want to change the parameters you need to push the curtain up again After that the parameters will be displayed and you can set the parameters at your own c...

Page 13: ...of the firmware is found the app will notify you with a pop up screen If you want to upgrade the firmware touch the Upgrade button At this point the MIOPS Mobile Remote must be in Firmware Upgrade mod...

Page 14: ...the button a counter will start at the bottom of the screen You can count how many seconds milliseconds have passed The shutter will close when you release the button Again in order to control the shu...

Page 15: ...e f Timed Release Self Timer If you want to have a custom exposure after the timer goes off you can use the Timed Release and Self Timer mode This mode combines the Self Timer with the capability of k...

Page 16: ...gth Once you start the time lapse you can see the progress on two counters at the bottom of the screen The counter on the left will show the interval status When the circle completes the interval peri...

Page 17: ...will not get pictures with the exposure set on the MIOPS app Once you start the Long Exposure mode you can take your smartphone away MIOPS Mobile Remote will be able to complete the whole process with...

Page 18: ...has been taken MIOPS will wait for the duration of the interval to take the next picture The process will continue until the set frame number is reached After you have set all parameters you can start...

Page 19: ...button and then touch the button to start the process After that you will see two counters at the bottom of the screen The first one will show you the distance traveled before the next picture As you...

Page 20: ...with circles at the bottom of the screen There will be an equal number of circles to the Frame value In the screenshot on the left the Frame value is set to 3 so there are three circles at the bottom...

Page 21: ...erstand where to set the threshold approximately to filter out the environment noise You can move the threshold bar around the button by touching the grey bar The second parameter is the delay The del...

Page 22: ...he Continuous Shot and the Single Shot In the Continuous Shot mode the MIOPS Mobile will trigger the camera each time a vibration is detected This can cause multiple pictures to be taken or multiple t...

Page 23: ...in milliseconds anywhere between 10ms and 99 hours The last parameter is the Frame This parameter defines how many pictures to be taken in case a motion is detected Once a motion is detected MIOPS Mo...

Page 24: ...the related parameters of that particular mode To start creating the scenario touch one of the modes listed on the top The parameters screen of that mode will open You can change the parameters of tha...

Page 25: ...will be deleted The scenario mode has some restrictions to keep the completion of the scenario possible all the time The last step of the scenario cannot be the delay parameter Also a step like time...

Page 26: ...same exposure The HDR mode requires the camera to be on BULB mode Otherwise the exposure value of your camera will be valid Please make sure that your camera is on BULB mode for the HDR mode The Long...

Reviews: