MIOPS Mobile Remote User Manual Download Page 10

MIOPS MOBILE Remote User Manual


The menu screen has also a link to the Settings. If you touch the gear icon at the right top of the 
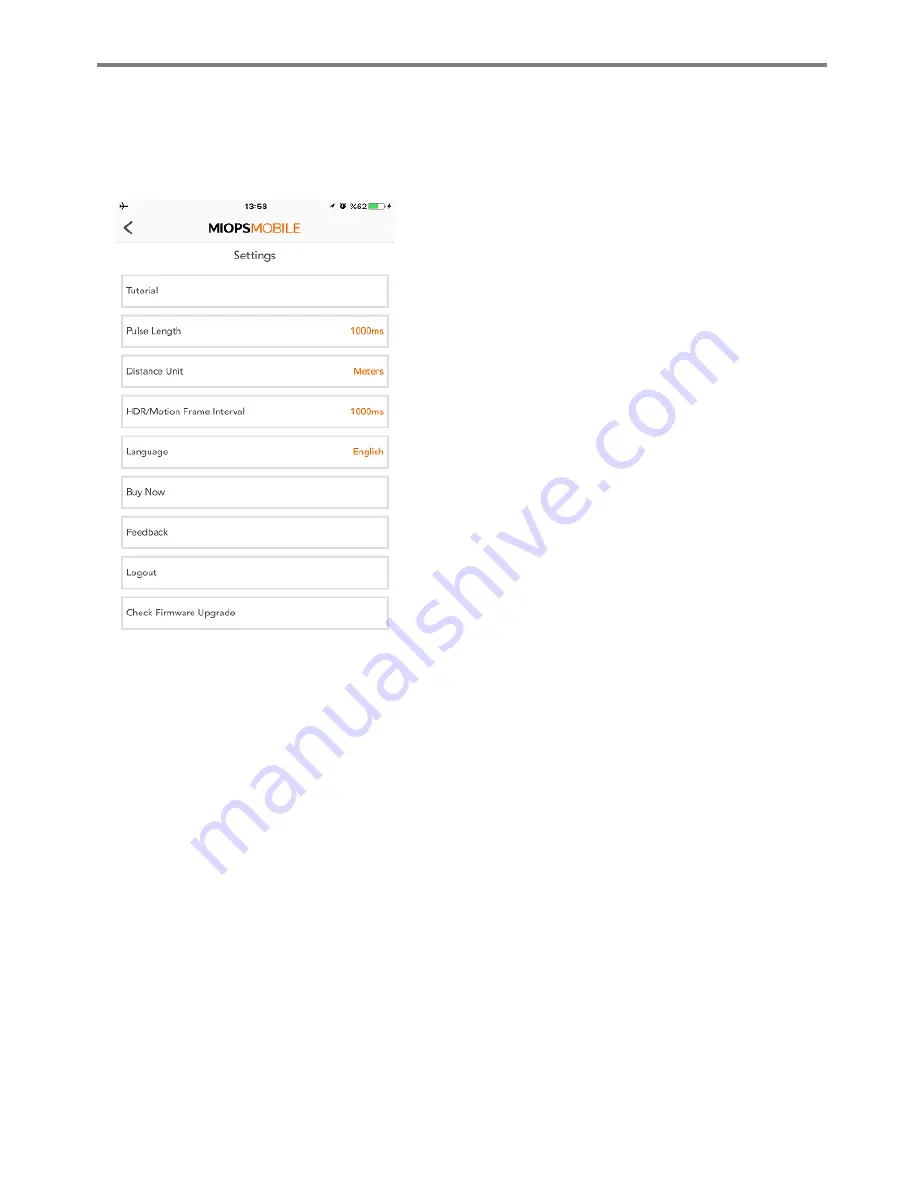
screen, you will be navigated to the Settings menu. The Settings menu enables you to change some 
device parameters, so MIOPS Mobile Remote will work exactly as needed. 

Tutorial: 

The tutorial plays a short video to introduce you 

the basic requirements to use MIOPS Mobile Remote. You 
can  close  it  anytime  by  touching  the  “Close”  sign  at  the 
bottom of the screen. 

Pulse Length: 

MIOPS Mobile Remote triggers your camera 

by shorting the terminals of the shutter release port. The 
Pulse  Length  parameter  defines  for  how  long  the 
terminals  will  be  shorted.  Some  cameras  may  require  a 
longer pulse to be triggered. In some cases, you may want 
to  shorten  the  pulse  length.  If  you  want  to  change  the 
pulse  length,  just  touch  the  line  and  a  selection  window 
will pop-up. You can select one of the five available pulse 
lengths. The durations are given in milliseconds. 

Distance  Unit: 

The  Road  Lapse  mode  requires  you  to  set 

the  distance  unit.  You  can  either  select  Meters  or  Feet. 
The  Road  Lapse  mode  will  use  that  unit  to  trigger  your 
camera as you travel on the road. 

HDR/Motion  Frame  Interval: 

The  HDR  and  Motion  modes  are  designed  to  trigger  your  camera 

consequently.  You  can  define  a  certain  interval  between  each  frame.  MIOPS  Mobile  Remote  will 
wait  for  the  specified  duration  before  triggering  again.  You  can  select  one  of  four  different 
durations. 

Language: 

The  app  will  be  available  in  several  languages.  You  can  use  the  app  in  one  of  the 

available languages. The default language of the app is English. 

Buy  Now: 

This  link  will  take  you  to  the  web  site  of  MIOPS  products,  where  you  can  buy  MIOPS 

products, see product specifications and much more. 

Feedback: 

This form has been designed you to enable to report any problem, ask questions or even 

request a new feature about MIOPS Mobile. The form enables you to add pictures to explain the 
issue better. The form will collect basic info about your smartphone and app version. Once you fill 
in the form, you can touch the “Mail” sign at the right top of the screen. This will turn the form into 
a ready to send email. You can send the email with your email client. 

Settings Screen


Summary of Contents for Mobile Remote

Page 1: ...MIOPS MOBILE REMOTE Users Manual V0 6...

Page 2: ...Type 8 c User Interface 11 d Firmware Upgrade 13 4 Modes of MIOPS Mobile Remote 14 a Cable Release 14 b Press Hold 14 c Press Lock 14 d Timed Release 14 e Self Timer 15 f Timed Release Self Timer 15...

Page 3: ...dent solution If your camera has a shutter release port you can use MIOPS Mobile Remote It will communicate with your smartphone over Bluetooth connection and trigger your camera or flash unit using a...

Page 4: ...ing Started a Technical Specifications Model Name MIOPS Mobile Remote Dimensions 27 mm x 17 mm x 63 mm Weight 77 grams Battery 250 mAh Li Polymer Connectivity Bluetooth 4 0 1 USB Port 2 Camera Connect...

Page 5: ...e is a problem with your unit do not dissemble it This will void your warranty In such a case contact your point of sale to get customer assistance The unit is not water proof You need to protect the...

Page 6: ...second The LED frame will fade in and then dim Power Off Press the On Off switch for a second The LED frame will glow and then fade out Firmware Upgrade Mode Press the On Off switch for 3 seconds The...

Page 7: ...over Bluetooth connection Once you install the app you will see the MIOPS MOBILE logo on your screen The logo is the same for iOS and Android app The app provides the interface to the settings of MIOP...

Page 8: ...ll show a Connection Type screen The MIOPS MOBILE app is used for both MIOPS Mobile Remote and MIOPS Mobile Dongle If you are using the MIOPS Mobile Remote select Bluetooth connection If you are using...

Page 9: ...te and your smartphone If you confirm you will be taken back to the Connection Selection screen Here you can start over and select the connection type IMPORTANT NOTE The Cable Connection will only wor...

Page 10: ...equires you to set the distance unit You can either select Meters or Feet The Road Lapse mode will use that unit to trigger your camera as you travel on the road HDR Motion Frame Interval The HDR and...

Page 11: ...can start using them the moment you select it The second type of button has a parameter to be adjusted The name of the parameter and the current value are displayed in the button In order to change t...

Page 12: ...ou can start the mode by touching it If you want to change the parameters you need to push the curtain up again After that the parameters will be displayed and you can set the parameters at your own c...

Page 13: ...of the firmware is found the app will notify you with a pop up screen If you want to upgrade the firmware touch the Upgrade button At this point the MIOPS Mobile Remote must be in Firmware Upgrade mod...

Page 14: ...the button a counter will start at the bottom of the screen You can count how many seconds milliseconds have passed The shutter will close when you release the button Again in order to control the shu...

Page 15: ...e f Timed Release Self Timer If you want to have a custom exposure after the timer goes off you can use the Timed Release and Self Timer mode This mode combines the Self Timer with the capability of k...

Page 16: ...gth Once you start the time lapse you can see the progress on two counters at the bottom of the screen The counter on the left will show the interval status When the circle completes the interval peri...

Page 17: ...will not get pictures with the exposure set on the MIOPS app Once you start the Long Exposure mode you can take your smartphone away MIOPS Mobile Remote will be able to complete the whole process with...

Page 18: ...has been taken MIOPS will wait for the duration of the interval to take the next picture The process will continue until the set frame number is reached After you have set all parameters you can start...

Page 19: ...button and then touch the button to start the process After that you will see two counters at the bottom of the screen The first one will show you the distance traveled before the next picture As you...

Page 20: ...with circles at the bottom of the screen There will be an equal number of circles to the Frame value In the screenshot on the left the Frame value is set to 3 so there are three circles at the bottom...

Page 21: ...erstand where to set the threshold approximately to filter out the environment noise You can move the threshold bar around the button by touching the grey bar The second parameter is the delay The del...

Page 22: ...he Continuous Shot and the Single Shot In the Continuous Shot mode the MIOPS Mobile will trigger the camera each time a vibration is detected This can cause multiple pictures to be taken or multiple t...

Page 23: ...in milliseconds anywhere between 10ms and 99 hours The last parameter is the Frame This parameter defines how many pictures to be taken in case a motion is detected Once a motion is detected MIOPS Mo...

Page 24: ...the related parameters of that particular mode To start creating the scenario touch one of the modes listed on the top The parameters screen of that mode will open You can change the parameters of tha...

Page 25: ...will be deleted The scenario mode has some restrictions to keep the completion of the scenario possible all the time The last step of the scenario cannot be the delay parameter Also a step like time...

Page 26: ...same exposure The HDR mode requires the camera to be on BULB mode Otherwise the exposure value of your camera will be valid Please make sure that your camera is on BULB mode for the HDR mode The Long...

Reviews: