background image

8

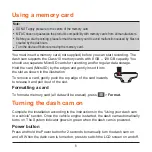
Using a memory card

Note:

l

  DO NOT apply pressure to the centre of the memory card.

l

  MiTAC does not guarantee the product’s compatibility with memory cards from all manufacturers.

l

  Before you start recording, please format the memory card to avoid malfunction caused by files not 

created by the dash cam.

l

  Turn the device off before removing the memory card.

You must insert a memory card (not supplied) before you can start recording. The 

dash cam supports the Class 10 memory cards with 8 GB – 128 GB capacity. You 

should use separate MicroSD cards for recording and for regular data storage.
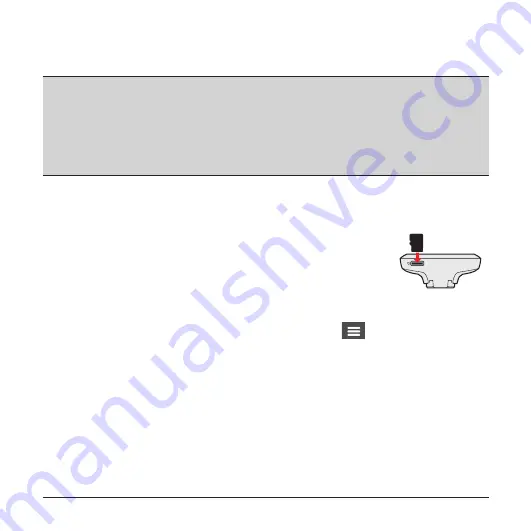
Hold the card (MicroSD) by the edges and gently insert it into 

the slot as shown in the illustration. 
To remove a card, gently push the top edge of the card inwards 

to release it and pull it out of the slot.

Formatting a card

To format a memory card (all data will be erased), press 

 > 

Format

.

Turning the dash cam on

Complete the installation according to the instructions in the “Using your dash cam 

in a vehicle” section. Once the vehicle engine is started, the dash cam automatically 

turns on. The System indicator glows in green when the dash cam is powered.

Power button

Press and hold the Power button for 2 seconds to manually turn the dash cam on 

and off. When the dash cam is turned on, press to switch the LCD screen on and off.

Summary of Contents for MiVue 798

Page 1: ...User Manual MiVue 798 798D...

Page 2: ...C does not warrant this document is error free MiTAC assumes no liability for damage incurred directly or indirectly from errors omissions or discrepancies between the device and the documents Note No...

Page 3: ...card 8 Turning the dash cam on 8 Power button 8 Restarting the dash cam 9 System icons 9 Function keys 10 Switching screens 10 Setting the date and time 11 Recording in driving mode 11 Continuous reco...

Page 4: ...18 MiVue Manager 23 Installing MiVue Manager 23 Playing the recording files 23 For more information 26 Caring for your device 26 Safety precautions 27 About charging 27 About the charger 27 About the...

Page 5: ...differ from the ones generated by the actual product 1 2 3 5 6 9 4 7 8 10 11 12 13 1 Power button 2 Device mount socket 3 Mini USB connector 4 Shutdown button 5 LCD screen 6 Microphone 7 System indica...

Page 6: ...mera lens and no reflective material is placed near the lens Please keep the lens clean l If the car s windscreen is tinted with a coating it may impact the recording quality l To ensure the highest q...

Page 7: ...ion area is free of dust oil and grease Attach the mount to the windscreen 1 and press the tab 2 to lock the suction cup in place 1 2 2 When adjusting the angle of mounting make sure that the camera s...

Page 8: ...tallation contact a skilled installer such as the service personnel of the vehicle for assistance MiVue rear camera Depending on your model your device may support a rear camera may be sold separately...

Page 9: ...ding and for regular data storage Hold the card MicroSD by the edges and gently insert it into the slot as shown in the illustration To remove a card gently push the top edge of the card inwards to re...

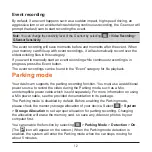
Page 10: ...does not shut down by keeping the Power button pressed you can force it to shut down by inserting a small rod such as a straightened paperclip into the Shutdown button on the device System icons Vario...

Page 11: ...rs Parking mode Adds a custom safety speed camera Opens the Menu screen Recording screen Moves to the next option Acts as the ENTER button Moves to the previous option Acts as the BACK button Menu scr...

Page 12: ...Recording in driving mode Continuous recording The system will automatically begin continuous recording in few seconds after start up The System indicator flashes in green and amber alternately while...

Page 13: ...he Event category for file playback Parking mode Your dash cam supports the parking recording function You must use an additional power source to record the video during the Parking mode such as a Mio...

Page 14: ...ection of the device You can change the configuration by selecting Parking mode Motion Detection and G Sensor Sensitivity l The rear camera optional does not support motion detection To exit the Parki...

Page 15: ...nail on the playlist indicates that the video comes with a corresponding rear video While playing the video you can use this option to switch between the front and rear videos Note The video files rec...

Page 16: ...u will receive a normal beep alert l When your car approaches a safety camera at a speed over the set threshold you will receive a persistent beep alert until your car speed drops lower than the appro...

Page 17: ...as may be removed relocated or new cameras installed Occasionally MiTAC may offer you updates of safety camera data Visit the Mio website for available downloads and follow the instructions to complet...

Page 18: ...have enabled the WIFI function on the smartphone 2 Open the MiVue Pro app and tap the icon 3 Tap Select WIFI and then select the dash cam you want to connect to 4 Tap Done to complete the WIFI connec...

Page 19: ...ile Playback Plays the recorded videos and photos l Camera Press to enter Camera mode l WIFI Enables or disables WIFI l Sound Recording Sets if you want to include sounds in the recordings l TPMS TPMS...

Page 20: ...he steps to calibrate the system 1 Drive the vehicle in the middle of the lane 2 Ask a passenger to select this option and then follow the on screen instructions to complete calibration Please adjust...

Page 21: ...rt you when the car ahead has proceeded to go after being stopped for longer than 10 seconds The default setting is Off l SafetyCam Sets how you want to be notified of safety cameras The available set...

Page 22: ...gh l G Sensor Sensitivity Sets the sensitivity level of the G sensor that allows automatic triggering of the parking recording when the dash cam is in Parking mode l LED Indicator Turns on or off the...

Page 23: ...s the status of the GPS GLONASS signal reception You can press and then select GPS or GLONASS for better signal reception if the need arises l Date Time Sets the system date and time l System Sound En...

Page 24: ...er Download MiVue Manager from the Support page of Mio website www mio com support and follow the on screen prompts to install it Make sure to download the correct software version Windows or Mac acco...

Page 25: ...he volume level 6 Plays the video in full screen 7 Displays the playback progress You can click on a point along the track bar to move directly to a different location for the playback 5 During playba...

Page 26: ...Check for Update Checks if there is any new version of MiVue Manager Internet access is required for this feature l About Displays the version and copyright information of MiVue Manager 6 Exports the...

Page 27: ...sation allow the device to dry out completely before use l The screen surface can easily be scratched Avoid touching it with sharp objects Non adhesive generic screen protectors designed specifically...

Page 28: ...he device or charge the battery Do not cover the charger with paper or other objects that will reduce cooling Do not use the charger while it is inside a carrying case l Connect the charger to a prope...

Page 29: ...te signals cannot pass through solid materials except glass When you are inside a tunnel or building GPS positioning is not available Signal reception can be affected by situations such as bad weather...

Page 30: ...1 ed 2 am1 am2 ISO7637 2 2004 EN 62311 2008 The manufacturer cannot be held responsible for modifications made by the User and the consequences thereof which may alter the conformity of the product wi...

Reviews: