10
3
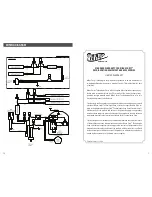
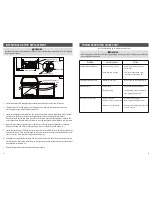
The freezer is designed for minimal condenser cleaning. With the “lint free” condenser design, most
dust and dirt will pass right through the condenser. To insure the proper operation, we recommend
scheduled check-ups and cleaning every three to four months. This period may be shorter or longer
depending on the location in which the freezer was installed. A dirty condenser can result in a voided
warranty, part failure, product loss, and higher electrical cost. The steps to clean the condenser are as
follows:
1. Unplug power cord from electrical receptacle.
2. Remove compressor cover from back of freezer.
3. Brush the dirt, dust and paper off the condenser coil plate, all the way to the fan. Use either a
vacuum or blow with a compressed air supply if available.
4. When finished with cleaning, replace compressor cover.
5. Plug power cord back into receptacle.
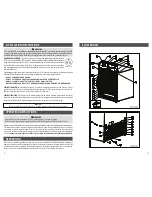
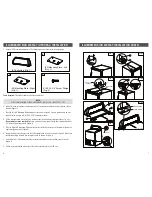
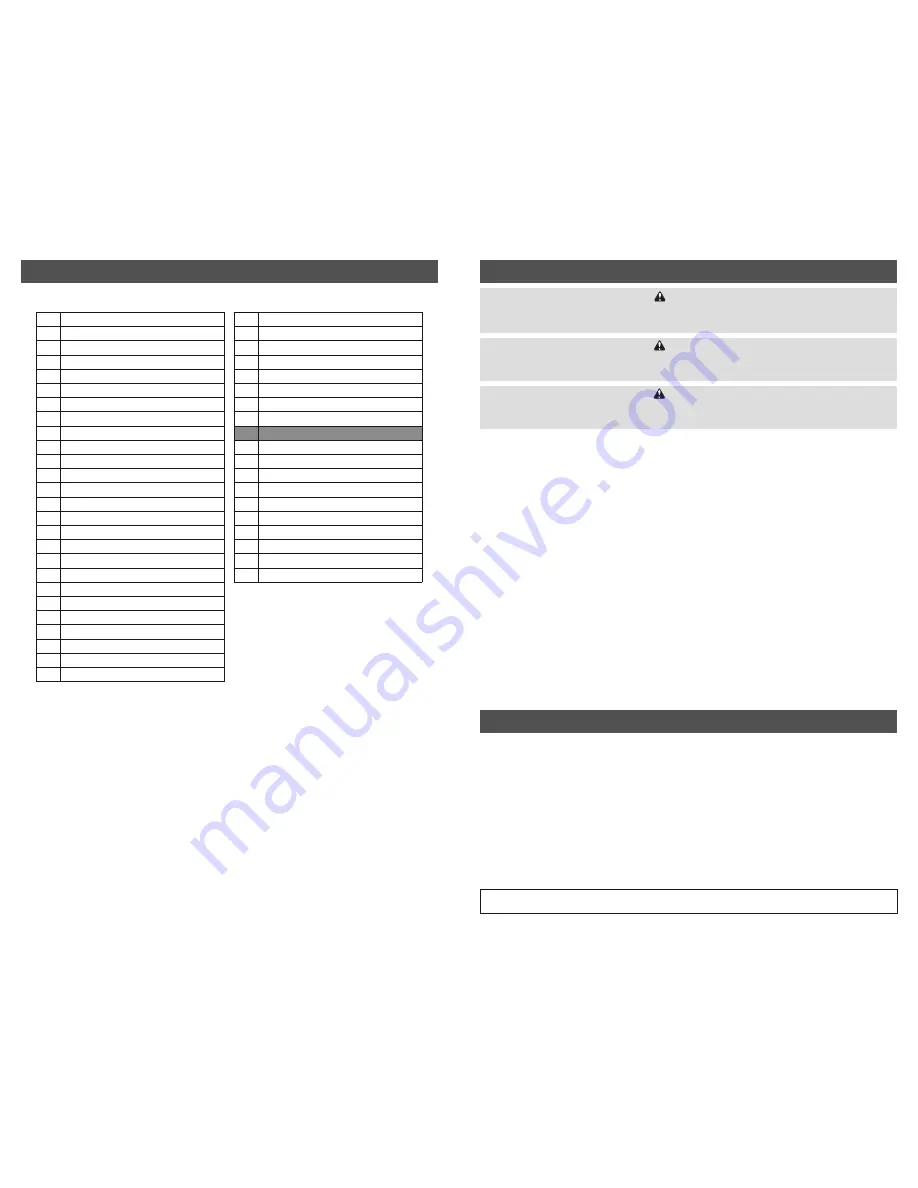
PARTS LIST
26
Relay
27
Filter Drier
28
Terminal Block
29
LED Driver
30
Power Cord
31
Thermostat
32
Compressor Cover
33
Receptacle
ISD Assembly (Optional)
28
Terminal Block
29
LED Driver
34
End Cap, ISD (Left)
35
End Cap, ISD (Right)
36
Back Cover Assembly, ISD
37
LED Strip, ISD
38
LED Extrusion Base
39
Power Cord, ISD
40
LED Light Switch
41
Lens
No
Description
1
Door Assembly
2
Hinge Bracket, Top
3
Torsion Bar
4
Hinge Bracket, Bottom
5
Washer, Flat
6
Basket, Wire
7
Basket, Wire (Small)
8
Divider
9
Divider, Small
10
Shelf, Wire
11
Shelf, Wire (Small)
12
Pilaster, Front
13
Pilaster, Back
14
Pilaster, Middle
15
Door Handle
16
LED Strip Interior
17
LED Lens Cover
18
Bumper, Cabinet Rear
19
Fan Motor
20
Fan Blade
21
Condenser
22
Bumper, Cabinet Front & Rear Bottom
23
Capacitor
24
Compressor
25
Overload
GENERAL
The freezer should be cleaned at regular intervals to meet a good standard of hygiene and
to keep the freezer attractive as an effective point of purchase display.
INTERIOR CLEANING
Use only mild non-abrasive liquid cleaner, water and a soft cloth for the entire freezer
interior. Make sure to wipe off all residue.
EXTERIOR CLEANING
Use only mild non-abrasive liquid cleaner, water and a soft cloth for the painted surfaces and
a stainless steel polish and cleaner for the stainless steel surfaces if desired.
CLEANING GLASS DOOR
Due to the special coating on the glass, use only a mild, non-abrasive liquid cleaner, water,
and a soft cloth. Same applies to the plastic door frame.
CLEANING
WARNING
To reduce the risk of fire, electrical shock or personal injury, disconnect the freezer from the power
source before cleaning. Keep liquids away from electrical and electronic components.
To clean the exterior whether it has the original finish or a decal package, use only a mild non-abrasive
liquid cleaner, water and a soft cloth. For stainless steel parts, a commercial stainless steel polish and
cleaner can be used. Always apply the cleaner to the soft cloth and then clean the freezer. Never apply
the cleaner directly to the freezer. Excess liquid applied to the surface may seep into the electronic con-
trol and switches which can cause an electrical hazard or a malfunction.
DO NOT USE
abrasive or caustic cleaners, scouring pads, solvents or flammable liquids.
CAUTION
Do not apply hot water on cold glass components. Allow glass to warm sufficiently to prevent
shattering.
CAUTION
Do not use ammonia or bleach based cleaners or abrasive type cleaners.
Do not use abrasive cleaning pads.
NOTE:
The cleaning of the condenser is a service not covered under the warranty
CONDENSER CLEANING


